If you use the tSQLt unit testing framework for long enough, you will eventually run into the “An INSERT EXEC statement cannot be nested” problem. This problem happens when you try to insert the output of a stored procedure into a temporary table for validation, but that stored procedure internally already does the same thing, inserting the output of another stored procedure into a temporary table. SQL Server does not allow this.
Researching the problem will lead you to a lot of articles and posts in which people say that you must change your code, and for example use:
- Table Valued Functions
- Shared temporary tables
- Table Variables as output parameters
- Custom parameters on your stored procedures that are only applicable for testing
- Workarounds using OPENROWSET, Linked Servers or even xp_cmdshell+sqlcmd
All those solutions are hacky, and it is simply not always possible to change the underlying code. Nor should you. Code should be tested exactly how it will be executed and used in the wild, else your test is not worth much and you’ll soon have users, or worse your boss, at your desk complaining about world ending errors.
In your search for a solution, you hopefully found an article by Charles Silbergleith called tSQLt and the INSERT EXEC Problem. It is a good article. You should read it. Charles’s solution is to use a CLR. If you’ve never used a CLR before, it is just a .Net application (dll) that is imported into SQL Server and executed like a stored procedure. By using a CLR, we can execute any queries or stored procedures as if the code is being run by an external application, like it would in the real world, and capture output of the query into a temporary table for validation. But Charles’s CLR implementation is far too advanced. It is going to take hours to figure out and even longer to get it working. This article is a follow on to Charles’s work, a quick and simple CLR How-to specific to tSQLt unit testing.
In this article, we’ll setup a test scenario that throws the “An INSERT EXEC statement cannot be nested” error and then step by step build a CLR to fix it. With lots of screenshots to help you along the way. I promise, you do not need to know how to code in C#. Just follow the steps below and copy paste.
Right, let’s get started.
The Test Scenario
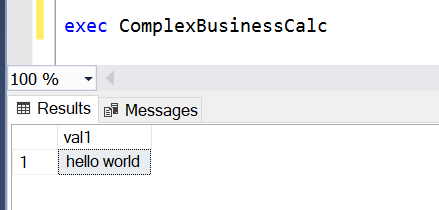
Let’s say for example you have a stored procedure called “ComplexBusinessCalc” which you would like to unit test. Internally your stored procedure uses other stored procedures that you absolutely cannot change. And your stored procedure works perfectly as-is when you execute it.
e.g.
If you’d like to follow along and test out the CLR for yourself, you could use the following code to create the ComplexBusinessCalc stored procedure in your test environment.
create or alter procedure SomeReallyComplexProc

as

begin

    select 'hello' as val1;

end

go


create or alter procedure ComplexBusinessCalc

as

begin

    create table #tmp (val1 varchar(50));


    insert into #tmp (val1)

    exec SomeReallyComplexProc;


    update #tmp set val1 += ' world';


    select val1 from #tmp;


    drop table if exists #tmp;

end

go
For your unit test, all you want to do is run the ComplexBusinessCalc stored procedure and capture its output into a temporary table for validation.
Hint: if you have not used tSQLt before, here is a good place to start.
Your tSQLt unit test could look something like this. In the test below, we are simply checking that our ComplexBusinessCalc stored procedure returns at least one row of data.
exec tSQLt.NewTestClass 'demo';

go


create or alter procedure demo.[test that ComplexBusinessCalc returns data]

as

begin

    create table #test (val1 varchar(50));


    insert into #test (val1)

    exec ComplexBusinessCalc;


    if not exists (select * from #test)

    begin

        exec tSQLt.Fail 'No data returned';

    end


    drop table if exists #test;

end

go
But when you run your unit tests, you get stuck on the annoying “An INSERT EXEC statement cannot be nested” problem.
exec tSQLt.RunAll;
Result
[demo].[test that ComplexBusinessCalc returns data] failed: (Error) Message: An INSERT EXEC statement cannot be nested. | Procedure: ComplexBusinessCalc (6) | Severity, State: 16, 1 | Number: 8164
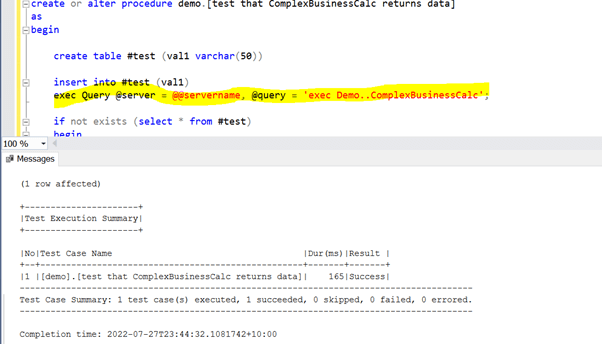
The solution is simple. All you need to do is change one line in your unit test. Instead of executing the ComplexBusinessCalc stored procedure within the current transaction’s context, you instead pass it as a query to a CLR to execute on it a new connection not enlisted in the same transaction context as the tSQLt test. See the "exec Query" line which replaced "exec ComplexBusinessCalc". The "Query" object looks like a stored procedure, and it is, but underneath it calls a CLR.
create or alter procedure demo.[test that ComplexBusinessCalc returns data]

as

begin

    create table #test (val1 varchar(50))


    insert into #test (val1)

    exec Query @server = @@servername, @query = 'exec Demo..ComplexBusinessCalc';


    if not exists (select * from #test)

    begin

        exec tSQLt.Fail 'No data returned';

    end


    drop table if exists #test;

end

go
Hint: If you need to pre-prepare some specific data for the unit test, add those commands into the @query parameter. The SQL connection made by the CLR would not be able to read any data setup via the tSQLt unit test’s transaction unless you allow uncommitted reads. Remember to rollback afterwards.
But, we first need to go create that “Query” CLR that accepts T-SQL commands and executes those against your SQL instance as an external application on a different transaction.
Here we go. Get ready to copy paste.
Create your first CLR
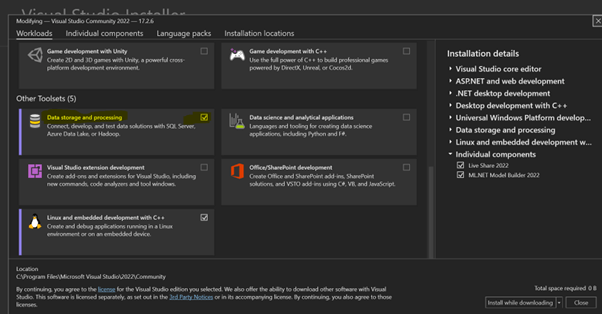
Step 1: Run Visual Studio and ensure that you have the “Data storage and processing” feature set installed. You can download the Visual Studio Community Edition for FREE from https://visualstudio.microsoft.com/ . All the screenshots in this article are from Visual Studio 2022.
In Visual Studio, via the Tools menu, open the “Get Tools and Features” dialog and ensure the Data storage and processing features are installed.

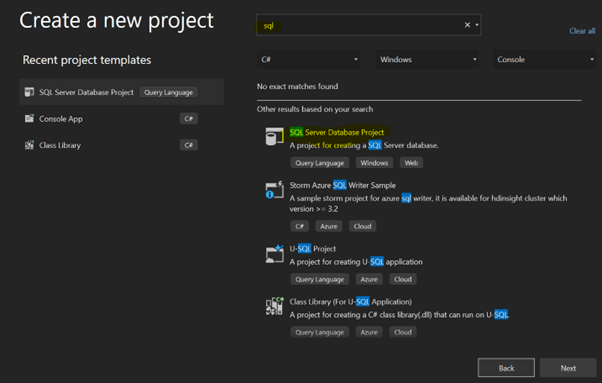
Step 2: Create a new SQL Server Database Project. You can access the Create Project dialog via the Files > New Project menu.
Step 3: Add a “SQL CLR C# Stored Procedure” item to your database project, by right clicking on your project inside the Solution Explorer view and selecting Add > New Item from the context menu. This will open the Add New Item dialog. Select the “SQL CLR C# Stored Procedure” template.
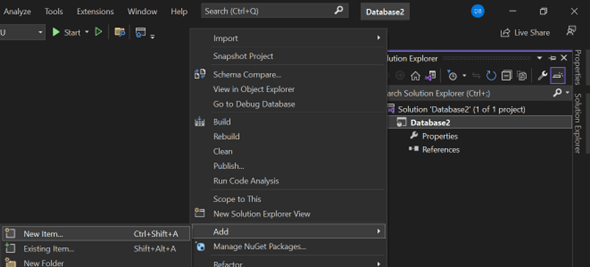
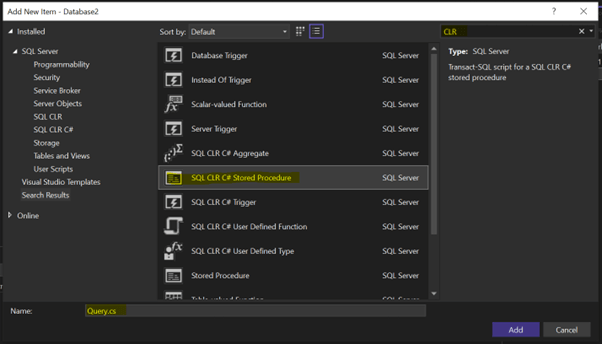
Name the new item Query.cs
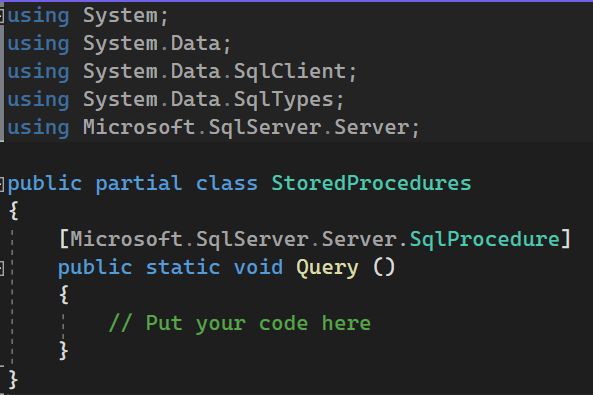
The default template code inside Query.cs will look like this:
Replace all the default template code inside Query.cs with the following. Note, if you do change the SqlConnection, you must remember to keep the setting Enlist=false else the connection pooler will automatically enlist the connection in the creation thread's current transaction context, and you’ll get the same “An INSERT EXEC statement cannot be nested” error, even when running your stored procedure via the CLR.
using System;

using System.Data;

using System.Data.SqlClient;

using System.Data.SqlTypes;

using Microsoft.SqlServer.Server;


public partial class Query

{

    [Microsoft.SqlServer.Server.SqlProcedure]

    public static void Exec(SqlString server, SqlString query)

    {

        SqlConnectionStringBuilder sb = new SqlConnectionStringBuilder

        {

            DataSource = server.ToString(),

            IntegratedSecurity = true,

            Enlist = false

        };


        using (SqlConnection conn = new SqlConnection(sb.ToString()))

        {

            conn.Open();

            SqlCommand cmd = new SqlCommand(query.ToString(), conn);

            SqlDataReader reader = cmd.ExecuteReader();

            SqlContext.Pipe.Send(reader);

        }

    }

}
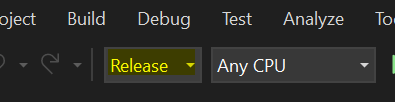
Step 4: Select the “Release” solution configuration from the drop down in the top toolbar in Visual Studio.
Step 5: Make the “Output” window visible in Visual Studio via the View menu.
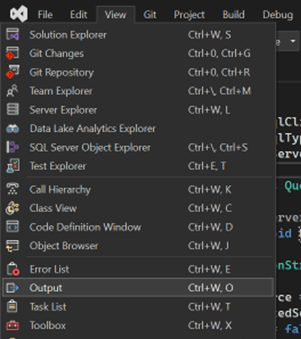
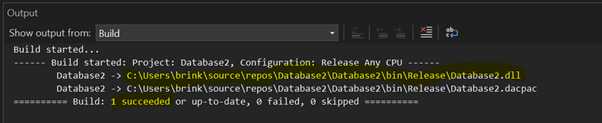
The Output window will pop up and look like this. After you have successfully built your database project, the name and path to your new .dll will be displayed in this window.

Step 6: Build your database project by right clicking on it in the Solution Explorer view and selecting “Build” from the context menu.
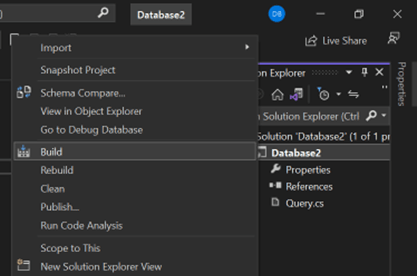
The Output window will show that your project was successfully built and the full name and path to your newly created CLR.
Step 7: Import your new CLR dll into SQL
exec sp_configure 'clr enabled', 1;

reconfigure;

go


alter database Demo set trustworthy on; --change to your database name

go


use Demo --change to your database name

go


 --change path to dll

create assembly ExternalUtils from 'C:\Users\brink\source\repos\Database2\Database2\bin\Release\Database2.dll'

with permission_set = external_access;

go


create procedure Query

@server nvarchar(max)

, @query nvarchar(max)

as

external name ExternalUtils.Query.[Exec];

go
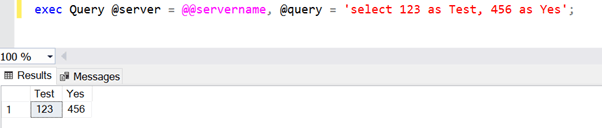
Step 8: Test your newly created CLR. By the way, if you haven’t noticed, the CLR uses Windows Authentication (a.k.a IntegratedSecurity). You’ll have to change the SqlConnection code in the CLR if you only have SQL Authentication in your environment.
Done: That’s all folks. Now simply update your unit test to use the CLR to execute your stored procedure. After which your tSQLt unit test will run perfectly.
Bonus Tip
You can use the “Generate Scripts…” task in SQL Server Management Studio (SSMS) to export your CLR as a T-SQL script. This makes deployment of the CLR to other servers very easy.
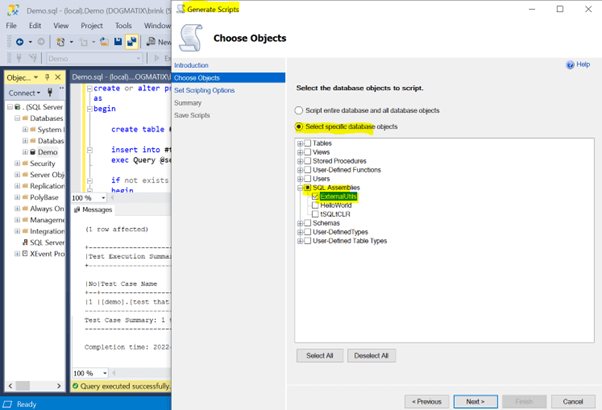
The output script will look something like this. Simply include it as-is in your deployment patches.

Have fun unit testing.