The previous Stairway article created a local source control repository using Git. At this point, all the database objects could be scripted out in SQL Server Management Studio. That script could then be checked into the local repository. Having a set of scripts in source control is better than not having code managed by source control. However, we need a foundational tool to detect changes and create deployment scripts with the required changes to automate database deployments. Red Gate SQL Source Control will be used in this series to manage our code.
SQL Source Control is an extension to SQL Server Management Studio, allowing database developers and DBA to rely on a trusted tool while adding source control. After installing the tool, SQL Source Control is available from the Tools menu. It is also likely that the source control tab is opened automatically in Management Studio.
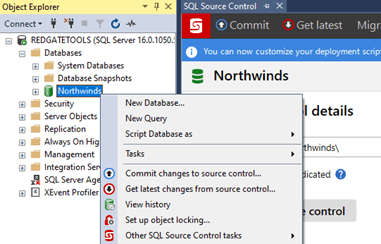
Starting the process of adding a database's schema can be accomplished in multiple ways. From the Object Explorer, choose the database to add to source control, right-click on it, and select Link database to source control... to open or focus the SQL Source Control tab. The Setup panel provides three options, as shown in the screenshot's background below. Another way to start the process is to open SQL Source Control from the Tools menu and navigate to the Setup panel in SQL Source Control.
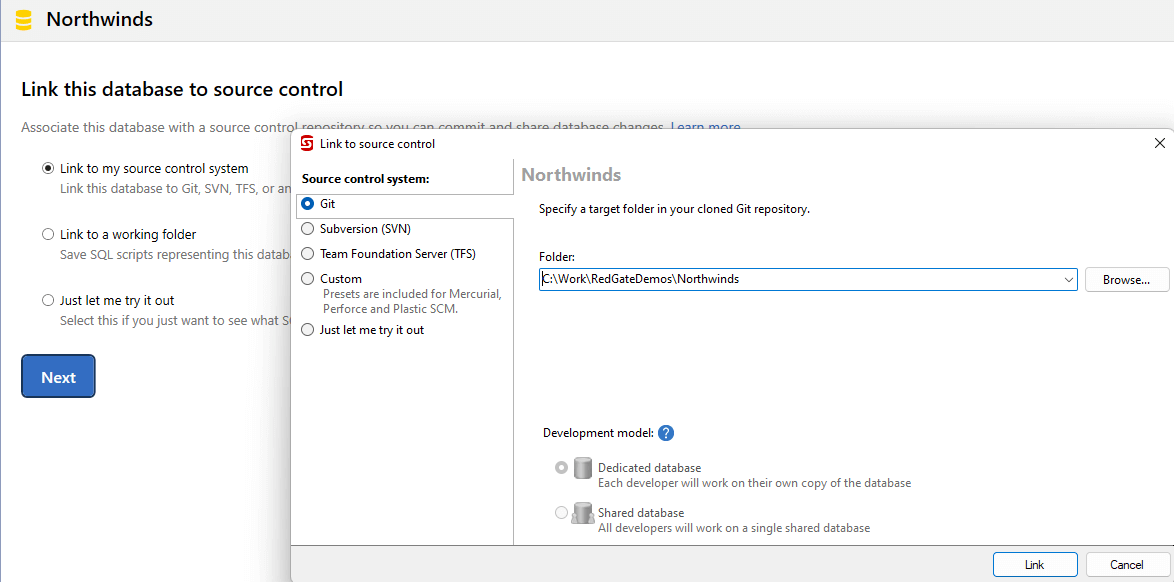
- Link to my source control system - enables SQL Source Control to work with your computer's local source control system. Using a local source control system, code can be versioned within SQL Source Control and pushed to a central repository.
- Link to a working folder - the database schema files will be saved to disk, as with the first option; however, source control functionality is unavailable within SQL Source Control, even if the destination folder is a source code repository. Any interaction with Git, Subversion, or other source control systems is manual and must be performed outside SQL Source Control (and SQL Server Management Studio).
- Just let me try it out - if you are not convinced a source control solution is for you, this option will create a temporary source control repository to investigate.
By the end of this series, we will have defined automated deployments in Azure DevOps and GitHub. We must check the schema into source control to continue towards that goal. Choose Link to my source control system to enable source control functionality within SQL Source Control to make your development easier, rather than directly working with the source control client. Browse to the local repository folder and create a subfolder matching the database name, Northwinds, in my case.
Adding Code to Source Control
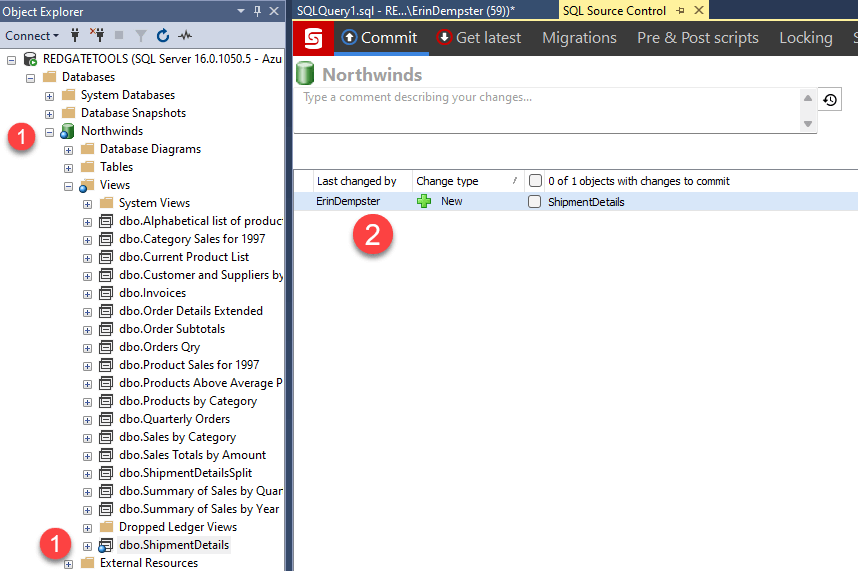
Now that the database is linked, right-click on the database to see more options available, including Commit changes to source control... Clicking this item will open SQL Source Control and navigate to the Commit panel, allowing you to perform a schema comparison between the live database and the source control repository. If SQL Source Control is open, navigate to the Commit panel and click the Refresh button to begin the schema comparison.
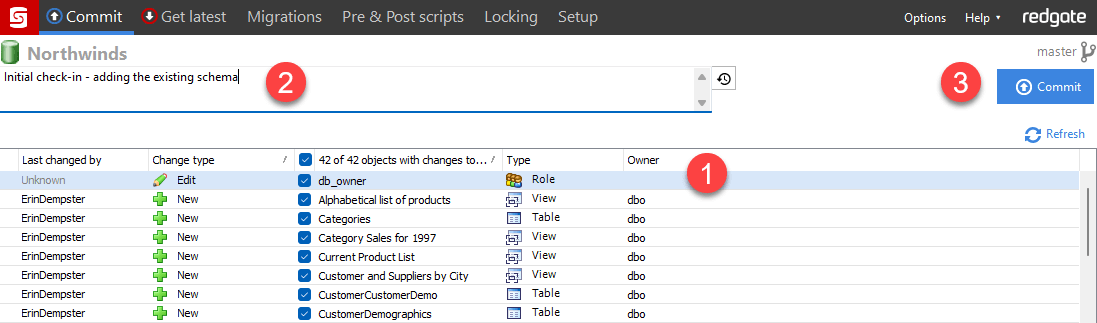
Once the schema comparison is complete, there are four steps to complete the check-in of the schema and push the code to the remote repository (we're using Azure DevOps). These numbers correspond to the numbers in the image below.
- List of changes - Choose the objects to save, or commit, to the local source control repository. In the example in the screenshot, it's the first time the repo has been compared to the database, so all changes should be selected. If multiple developers are making changes in the future, it's a good practice to choose your changes to check in, allowing other developers to check in their changes when they are ready.
- Check-in comments - Provide a meaningful note about the changes. If the changes are for a bug logged, include the bug number. Remember, you likely won't be the only person to work on the database during its lifetime. Leave notes other developers will understand.
- Commit code - With the set of schema changes selected and a good note about the changes, Commit the changes to the local source control repo.
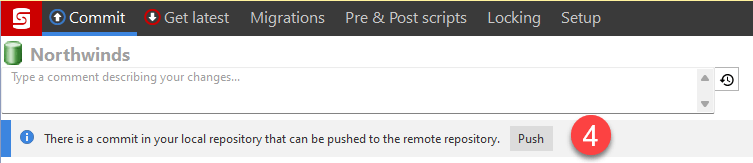
- Push - After the code has been committed locally, it needs to be pushed to the remote repository you are using (we are using Azure DevOps). Note: If SQL Source Control doesn't detect local changes needing to be pushed, the Push button will not be shown.
Working on a team where every developer has their own copy of the database, such as a local SQL Server development install on your computer, there are two critical processes to keep the team in sync with development changes. The first is pushing changes from your local repository to the remote repository. It isn't as crucial with a shared database because others can see your changes in the database. Pushing changes to the central code repository gives visibility of your changes to the team. Pushing code to the remote repository is also needed when we build the automation process.
Whether we use Azure Pipelines in Azure DevOps or GitHub Actions in GitHub to automate builds, the source code will come from the respective code repository. Additionally, should you be working on your copy of the database and your hard drive crashes, or the OS becomes corrupt, your changes are saved and can easily be retrieved on the fresh operating system install.
The second is to pull changes from the remote repository (Azure DevOps) regularly, so changes others make are reflected in your copy of the database. This is covered in detail in a later section.
We're all set! It's time to start writing code. Let's use the Northwinds database to create a view a report will use.
CREATE VIEW [dbo].[ShipmentDetails] AS
SELECT c.CompanyName,
   c.Country CustomerCountry,
   sh.CompanyName ShippingCompany,
   o.ShipCity,
   o.ShipCountry,
   o.ShipPostalCode
FROM dbo.Customers c
inner join dbo.Orders o on c.CustomerID = o.CustomerID
inner join dbo.Shippers sh on o.ShipVia = sh.ShipperID

GO
Shortly after creating the view, there are a couple things to notice. In Object Explorer, there is a blue sphere on the database, Views folder, and on the new view, ShipmentDetails. These indicators help direct the user to newly added or modified objects compared to the local repository. Second, the new view and the user who made the change are listed in the SQL Source Control tab. This time, the list of changes is very short, with one item, since the rest of the objects in the database match the code saved in source control.
To commit the new view to source control, we'll do the same four steps described earlier with the initial check-in of the database schema.
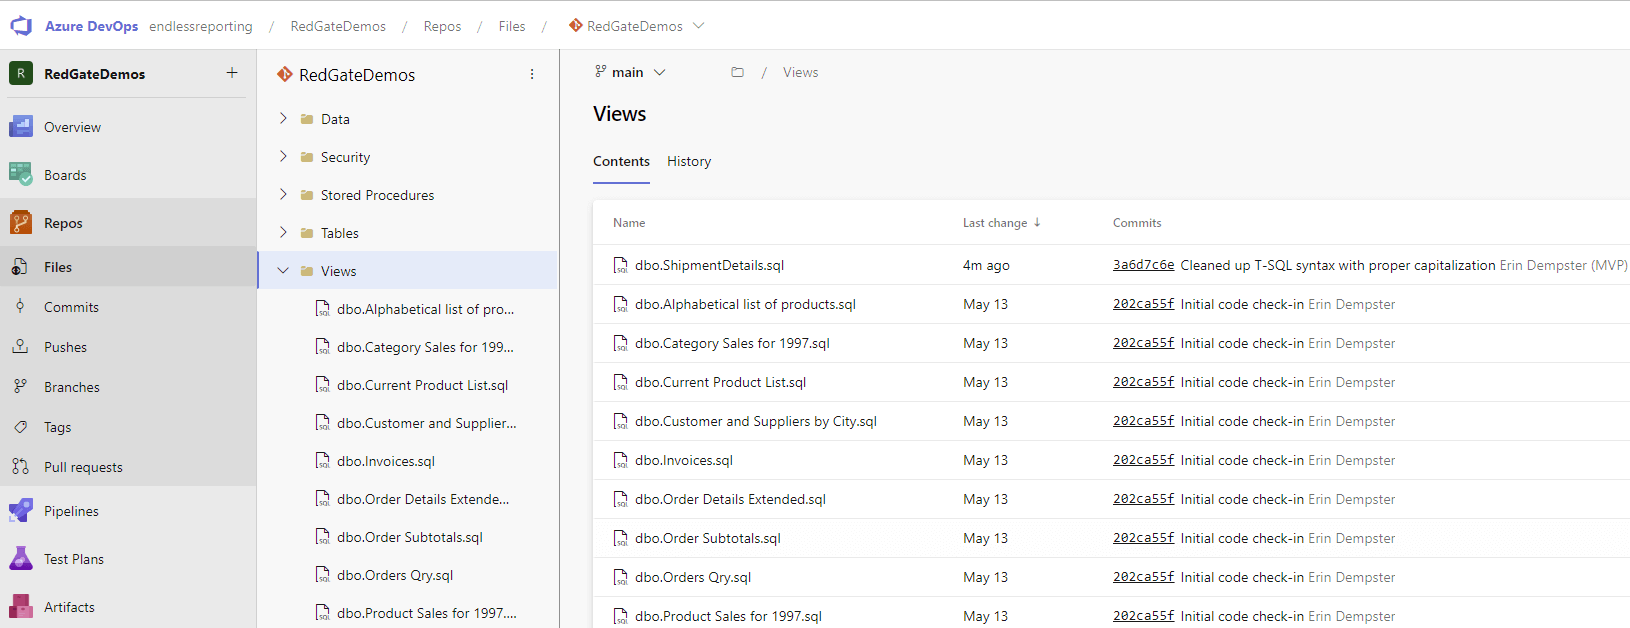
After pushing the creation of the dbo.ShipmentDetails view to Azure DevOps, log back into Azure DevOps and locate your changes to confirm they were made. I created a view in this example, so SQL Source Control organized it into a Views subfolder. It is listed at the top of the list of views in the screenshot below.
Should there be any questions or concerns about the view, either now or in the future, Azure DevOps tracks all of the committed changes made to a file. To see all of the changes made to a file, click on the file to view its contents, and then choose History to see what has occurred over time. Each iteration of the file can be viewed by clicking on a change.
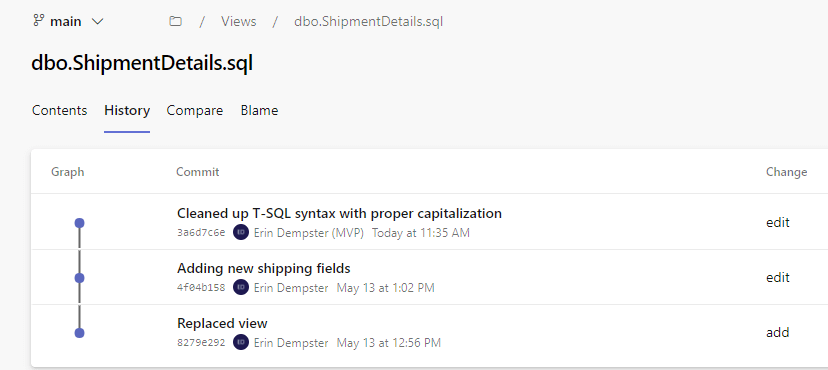
Additionally, Azure DevOps allows side-by-side comparisons of two versions of the file. To compare two versions, take note of the commit version numbers, which are on the 2nd line of each change, just before the developer's name (ex. 3a6d7c6e from the latest change) Choose Compare, next to History, and choose the two versions to compare from the drop-down lists. In the screenshot below, the view was reformatted, with keywords capitalized in the later version (right side).
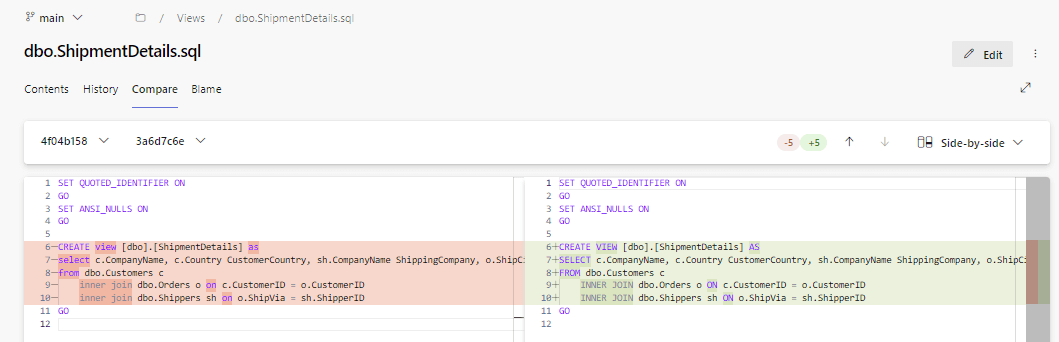
In this case, there have been two changes since the initial commit of the view. In the most recent check-in, I tidied up the code, so it doesn't look as sloppy. Remember, in the real world, the database will probably outlast our time at the company. Leave the code in a good place for future developers. Let's sync the change back to the database to ensure this change isn't overwritten on a future commit.
Managing Static Data across Environments
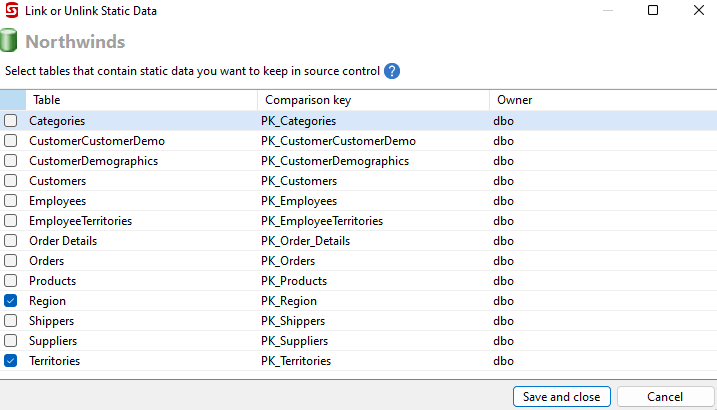
Almost every database has at least one lookup table whose lookup values must be kept in sync from environment to environment. For a transactional database, the application likely has actions built upon the values in this type of table (or through an enumerated type that mimics this table). Once again, SQL Source Control makes this process very easy. With Northwinds, there are a few tables that can be managed in source control, including Region and Territories. We can store the data from these tables in source control, because we need to keep the data in these tables the same across every environment, dev, test, UAT, and production. Other tables in Northwinds, like Orders, Customers and Employees are not candidates for managing static data, because the data is not static. New orders and new customers will be created in production over time (and test orders in test).
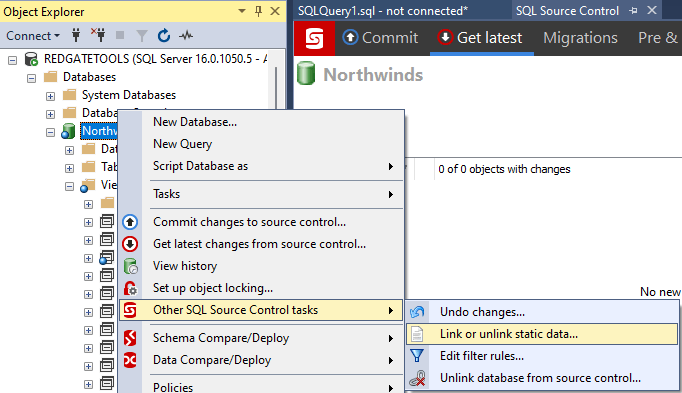
To start, right-click on the database, choose Other Source Control tasks, and then select Link or unlink static data... Choose Region and Territories in the dialog window and click Save and close.
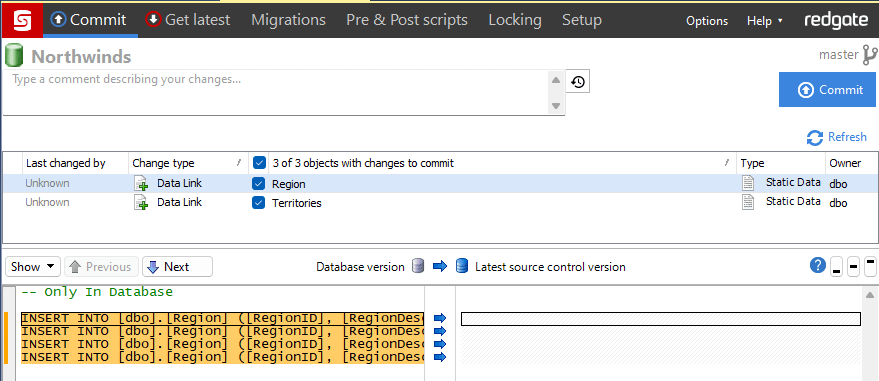
Navigating to the Commit panel, there are two new files to commit, both with the Change type of Data Link. Each file starts as a set of insert statements representing the data in the table. Check them into source control, as with any other object or file type within SQL Source Control.
As new regions or territories are defined and added to the respective tables, SQL Source Control will scan those tables and find any changes to commit. When changes are pulled to another environment, the data will be updated from the Commit panel, including updates to existing records. The transaction below was captured in SQL Server Profiler, showing an update was made to RegionID 1, and 2 new regions were added.
BEGIN TRANSACTION

PRINT(N'Drop constraint FK_Territories_Region from [dbo].[Territories]')
ALTER TABLE [dbo].[Territories] NOCHECK CONSTRAINT [FK_Territories_Region]

PRINT(N'Update 1 row in [dbo].[Region]')
UPDATE [dbo].[Region] SET [RegionDescription]=N'Southeast                                         ' WHERE [RegionID] = 1

PRINT(N'Add 2 rows to [dbo].[Region]')
INSERT INTO [dbo].[Region] ([RegionID], [RegionDescription]) VALUES (5, N'Northeast                                         ')
INSERT INTO [dbo].[Region] ([RegionID], [RegionDescription]) VALUES (6, N'Canada                                            ')
ALTER TABLE [dbo].[Territories] WITH CHECK CHECK CONSTRAINT [FK_Territories_Region]
COMMIT TRANSACTION
Filtering Database Objects
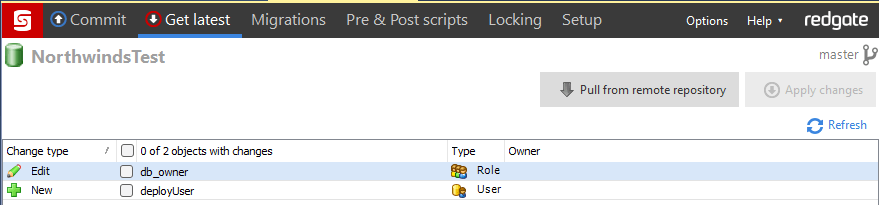
By default, SQL Source Control will manage all objects in a database, including users and roles. In the development environment, a user, deployUser, was scripted along with its membership to db_owner. It was easy to uncheck the boxes, so the two objects weren't deployed to NorthwindsTest. Thinking about future automation around the deployment of Northwinds, there won't be an option to uncheck the boxes. Our SQL Source Control code needs to exclude these object types.
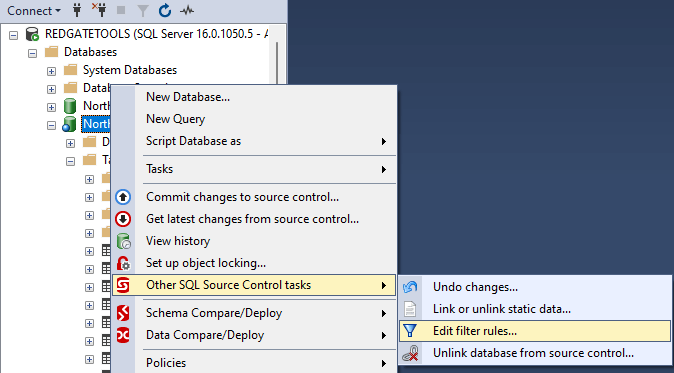
Again, SQL Source Control provides an intuitive process to exclude certain object types and even specific objects. As with managing static data, to start, right-click on the database, choose Other SQL Source Control Tasks, and select Edit filter rules...
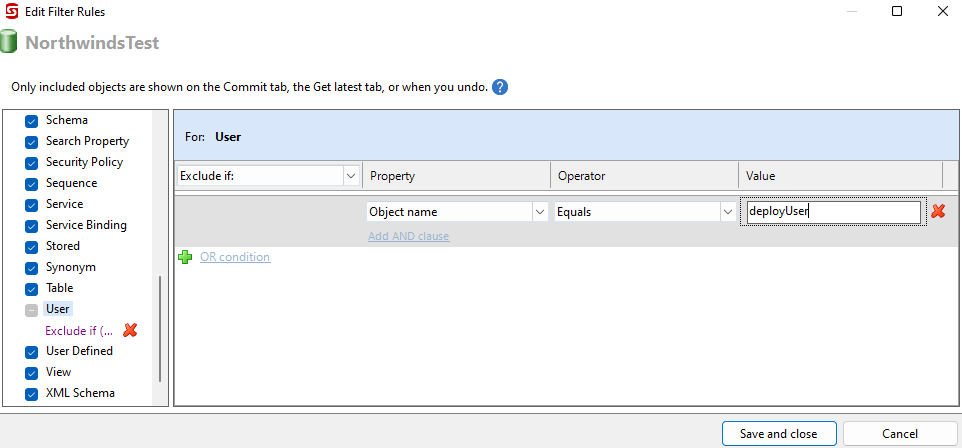
By default, all object types are selected. If an entire object type should be excluded, uncheck the object type on the left side of the dialog. If only certain objects need to be excluded, filter rules are on the right. In the screenshot above, the SQL user, deployUser, is excluded because the login only exists in the development environment. Deployment failures will occur when the code is deployed to a different server.
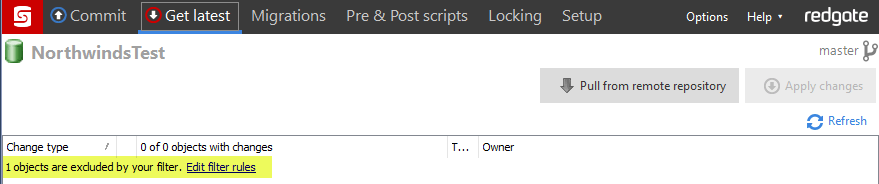
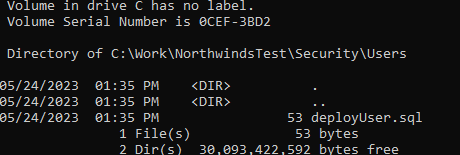
The next time the latest version is applied, after adding the filter, a note will appear stating a filter excluded objects. The SQL script may still exist in the repo but will be ignored, as shown below.
Summary
At this point, we know how to commit schema and static data changes to source control and filter the types of objects we don't want SQL Source Control to track. Using these features, we have defined the codebase to automate Azure SQL DB deployments. Before we start automating database deployments, let's take a look at ways to manage development changes in Azure DevOps and in our local Git and SQL Source Control environment.
