Over the past decade, application developers have been automating builds and deployments of their applications. Many established patterns exist to build and deploy applications easily, whether with tools external to source control systems, including GitHub or Azure DevOps. However, when it comes to database deployments, the patterns are harder to find and understand how they work. For database development teams and DBAs who aren't working with application developers, like a data warehouse team, it may be harder to get up and running with an automated environment…at least, that has been my experience.
In this Stairway series, we will explore different tools and methods with a common goal, automating the deployment of schema changes from source control to the destination database. Different levels in the series will cover the topics listed in the table below, starting with the tools listed under Initial Tools. Once we have an automated database deployment to an Azure SQL DB running in Azure Pipelines, additional tools will be swapped in, providing a more comprehensive look at the database deployment landscape. It is important to note that other developer tools are on the market to manage database code. Information about those tools can be found on my website.
| Initial Tools | Additional Tools | |
| Destination | Azure SQL DB/Managed Instance | SQL Server (on-premises or cloud VM) |
| Process Orchestration | Azure Pipelines | GitHub Actions |
| Source Control | Azure Repos (Git) | GitHub |
| Developer Tools | Red Gate SQL Source Control | Red Gate Flyway |
Manage Code with Azure DevOps and Git Client
This series will get to the design and implementation of automating database deployments. However, some groundwork needs to be laid. The first step is to define a source control repository for the database schema. This level of the series introduces these three topics.
- Overview of Source Control
- Azure DevOps Repositories
- Git Client
By the end of the article, your computer will be set up and ready for you to begin the journey of managing your database schema within source control.
As you have read articles or watched videos on any number of development projects, you've likely heard about these products.
If you haven't heard of these, that's okay. They are all source control tools development teams use to manage their code. They all work roughly the same way by managing versions of source code. When a module or database object changes, the changes are checked into source control. Previous versions are kept in the repository when changes are checked in, unlike saving a file in Word or Excel, which overwrite the previous version with your latest changes. Previous versions of source code can be accessed at any time. This is especially useful if there is an issue with the current version of the code, and you need to see what the code looked like before. Techniques to manage and retrieve previous versions of code will be covered in later levels of this series.
Multiple developers are often on a team, so code needs to be saved in a central repository that everyone can access. The central repository may be on the local network, as is the case with Subversion and a self-hosted installation of Bitbucket. GitHub, Azure DevOps, and Bitbucket Cloud are hosted externally.
All the source control systems have two components, a server-based central repository and a client installed on the developers’ computers. The client tools have integrations with popular developer tools, allowing for easier code management. Azure DevOps and GitHub use the same client, Git client, or Git for short. Git provides a local repository to version code before it’s checked into the main branch.
Azure DevOps
Let’s look at Azure DevOps to see the central repository, and then we’ll return to getting the client installed.
Azure DevOps (aka DevOps or ADO) is Microsoft’s long-running source control system (Microsoft has also owned GitHub since 2018). Azure DevOps has evolved its source control tool over the years. It was previously known as Visual Studio Team Services and Team Foundation Services before that.
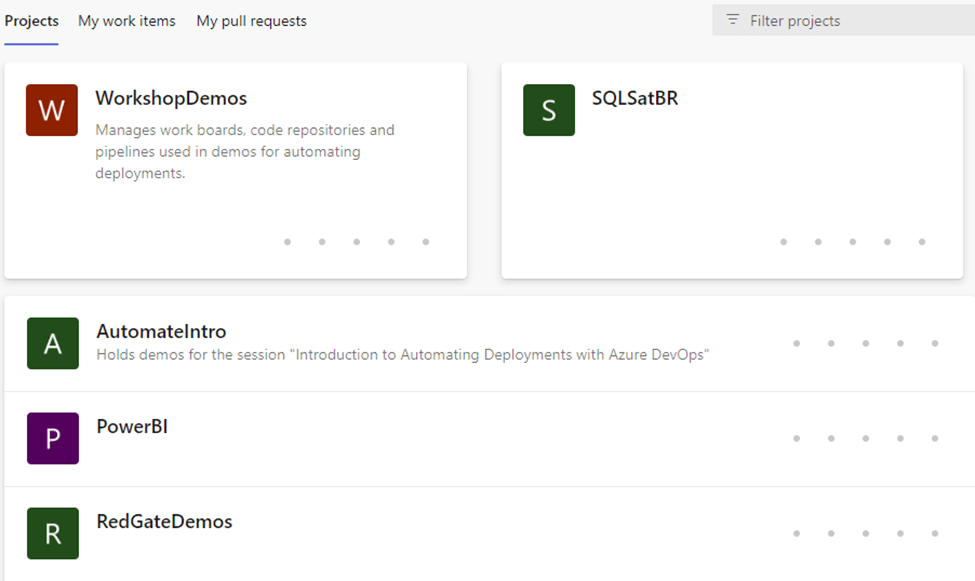
Let's assume there is an existing Azure DevOps organization to use, and a project has been created previously. To access the website, enter https://dev.azure.com/MyOrg, where MyOrg is the name of your organization registered with Azure DevOps. The home page will display your organization’s projects that you have access to. The screenshot below shows some of the projects I have in my Azure DevOps account.
 Figure 1- Azure DevOps projects screen
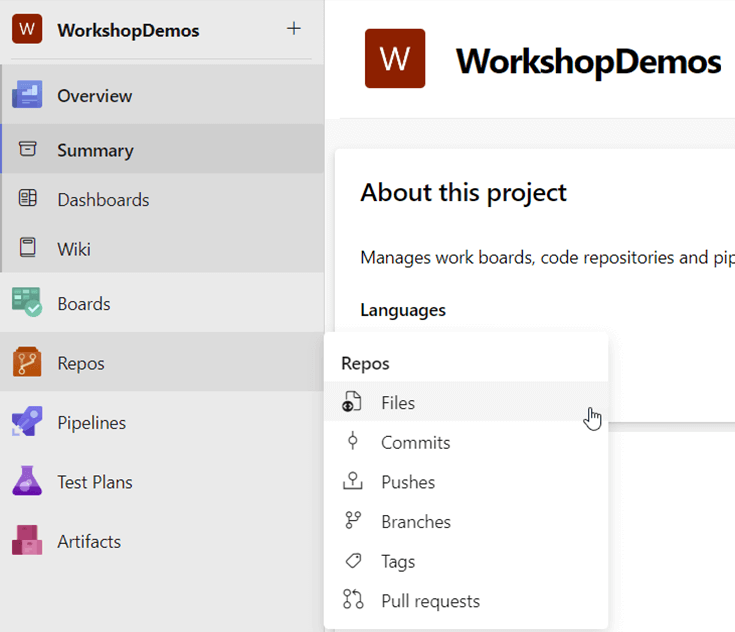
Within the project, there is a code repository (or repo). Azure DevOps makes it easy to clone a repository by giving us a URL to paste into our client. Click Repos and then Files, as shown in the screenshot below.
Figure 2 - Navigate to source control repository
If other teams or team members have added code to the repository in the past, then you should see those files and folders. The Clone button in the upper-right corner interests us, as shown below. Clone Repository, by default, gives us the URL of this repository. Copy the HTTPS command line and save it to a text editor. It will be needed to test the installation of the Git client later in this level.
Figure 3 - Source Code Repository
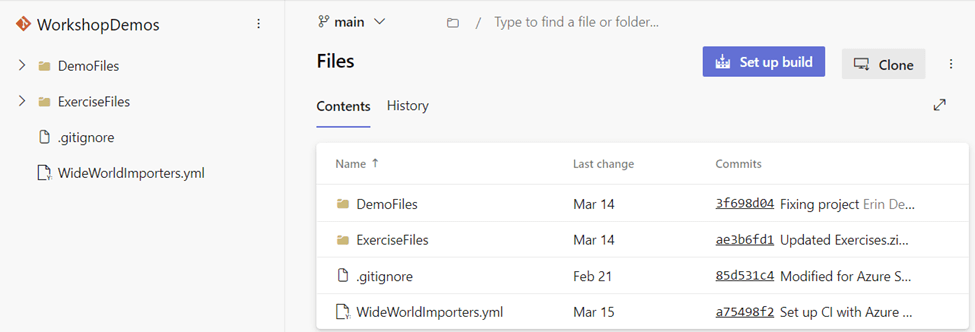
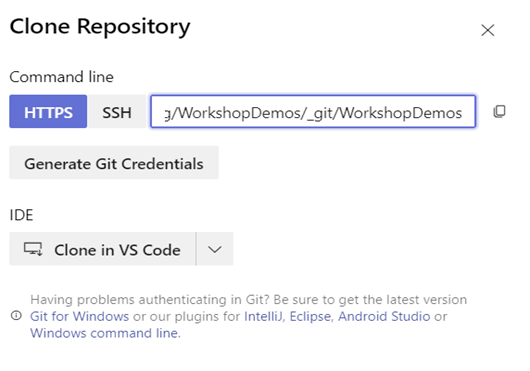
Figure 4 - Clone Repository – established repository
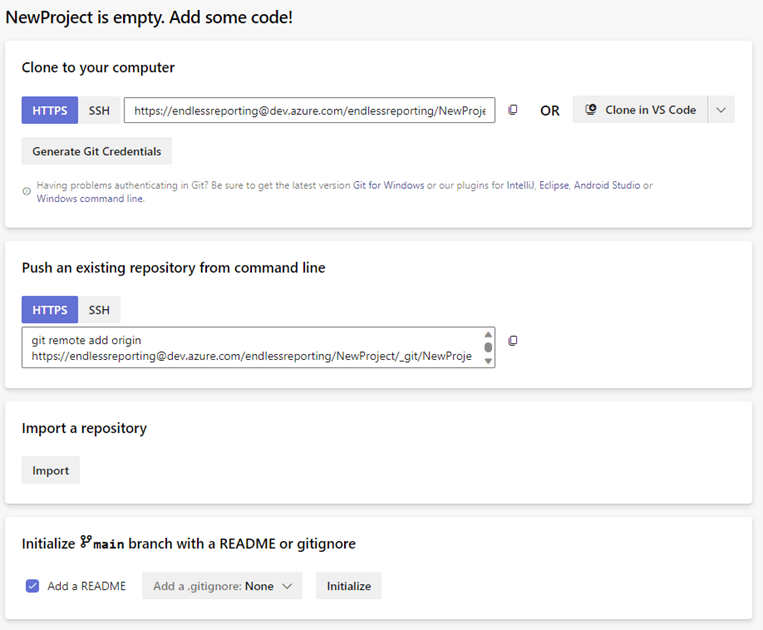
The repository screen will look considerably different for a new project, as the screenshot below illustrates. Instead of a Clone button, that functionality is displayed on the screen as an initial step to get started. Copy the HTTPS URL and save the URL to a text file for later use.
Figure 5 - New source control repository
 F
FInstalling Git Client
To work with the repository in Azure DevOps, the Git client needs to be installed on the local computer. It can be found through multiple 3rd-party websites, including Azure DevOps documentation. Most will direct you to this URL, https://git-scm.com/downloads.
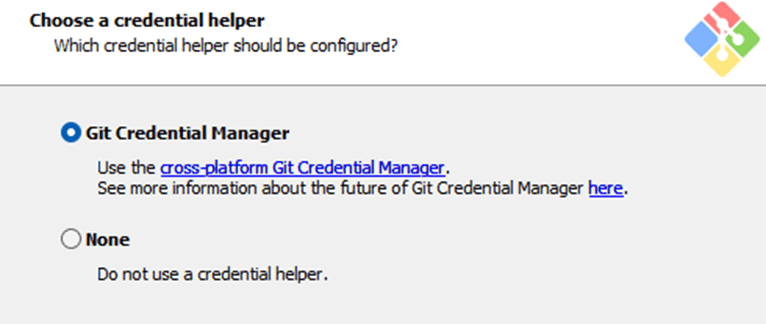
During the installation of Git Client, there are numerous options, almost all of which can use the default value. When prompted to Choose a credential helper, select Git Credential Manager. Depending on the version of the operating system on your computer, a Microsoft Online login screen may be presented when you authenticate with Azure DevOps. This is the easiest way to manage credentials with Azure DevOps. Otherwise, Personal Access Tokens need to be used. This is more cumbersome, as they expire over time and must be renewed.
Figure 6 - Git Installer - choose a credential helper
Once Git Client is installed, the first test is to see the successful installation. Open a Command Prompt and type Git.exe, and press Enter. If the command options are returned, we know the application exists. Next, let’s create a local folder and clone a repository from Azure DevOps.
Each line below needs to be entered as a separate command, pressing Enter to execute the command.
c:
mkdir GitRepos
cd \GitRepos
git clone https://dev.azure.com/EndlessReporting/NewProject/_git/NewProject
If a Microsoft login screen appears, enter your credentials to access Azure DevOps, as you did earlier. For Windows 11 users who are logged into their computer with the same credentials you use to access Azure DevOps (Entra ID - previously known as Azure Active Directory), Git may have used those credentials and won't prompt you. It's okay, as it saved you a few mouse clicks.
Figure 7 - Successfully cloned empty repository

The output will look something like this for a repository already containing a copy of the files within the repository.
Figure 8 - Successfully cloned repository with files

If there are authentication errors, check your credentials and try cloning the repository again. For accessing an existing Azure DevOps organization your company uses, reach out to a development team or IT department for assistance.
To verify the repository was cloned, type dir and press Enter. A sub-folder named the same as the repository should be listed like my repository below, NewProject. This can also be done by navigating in Explorer to this location.
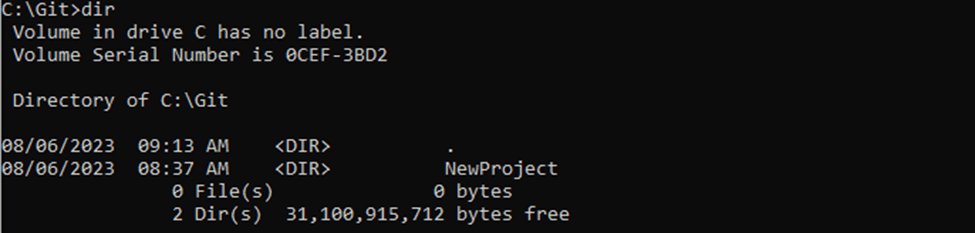
Figure 9 - Folder containing Git repository
Your computer now has a copy of the Azure DevOps repository. Let’s add a new readme file. Keep the Command Prompt window open and open Notepad to create a new text file. Enter a quick note about this repository. save the file as readme.md in the local Git folder, C:\Git\NewProject in my case. Return to the Command Prompt and navigate into the repository. The syntax is the following (assuming the command prompt is still open to c:\Git).
cd NewProject
The following three commands are needed to make Git aware of the file and check in (or commit) the file to the local repository before committing the change to Azure DevOps. The 2nd command requires a check-in comment. Add a meaningful note about the change as a good habit. While this is a readme file, it’s good to let others on the team know the purpose behind the code commit.
git add .
git commit -m “Demonstrating Git check-ins with a readme file.”
git push
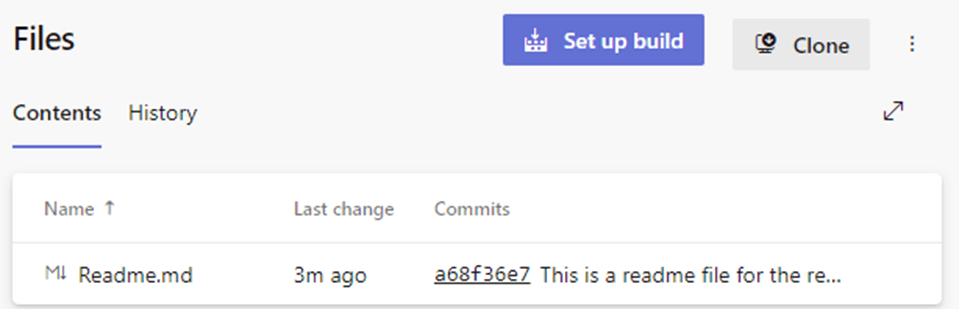
Return to Azure DevOps and navigate back to Azure Repos within your project. If you left browser running, refresh the page. There should now be a new readme file listed.
Figure 10 - Azure DevOps repository with the newly created readme file.
A lot has been accomplished in a short amount of time. This level has covered these key areas.
- What is source control?
- Introduction to Azure DevOps
- Installation and configuration of the Git client
- Committed a file to Azure DevOps
The next level of this series will begin the process of managing code in Azure DevOps. Red Gate SQL Source Control will be linked to the local Git repository, before extracting the schema of a database and saving it to Git and pushing the changes to Azure DevOps. We will see that SQL Source Control handles much of the communications with Git, so we don’t need to remember how to commit and push changes.
