

Introduction
The Azure Machine Learning (AML) Python SDK v2 is an updated Python SDK package. It helps to build a single command or a chain of commands like Python functions to create a single step or a complex workflow.
I will discuss the end-to-end solution for writing a code logic in AML Python script and execute the ML Pipeline through Azure Data Factory Pipeline.
Here are the Azure Resources used:
Steps
The following steps will explain the creation of the Azure Data Resources and execution of a Machine Learning Pipeline through Azure Data Factory. The Machine Learning Pipeline will execute a Python notebook where a Python script will be called.
Step 1
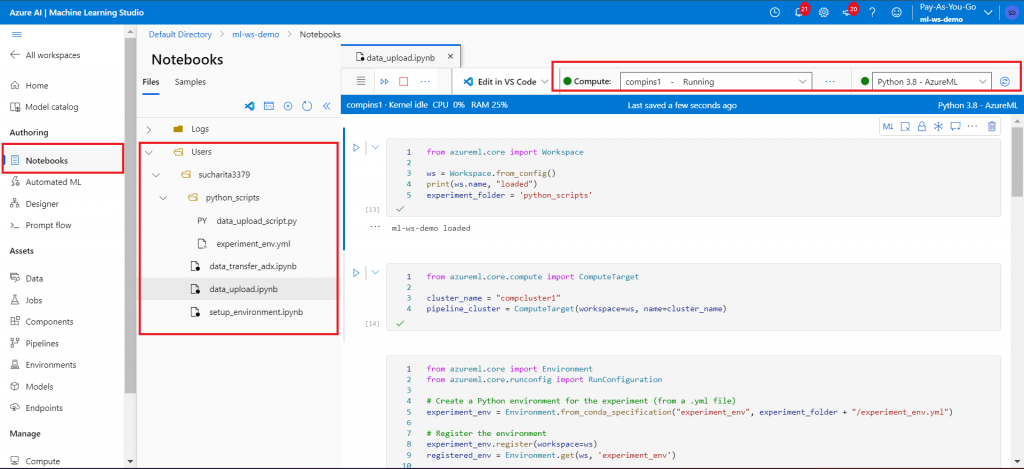
First, create an Azure Machine Learning Studio workspace and create a compute instance. Go to Notebooks.
- Create a folder named python_scripts under the user folder.
- Create a new notebook named setup_environment.ipynb.
This notebook will create a compute cluster and an environment file, named experiment_env.yml, in python_scripts folder. The environment file contains all the required Python libraries to be available for code execution. The notebook needs to be executed interactively cell-by-cell. The Compute instance should be connected to execute the notebook.
Create a python script, named data_upload_script.py, under the python scripts folder. This script will print the value of an argument named PClass.
Create a new notebook, named data_upload.ipynb. This notebook will first create the run configuration using the compute cluster and the environment as created after the execution of setup_environment.ipynb. Then, the pipeline steps are defined with a script named data_upload_script.py and the pipeline is executed.
Execute the notebook interactively cell-by-cell.
All the related scripts and notebooks are attached with this article.
Step 2
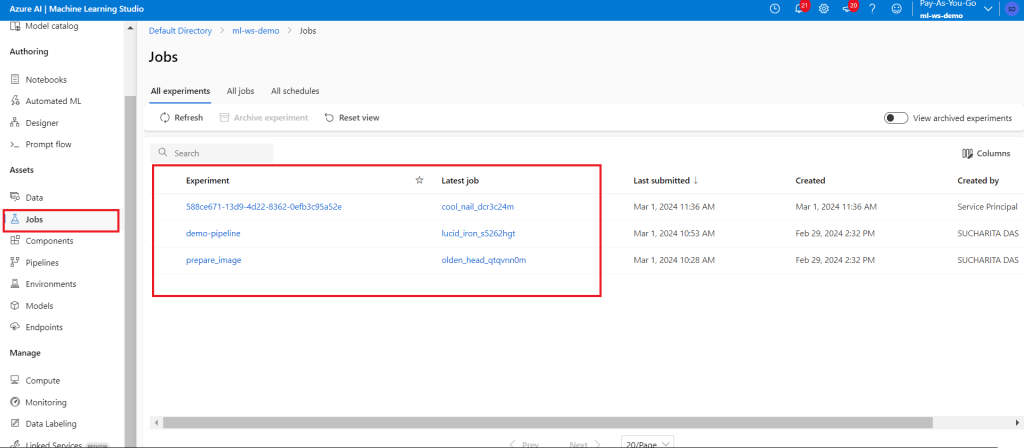
Once the Pipeline run step starts, go to the Jobs tab. Two experiments are available during the first run. prepare_image is the experiment which is running to setup the environment only for the first time pipeline execution. Click on the name of the experiment to monitor its execution progress. demo-pipeline is the pipeline as defined in the notebook in the earlier step. Monitor its execution. The output log also can be seen where the PClass value will be printed.
Step 3
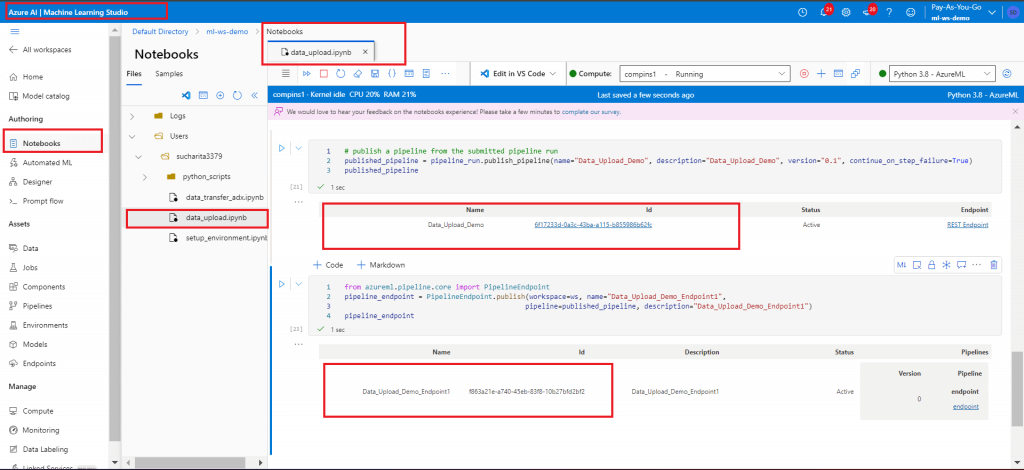
After successful completion of the demo-pipeline, go back to the Notebooks tab. Edit data_upload.ipynb to add last two cells, which publish the Pipeline and then create and publish one endpoint for the Pipeline. Make a note of the two IDs as given in the below screenshot.
Whenever there is a code change for Pipeline definition or in the python script, the pipeline should be published and a new endpoint to be created for the published pipeline.
Step 4
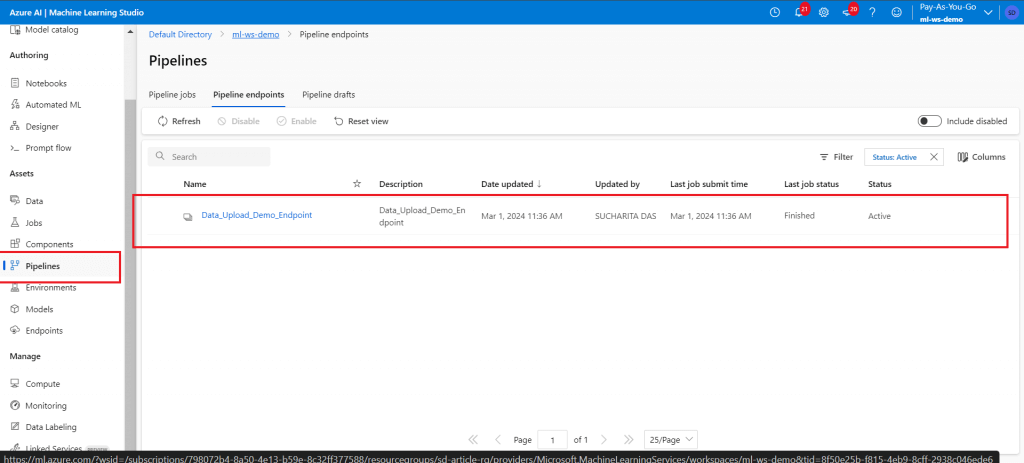
Once completed, go to the Pipelines menu item. The newly published pipeline endpoint is available here. Click on the endpoint link to get the details about it.
Step 5
Create a new Data Factory. Create a pipeline named ml_pipeline_execute. Add a Machine Learning Execute activity.
Create a pipeline parameter named PClass and set a default value.
Create a linked service for the Machine Learning Workspace and use it in the Settings tab of the activity.
Put the values for Pipeline endpoint ID and Experiment Name as copied from the Pipeline and Endpoint publishing steps.
Set the Pipeline parameter PClass to be populated from the Data Factory parameter.

Step 6
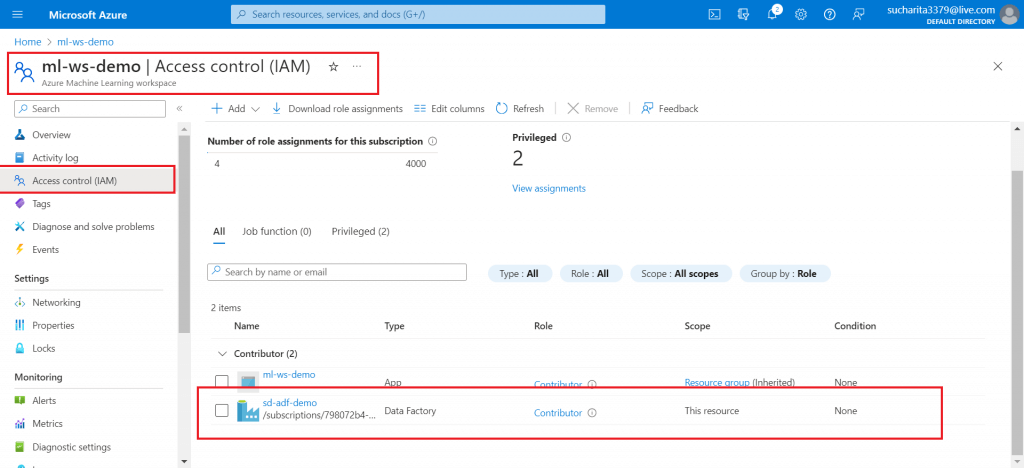
Go to the Access control link in the ML workspace. Give Contributor access to the Data Factory. This is a prerequisite to execute the ML Pipeline through Data Factory Pipeline.
Step 7
After saving the Pipeline activity with the Settings, start debugging. Supply any integer value for PClass parameter. There is a link in the Output window to monitor the ML Pipeline Execution.
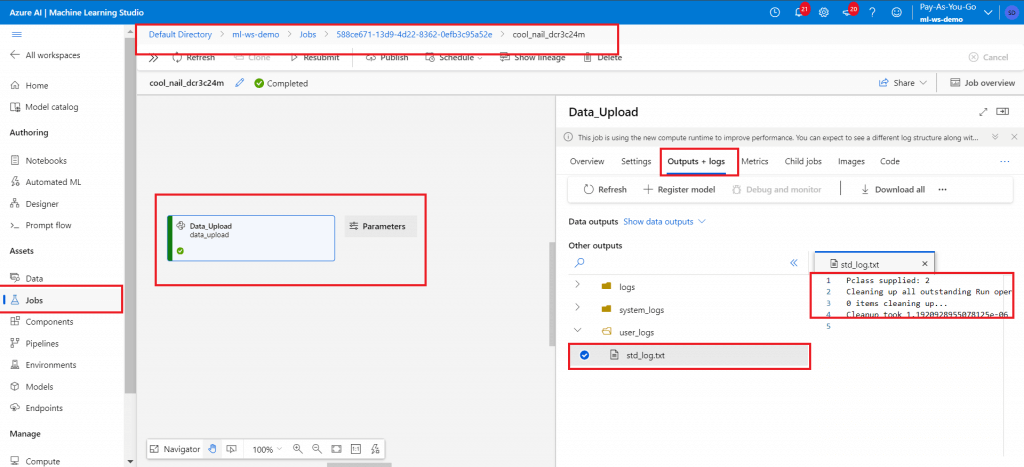
Click on the link. It will redirect to the Jobs tab in the Machine Learning Workspace. Monitor the Job step execution.
Once completed, the log should have the PClass value printed as supplied during Data Factory Pipeline execution.
Note
Following articles may be referred for better understanding of the working of Data Factory and Machine Learning Workspace.
Ingest and retrieve data from ADX Cluster database using ML Studio Python Script
Conclusion
The above steps show how to execute the ML Pipeline from Data Factory and monitor the progress. The compute instance and the compute cluster should be in running state for the successful execution. In the demo, a simple python script is used to print an argument. Required Python code logic can be executed from the script. It is important to add all the required libraries in the environment file as used in setup_environment notebook. Also, any whl file referred in the Python script can be included with the environment. Multiple parameters can be configured in the Pipeline definition within the notebook file as required for the script execution.