

When you create a data pipeline in Microsoft Fabric, you typically use one or more connections. A connection points to a certain data source (such as Azure Blob Storage, a relational database, a Cosmos DB instance etc.) or to a destination in Fabric (OneLake, Lakehouse, Warehouse etc.). After development is finished and you tested your pipeline, you probably want to promote it to another workspace as part of your deployment and testing strategy (development – test – acceptance – production). However, you don’t want your connections to point to the same sources and destinations as in your development environment. A pipeline in production shouldn’t be updating a warehouse in the development environment.
When you deploy a pipeline to another workspace, Fabric doesn’t change the connection. For example, if the connection points to a warehouse named my_warehouse in the dev workspace, it will still point to the same warehouse after you’ve deployed it to your test workspace, even though there might be a warehouse with the same name in that workspace. Connections are absolute, not relative. In the following screenshot you can see Fabric appends the workspace name to the name of the warehouse, to indicate that there are multiple warehouses in your tenant with the same name, and to let you know which warehouse exactly you are connecting to:
To avoid issues with your connections after deployments, you need to parameterize the connections. At runtime, the parameters will tell the connection which object to reference. In Azure Data Factory or Synapse Analytics, you use linked services to hold your connections. You can parameterize a linked service, or you can overwrite the connection values (such as the server or database name) in the CI/CD pipeline. In Fabric, the concept of linked services do not exist. There’s only one place to manage connections:

At this point, it’s not possible to parameterize a connection itself. There’s also no support for deployment rules for data pipelines in the deployment pipelines (you would use those for example to change the source connection of a Power BI semantic model). But recently Fabric introduced the variable libraries, which are the solution for parameterizing your data pipeline connections. In this article, we’ll show you how you can use those variable libraries to create dynamic internal (to Fabric objects) and external connections (to sources outside of Fabric).
At the time of writing, variable libraries are in preview. Functionality or user interfaces might change until the feature is generally available (GA).
Fabric Variable Libraries
Set-up
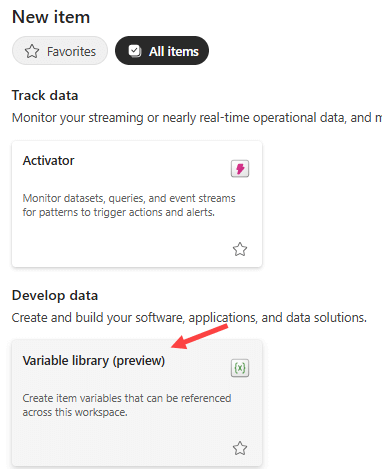
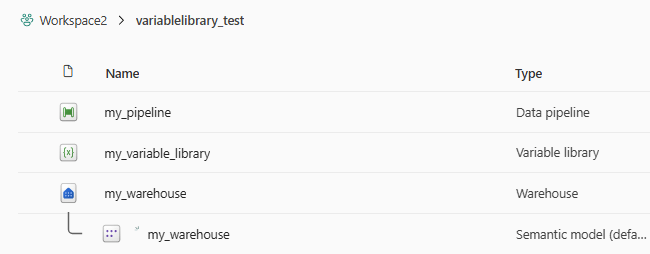
To demonstrate the concept of a variable library, we’re going to create a data pipeline that copies data from an Azure SQL DB to a Fabric Warehouse. In a Fabric-enabled workspace, choose to create a new item and search for variable library.
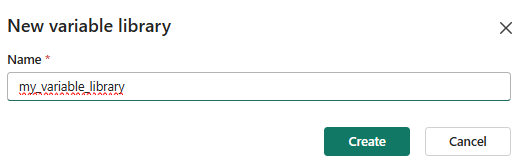
Give the library a name:
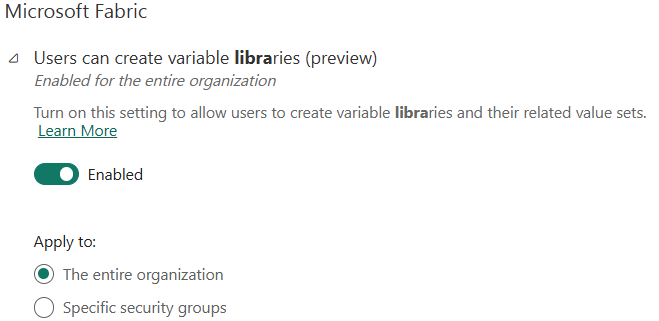
To use variable libraries in your tenant, the feature needs to be enabled in the admin portal:
If this is not the case, an error will be shown:
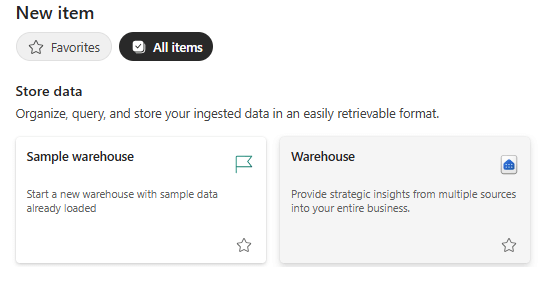
Also create a warehouse:
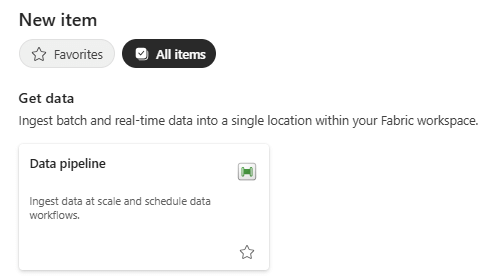
And a data pipeline:
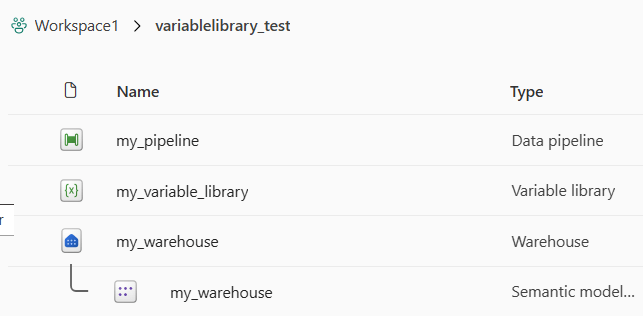
You should have the following objects in the dev workspace:
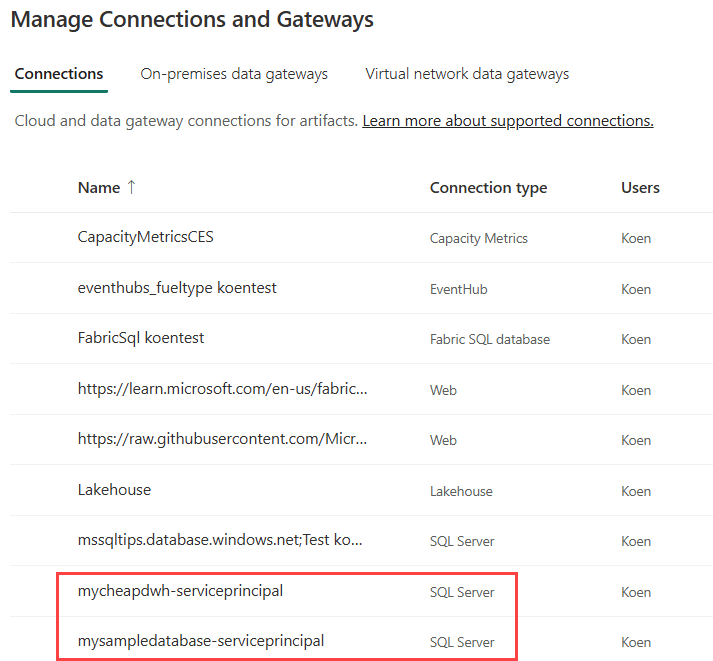
In my set-up, I have two different Azure SQL Databases as a source, so we can show the external connection actually changes. In reality, you might also have a different source database per environment. In the connections menu shown earlier, I created connections to those two databases:
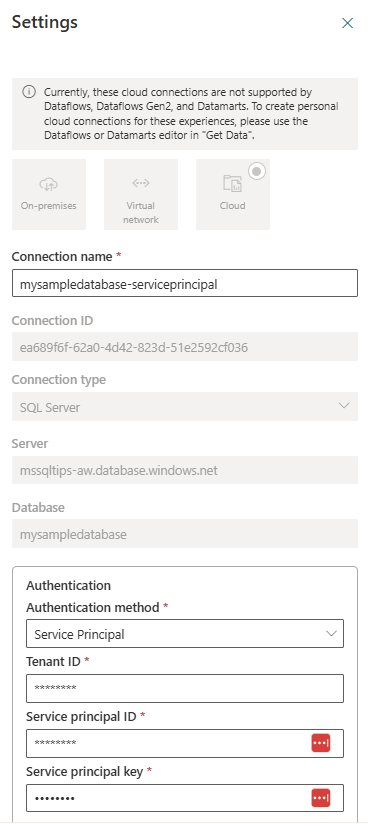
A connection definition looks like this:
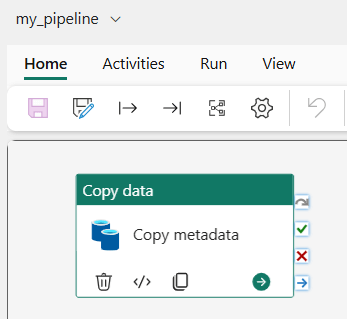
Note that a connection has a unique connection ID, which we’ll use later. Edit the pipeline and add a Copy Data activity:
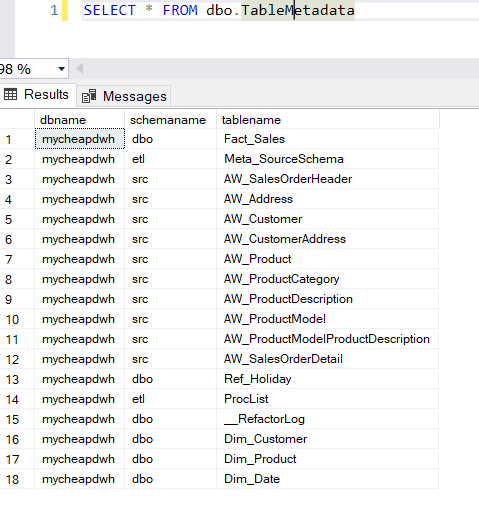
I develop the pipeline first without parameterization, so it be tested thoroughly before parameterization (since variable libraries are in preview, some functionality like data previews don’t work yet). In the source, I connect to one of the two Azure SQL databases and read out some table metadata:
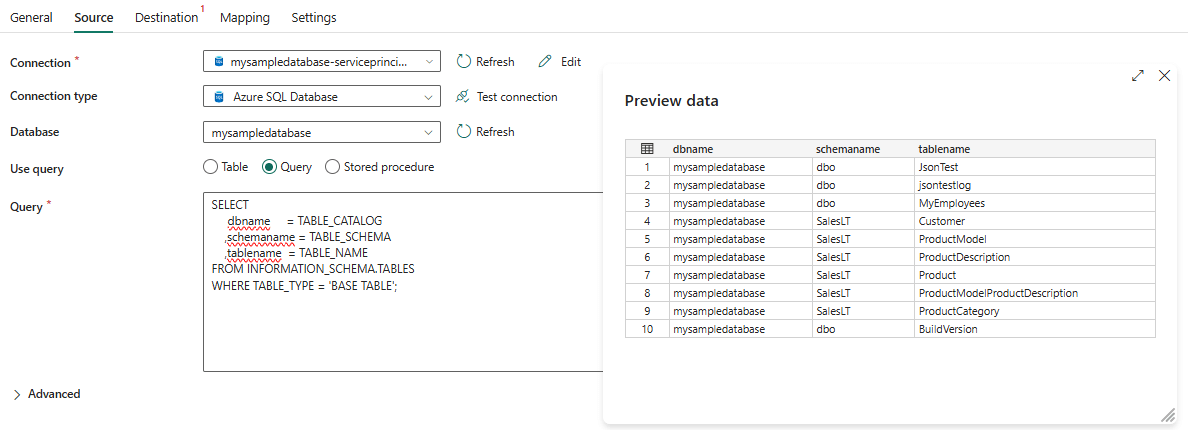
The following query is used:
SELECT
dbname = TABLE_CATALOG
,schemaname = TABLE_SCHEMA
,tablename = TABLE_NAME
FROM INFORMATION_SCHEMA.TABLES
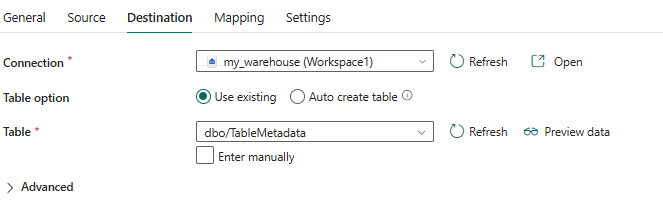
WHERE TABLE_TYPE = 'BASE TABLE';The warehouse of the same workspace as the pipeline is configured as the sink:
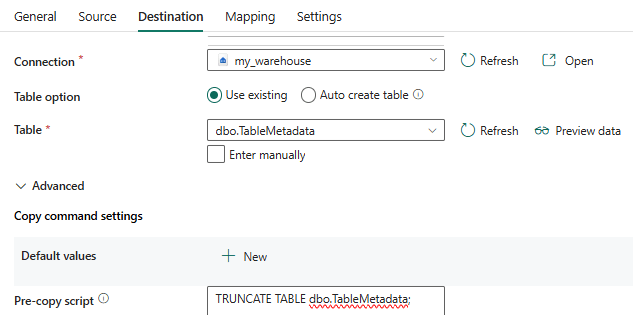
The data will be written to a table with the following schema:
CREATE TABLE dbo.TableMetadata(
     dbname     VARCHAR(100) NOT NULL
    ,schemaname VARCHAR(100) NOT NULL
    ,tablename  VARCHAR(100) NOT NULL
);
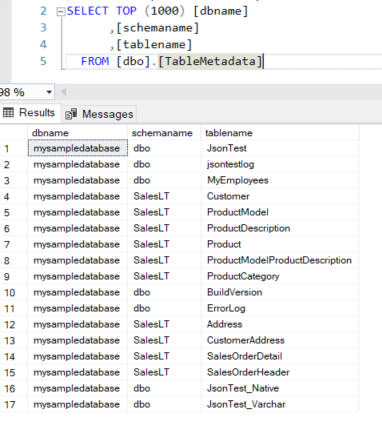
Don’t forget to truncate the table before the data is loaded. When the pipeline is run, data like this should be written to the table:
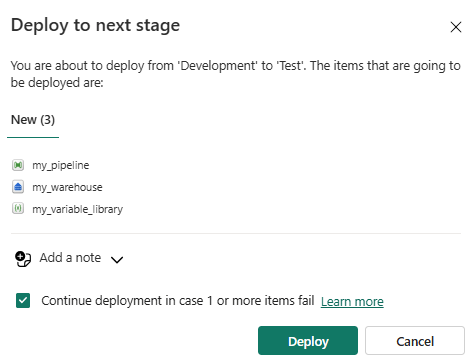
Create a deployment pipeline to deploy your items from the dev workspace to a test workspace:

The deployment pipeline will create a warehouse with the table dbo.TableMetadata, the data pipeline (with connections still pointing to the original data sources) and an empty variable library.
Use the Variable Library to Parameterize Connections
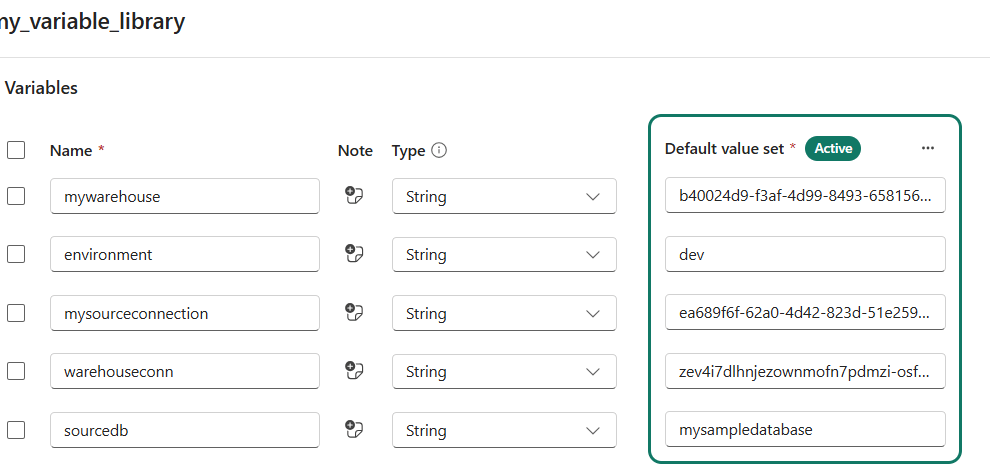
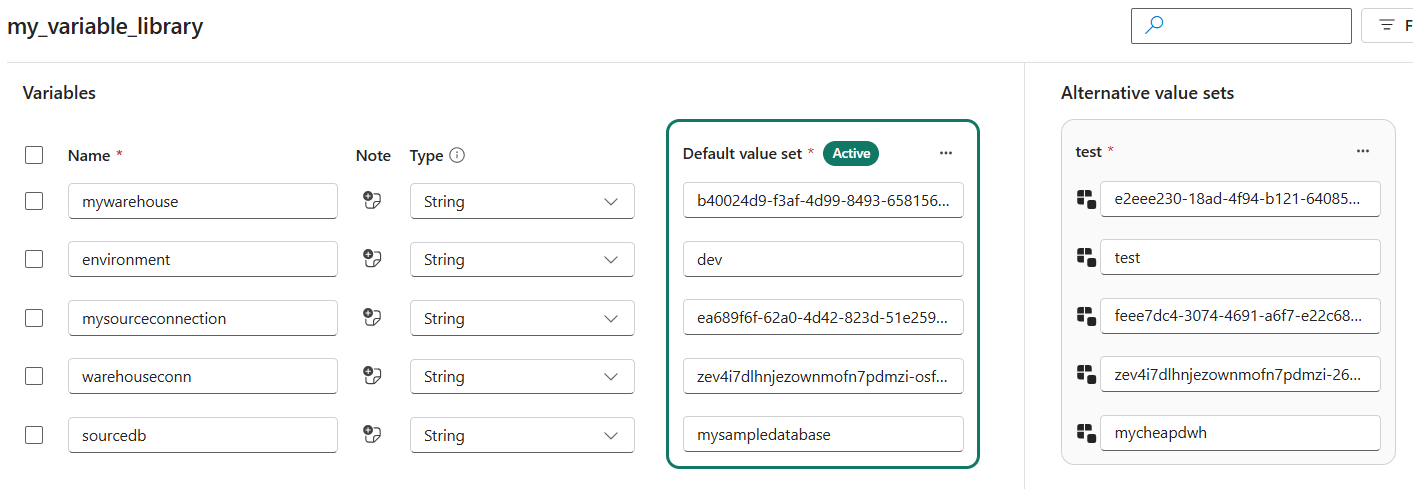
Open up the variable library and add these variables:
- mywarehouse. This contains the object ID of the warehouse.
- mysourceconnection. The object ID of the connection pointing to the Azure SQL DB (as mentioned before).
- warehouseconn. The SQL connection string to the warehouse.
- sourcedb. The name of the database in the Azure SQL DB.
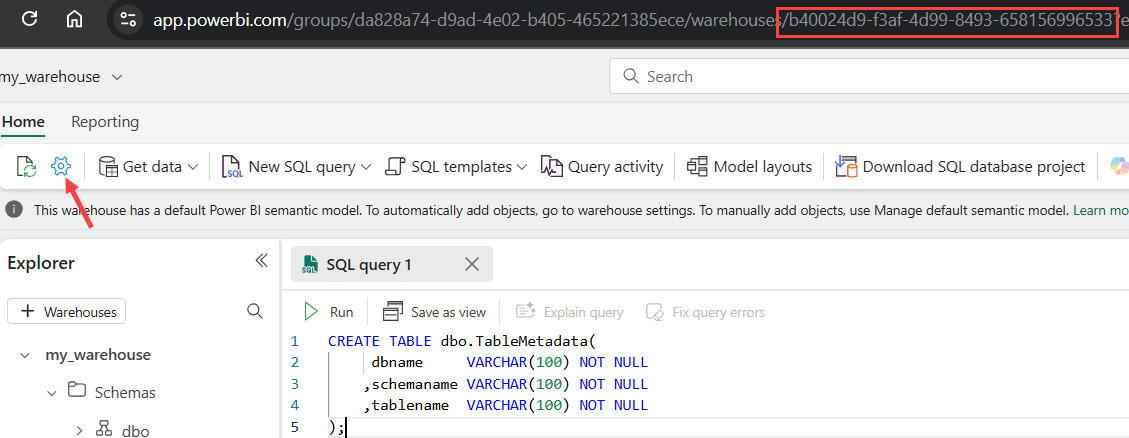
You can find the object ID of an item by browsing to it; the object ID is contained in the URL. For example, the object ID of a warehouse:
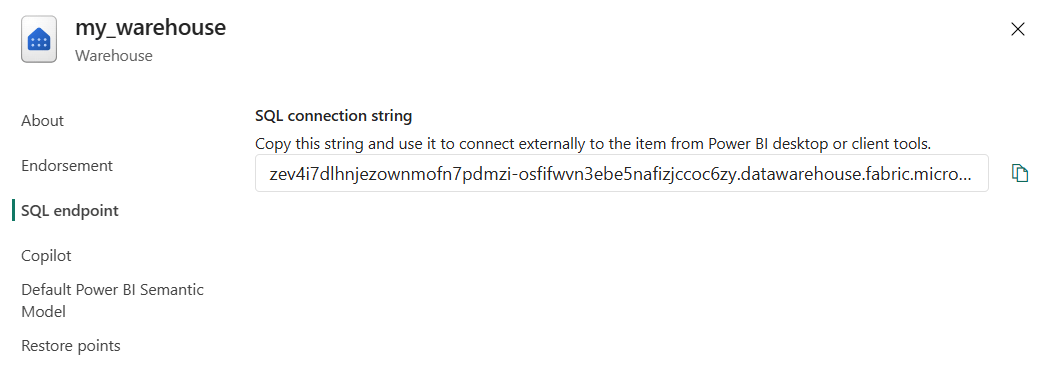
The SQL connection string can be found in the settings (see screenshot above and below):
We’re also going to add a value set to the variable library. A value set is a set of alternative values for your variables.

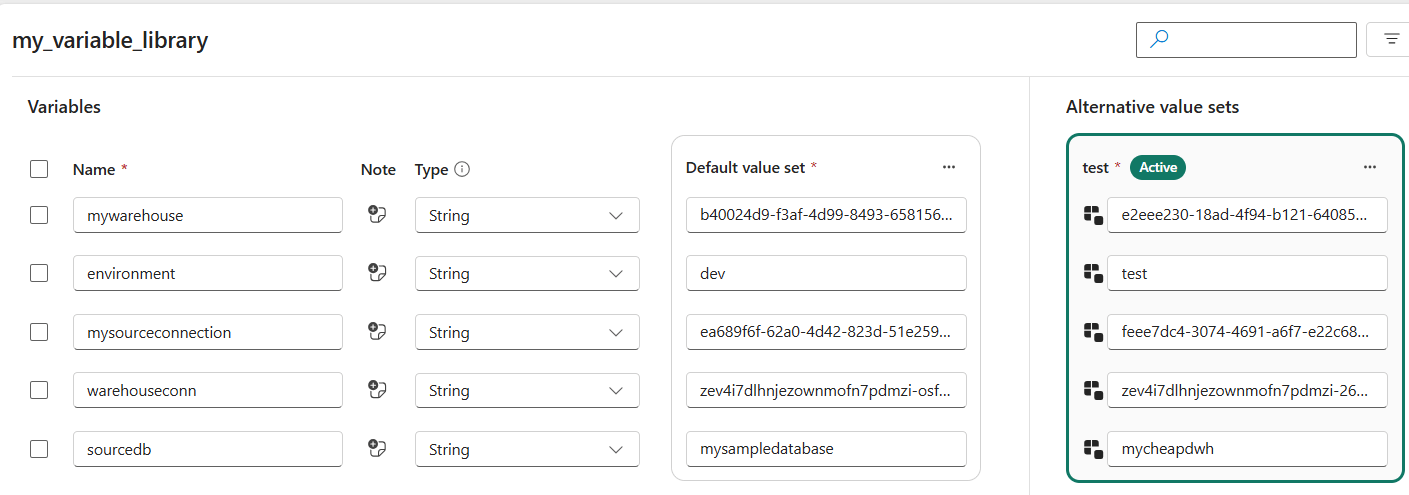
The default value set will be used in development, while the other values set is used in the test workspace. For the new value set, specify the correct object IDs for the test workspace:
You can obviously only find the object ID of the test warehouse after you’ve deployed it to that workspace. Also change the object ID of the source connection to the second Azure SQL database connection, and similarly for the database name. Deploy the changed variable library to the test workspace using the deployment pipeline. There we’re going to set the test value set as the active one:
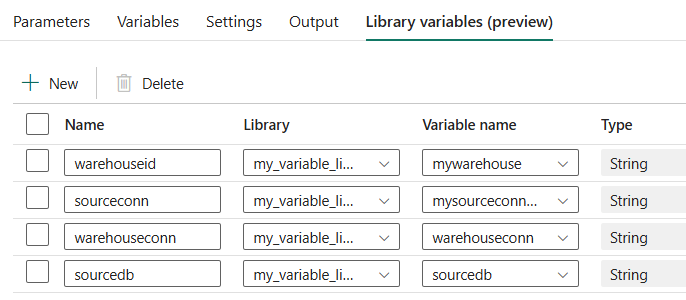
Back to the data pipeline. In the settings of the pipeline itself, a new tab has been added for library variables:
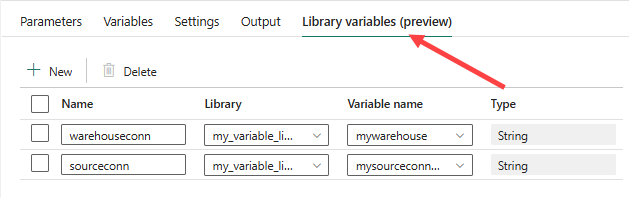
For each variable of the library, add a variable in this pane and link it to the corresponding library variable. The result should be like this:
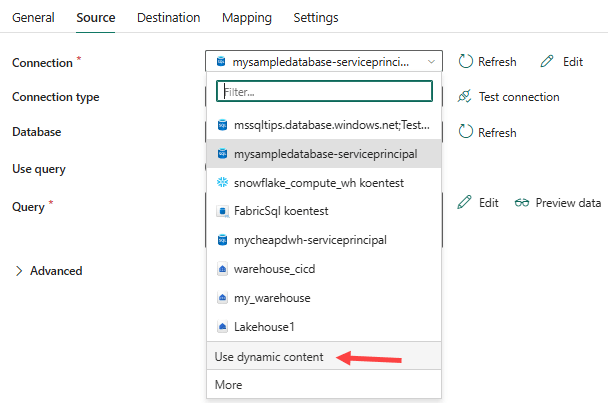
Now we can use those variables inside the pipeline in dynamic content expressions. In the source pane of the Copy Data activity, change the connection to Use dynamic content.
The expression editor will pop up. It’s a bit hidden, but you can find the variable libraries when you click on the ellipsis:
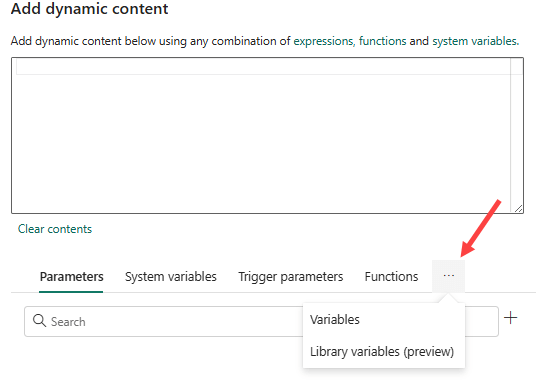
There we can find the variables that we just added to the pipeline:
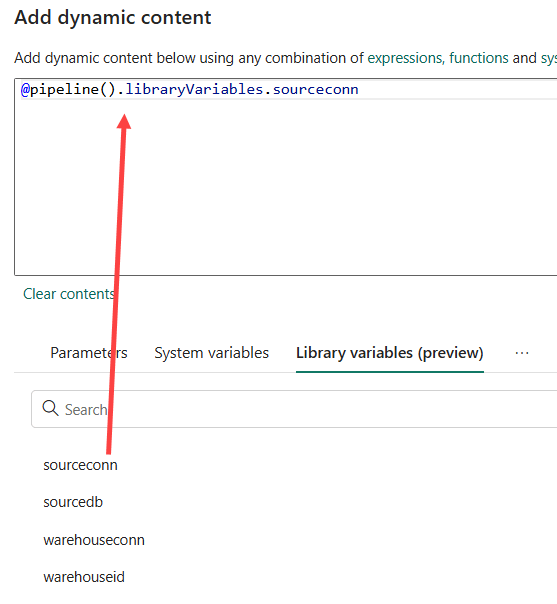
Drag the variable holding the object ID of the source connection to the expression pane and click OK. Using the same method, we can parameterize the database name as well:
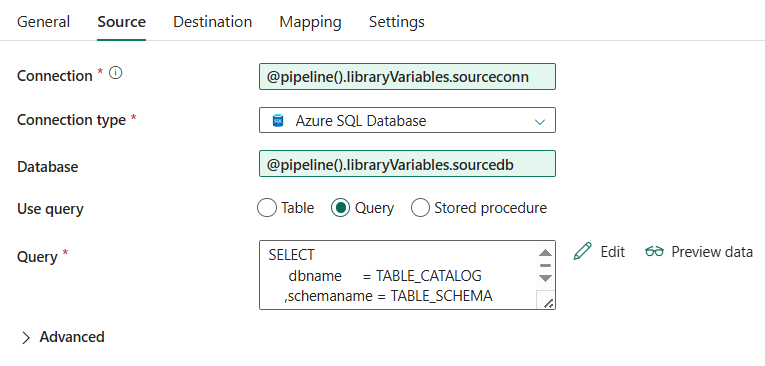
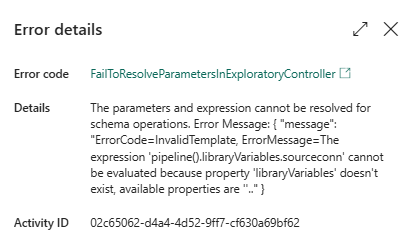
As mentioned before, some features don’t work yet while variable libraries are in preview. When you try to preview the data, an error will be shown:
We can now parameterize the sink connection as well with the other variables:
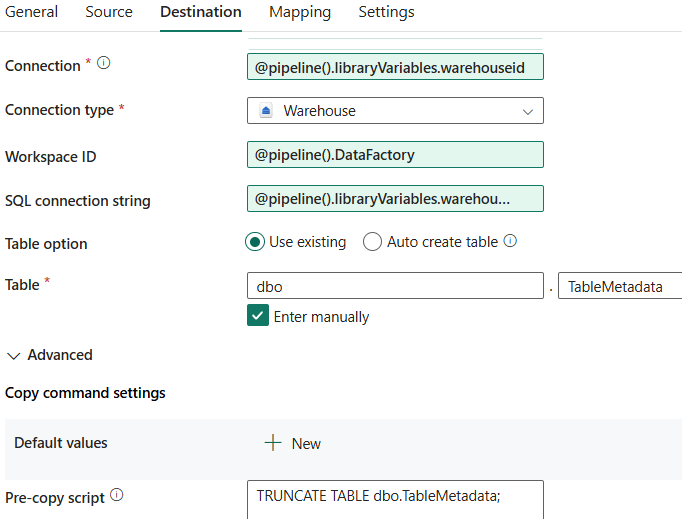
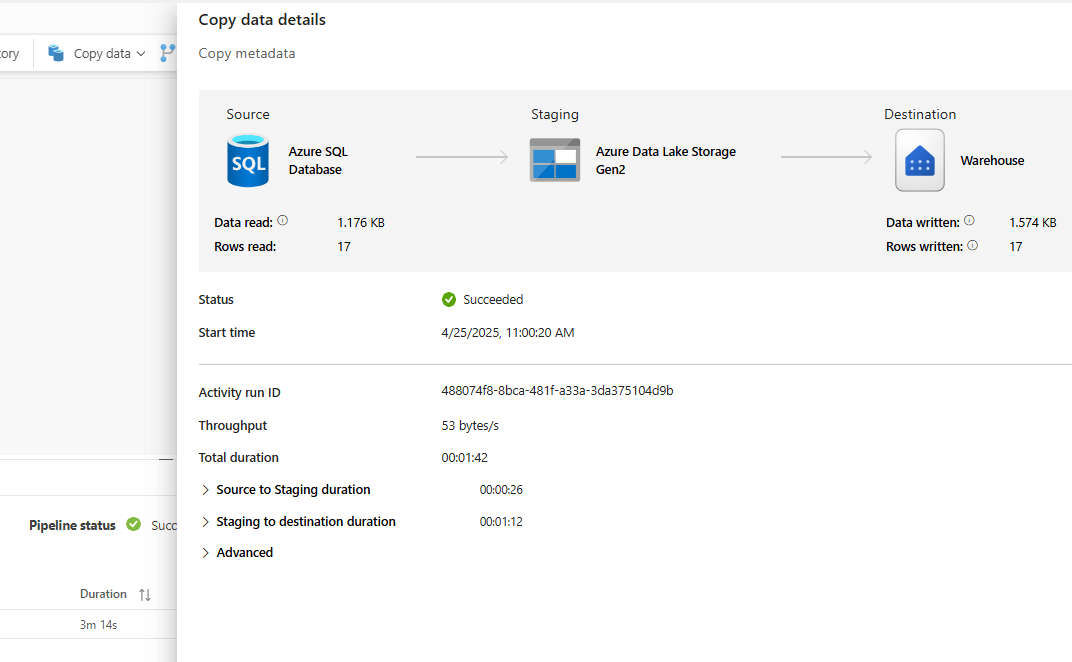
For the workspace ID, the system variable DataFactory can be used. Test the pipeline by running it. The same data should be written to the dev warehouse.
Deploy the parameterized data pipeline to the test workspace.
When you open the data pipeline in the test workspace, it should look identical to the one of the dev workspace. However, when that pipeline is run, data from the other Azure SQL DB (named mycheapdwh in my case) should be written to the test warehouse:
This shows that the parameterization of the connections was successful.
Conclusion
In this article we’ve shown how we can build data pipelines in Fabric Data Factory with parameterized connections. Using a variable library, we can pass on different sets of values in different workspaces, so we can change a connection dynamically. This should be part of your CI/CD strategy when deploying artefacts from one workspace to another. At the time of writing, the feature is in preview and only data pipelines are supported. Be sure to check the considerations and limitations in the documentation.