

Microsoft Fabric is a new centralized, SaaS data analytics platform which has been generally available since November 2023. It offers different types of analytical workloads, such as batch processing with Spark (in either a lakehouse or a warehouse) or real-time streaming with KQL databases.

At the core sits the OneLake, which is a centralized storage hub based on Azure Data Lake Storage. Most analytical workloads store their data in OneLake in the delta table format, which are basically Parquet files with a transaction log on top of them. Recently a new feature was announced to get source data quickly into OneLake in Fabric: database mirroring.
Database mirroring offers a no-code, frictionless solution to replicate data from a source database into Fabric. The goal of mirroring is to get the data as easy as possible and with low latency into OneLake, where it can be used for further analysis. Even though it shared the same name as mirroring in SQL Server (which has been deprecated and replaced with Always On Availability Groups), the concept is different. Mirroring in SQL Server was used for more high availability and disaster recovery scenarios, while mirroring in Fabric serves as an ingestion method for the analytical data platform.
Database mirroring supports – at the time of writing – three possible sources:
- Azure SQL Database (SQL Server’s little brother in the cloud)
- Snowflake (the cloud data warehouse)
- Azure Cosmos DB (the non-relational cloud database)
In this article we’ll focus on Azure Cosmos DB. The functionality of database mirroring in Fabric might seem very similar to Azure Synapse Link for Azure Cosmos DB, but under the hood they’re different things. Synapse Link uses the Analytical Store of a Cosmos database, while database mirroring uses the continuous backup feature.
If you want to configure mirroring in Fabric yourself, you can get a free trial for Fabric and you can configure Azure Cosmos DB to use the free tier discount, which gets you the first 1000RU/s and 25GB of storage for free.
The Prerequisites
First, we need an Azure Cosmos DB. If you already have one, make sure it doesn’t have the analytical store enabled, because if it is you won’t be able to configure continuous backup.
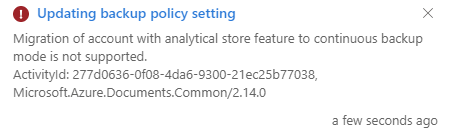
It should be possible to have continuous backup configured first, and then enable the analytical store, but not the other way around.
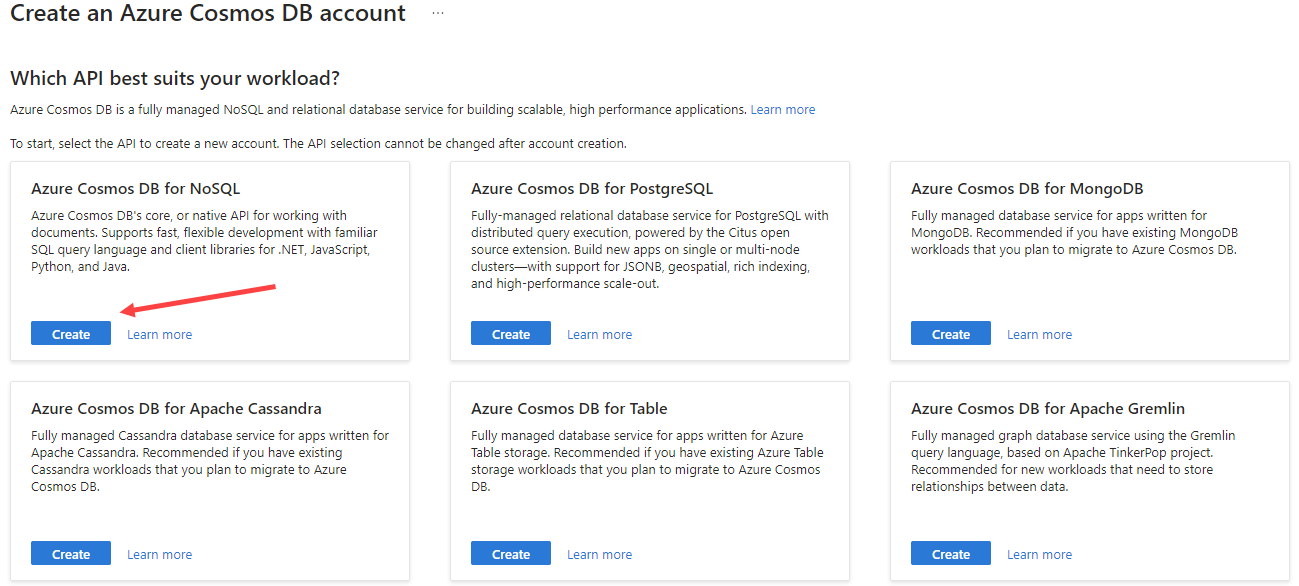
If you haven’t got Cosmos DB account, create a new one in the Azure Portal. Make sure to select the NoSQL API.
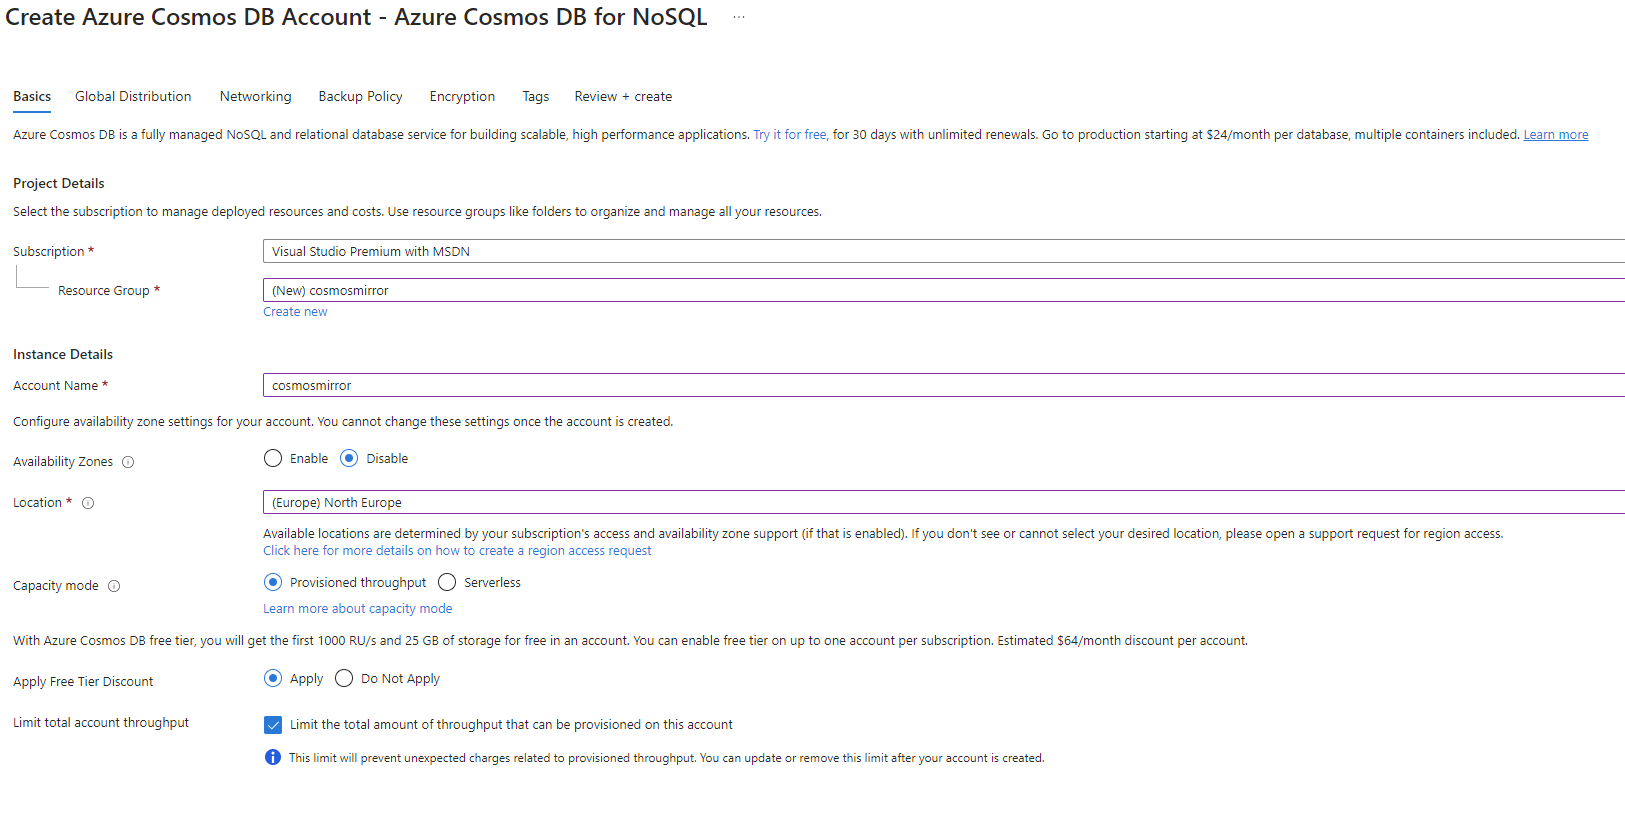
In the configuration screen, select a subscription, a resource group, and a location. Specify a name for your account (which needs to be globally unique) and set the capacity mode to Throughput (which is needed to apply for the free tier).
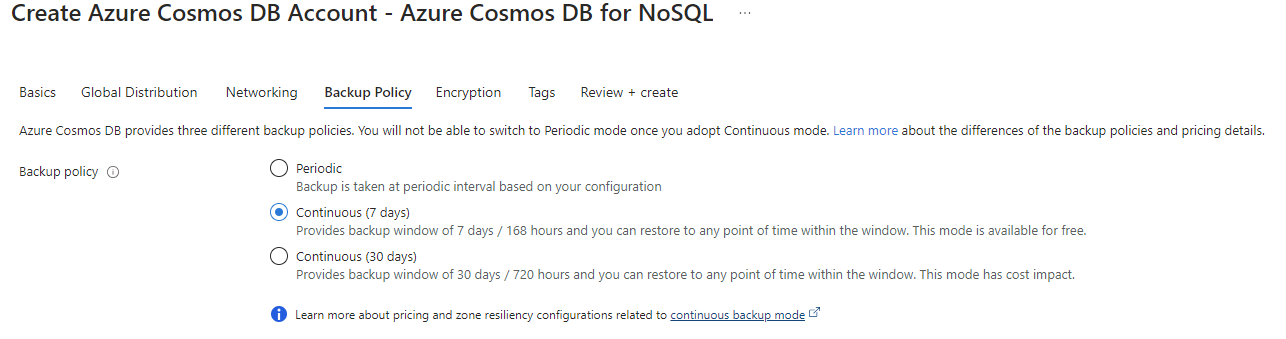
Go to the configuration screen for the Backup Policy, and set it to Continuous (7 days). This is a prerequisite for Fabric database mirroring.
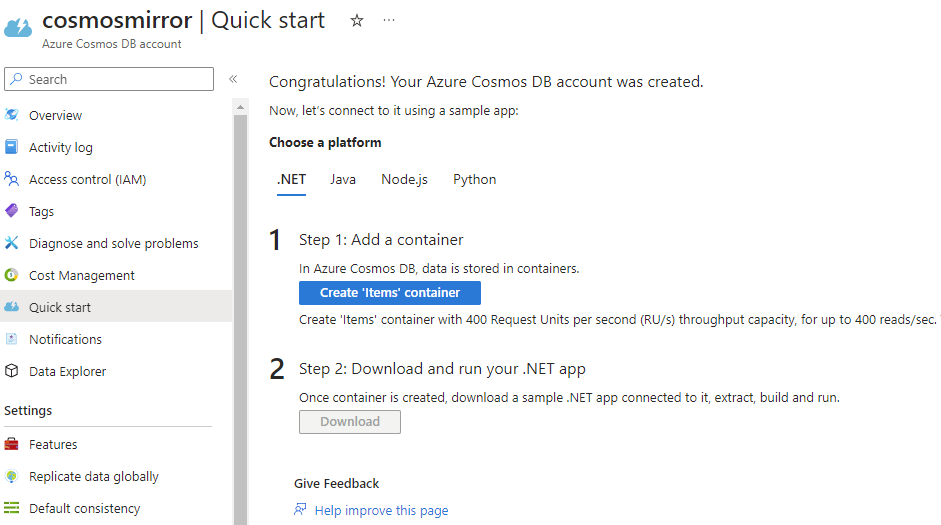
Finish the setup and wait for your new Azure Cosmos DB account to be created. Once it’s initialized, you’ll be taken to the Quick start, where you can choose to get a database and container created for you. Unfortunately, it doesn’t contain any items so it’s not that useful.
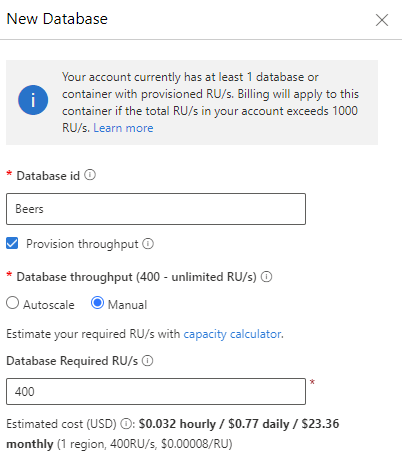
Go to Data Explorer and create a new database. In my case, I named it Beers and I configured the throughput to be manual with a throughput of 400 RU/s (remember we can’t go over 1000RU/s).
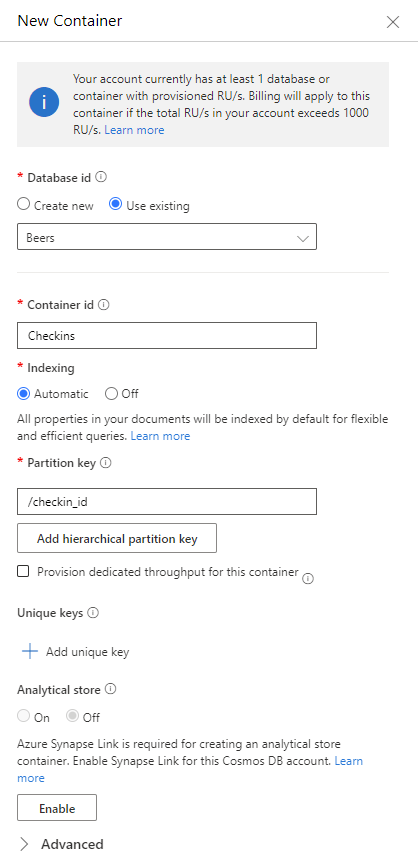
Next, create a new container and name it Items. The partition key is set to /checkin_id.
Once the container is created, you can create an item with the following JSON:
{
 "beer_name": "Orval",
 "brewery_name": "Brasserie d'Orval",
 "beer_type": "Pale Ale - Belgian",
 "beer_abv": "6.2",
 "beer_ibu": "36",
 "venue_name": "Lindner Hotel & City Lounge",
 "venue_city": "Antwerpen",
 "venue_state": "Antwerpen",
 "venue_country": "Belgium",
 "venue_lat": "51.2133",
 "venue_lng": "4.42253",
 "rating_score": "4",
 "created_at": "2018-05-23T19:11:38",
 "brewery_country": "Belgium",
 "brewery_city": "Villers-devant-Orval",
 "brewery_state": "Luxembourg",
 "flavor_profiles": [
 {
 "flavor": "fruity"
 }
 ],
 "serving_type": "Bottle",
 "checkin_id": "601849915",
 "bid": 851,
 "brewery_id": 169,
 "global_rating_score": "3.7",
 "global_weighted_rating_score": "3.7",
 "total_toasts": 1,
 "total_comments": 0
}
This concludes the prerequisites on the Azure Cosmos DB side. On the Fabric side, we only need a workspace that has a Fabric capacity assigned to it.
Database Mirroring in Fabric Configuration
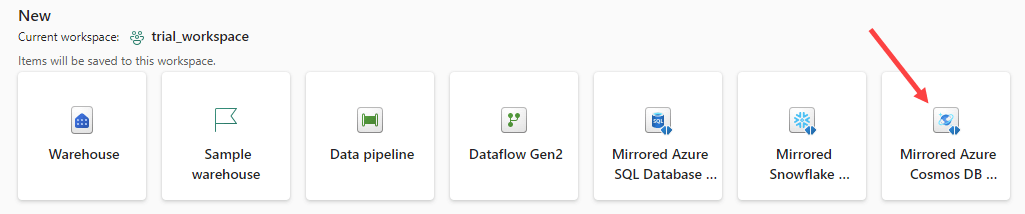
In your Fabric workspace, go to the data warehouse persona (also called workload). Select Mirrored Azure Cosmos DB database from the list of new objects to create.
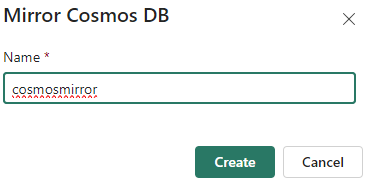
Provide the new mirrored database with a name:
In the configuration wizard, you can either choose between an existing connection, or create a new one.

When you create a new connection, you need to specify the Cosmos DB endpoint (you can find this in the overview of your Azure Cosmos DB account). You can also change the default name of the connection, which is recommended.
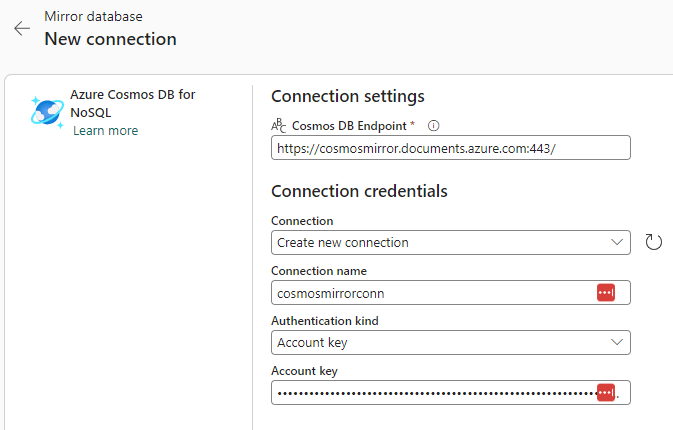
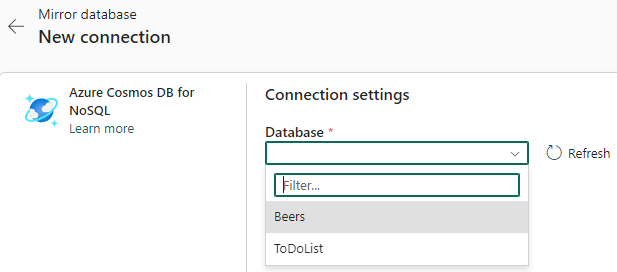
The only possible method of authentication is – at the time of writing – the account key of the Azure Cosmos DB account. In the next screen, you can choose which database you want to mirror:
Once we’re connected to the database, we get the following screen:
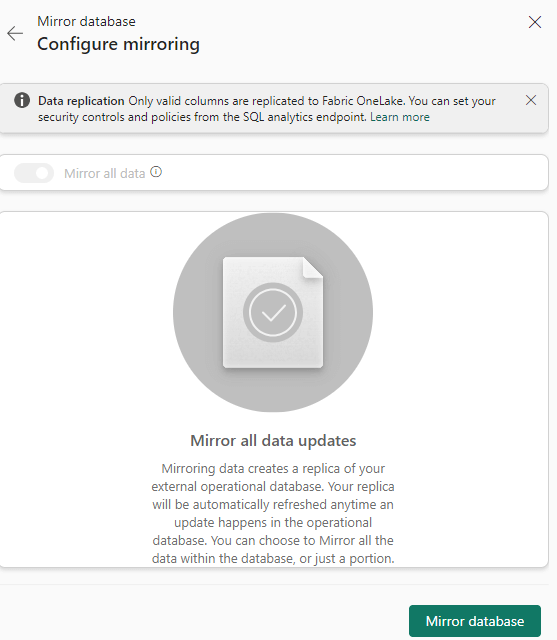
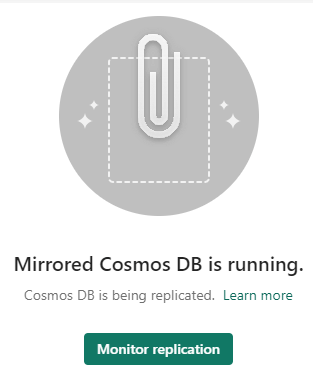
It seems all containers of the database will be mirrored by default. Click on Mirror database to finish the wizard. Fabric will set up the replication process for you. Once it’s finished, you can monitor the replication:
In the monitoring pane, you’ll get an overview of the overall status and a detail of each table stating how many rows have already been replicated.
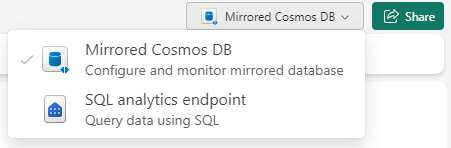
In the top right corner, you can switch from the mirrored database to the SQL Analytics Endpoint. Each mirrored database will have automatically such an endpoint created, along with a default Power BI semantic model.
In the SQL endpoint, which is similar in behavior to the warehouse in Fabric, you can preview the mirrored data and you can also write plain T-SQL queries on top of it.
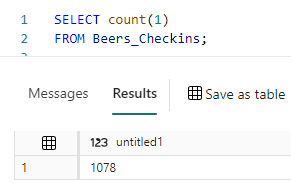
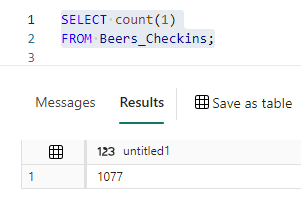
We can for example retrieve the row count of the replicated container:
Or fetch some details of a particular document:

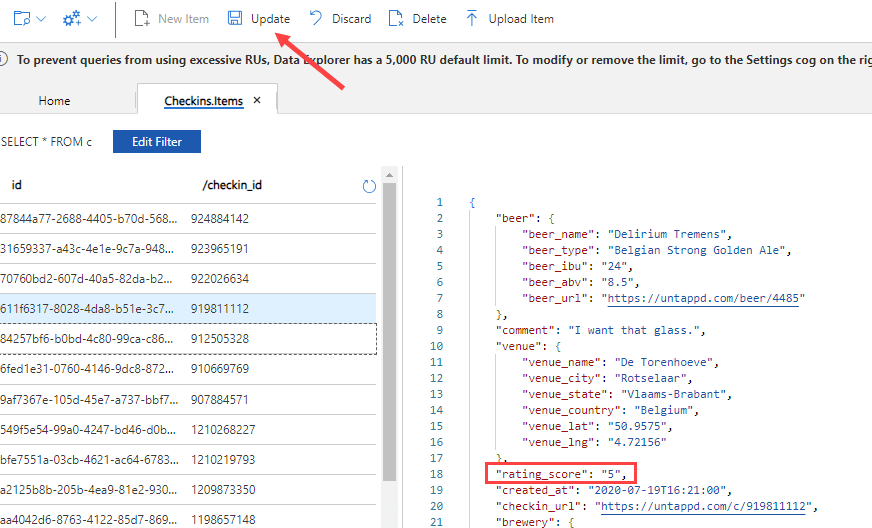
Let’s delete a document in the source container and update the rating of another:
We can see the changes being replicated with low latency:

When we check the row count, we can verify a record is gone:
And that the document has changed:

How to Write Queries on the Nested JSON Data
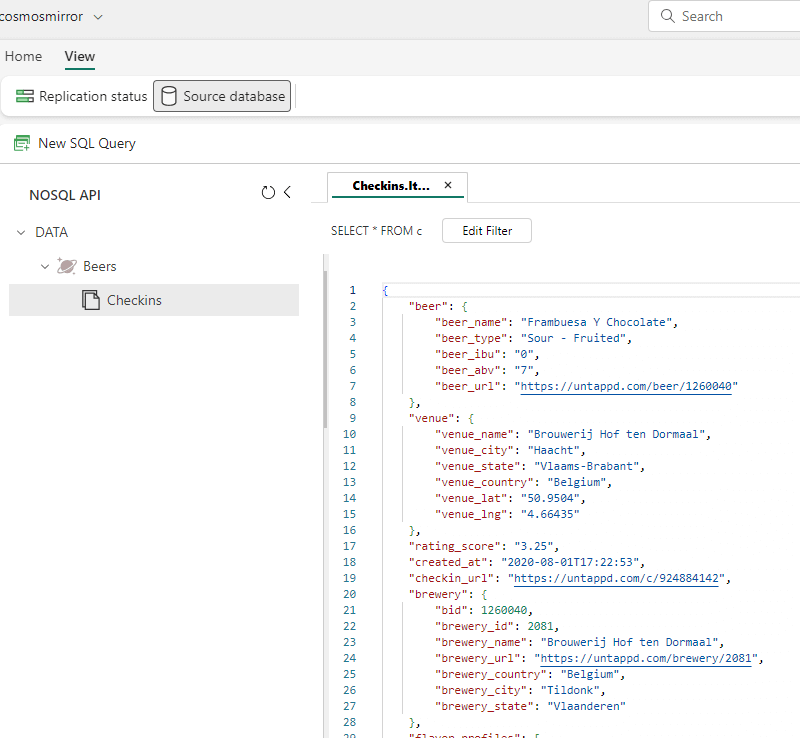
The Azure Cosmos DB NoSQL API stores the data as different JSON documents. In the replication configuration screen, you can preview this data by switching from “replication status” to “source database”:

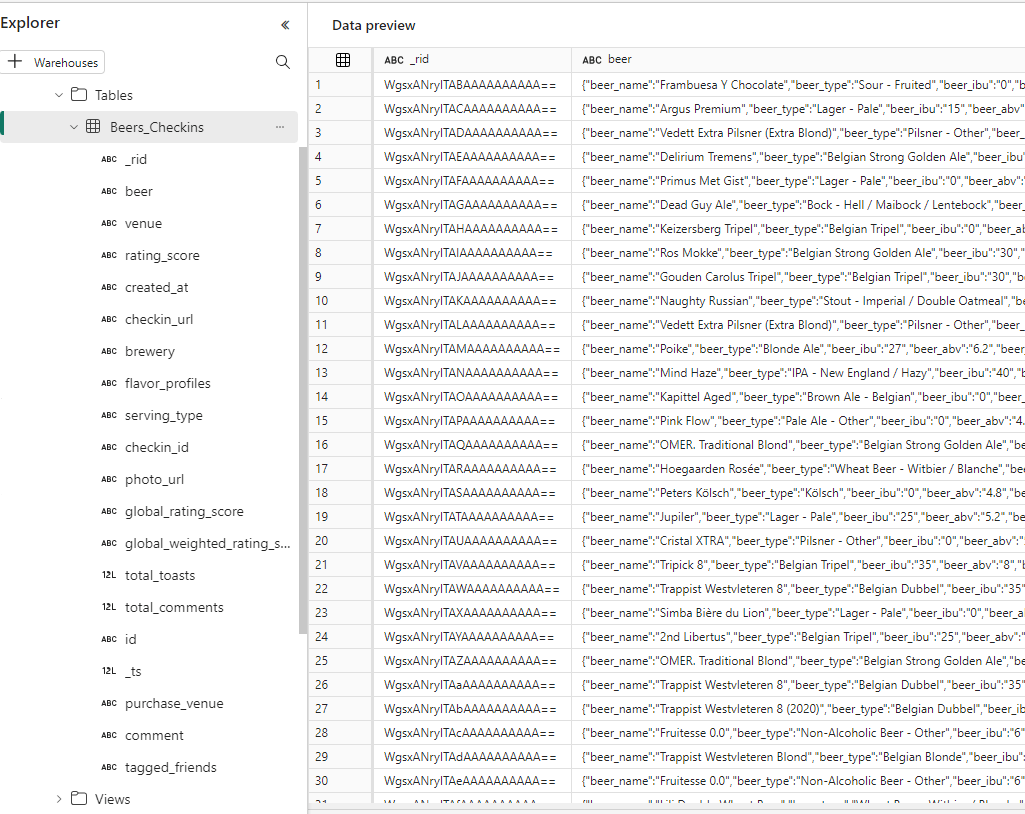
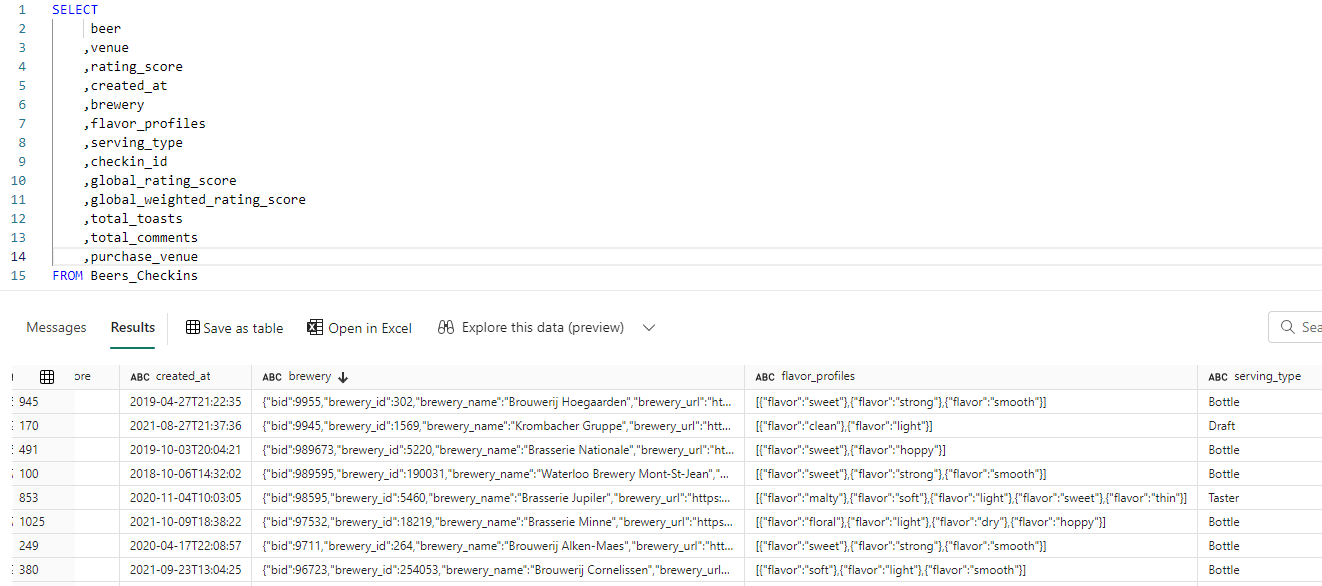
This is a live preview on the Azure Cosmos DB container. When this data is replicated to Fabric, the JSON is parsed, and the top-level attributes will be placed in different columns (like in the Cosmos DB Analytical Store). However, nested attributes will still be stored as JSON inside the columns:
With the OPENJSON clause, we can refer to nested attributes. The following query extracts the name and type of the beer out of the beer column:
SELECT
     beers_parsed.beer_name
    ,beers_parsed.beer_type
    ,rating_score
    ,created_at
    ,serving_type
    ,checkin_id
FROM Beers_Checkins src
OUTER APPLY OPENJSON(src.beer)
WITH (
      beer_name VARCHAR(100)    '$.beer_name'
     ,beer_type VARCHAR(50)     '$.beer_type'
) AS beers_parsed;
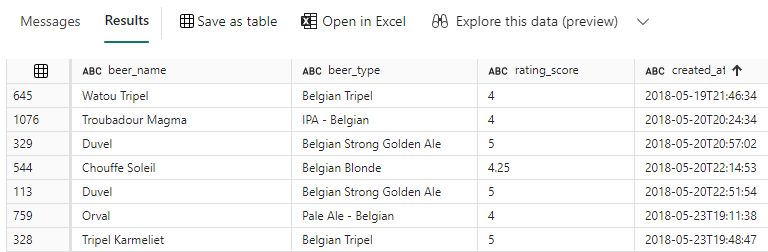
The WITH clause is used to specify the location of these attributes and what their data types are. The difference between using OUTER APPLY and CROSS APPLY is that OUTER APPLY will return records even if the source column (the column beer in this case) is empty.
Another type of nested JSON is the array. In our sample data, this is the flavor_profiles column. Zero or more flavors can be assigned to a specific beer tasting. We can parse this data with OPENJSON again:
SELECT
     beers_parsed.beer_name
    ,src.checkin_id
    ,flavors.flavor
    ,src.flavor_profiles
FROM Beers_Checkins src
CROSS APPLY OPENJSON(src.beer)
WITH (beer_name VARCHAR(100)    '$.beer_name') AS beers_parsed
CROSS APPLY OPENJSON(src.flavor_profiles)
WITH (flavor VARCHAR(100) '$.flavor') AS flavors;
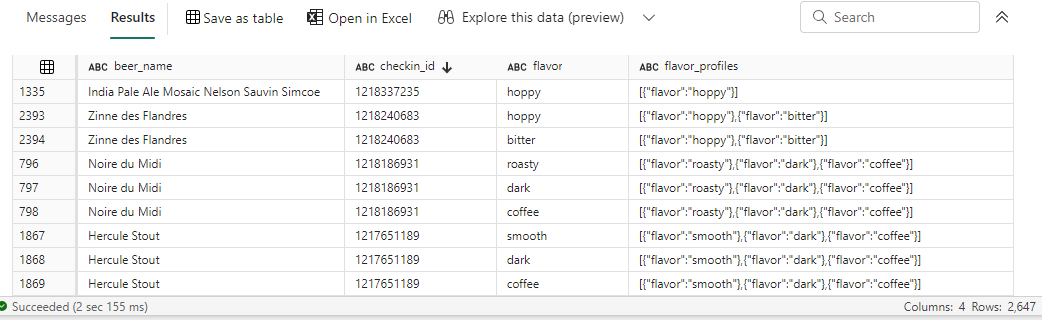
Since there can be multiple flavors for one beer, it’s possible that multiple rows are now returned for a single tasting. We now use CROSS APPLY to filter out all the rows where no flavor was assigned.
Conclusion
In this article we’ve introduced the concept of database mirroring in Microsoft Fabric. We’ve also shown how you can easily set up replication between an Azure Cosmos DB and Fabric without writing a single line of code. Finally, we looked at how we can write T-SQL queries on top of this replicated data and how we can extract nested JSON values from the data.
If you want to learn more about this feature, check out the documentation and the FAQ.