

In this article, I am going to explain how to create a PostgreSQL database using Amazon RDS. Amazon is one of the most popular cloud vendors in today's market. There are a lot of services offered by Amazon. These services can be found under Amazon Web Services or AWS for short. You can get a quick shot at the various services by navigating to https://aws.amazon.com/ and browsing Products. Amazon RDS is one of the managed services offered by Amazon in which you can quickly spin up a database server of your choice without having to manage the infrastructure on your own. It is also easy to operate and scale. As per the definition from Amazon, "Amazon Relational Database Service (Amazon RDS) makes it easy to set up, operate, and scale a relational database in the cloud. It provides cost-efficient and resizable capacity while automating time-consuming administration tasks such as hardware provisioning, database setup, patching and backups. It frees you to focus on your applications so you can give them the fast performance, high availability, security and compatibility they need.".
Pre-Requisites
Before proceeding forward, it is important to have the following pre-requisites fulfilled.
- A valid AWS Account - You need to have a valid AWS account in order to create the RDS Environment. You can create one by navigating to https://console.aws.amazon.com/.
- PGAdmin - PGAdmin is the client tool which you can use to connect to the database on RDS. You can download PGAdmin from https://www.pgadmin.org/.
Spin up an RDS Instance
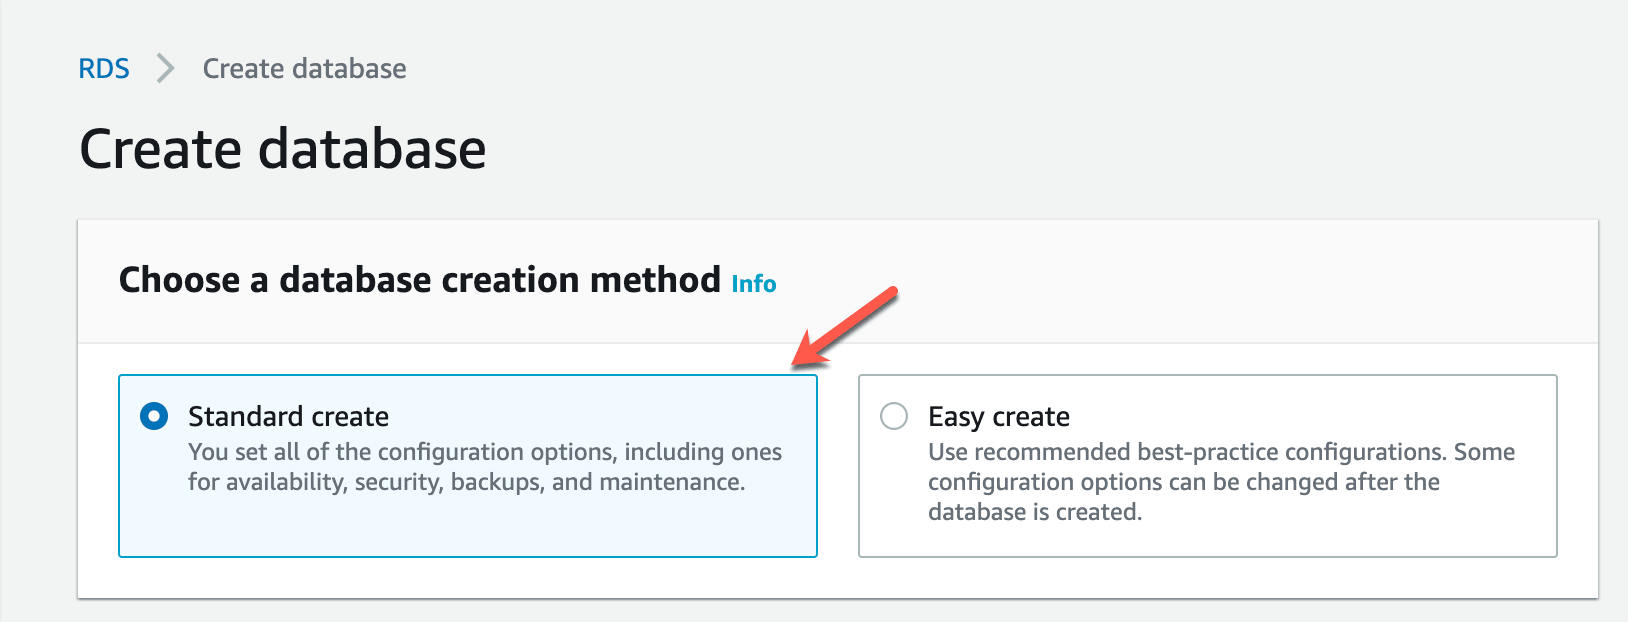
Spinning up an RDS instance is quite easy. Once you have created an AWS account, simply search for RDS on the console search bar or navigate to Services, Database, and RDS. Once you are on the RDS Service page, click on Create Database to begin. Select Standard Create as the database creation method. This will allow you to define your own configurations as desired.
In the next step, you are required to choose the database engine. Since we are going to create a database in PostgreSQL, select the corresponding option and the latest stable version as PostgreSQL 12.3-R1.

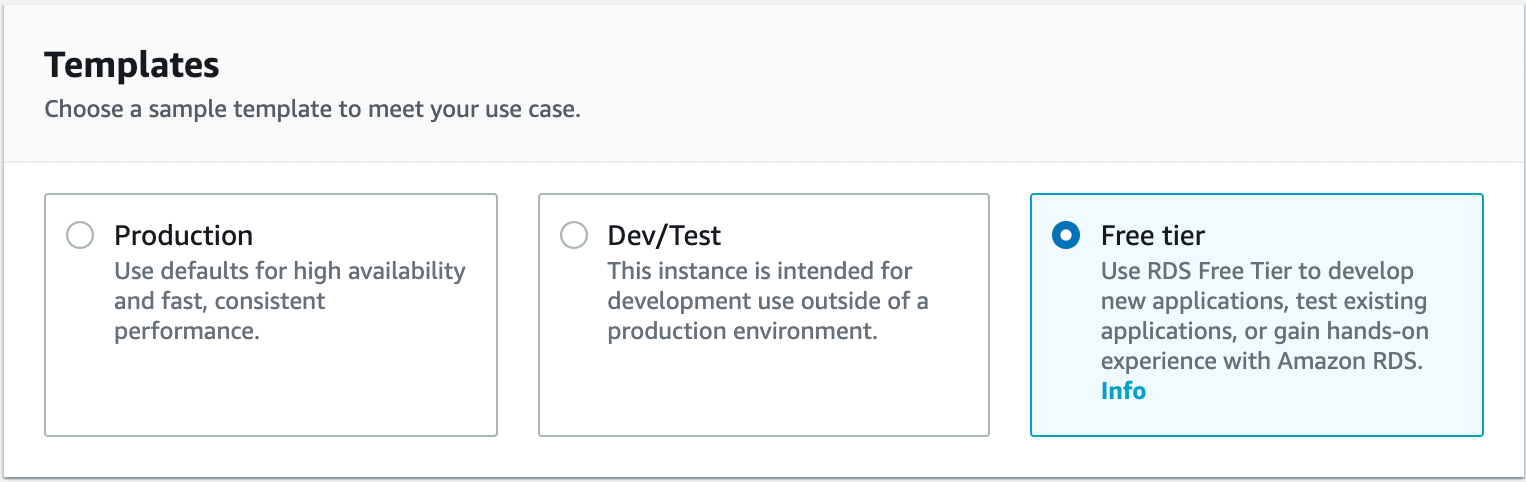
Now, we need to select a template to proceed to the next step. There are three templates available for production, development or testing, and a Free tire. The free tire is mostly used for POC and educational purposes. When you choose the free-tire, you won't be billed for the usage as it comes under 750 hours of usage every month which is free to use for the first year.
Configure the database using the AWS Console
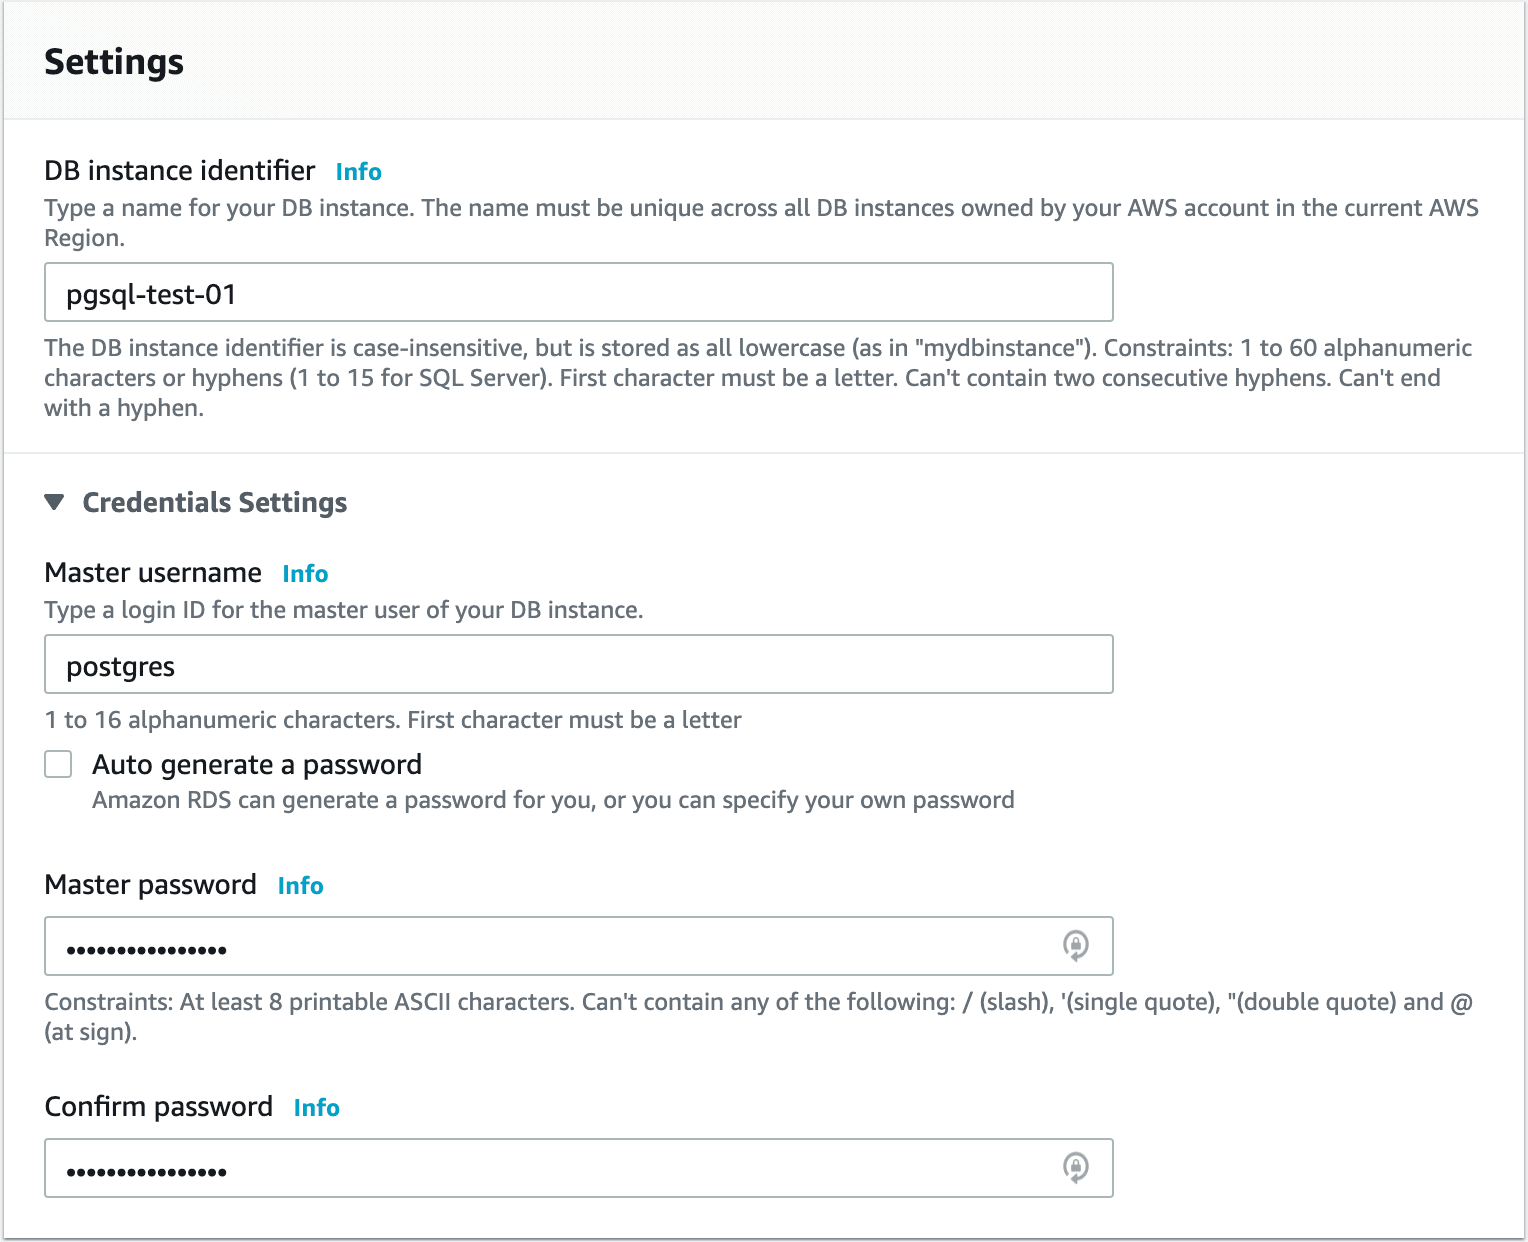
In the next step, you need to provide a name for the database instance. There are some specific rules for the naming convention such as the name should be unique across all the database instances in the current region under your AWS account. Also, the name should be less than 60 characters and so on. As you can see, I have used a very short yet meaningful name for the database instance, and I would also advise you to choose something similar. Next is to provide a master username and a password to login into the database. Make sure to choose a strong password.
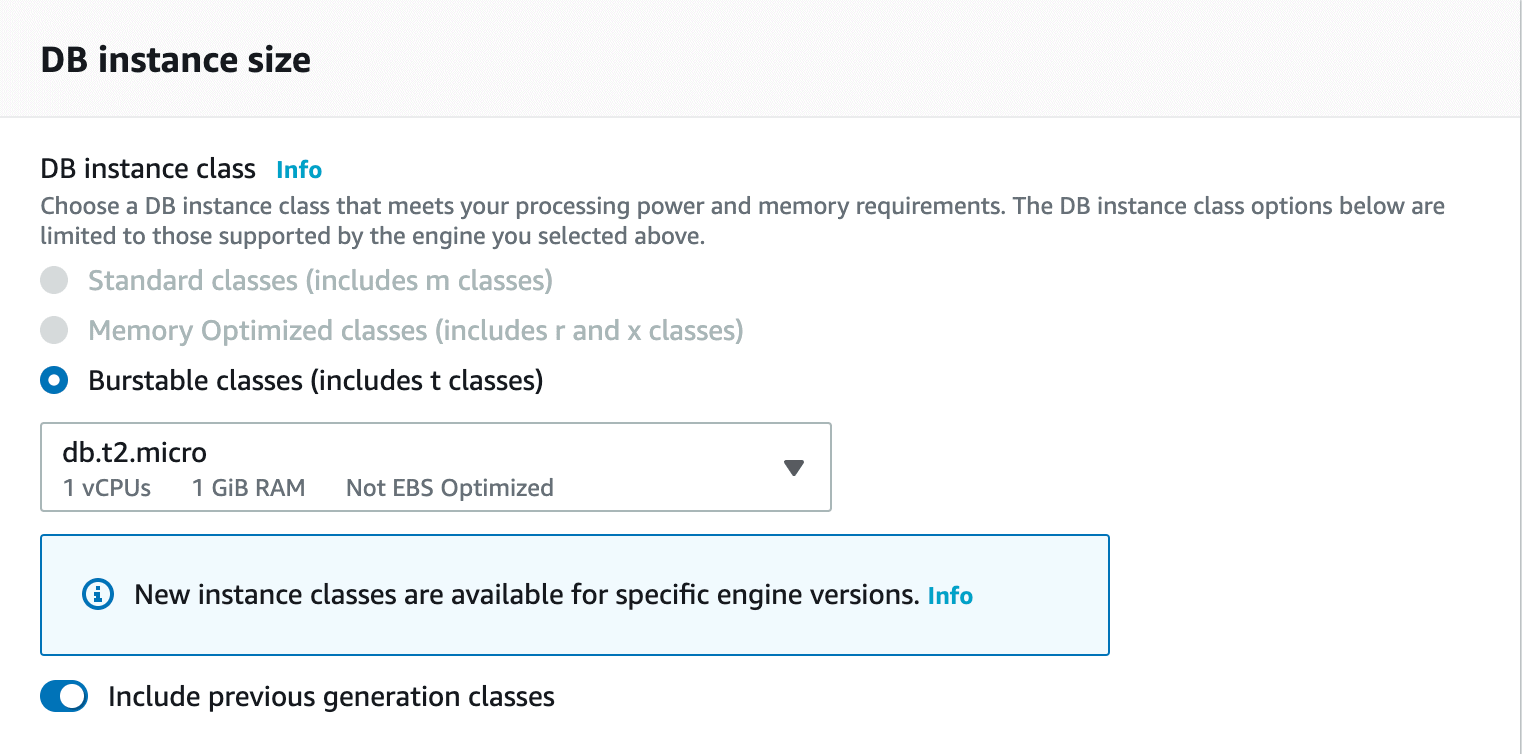
Now you need to select the Database Instance size. This will depend on your requirements and processing power. In most of the cases, where you do not need much processing power, you can consider moving with "db.t2.micro" as the instance size.
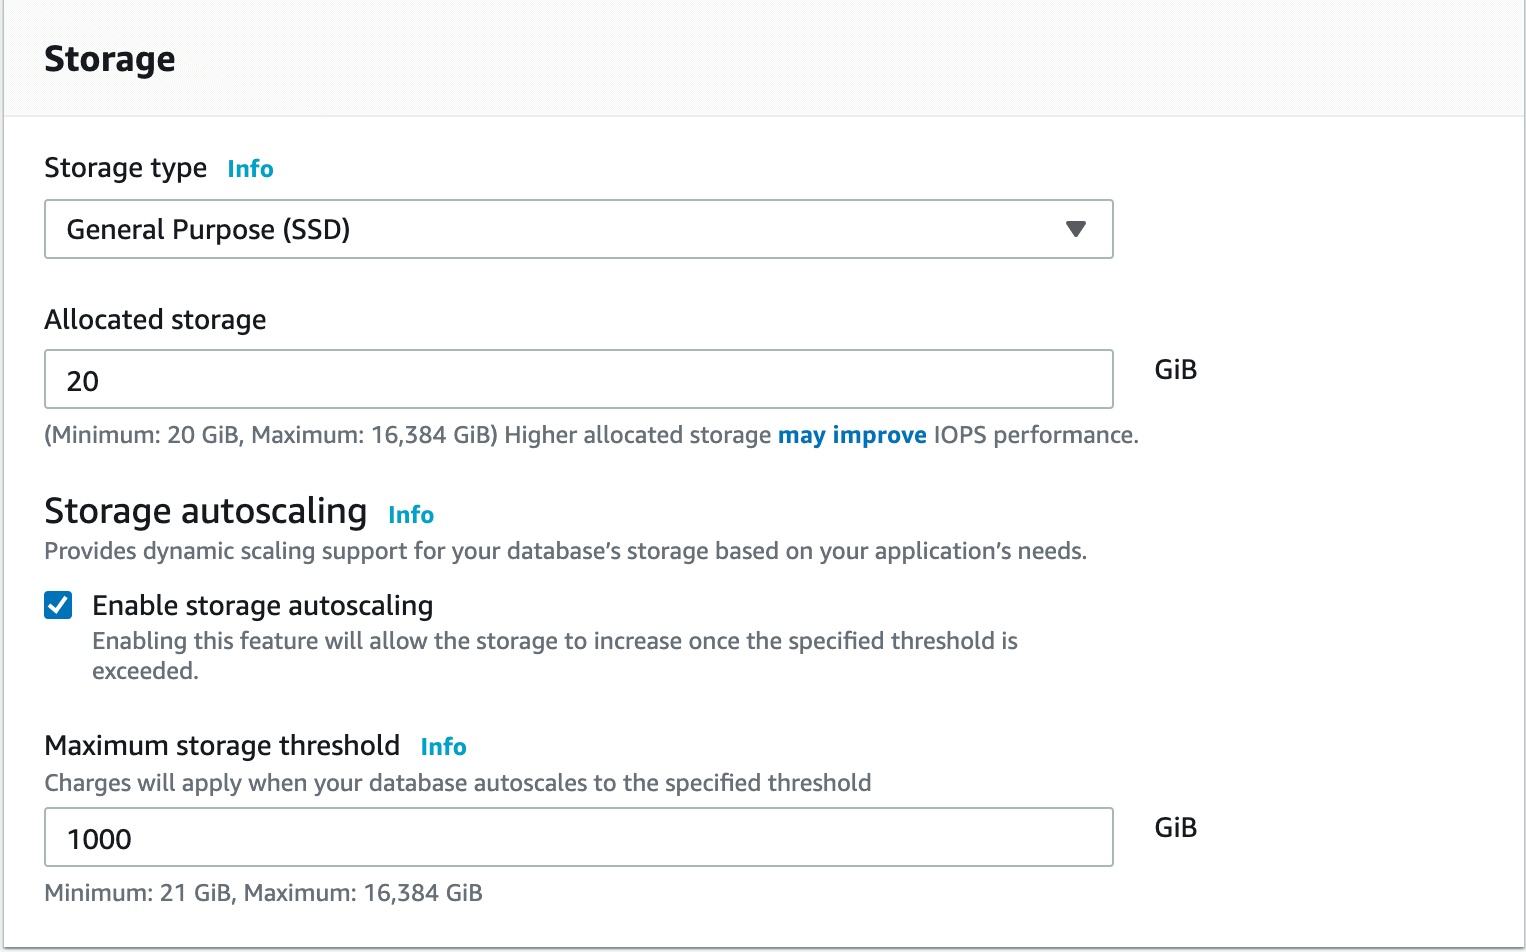
In the next step, you need to specify the storage capacity that you intend to use. For this purpose, you can begin with the minimum size, i.e. 20GB and set an autoscale of 1000 GB. These are the default values and should be fine to proceed with.
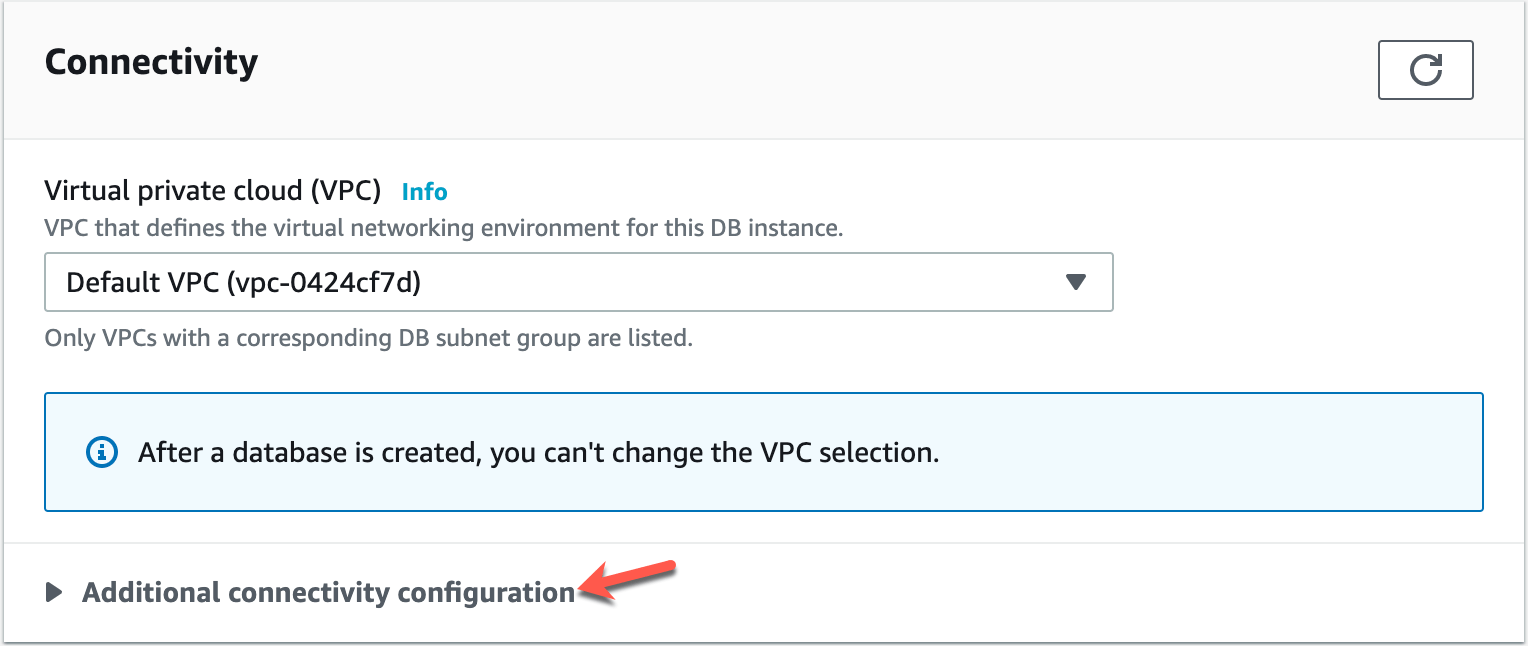
The next step is to define the Connectivity Settings. Select the Default VPC for this. By default, the database is not accessible from outside the AWS environment. Click on Additional Connectivity Configuration.
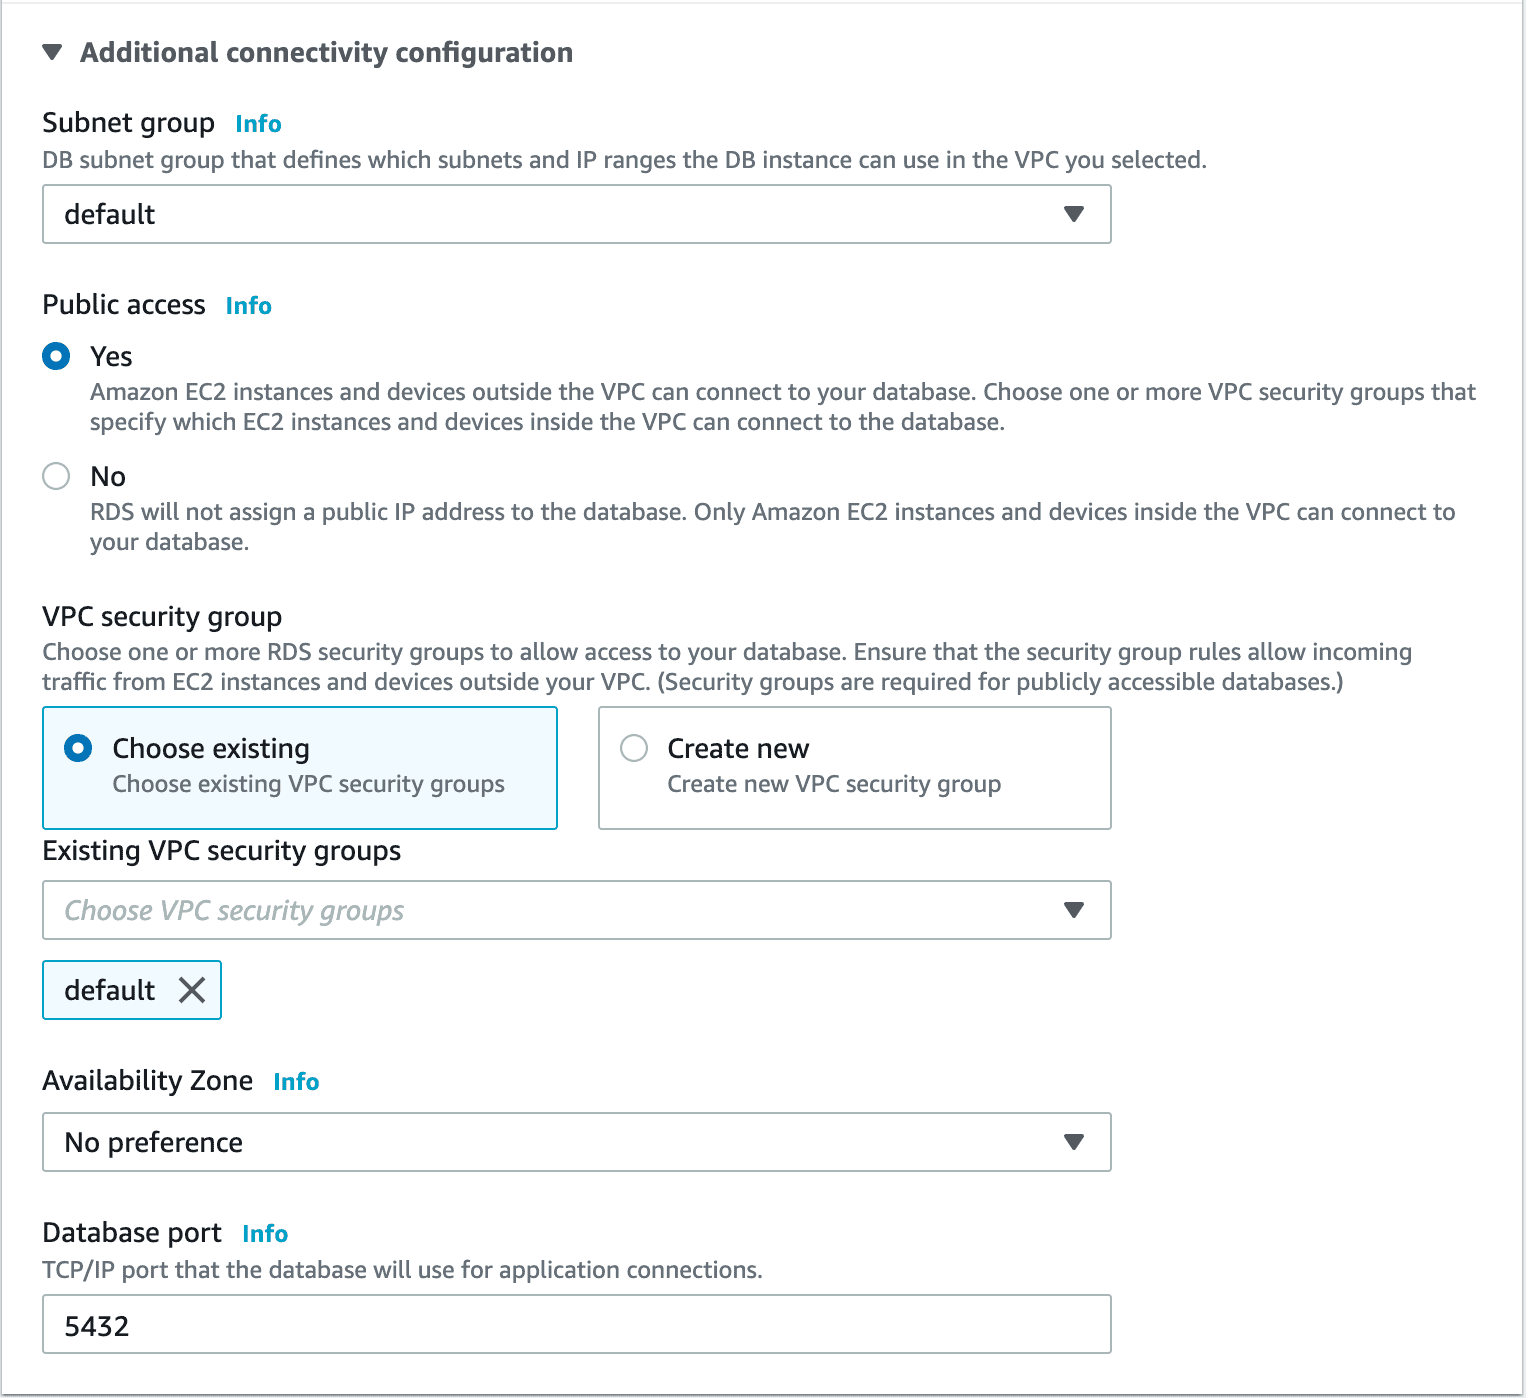
Under Additional Connectivity Configuration, select the Subnet Group as Default, Public Access as Yes, and VPC Security Group as Default. Leave other settings to default values.
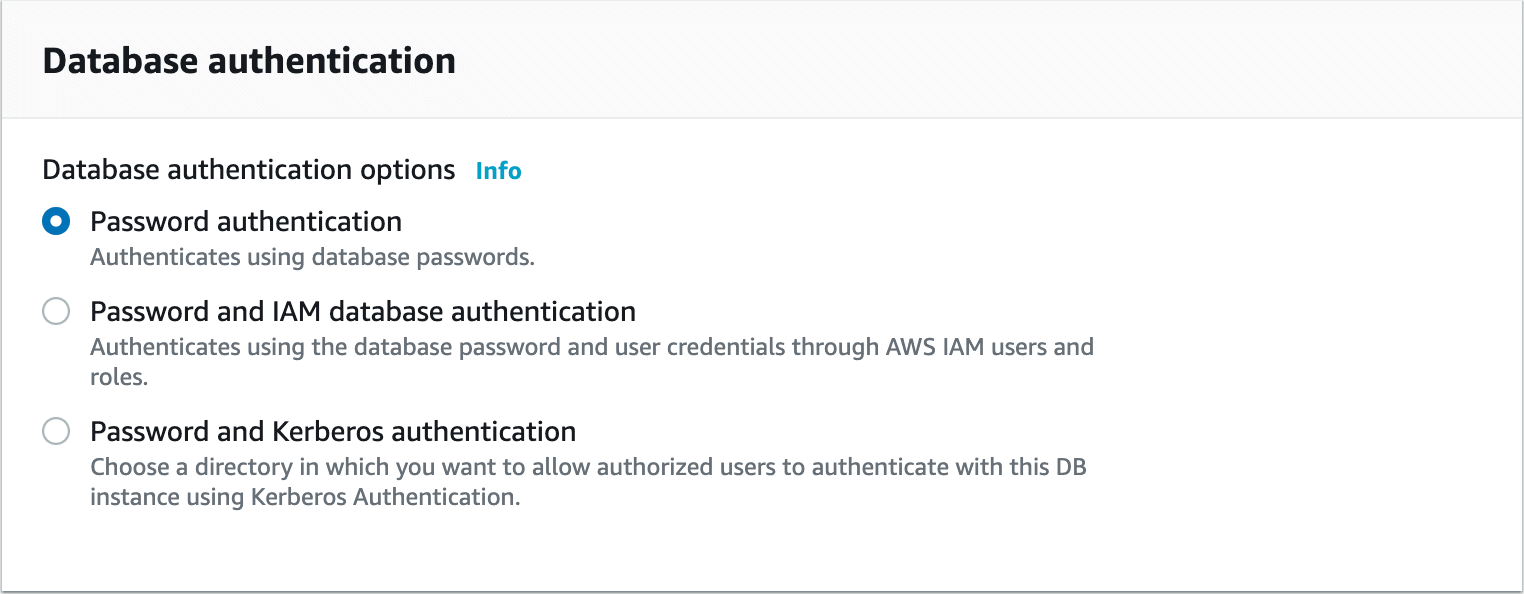
The final part in configuring the database is defining the Database Authentication mode. Choose Password authentication and click on Create Database.
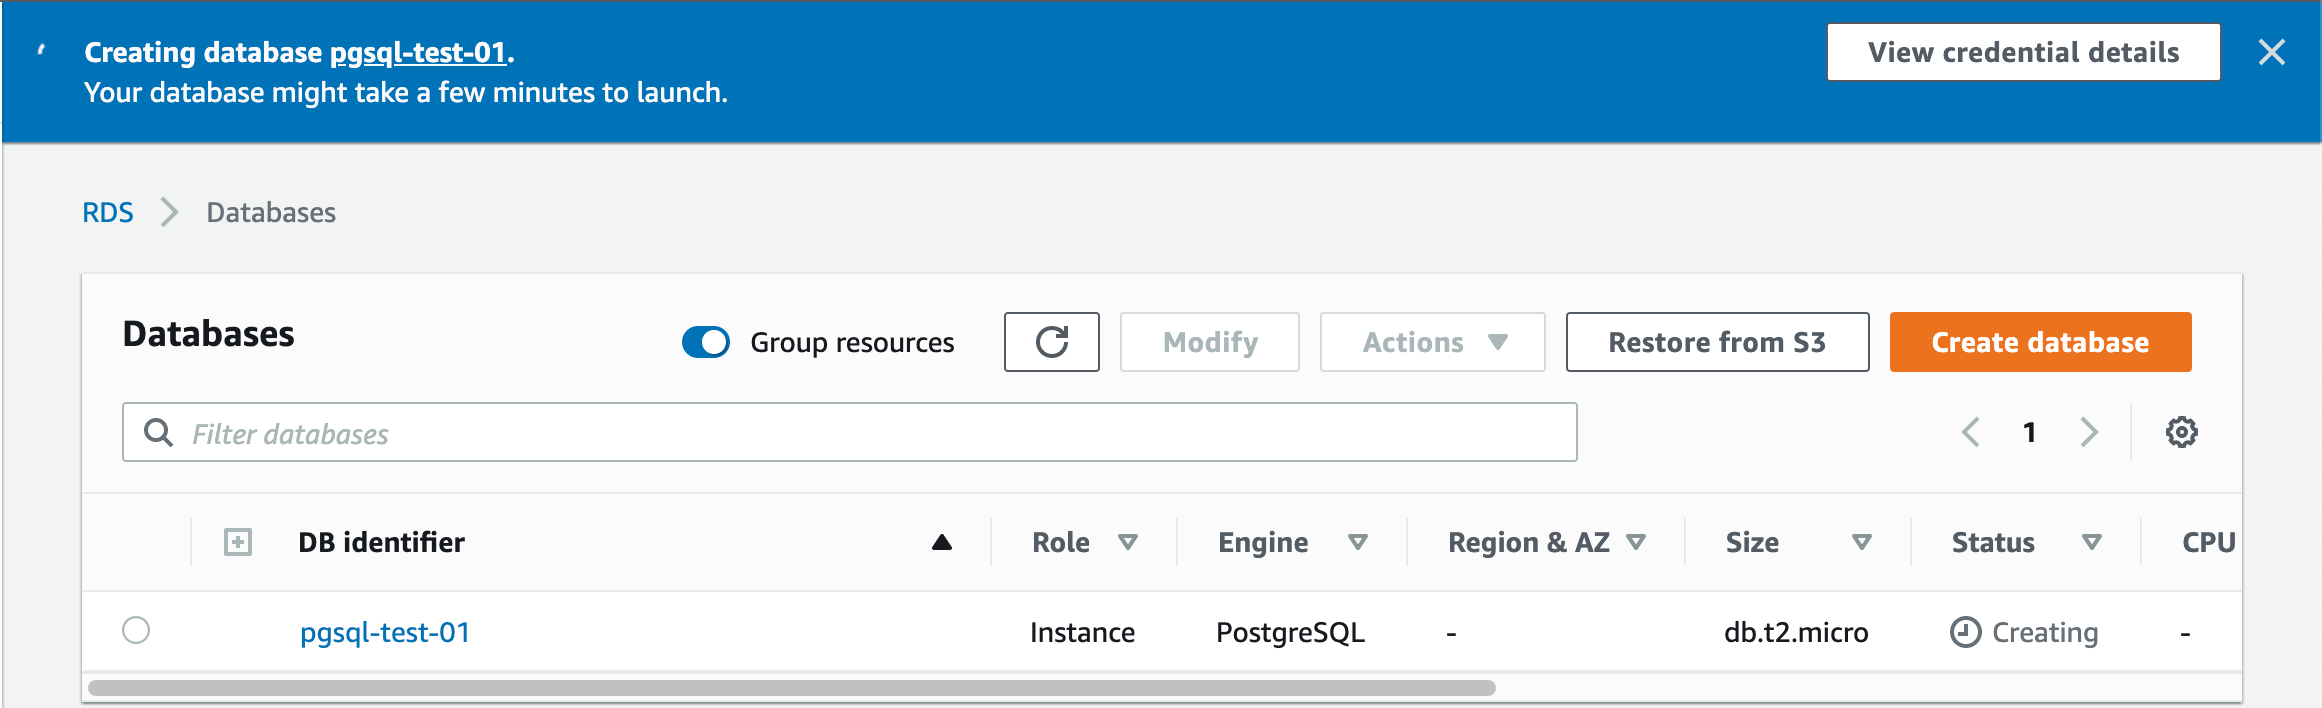
Once you create the database, it might take a while for AWS to create the instance and make it available for use.
Connecting to the AWS RDS database using PGAdmin
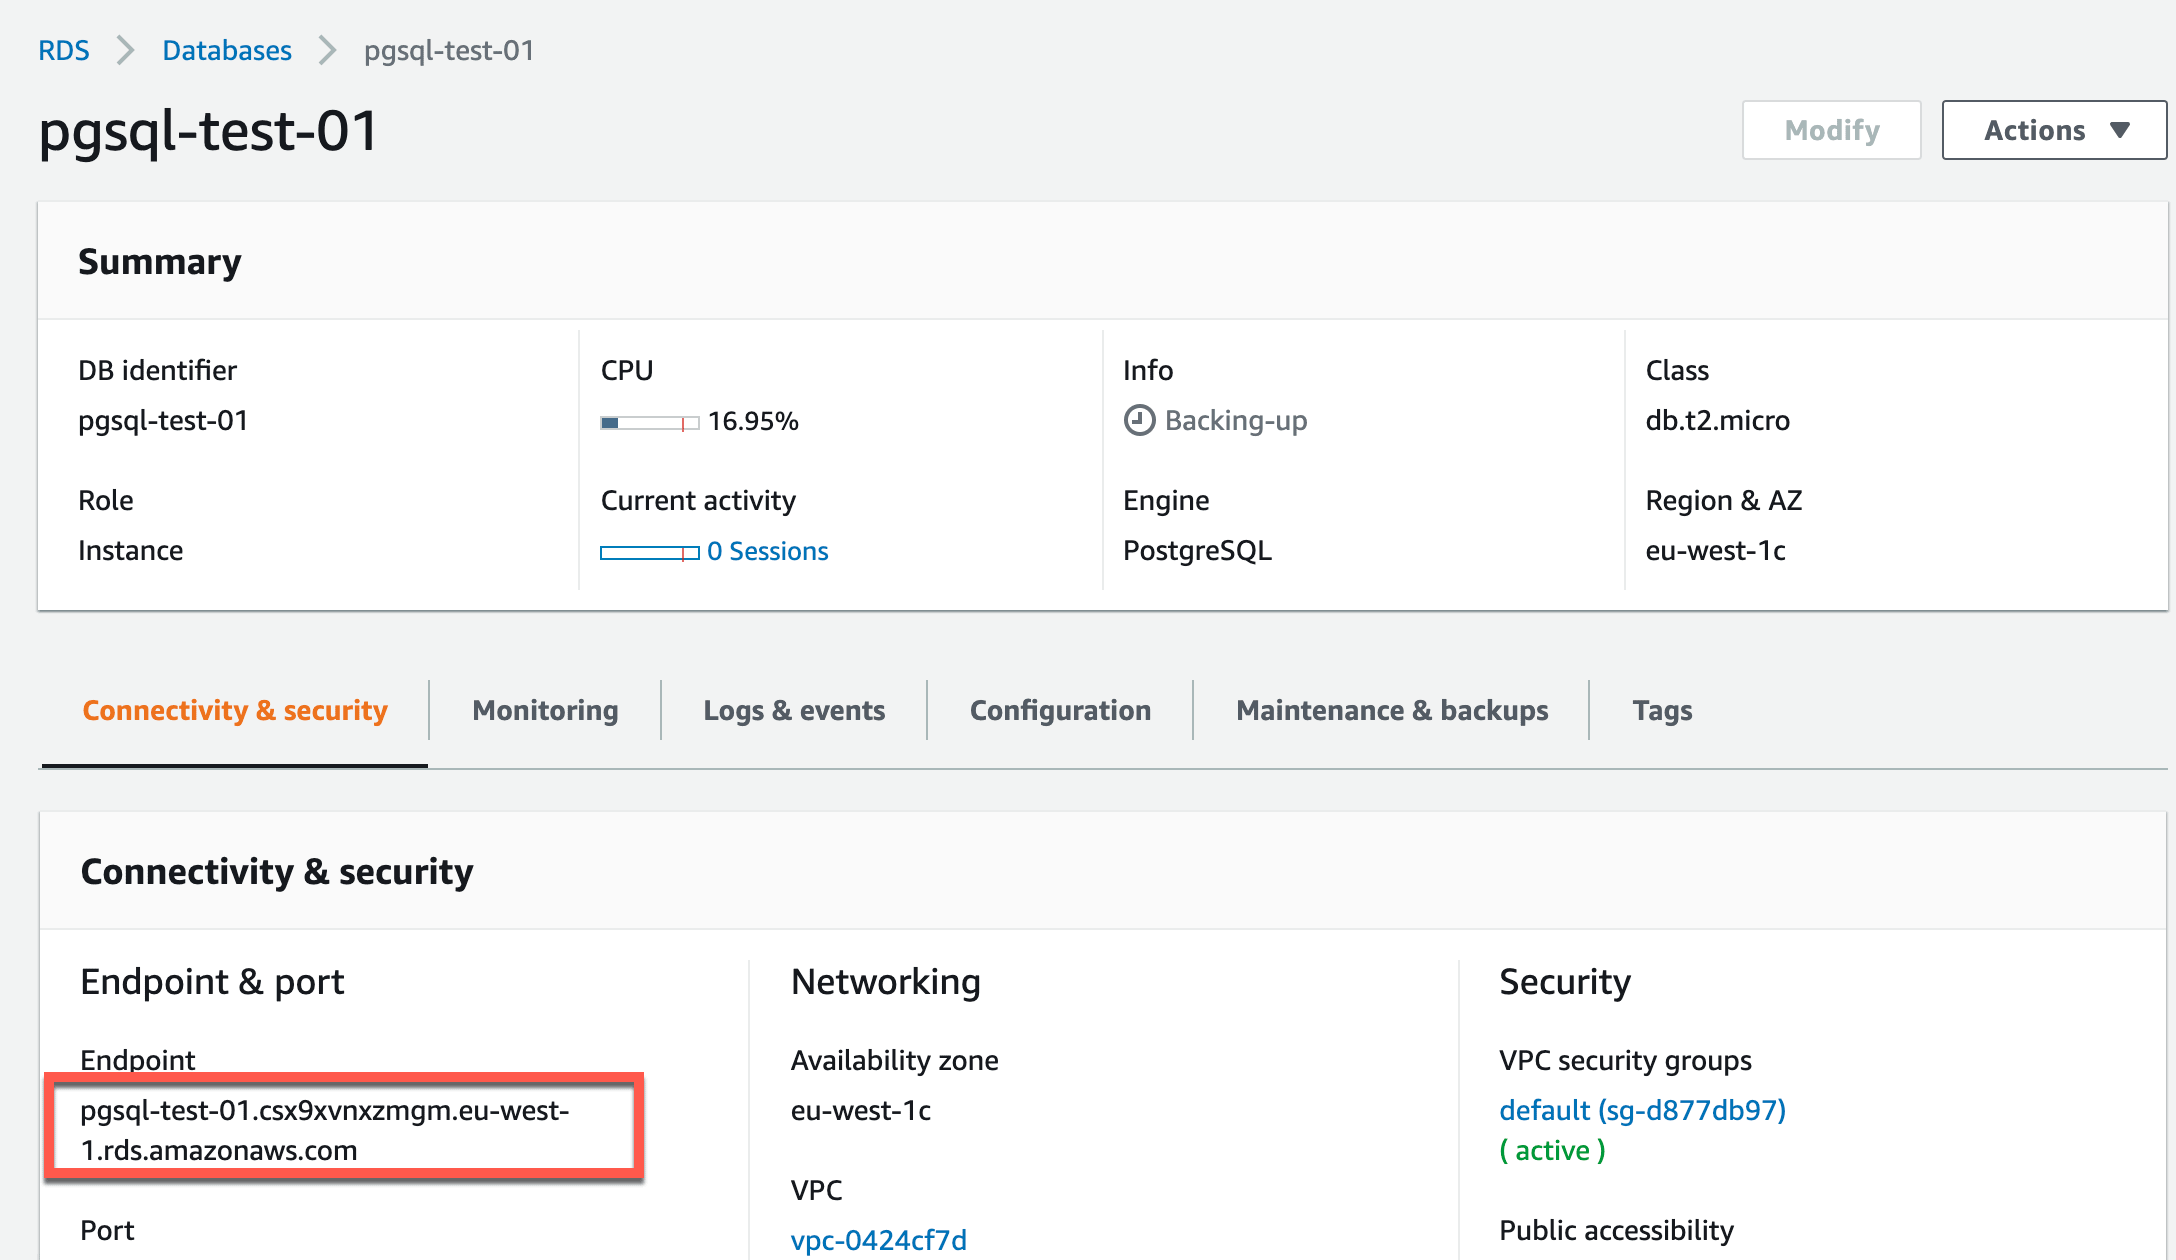
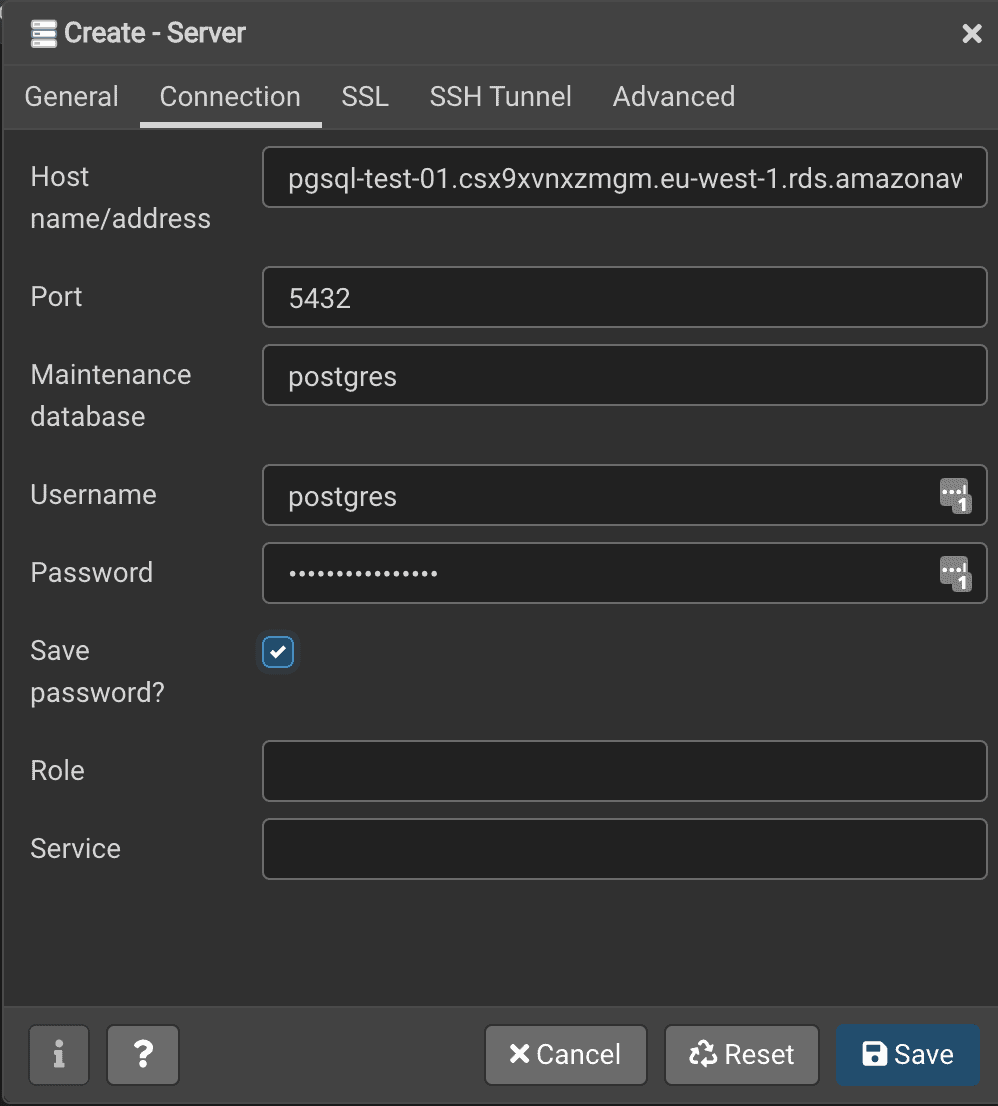
Once the database instance is created, you can use PGAdmin to connect to this database instance. Start the PGAdmin client on your machine and provide the connection details. You can find the connection endpoint by opening the instance name.
Provide these details in PGAdmin and try to connect. Create a new Server in PGAdmin and save the connection details as follows.
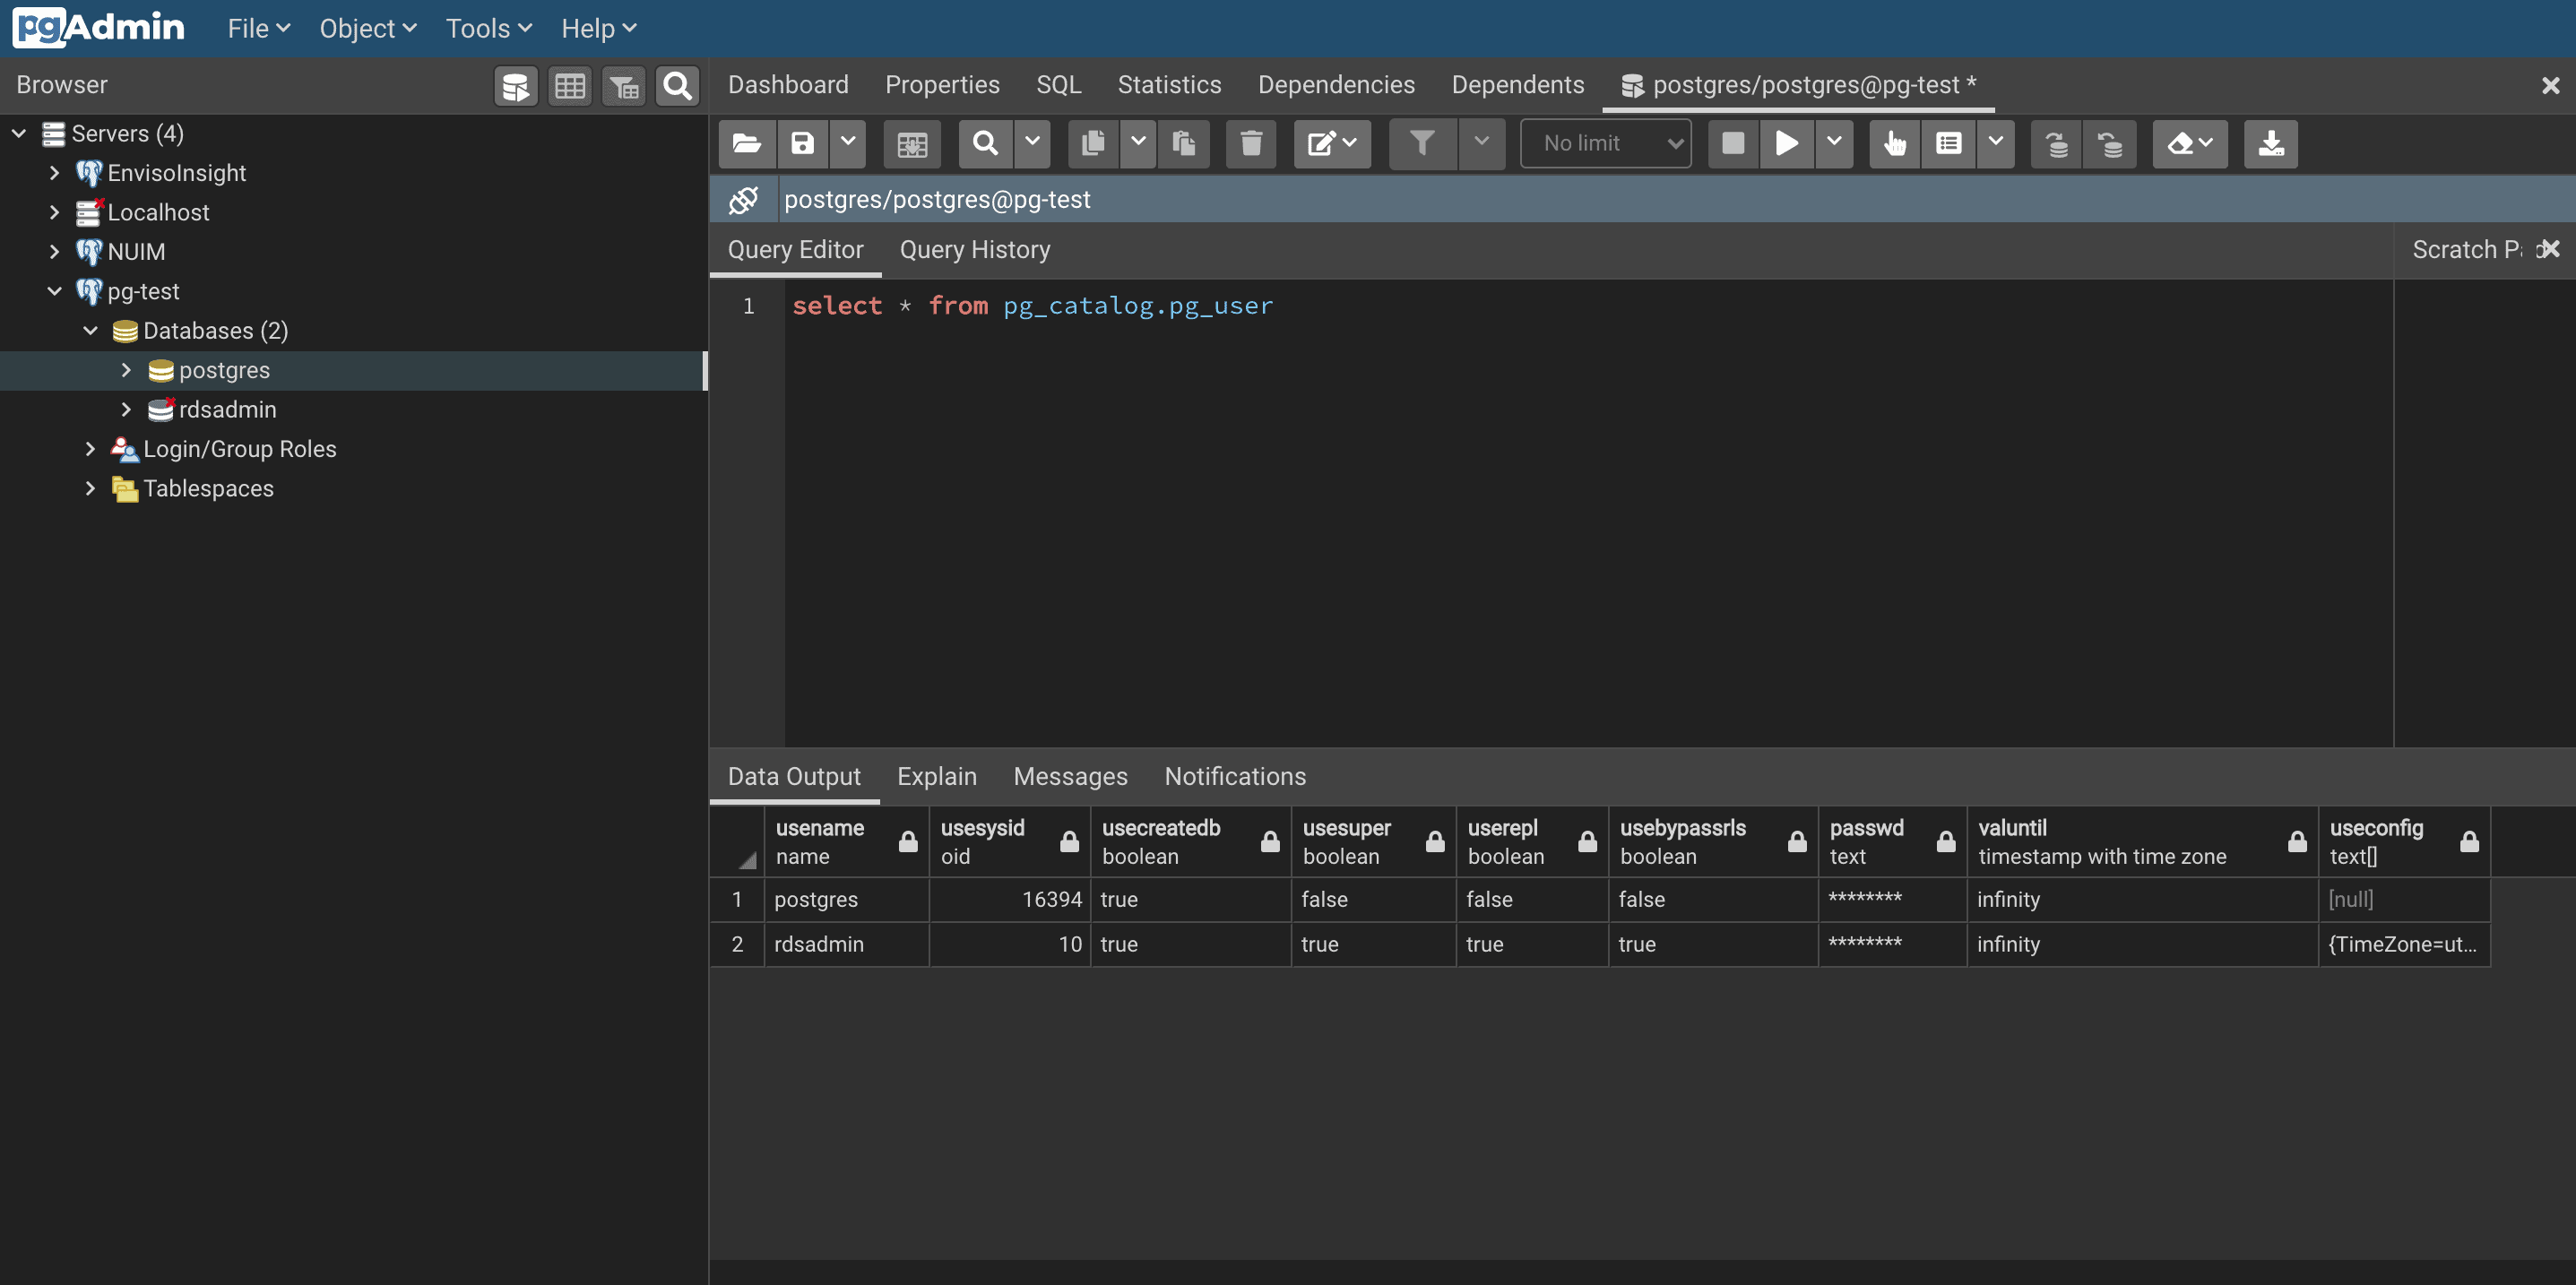
Click on Save and you will be connected to the new instance that you just created. You can execute any query of your choice. As of now, there is no data in the database, so I am writing a query to display the default users in the system.
Conclusion
This article explains how to create a PostgreSQL database in Amazon RDS and connect to it using the PGAdmin client. PostgreSQL is widely used for both OLTP and analytical purposes. You can read more about PostgreSQL from the official documentation.