

Introduction
In a previous article, we showed how to expose an Amazon RDS instance to the public internet securely for direct access to the database. This article focuses on configuring an Amazon EC2 instance for network access to an existing Amazon RDS instance. The purpose of this would be to make sure that if we deploy an application to this EC2 instance, communication from the client to the RDS instance would be smooth.
AWS has improved the process of deploying an Amazon EC2 instance significantly. If you have been around AWS long enough you might be familiar with the previous process which is shown in this video. The new process is much easier and allows us to take other steps such as connecting the EC2 directly with an existing database instance as we shall demonstrate in this video.
Simplicity – The Format of this Article
Efforts have been made to keep this article simple and heavy on graphics. We shall show the steps required to deploy and Amazon EC2 visually and add summary descriptions as bullet points in each section. Your feedback as to the usefulness of this format would be appreciated.
Getting Started
In this section we run through the process of launching an Amazon EC2 instance as follows:
- Navigate to the EC2 dashboard. We arrive at the EC2 dashboard by searching for the term EC2 at in the search bar of the AWS Console. You will discover that you can search for anything available on AWS with this search bar (See Figure 1).
- Click EC2. This opens the EC dashboard where you click the launch instance button. Incidentally, the wizard first prompts you to identify the instance you are about to create with a Name tag (See Figure 2 & 3)
- The next step is to select the desired Amazon Machine Image (AMI). An AMI is a prebuilt configuration of an instance. In this case we choose the Windows Server 2022 AMI and a t2 micro instance type. Once our selection is made, we can review a summary of our options (See Figures 4 & 5).
- Finally observe that we can launch several EC2 instances with a single image and a single effort. This is a useful new development (Figure 6).
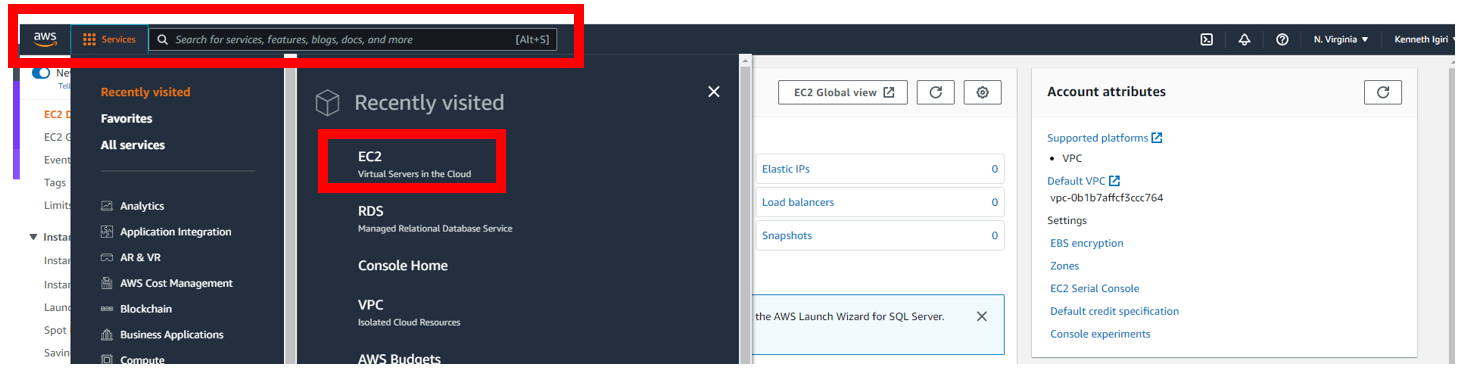 Figure 1: Search for Amazon EC2 Dashboard
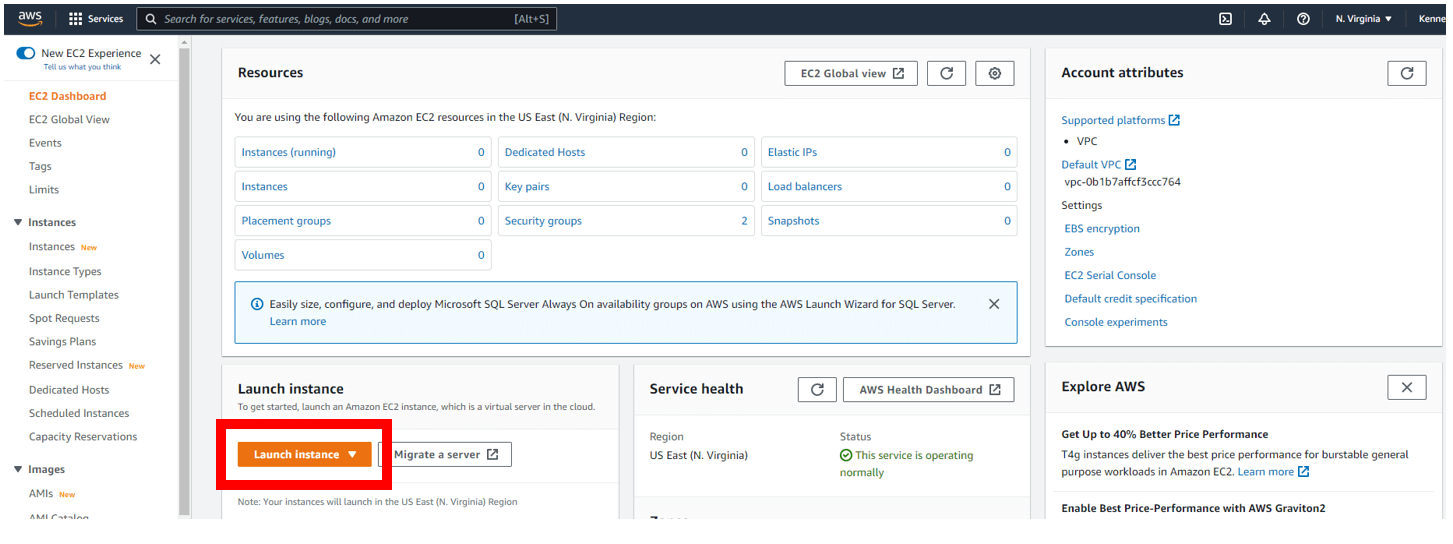 Figure 2: Launch an Amazon EC2 Instance
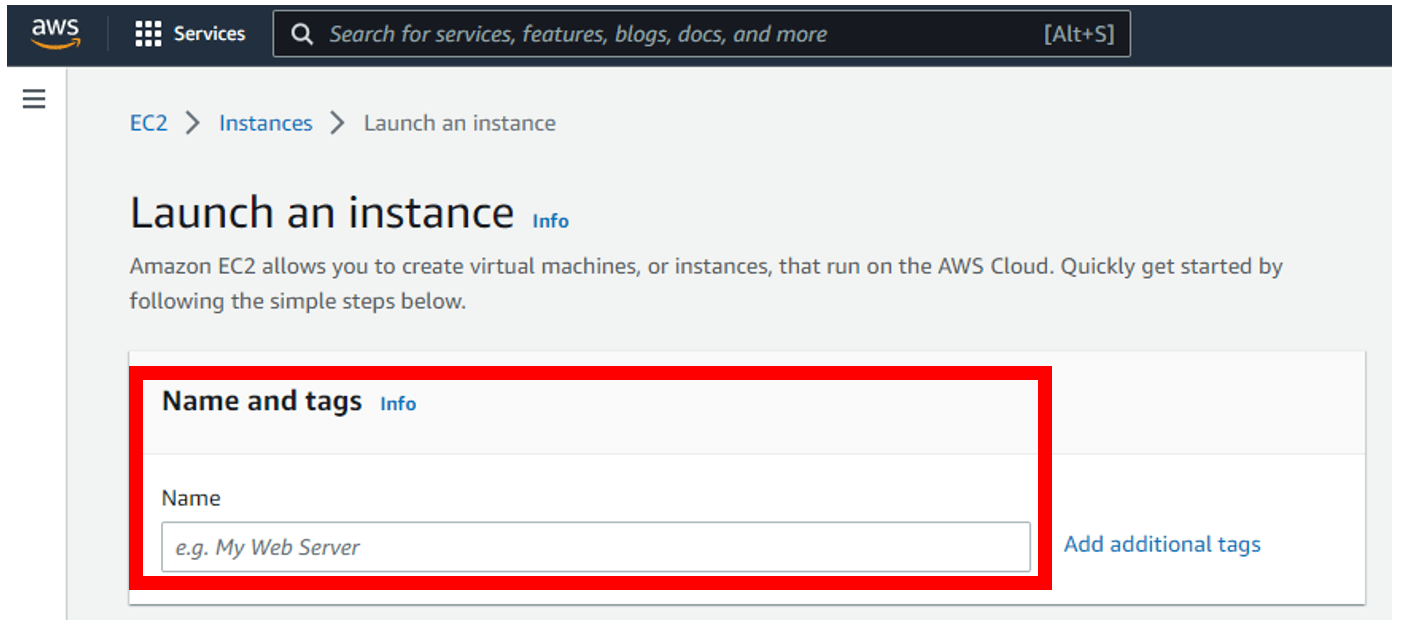 Figure 3: Amazon EC2 Launch Wizard
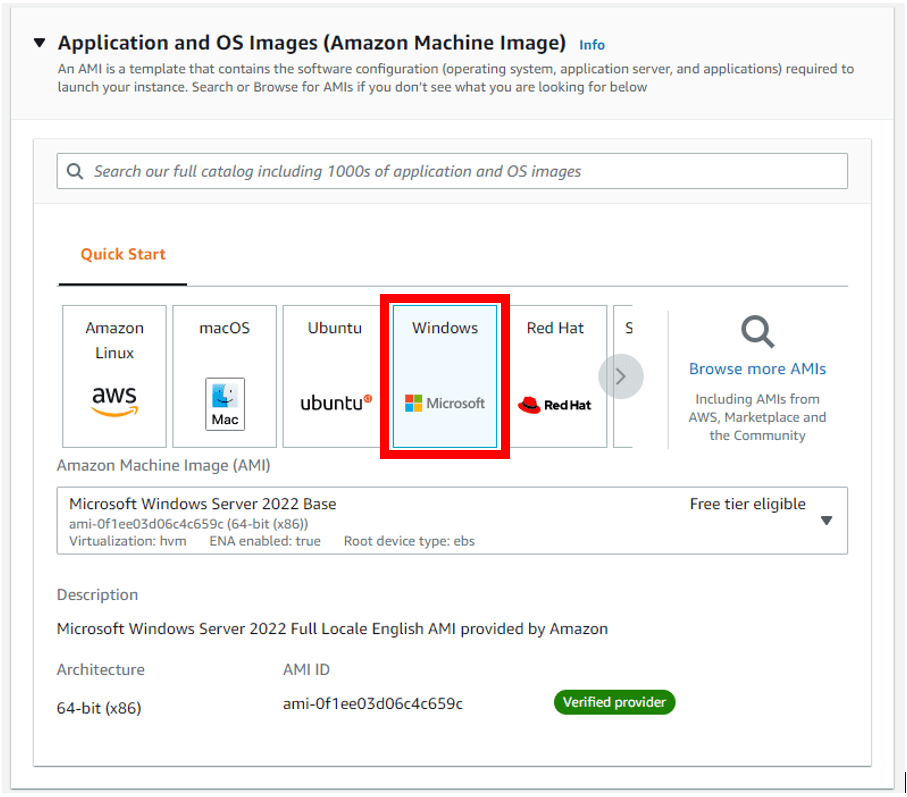 Figure 4: Select the Desired Amazon Machine Image
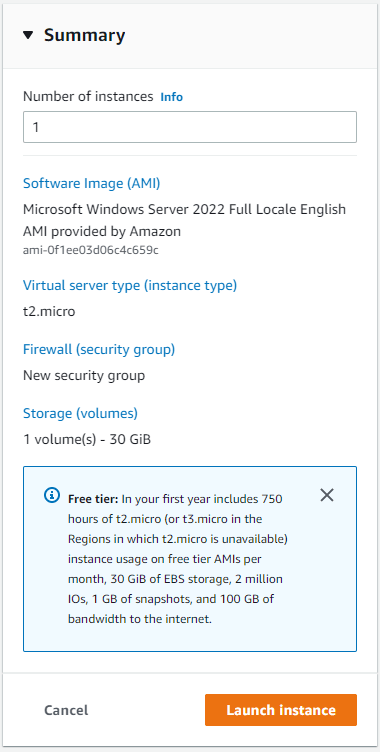 Figure 5: Summary of Options
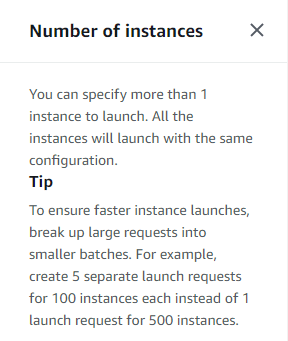 Figure 6: One AMI, Multiple Instances
Creating a Key Pair for Access to the Amazon EC2 Instance
In this section, we see how to generate a key pair that will be used to connect to the Amazon EC2 instance. We then go on to complete the launch.
- AWS secures Amazon EC2 instance with key pairs. This key pair can be generated while creating the instance. One can create a single key pair and reuse the same for all future EC2 instances.
- Because we are creating a Windows instance, we must use the Privacy-Enhanced Mail (PEM) format. The Public Private Key (PPK) format is designed for use with Putty (UNIX/Linux systems).
- Once we are done creating this key pair, the wizard completes the EC2 launch and we can then proceed with other possible actions. In this case, we want to connect to an Amazon RDS instance for SQL Server.
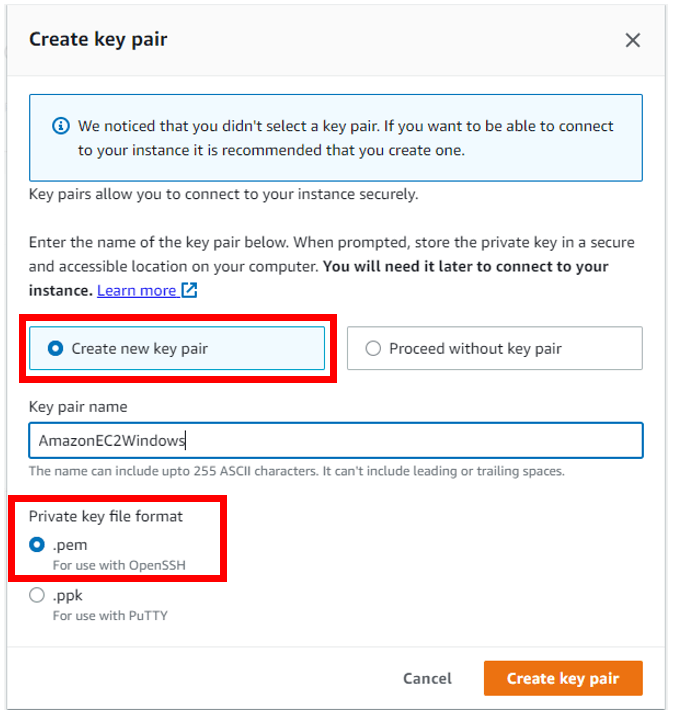 Figure 7: Create a New Key Pair
Completing the Launch and Connect to an Amazon RDS Instance
In a previous article, we created an Amazon RDS instance for SQL Server called articledb. We will connect to this instance as part of the flow for creating our Amazon EC2 instance.
- Figure 8 shows us a button we click to initiate a connection to an Amazon RDS instance for SQL Server
- In Figure 9, we select the “instance” database role and proceed to select our articledb which was created in a previous article
- Click connect when the options are selected (See Figure 9). Notice the warning about potential egress charges if the EC2 instance is in a different AZ from the RDS instance
- Review the connection log (Figure 10). Notice that a lot of changes are made to security groups to establish the connection. The security groups required to establish this connection are automatically created
- Click “View Instances” (Figure 10) to see the summary of the Amazon EC2 instance just created
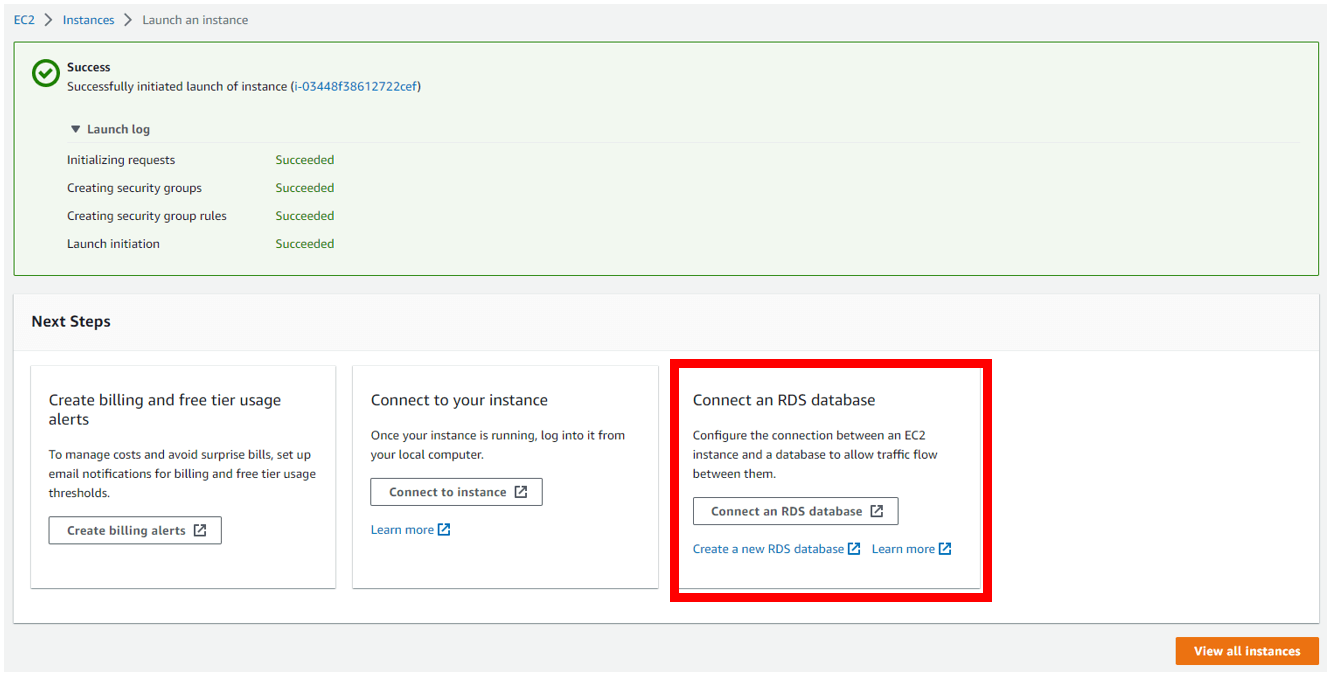 Figure 8: Connect to an Amazon RDS Instance for SQL Server
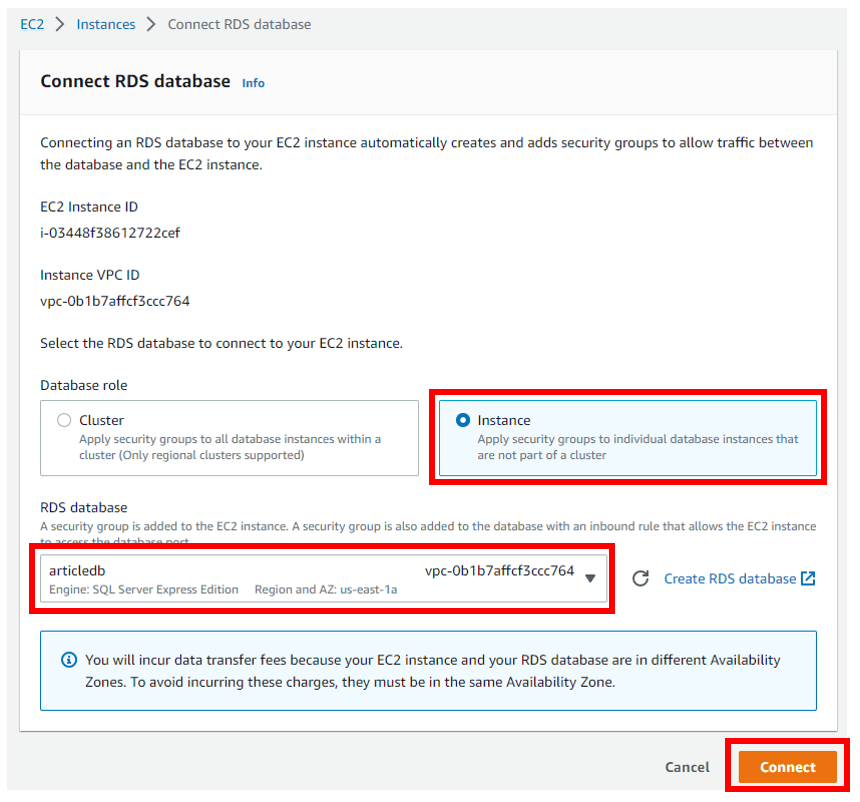 Figure 9: Connect to Already Existing Amazon RDS Instance
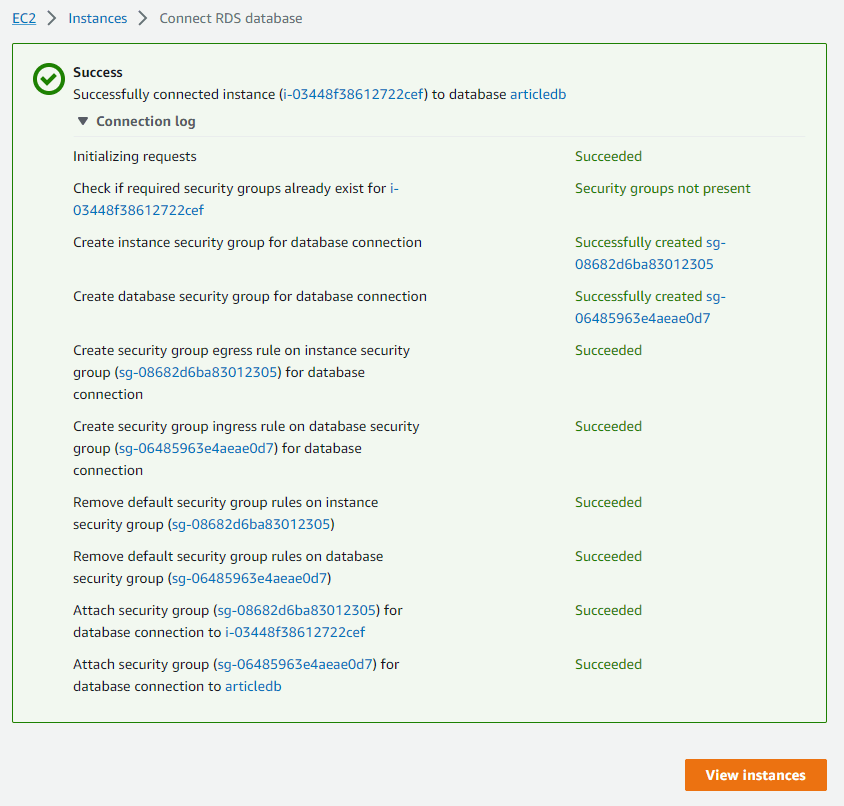 Figure 10: RDS Instance Connection Log
Overview of the New Amazon EC2 Instance
Details of the new Amazon EC2 instance are shown on the dashboard. Attributes such as the name, instance state, instance type, availability Zone IP addresses, security groups and so forth are shown (See Figure 11). Moving the scroll bar to the right shows even more details up to the launch time.
More details of the configuration are shown in the lower pane. Security, Networking, Storage, Status Checks, Monitoring and Tags.
- The Details tab gives a summary of the instance configuration. It expands on the columns shown in the upper pane.
- The Security tab gives a summary of Security Group rules and their rules. Both the default rule created during instance launch and the rule for RDS access are shown (see Figure 13)
- The Networking tab shows details of public and private IP address, the subnet where the Amazon EC2 instance sits, interfaces and Elastic IP addresses if any (See Figure 14).
- The Storage tab shows root device details and other block devices attached to the instance. (See Figure 15)
- The Status Check tab shows the results of automated checks performed periodically on the EC2 instance. These checks cover both hardware and software issues and are categorized as System Status Checks and Instance Status Checks. The information her is useful for high level troubleshooting of the instance (See Figure 16).
- The Monitoring Tab shows a dashboard of basic metrics on CPU, Network, and Disk activity.
- The Tags Tab shows all tags applied to the Amazon EC2 instance. Tags are key-value pairs used to label AWS assets for purpose of categorization, identification and even billing reports (See Figure 18).
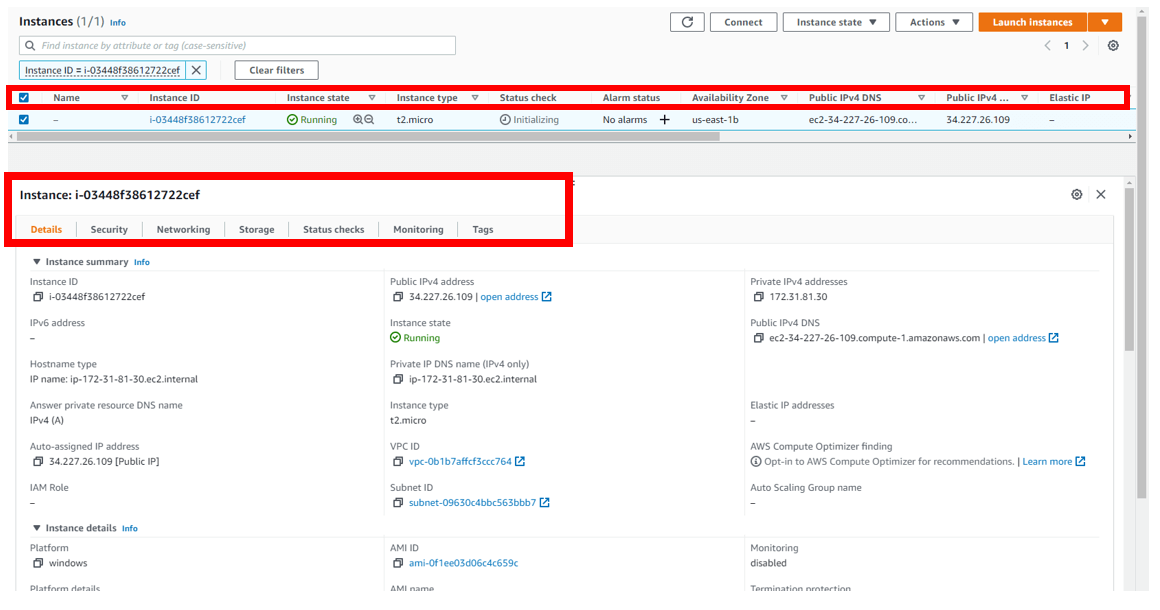 Figure 11: Amazon EC2 Configuration Details
 Figure 12: Scroll Right
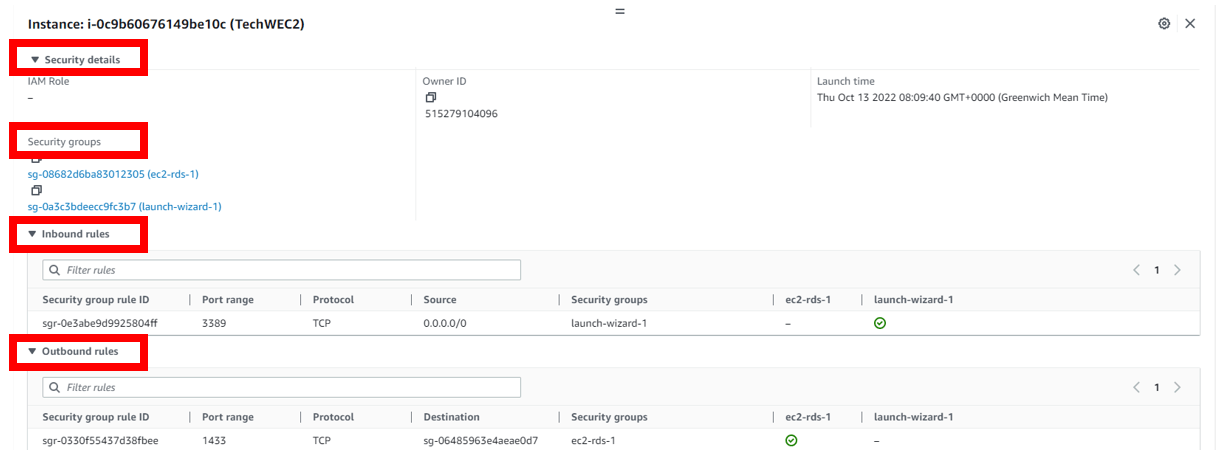 Figure 13: Amazon EC2 Security Tab
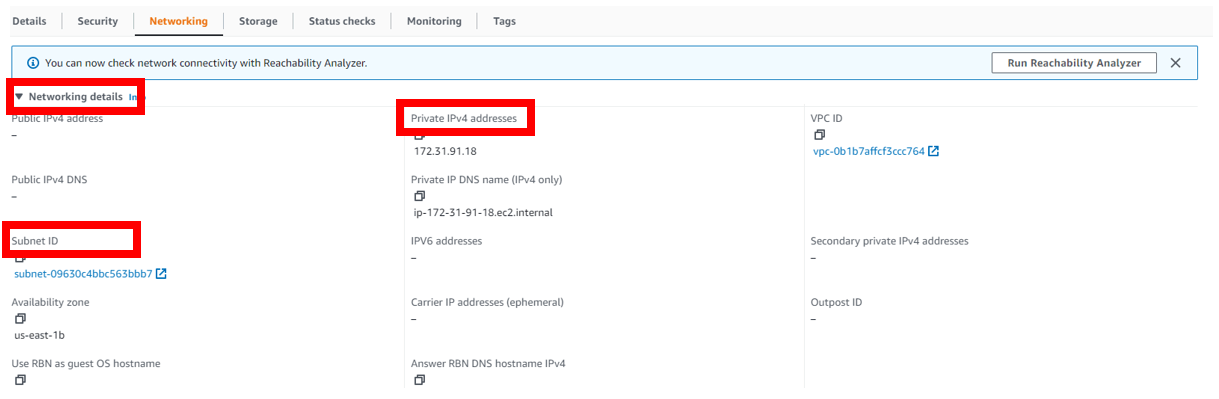 Figure 14: Amazon EC2 Networking Tab
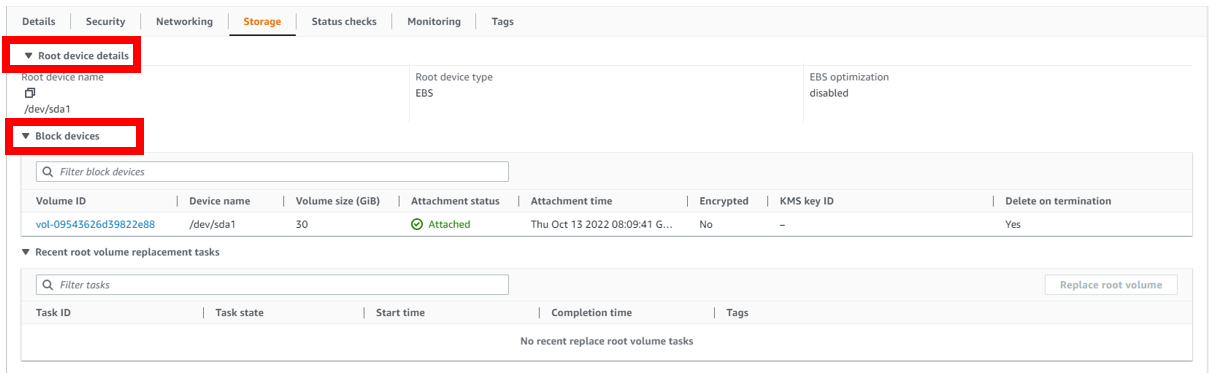 Figure 15: Amazon EC2 Storage Tab
 Figure 16: Amazon EC2 Status Check Tab
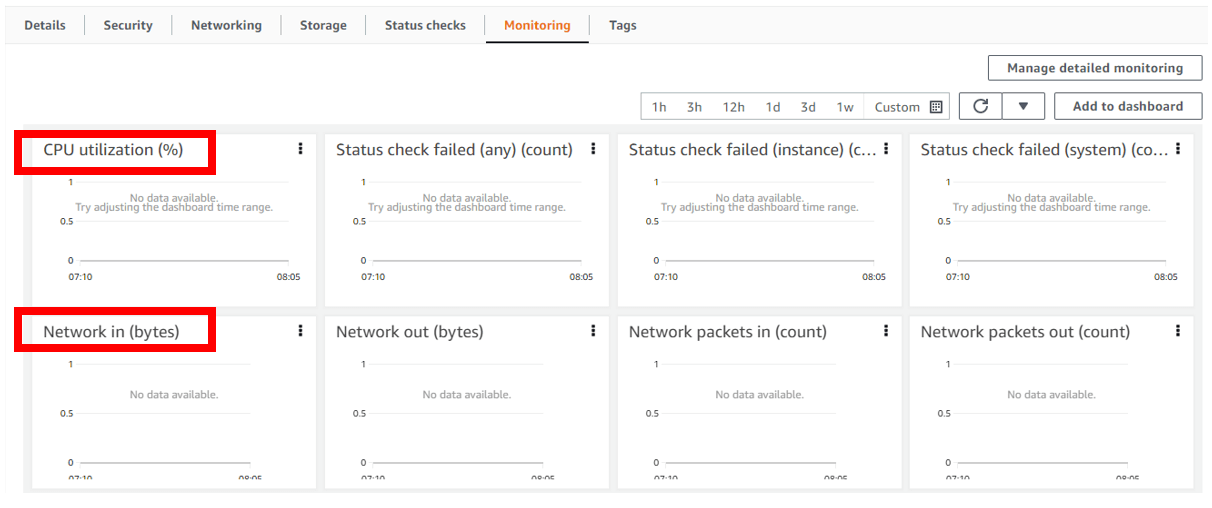 Figure 17: Amazon EC2 Monitoring Tab
 Figure 18: Amazon EC2 Tags Tab
Using Tags to “Label” the Amazon EC2 Instance
In this section, we demonstrate the simple but important practice of labelling Amazon EC2 instance with tags.
- In the Tags tab, we click the button, “Manage Tags” (See Figure 19). This leads us to the dashboard shown in Figure 20.
- Clicking the “Add New Tag” button allows us add key value pairs one row at a time. In this case we have added labels for the name of the instance, the purpose and the owner (Se Figure 20).
- The name tag is visible on the Amazon C2 instance dashboard (Se Figure 21).
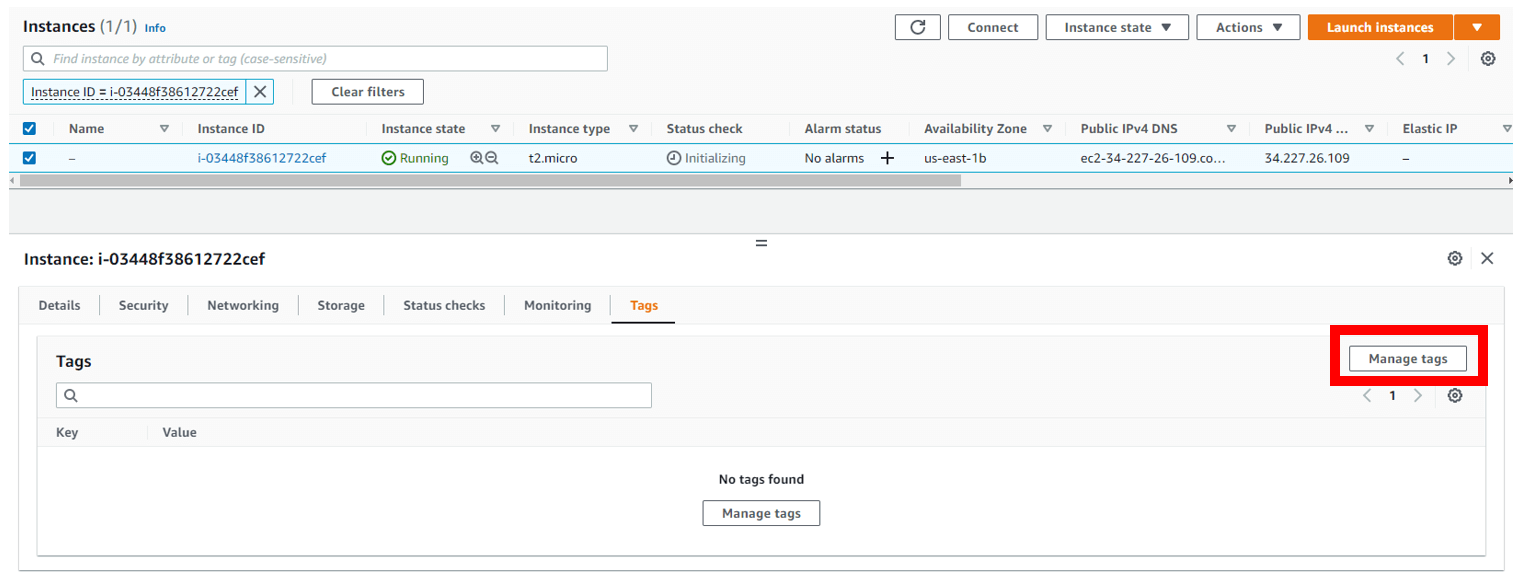 Figure 19: Manage Tags on an Amazon EC2 Instance
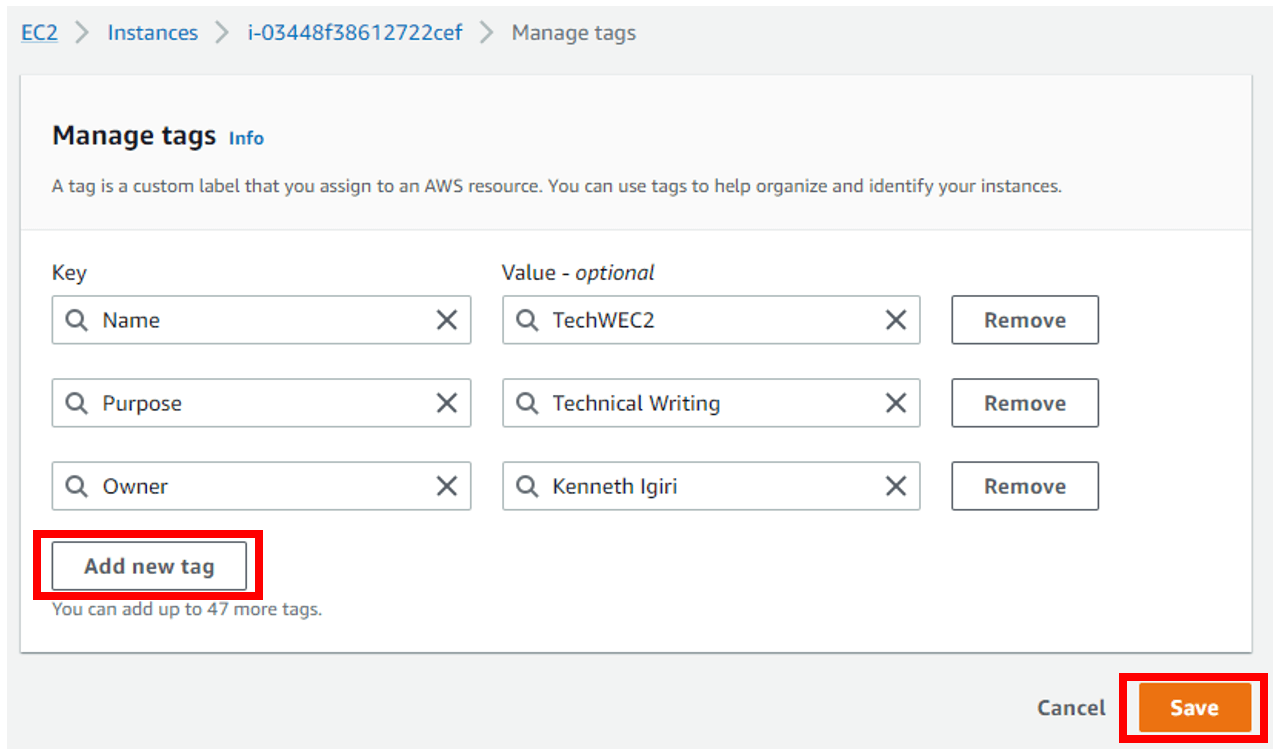 Figure 20: Add Tags
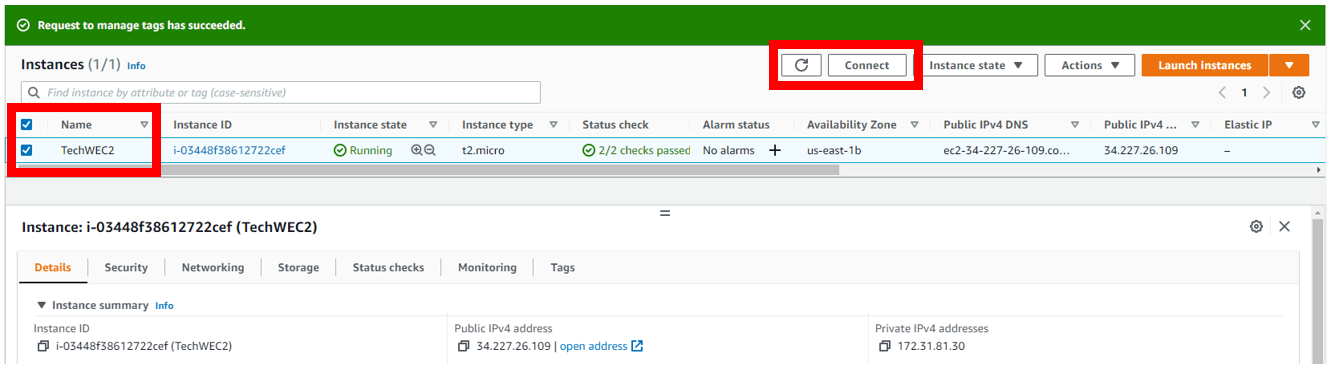 Figure 21: Named EC2 Instance
Establishing a Connection to the Amazon EC2 Instance
Once the Amazon EC2 instance is built and ready, we are now ready to connect to the Amazon EC2 instance and confirm our connection to the Amazon RDS instance. AWS offers three possible ways to connect to an Amazon EC2 instance. To see these options, we click the “Connect” button in the EC2 dashboard and then on the instance summary pop-up (See Figures 21 and 22).
- Session Manager allows you connect to Amazon EC2 instances for “without the need to open inbound ports, maintain bastion hosts, or manage SSH keys”. Session Manager is a component of AWS Systems Manager. An SSM Agent is required on the EC2 instance in order to use Session Manager.
- RDP Client implies connecting with the well-known Windows Remote Desktop Protocol. This requires downloading an RDP client as shown in Figure 24.
- EC2 Serial Console allows you can enter commands to an Amazon EC2 instance as if your keyboard and monitor are directly attached to the instance's serial port. This access needs to be configured explicitly.
 Figure 22: Connect to an Amazon EC2 Instance
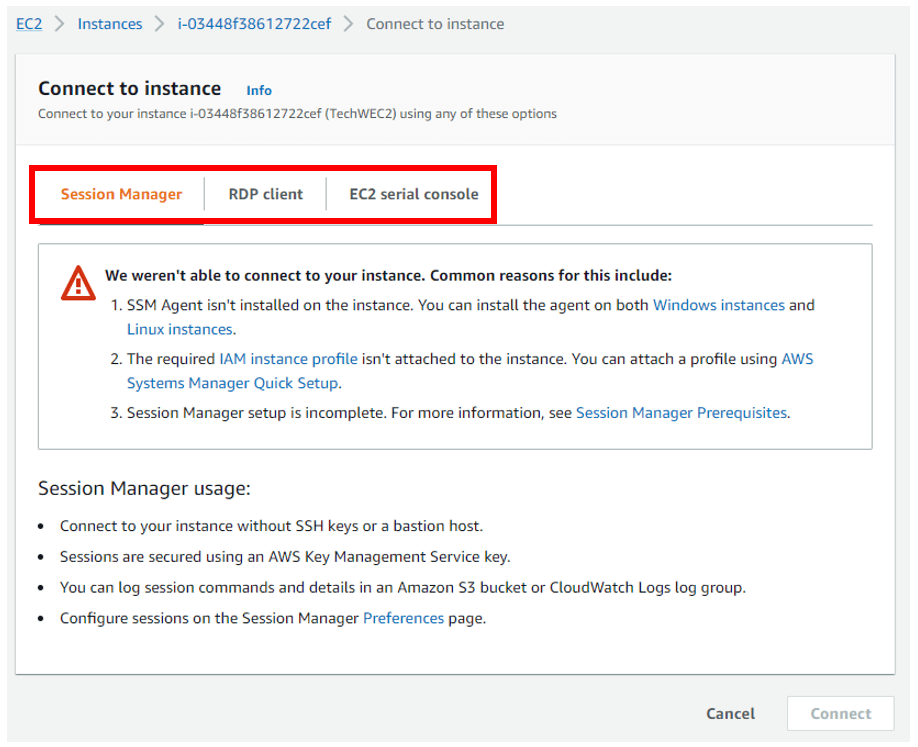 Figure 23: Connect Using Session Manager
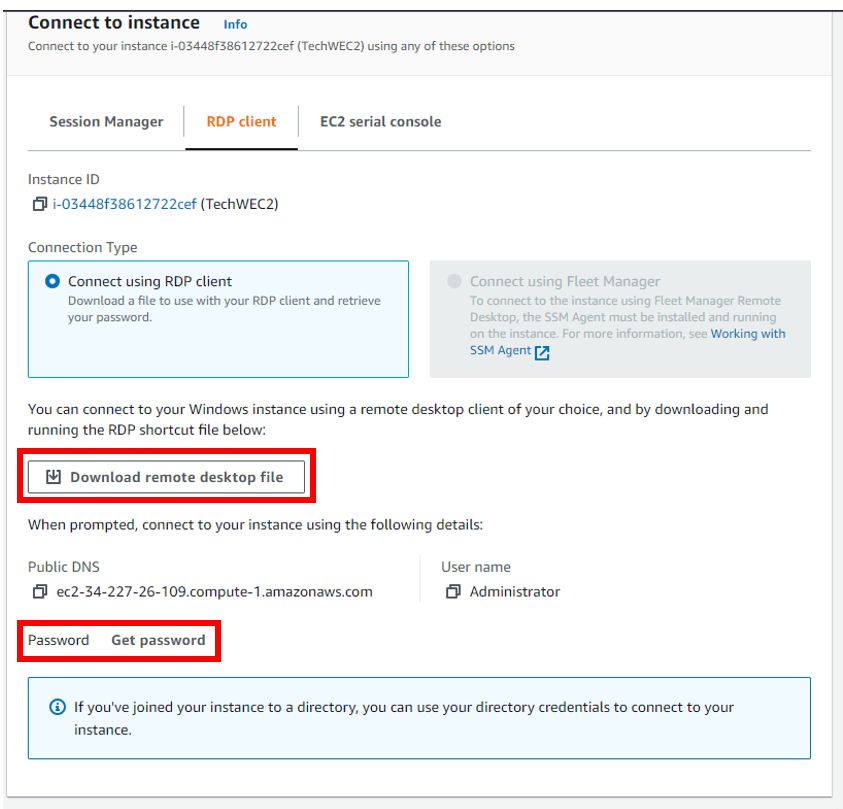 Figure 24: Connect Using RDP Client
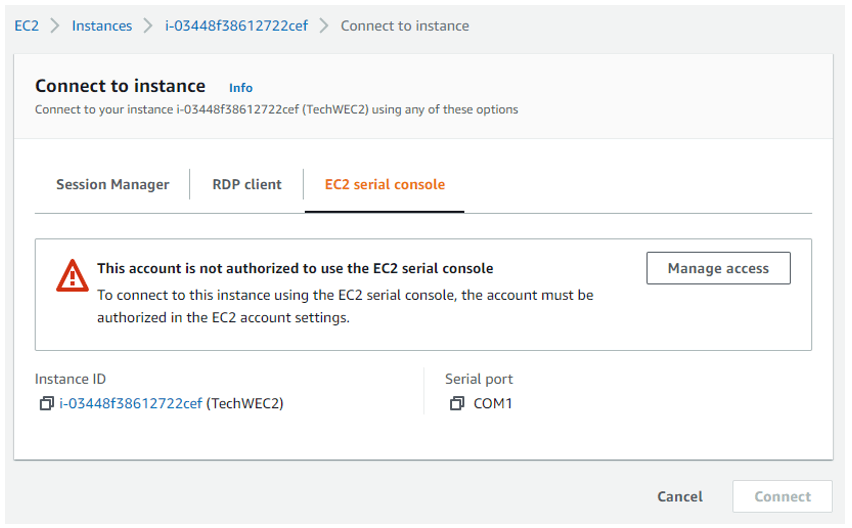 Figure 25: Connect Using EC2 Serial Console
Establishing a Connection Using RDP Client
Using an RDP Client is about the most straightforward way to establish a connection to an Amazon EC2 instance running Windows.
- We start by downloading a remote desktop file as earlier shown in Figure 24. Save this file to you computer; it will be used to open an RDP session.
- We then proceed with getting the Windows password (See Figure 24). The wizard prompts us to upload the key pair we created earlier in Figure 7. It is very important that this key pair file is kept safe.
- Click “Decrypt Password” to get the Windows password for the Amazon EC2 instance (See Figure 26). The decrypted password is shown in Figure 27.
- Double-click the remote desktop file downloaded earlier. Provide the credentials as shown in Figure 28.
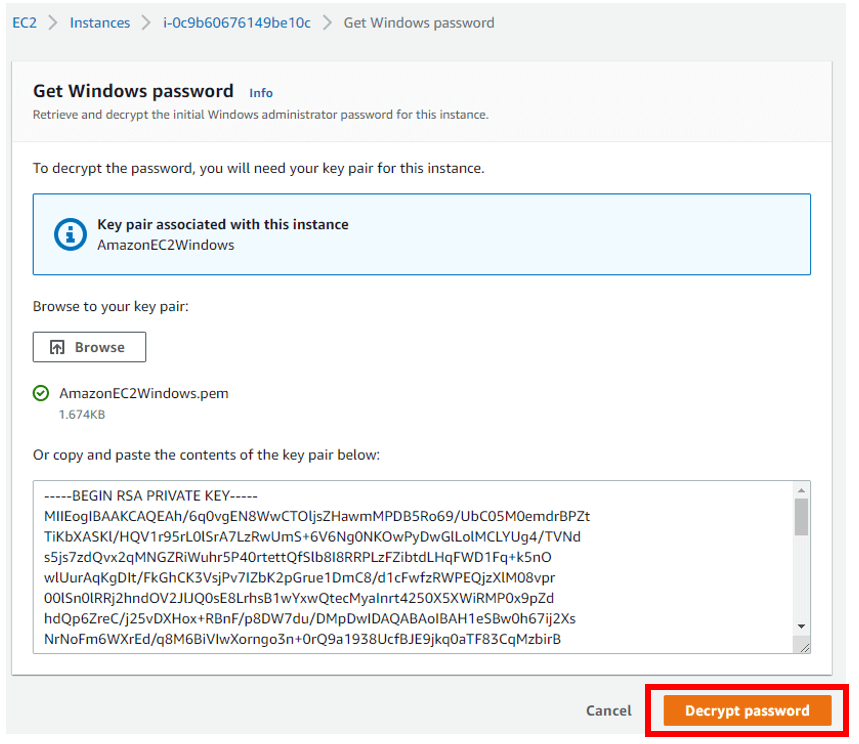 Figure 26: Upload Key Pair to Decrypt Windows Password
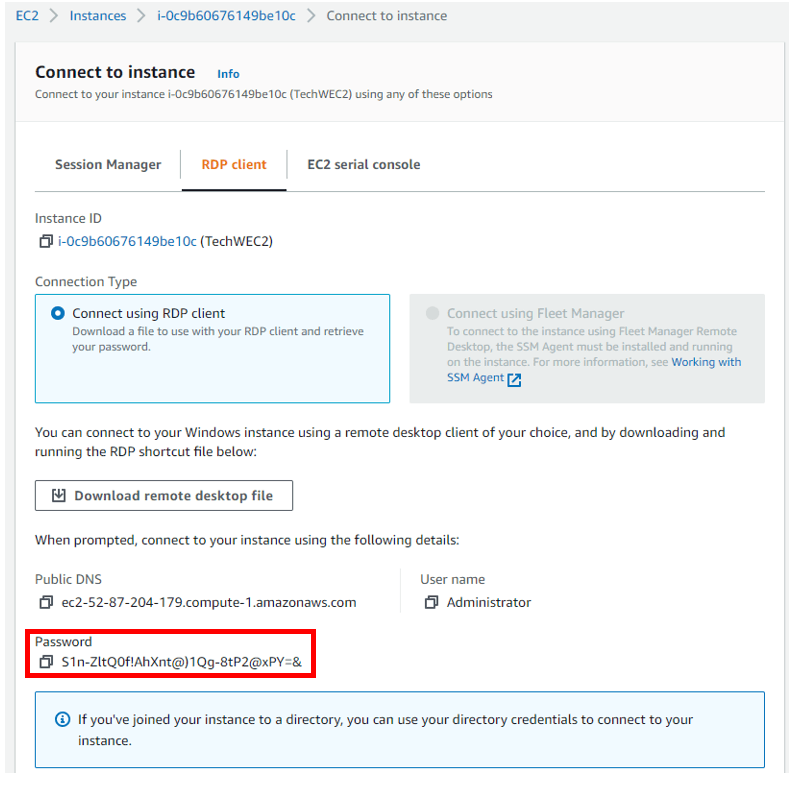 Figure 27: Copy Windows Password
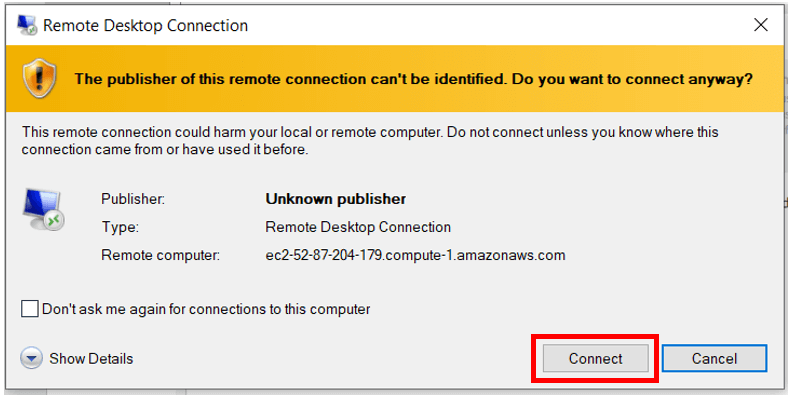 Figure 28: Open Remote Desktop File
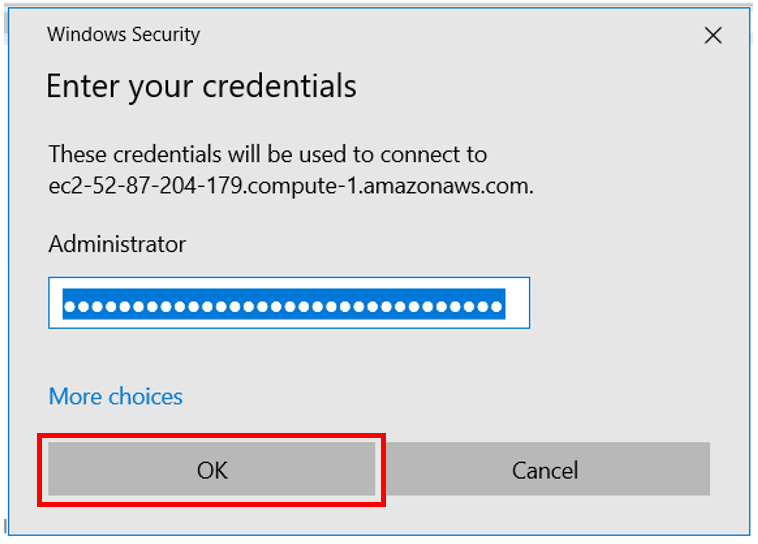 Figure 29: Supply Amazon EC2 Credentials
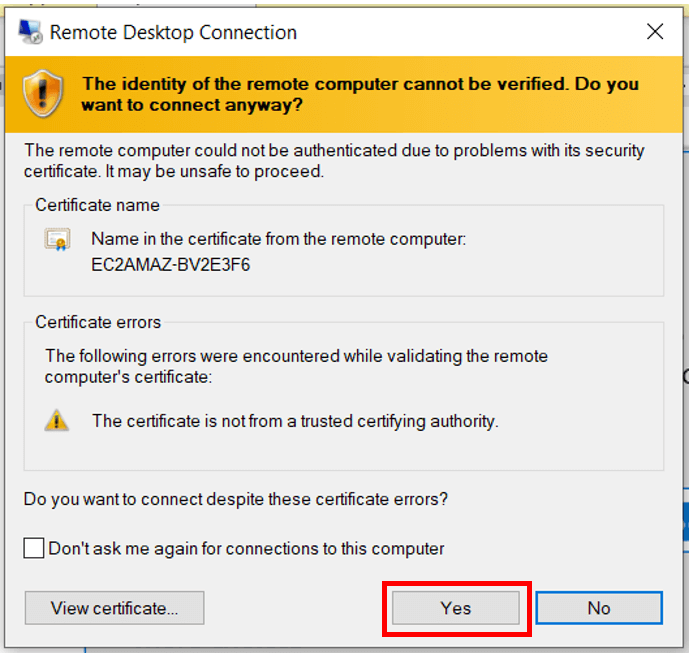 Figure 30: Connect Despite Security Warning
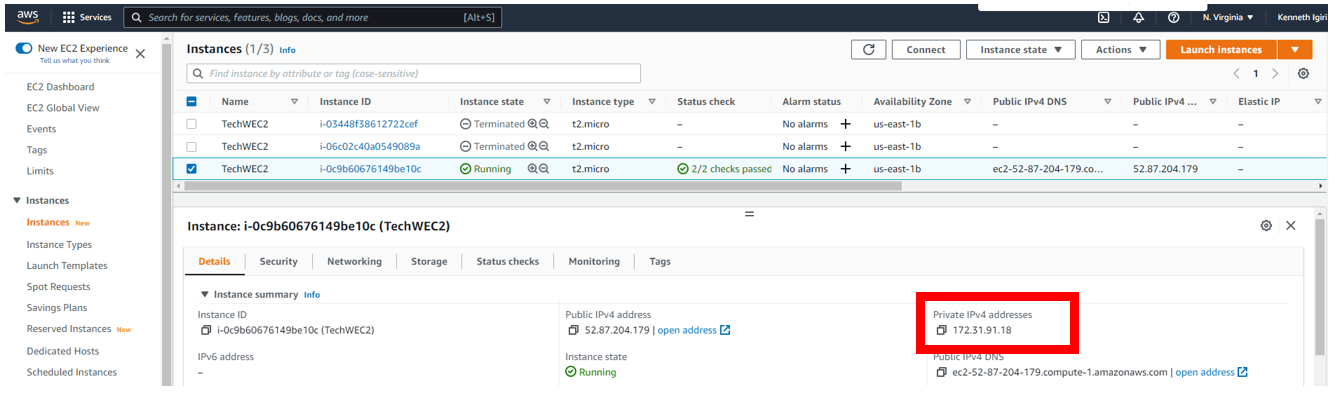 Figure 31: Amazon EC2 Private IP Address
Testing Connectivity to the Amazon RDS Instance
Once we are within the server, we can test connectivity using Windows Telnet tool.
- First, we validate that we are in the server using ipconfig. Notice the Private IP address shown in Figure 31 matches the output of the ipconfig command in Figure 32.
- Using nslookup, we are also able to resolve the Amazon RDS endpoint to a valid IP address (See Figure 33).
- Finally, we do a telnet test to confirm connection to the instance on the MS SQL Server default port 1433.
- Figures 35 and 36 show the quit and exit commands for telnet client and Windows Command Prompt respectively.
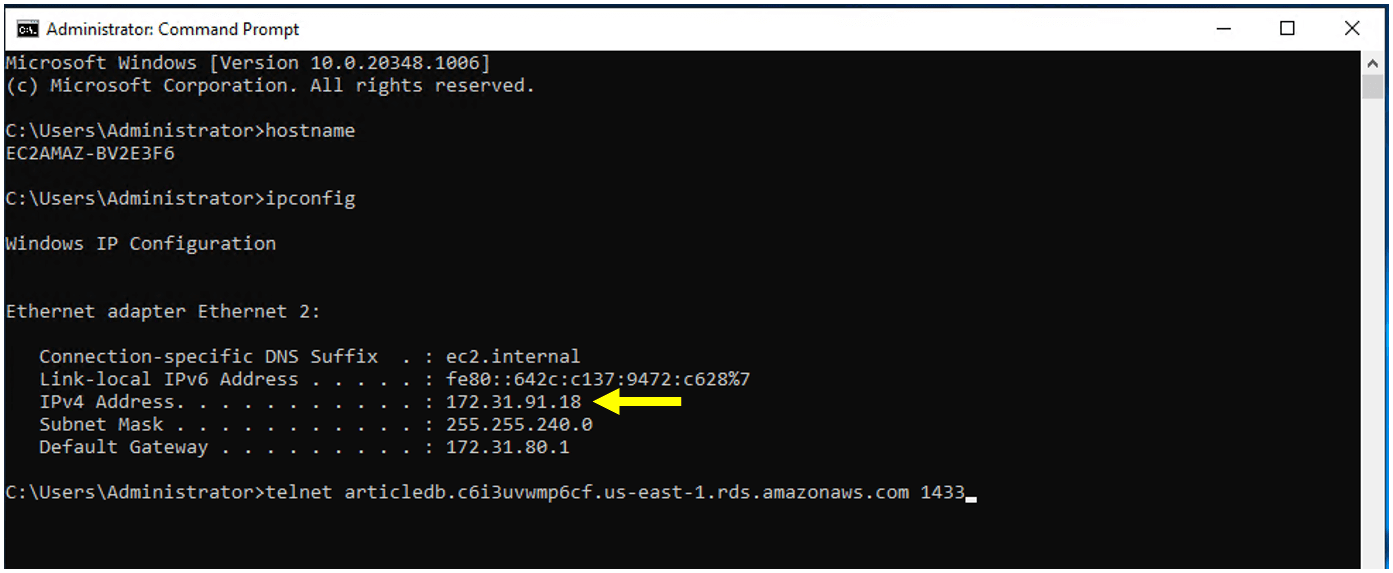 Figure 32: Private IP Address and Telnet Test Using Command Prompt
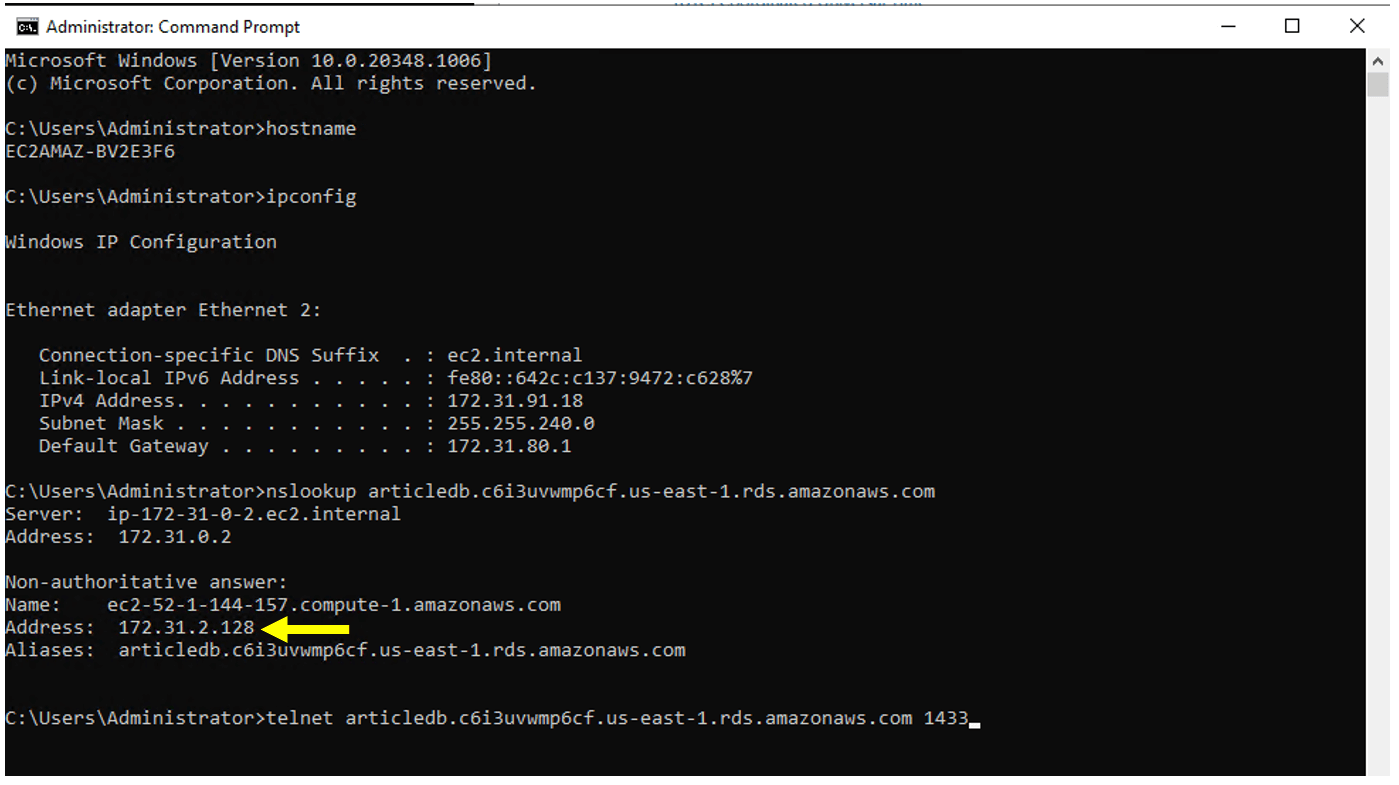 Figure 33: NSLOOKUP for RDS Endpoint
 Figure 34: Successful TELNET Connect to Amazon RDS Instance
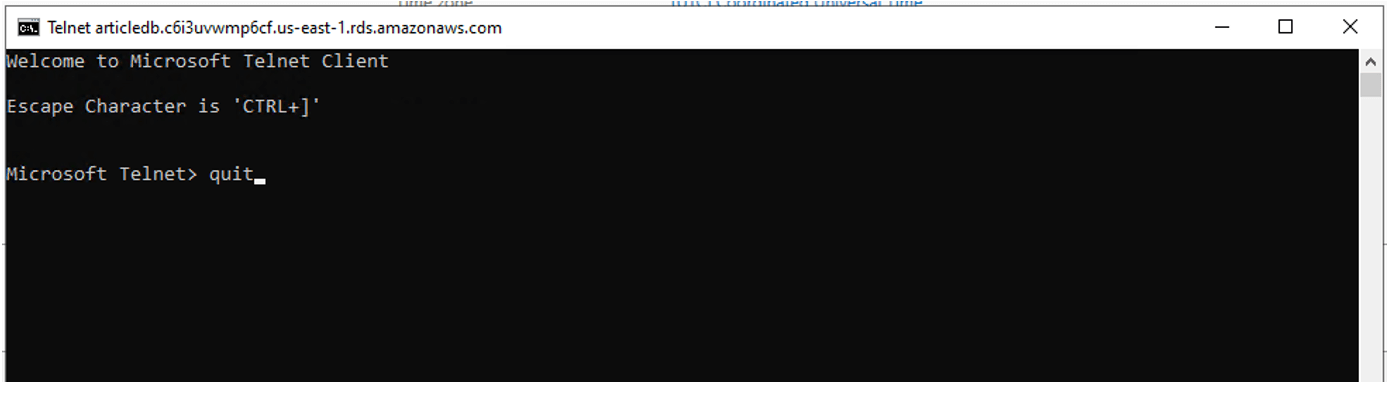 Figure 35: Exit TELNET Client
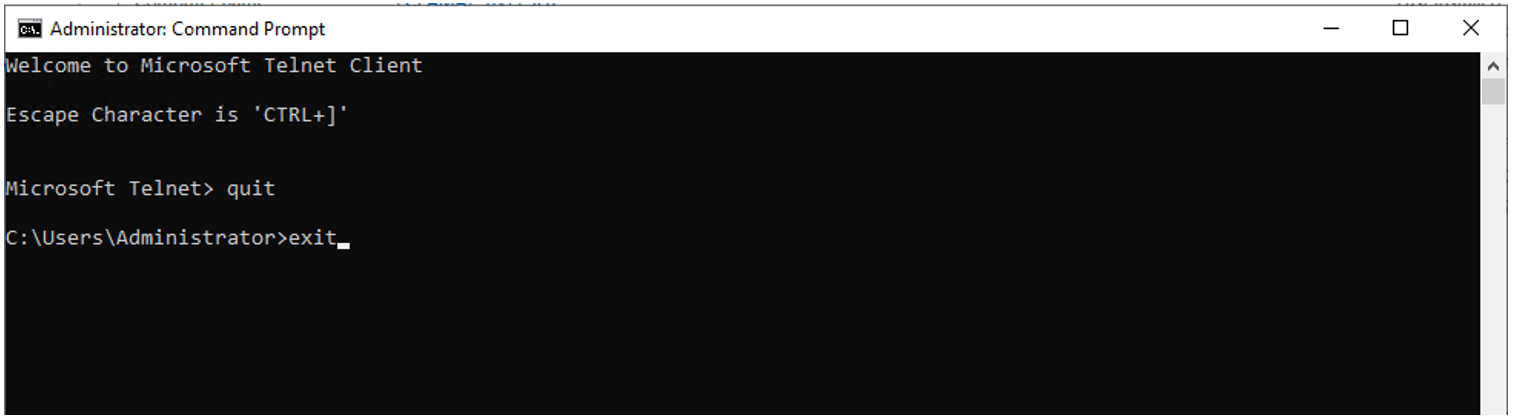 Figure 36: Exit Command Prompt
Conclusion
In this article, we showed the detailed steps for creating an Amazon EC2 instance and establishing a connection to an existing Amazon RDS instance. We showed that this "connection" is simply a set of virtual firewall rules automatically configured when we click a few buttons on the GUI. Once done with the configuration, we were able to validate the connection to the Amazon RDS instance from the Amazon EC2 instance using basic Windows tools and commands.