

Introduction
In a previous article, we explored the factors worth considering when deploying a database in the public cloud. We also created a SQL Server RDS instance on Amazon Web Services. In this article we shall demonstrate how to connect to this new instance using a client tool – dbForge Studio. Our client tool will sit outside AWS console and we can assume that the workstation we are using is “on-prem”. The main parameters we need to establish a connection to our database instance are:
- Endpoint – AWS defines this as the representation of the data required to connect to an Amazon RDS instance
- Master Username – this translates to a SQL Server login principal in essence
- Master Password – Password for the initial login
Connecting to an Amazon RDS Database
Figure 1 shows how to provide these details to a client tool. In this example, we are using dBForge studio. The case of SQL Server Management Studio is quite similar.
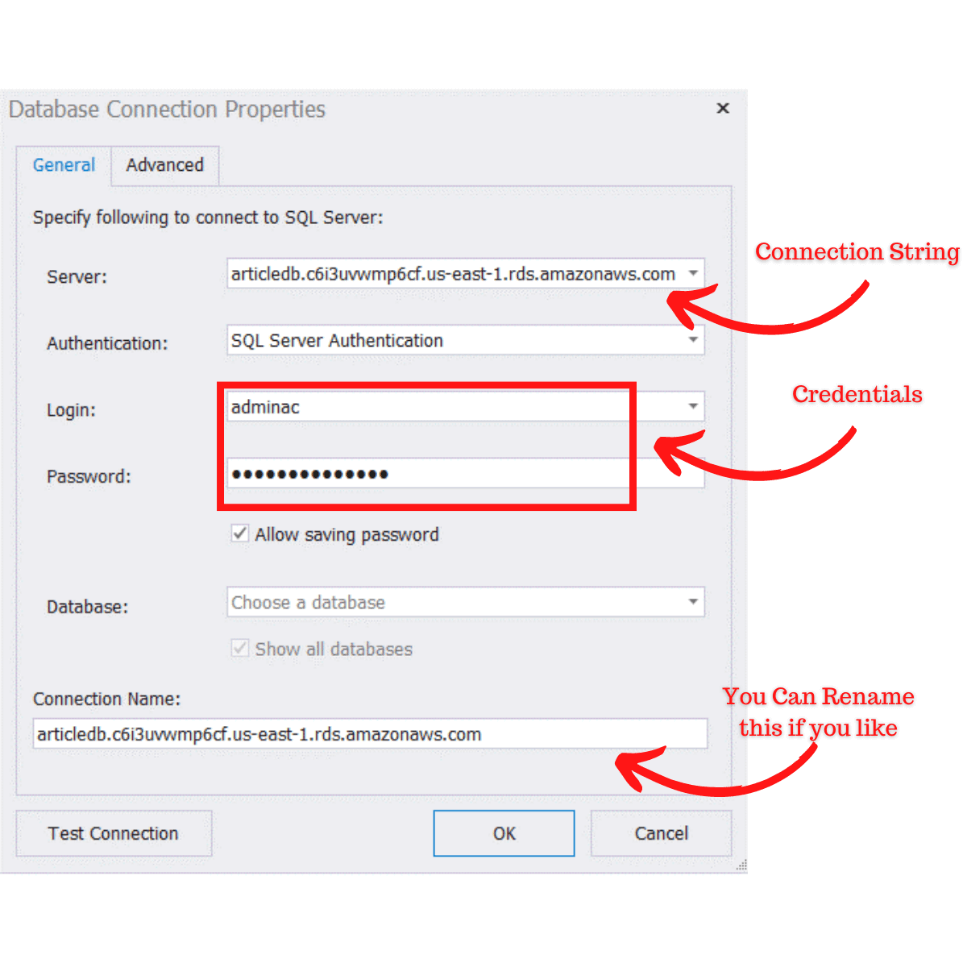 Figure 1: Setting Up a Connection to an Amazon RDS Instance (SQL Server)
Password Reset
As a small digression, you can easily recover this Master Password in it is not available as login as you have access to the AWS console. The recovery requires modifying the SQL Server RDS instance. Navigate to RDS > Databases > [instance name] to modify the instance of interest (See Figures 2, 3 and 4).
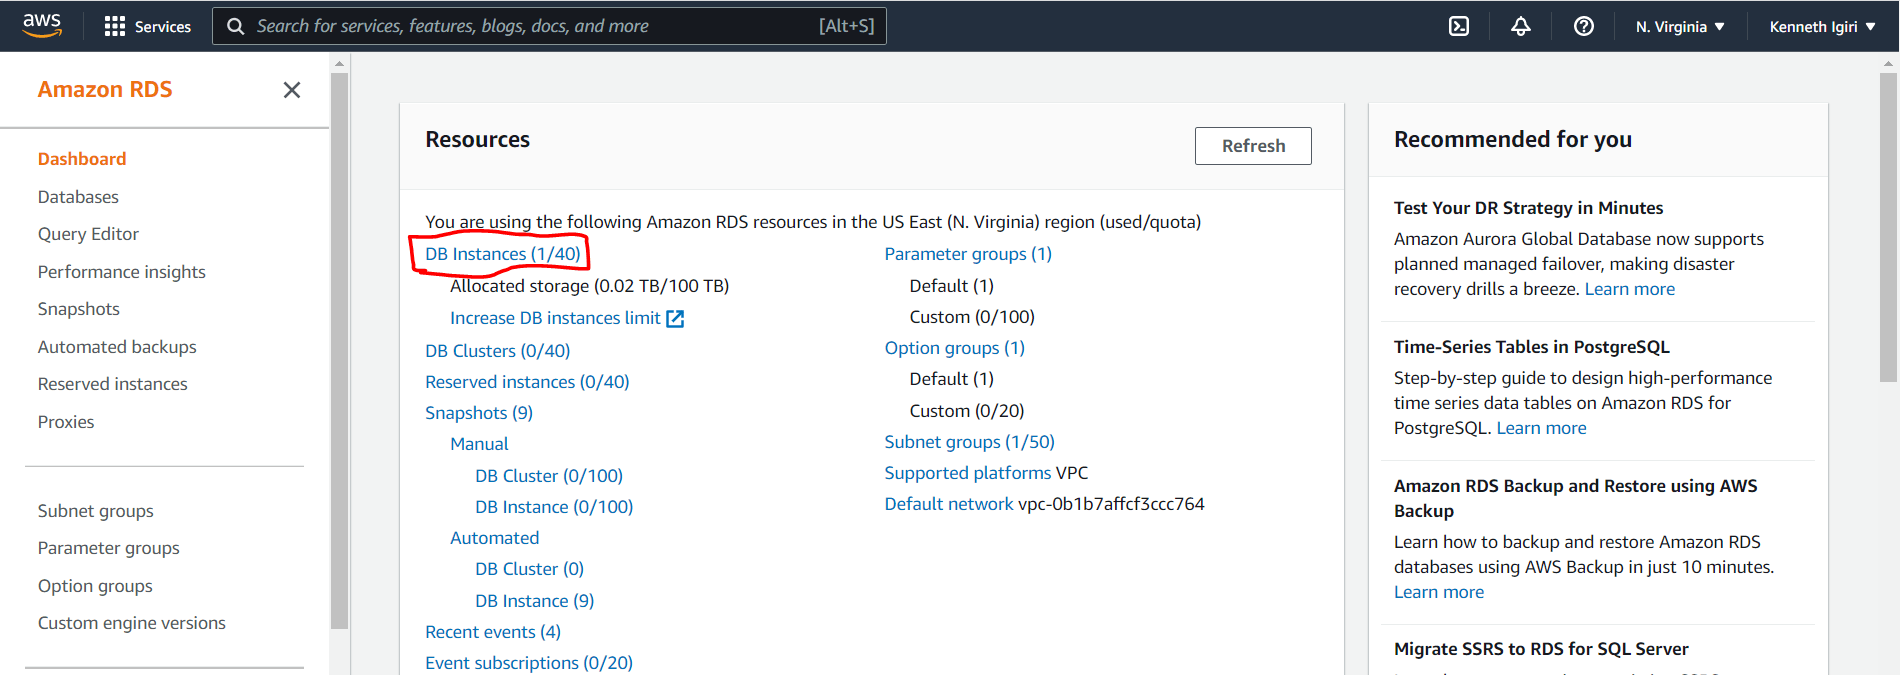 Figure 2: Amazon RDS Dashboard
 Figure 3: ArticleDB Amazon RDS Instance
 Figure 4: Modify the Database Instance
The settings shown in Figure 5 are the configuration options for your RDS instance. This means you can change the password here simply by typing in the new desired password and saving the configuration.
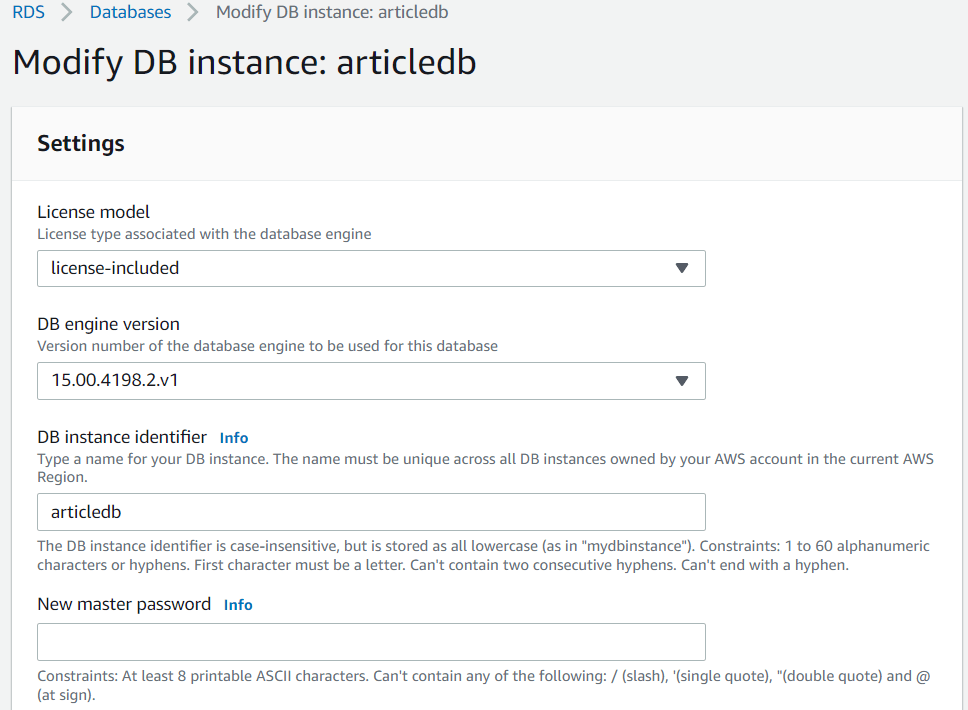 Figure 5: RDS Instance Settings
First Connection Attempt
Once we have these three parameters, we can attempt the connection. We make out first connection attempt (See Figure 6) but we get an error indicating that the client is unable to open a connection to the SQL Server instance. To overcome this, we must make a couple of configuration changes on AWS to allow our connection.
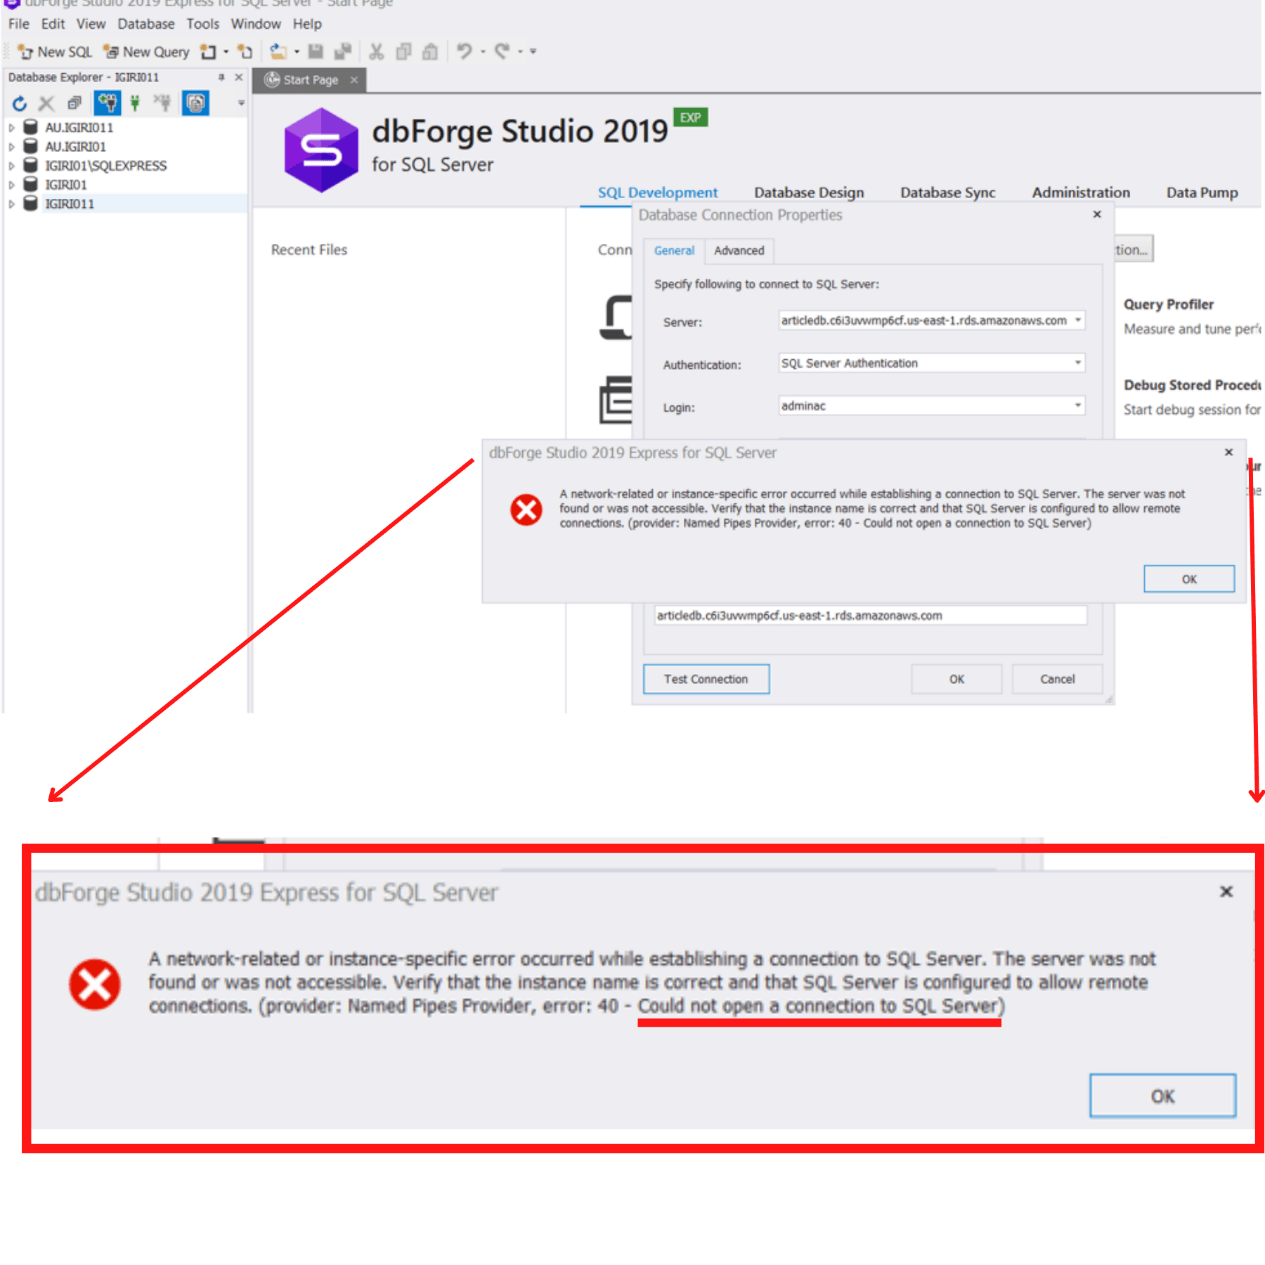 Figure 6: Could Not Open a Connection to SQL Server
To allow inbound connections to our RDS instance in AWS, we must take two steps.
- Allow our public IP address through the Security Group
- Enable Public Accessibility for the database instance
Configuring the Security Group for an Amazon RDS Instance
On the AWS Console, search for the VPC Dashboard and click Security Groups.
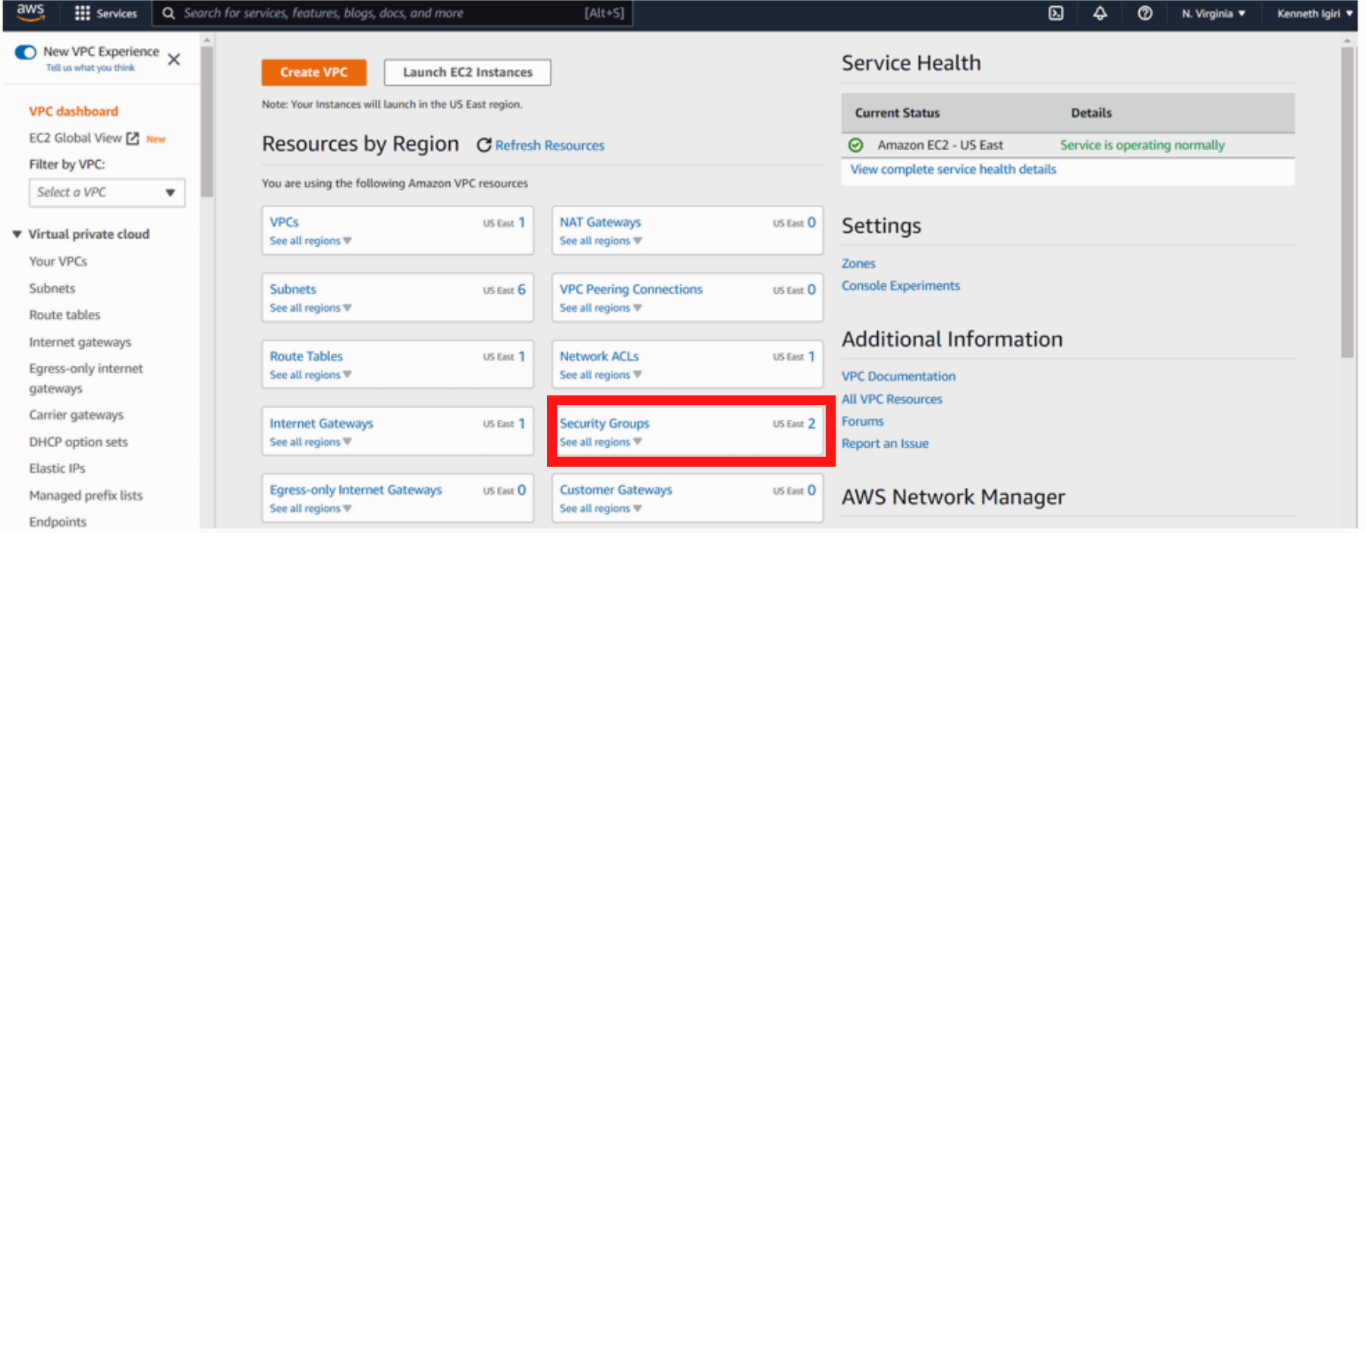 Figure 7: VPC Dashboard – Security Groups in Focus
Our database security group is called DBSecGrp. We must modify this Security Group to allow access to our IP Address.
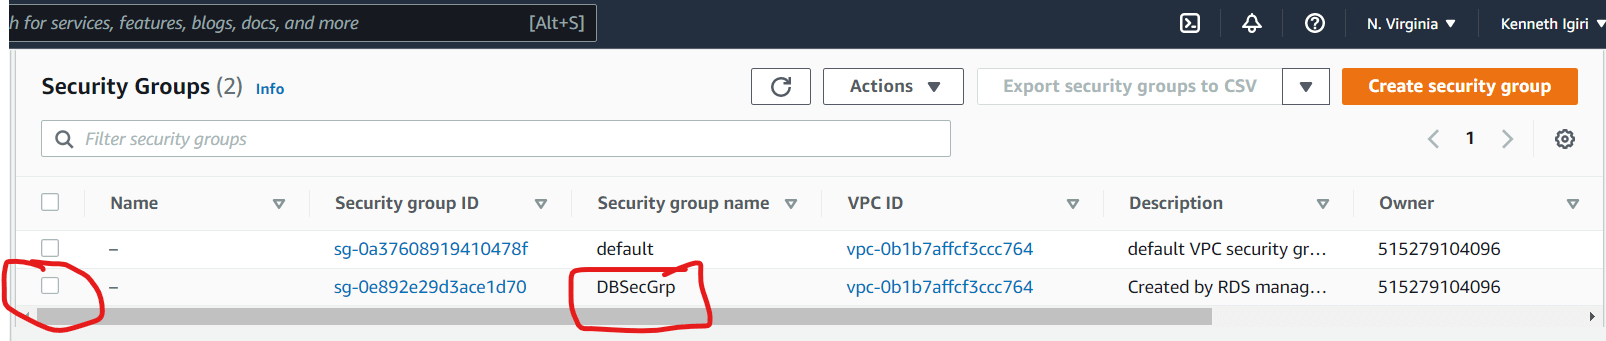 Figure 8: DBSecGrp Security Group
When we select the Security Group of interest, the description, rules and tags of the Security Group are displayed (See Figure 8). We navigate to the Inbound Rules sections and add a line that allows our IP address. Click edit inbound rules.
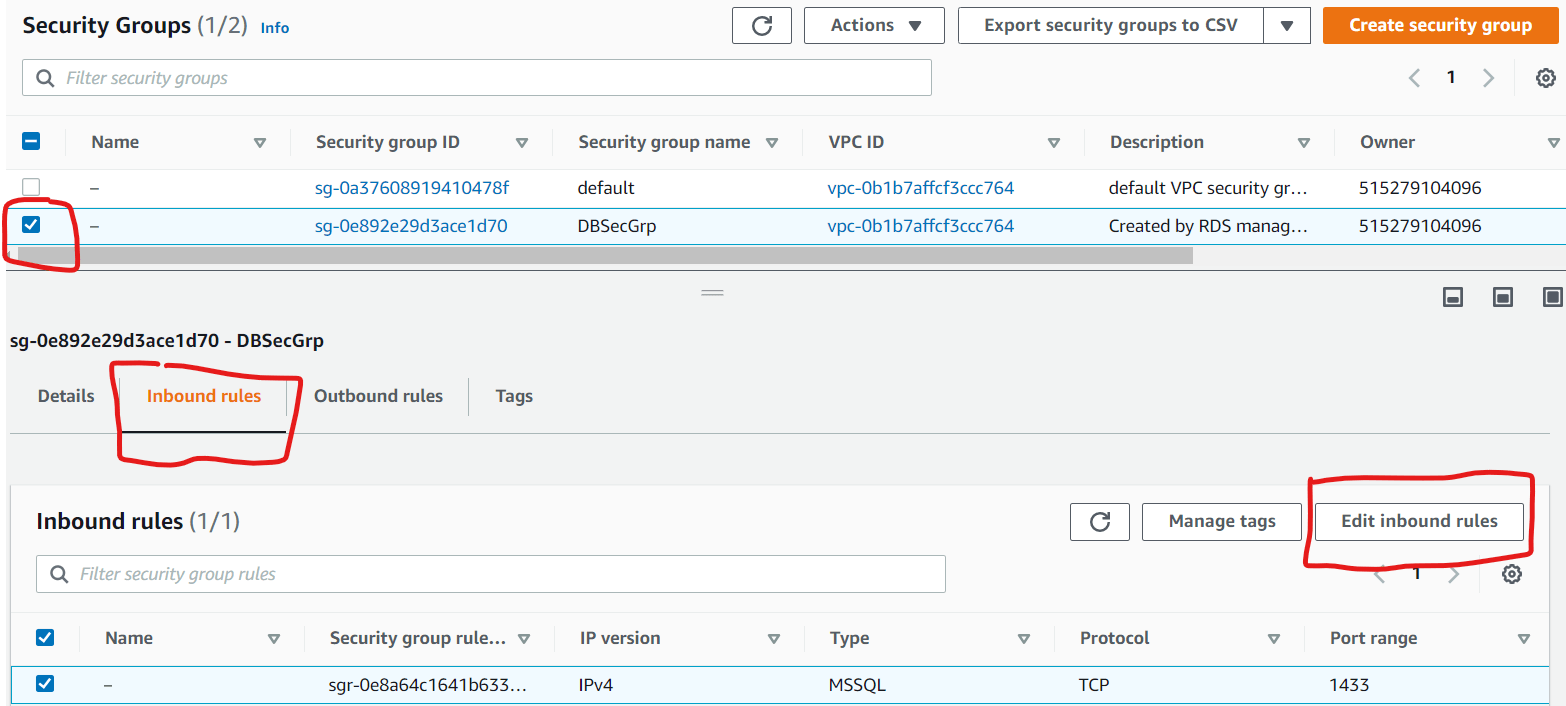 Figure 9: DBSecGrp Security Group Details
Click add rule (See Figure 10). This introduces a new line. One question on your mind might be where we got the IP Address 41.210.16.236. This is a public IP address associated with the Internet Service Provider used by the “on-prem” computer where the configuration is being done from. You cannot use a private IP address for this configuration (for example the IP address on your computer’s NIC). One can get this address by simply visiting https://whatismyipaddress.com/ from the computer being used for the configuration.
In the case of an enterprise, you will have a more definite IP address based on how the connection to your cloud service provider is achieved. If you are accessing the CSP over the internet as well, you are also light to be giving access to the IP address of the device (router, firewall etc.) that allows your organization access the internet. Once we are ready, we save the rules.
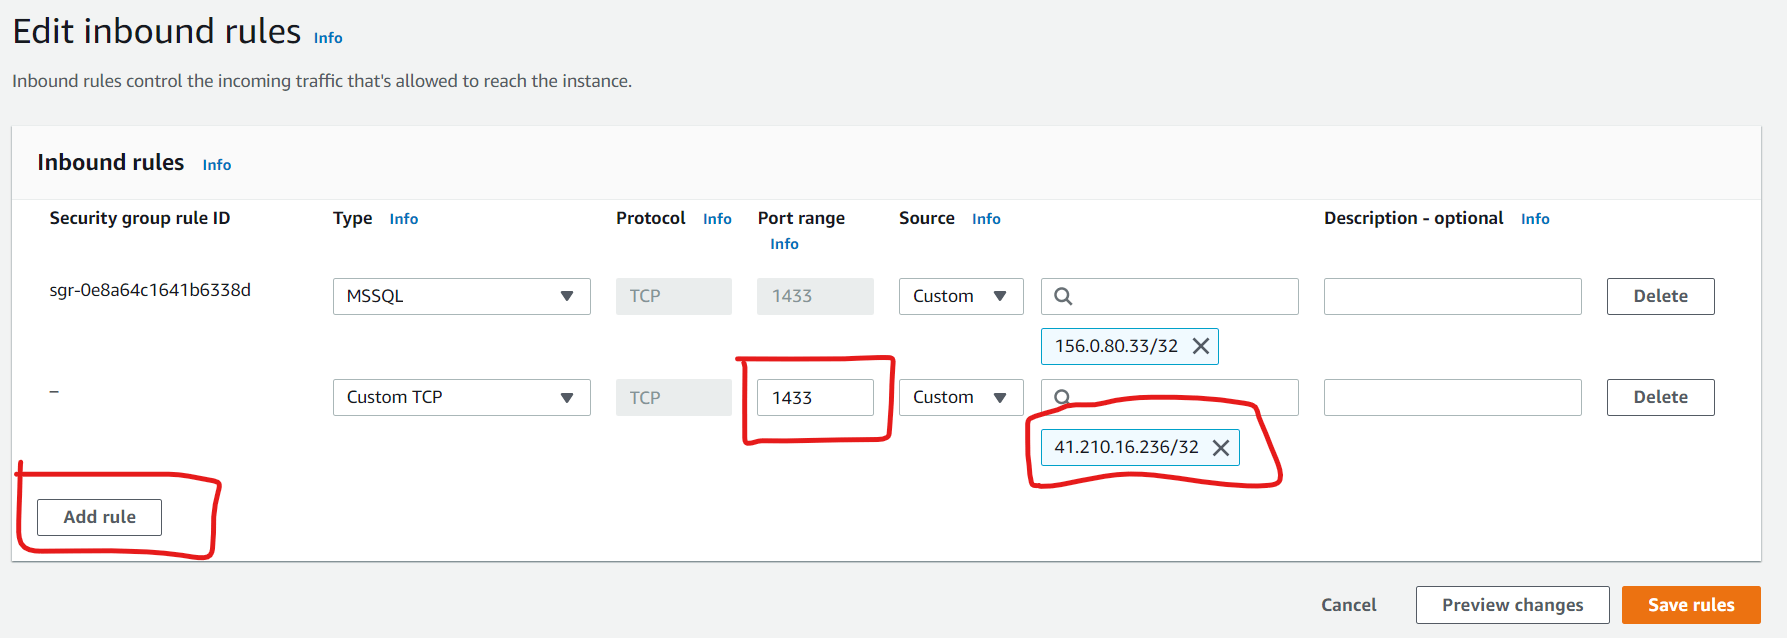 Figure 10: Save Inbound Rules
Comparing NACLs and Security Groups
However, we still get Error 40 when we attempt the connection again (See Figure 11). There is more to be done. There is a temptation to think that we have to do something about Network Access Control Lists (NACL) but this is not the case.
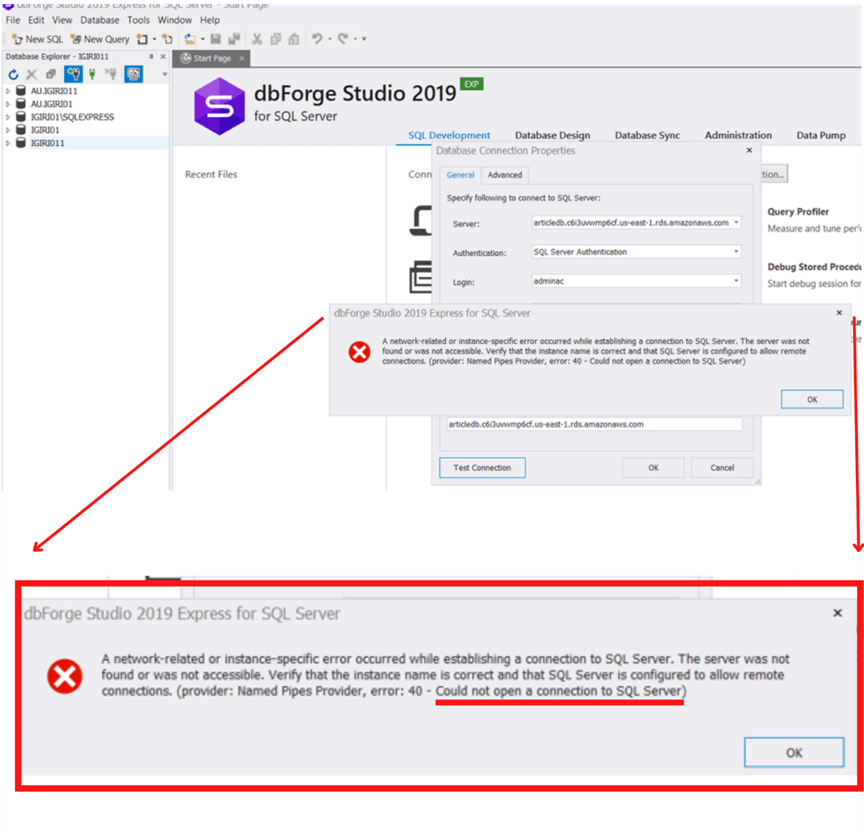 Figure 11: Second Failed Connection Attempt
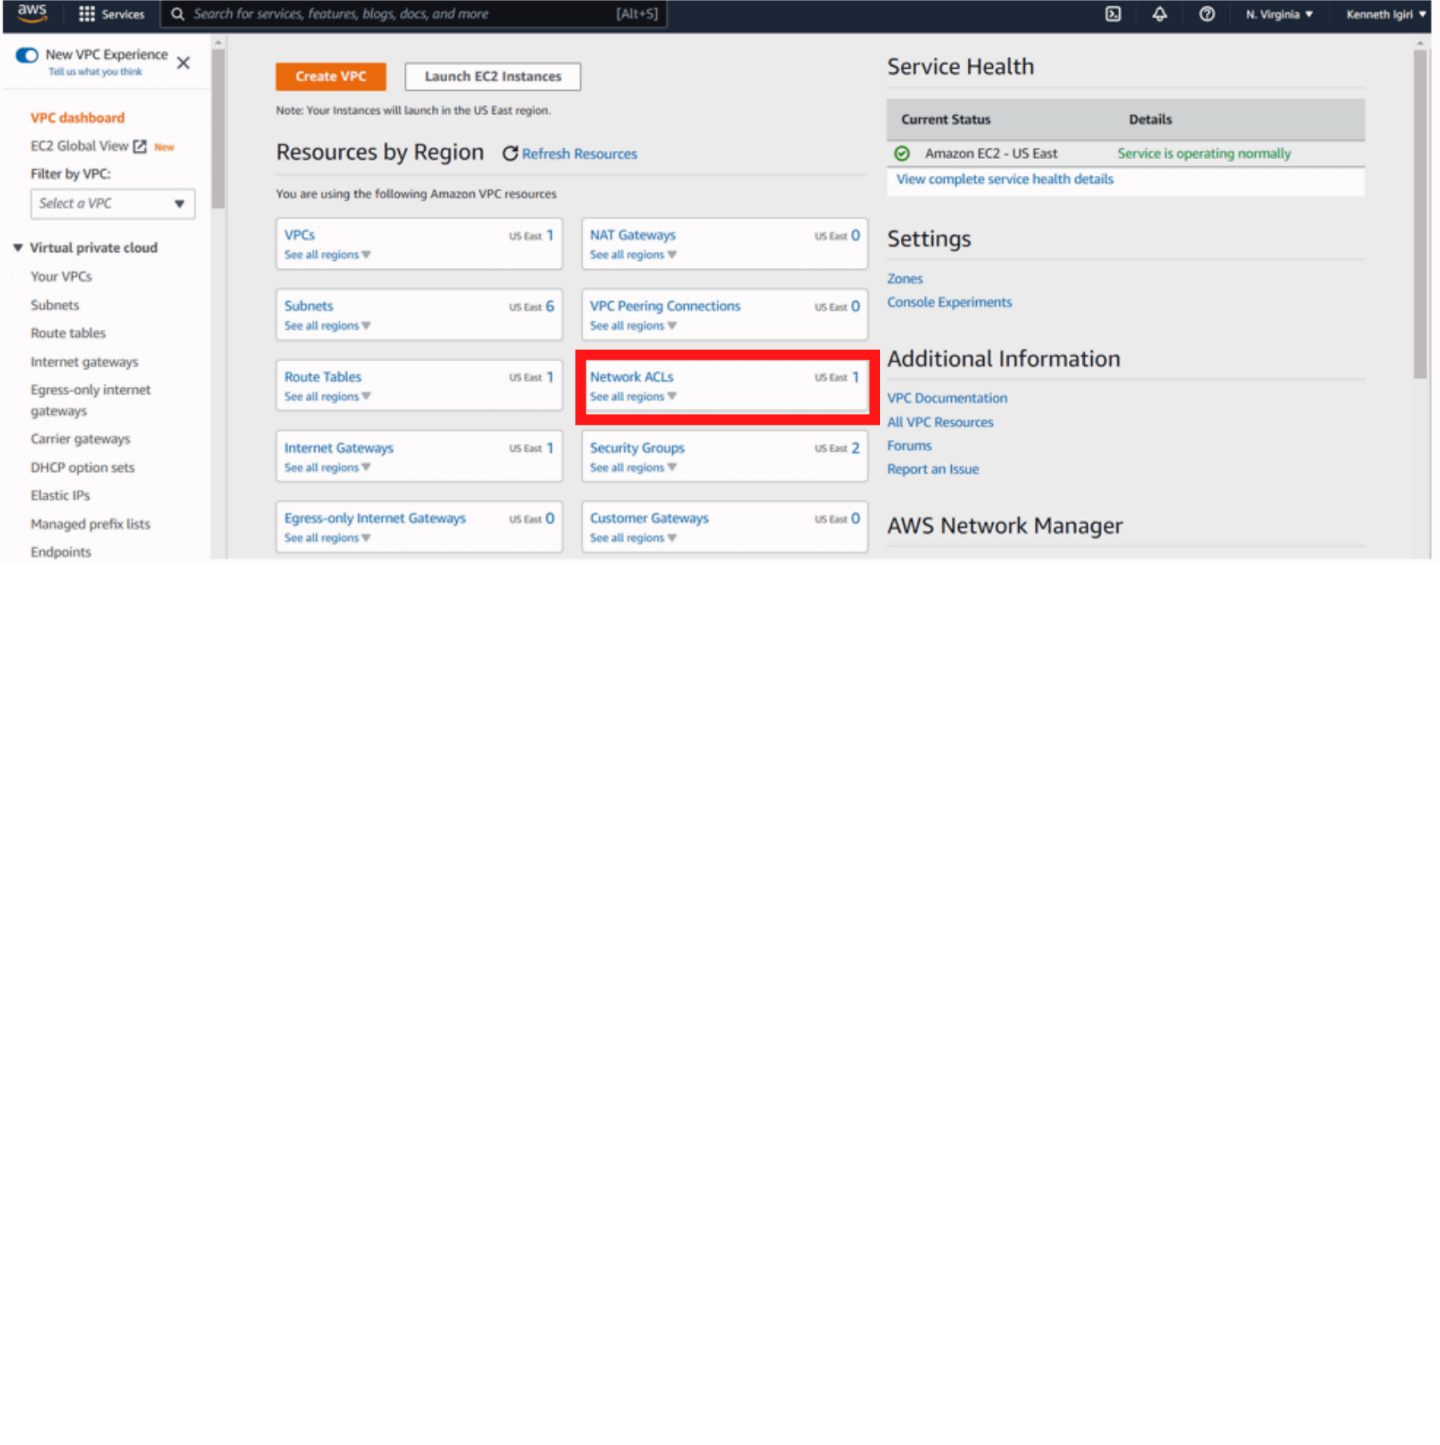 Figure 12: VPC Dashboard – Network ACLs in Focus
Network ACL rules already allow inbound access at the network layer as can be seen in the configuration for this VPC (See Figure 13). You might be wondering what the difference between a Security Group (virtual firewall) and Network Access Control List (ACL) is and why we need both. This is a potential examination question in AWS ad is summarized in Figure 14.
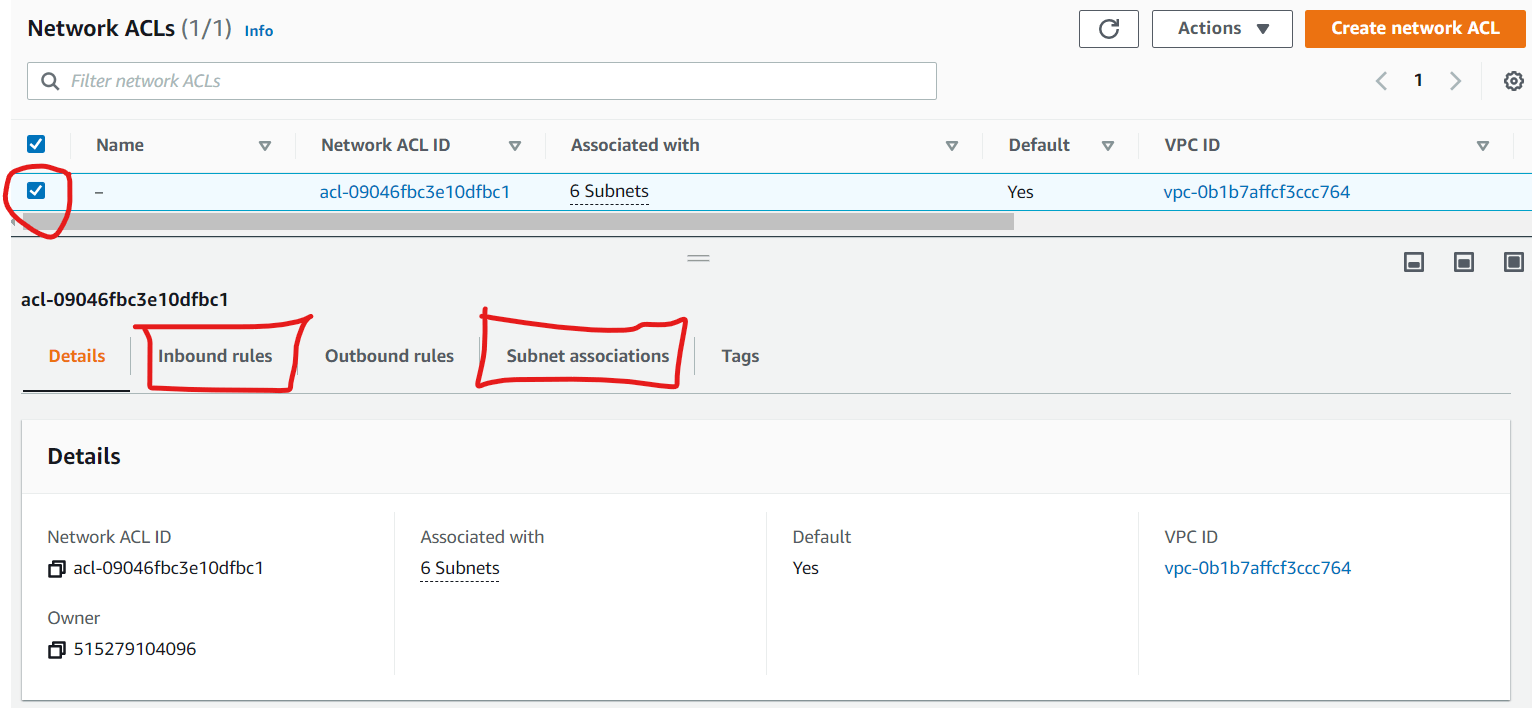 Figure 13: Network ACL Rules
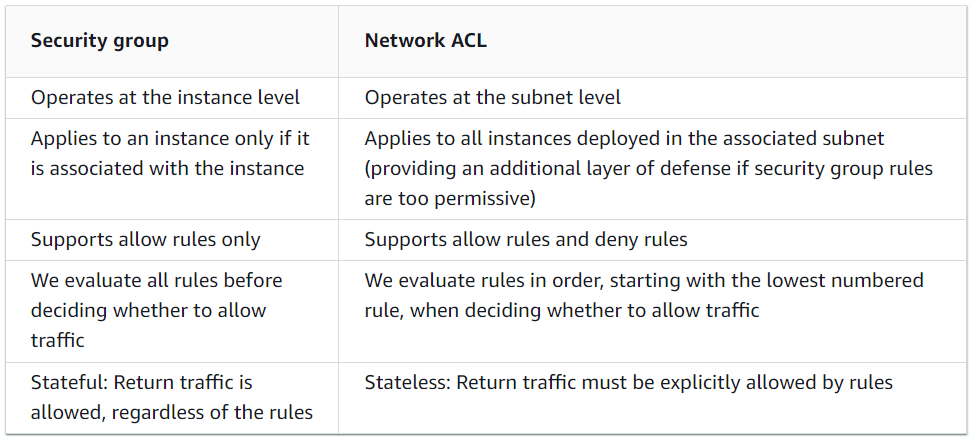 Figure 14: Comparison of Security Groups and Network ACLs
Configuring Public Accessibility for an Amazon RDS Instance
What we must do is configure the database to be publicly accessible from the RDS dashboard. We once again navigate to RDS > Databases > articledb as shown in Figures 15, 16 and 17.
 Figure 15: Amazon RDS Dashboard
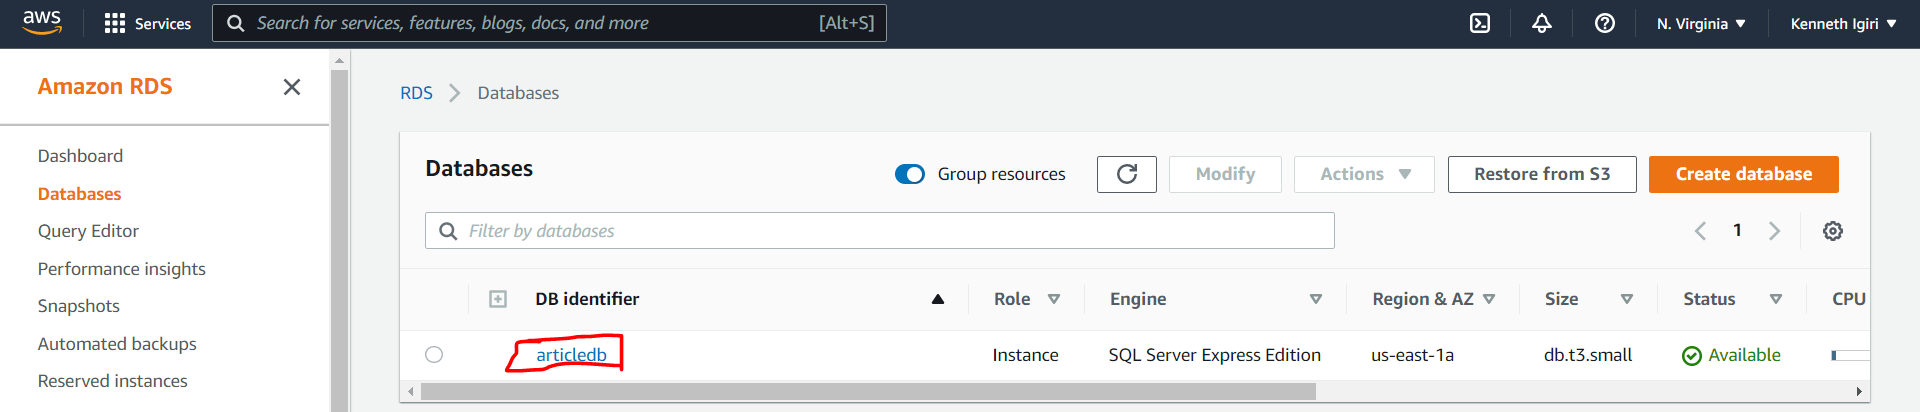 Figure 16: ArticleDB Instance
Click the modify button and scroll down to the Connectivity section (Figure 17). Here is where we select the Publicly Accessible option after expanding Additional Configuration (See Figures 18 and 19).
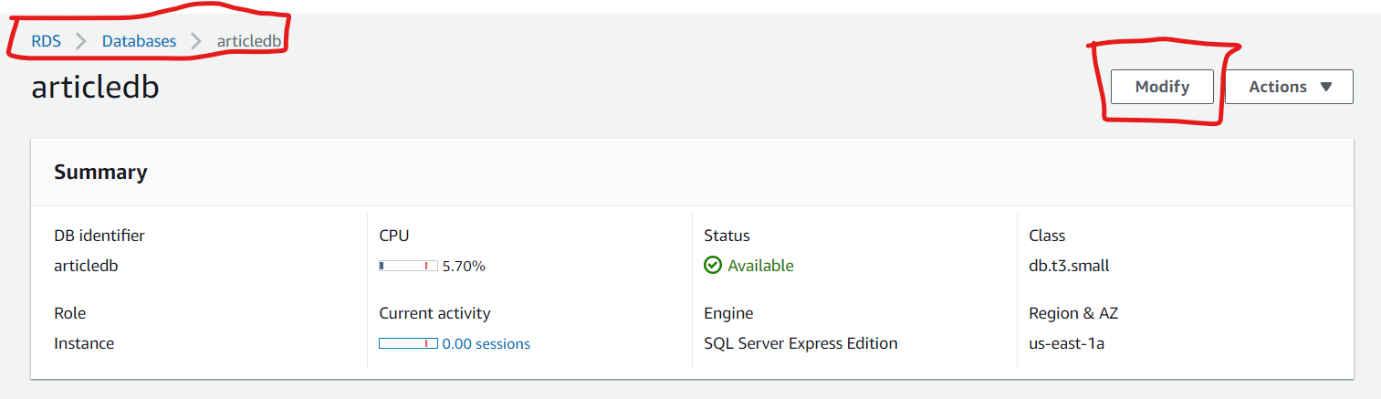 Figure 17: Article DB Configuration
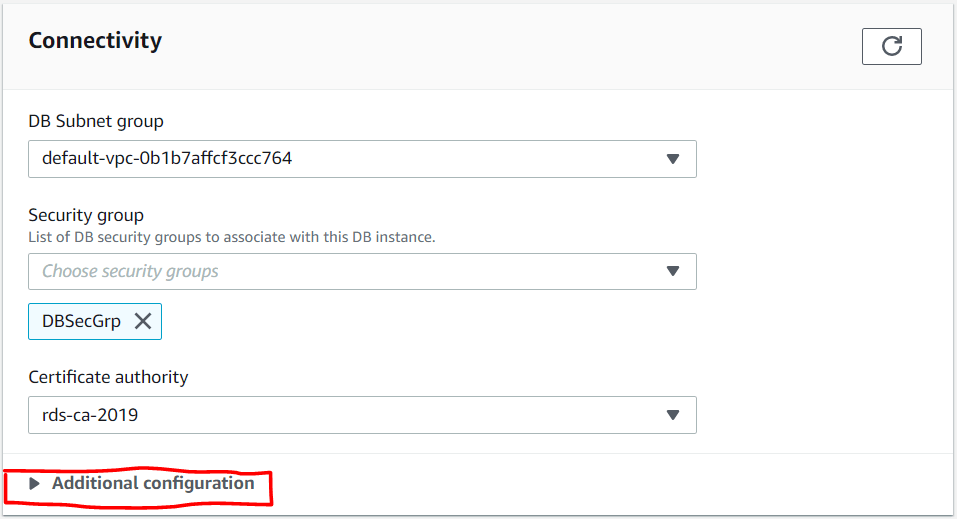 Figure 18: Connectivity Section
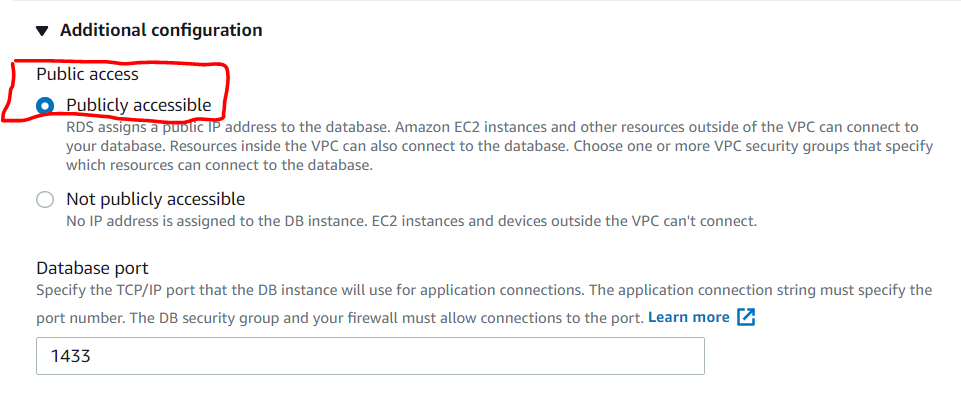 Figure 19: Additional Configuration
Once the options are selected, we then select the option of modifying the database instance immediately. In a production environment it will be more appropriate to schedule this restart outside work hours. This is especially because the change might take a bit of time to apply (See Figures 20 and 21).
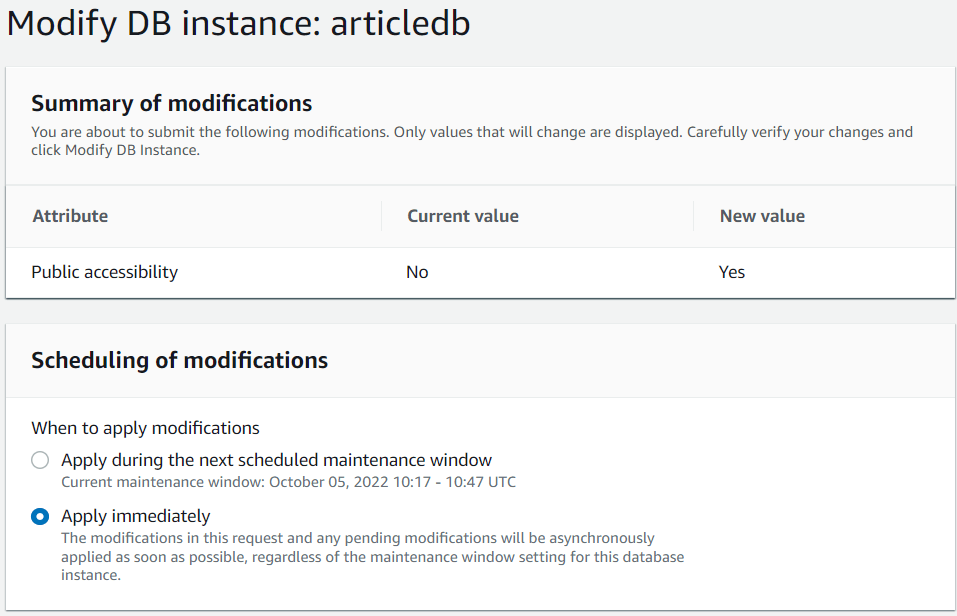 Figure 20: Apply Window
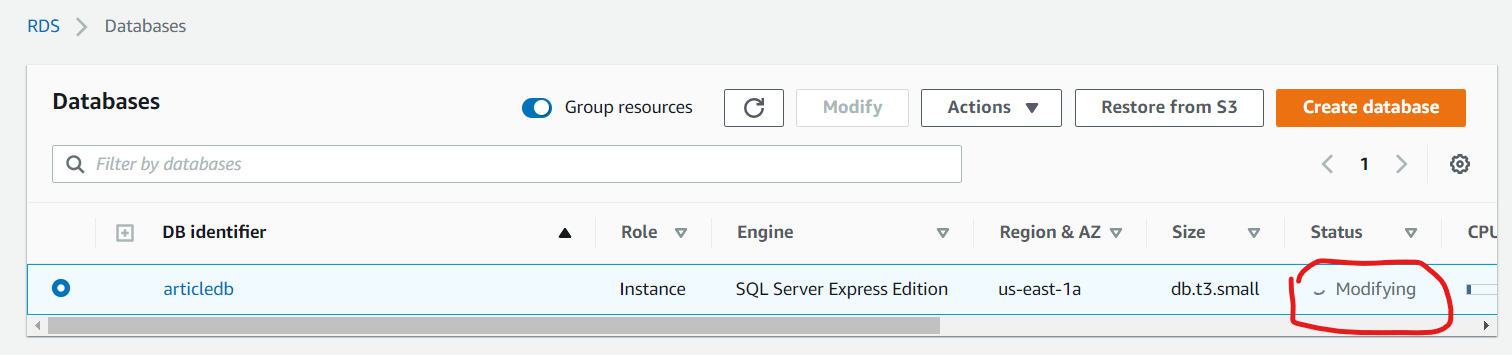 Figure 21: Modifying DB Instance
Retrying the Client Connection Using dbForge
Once the change is applied and the database becomes available again, we re-attempt the connection, This time it is successful (Figure 22).
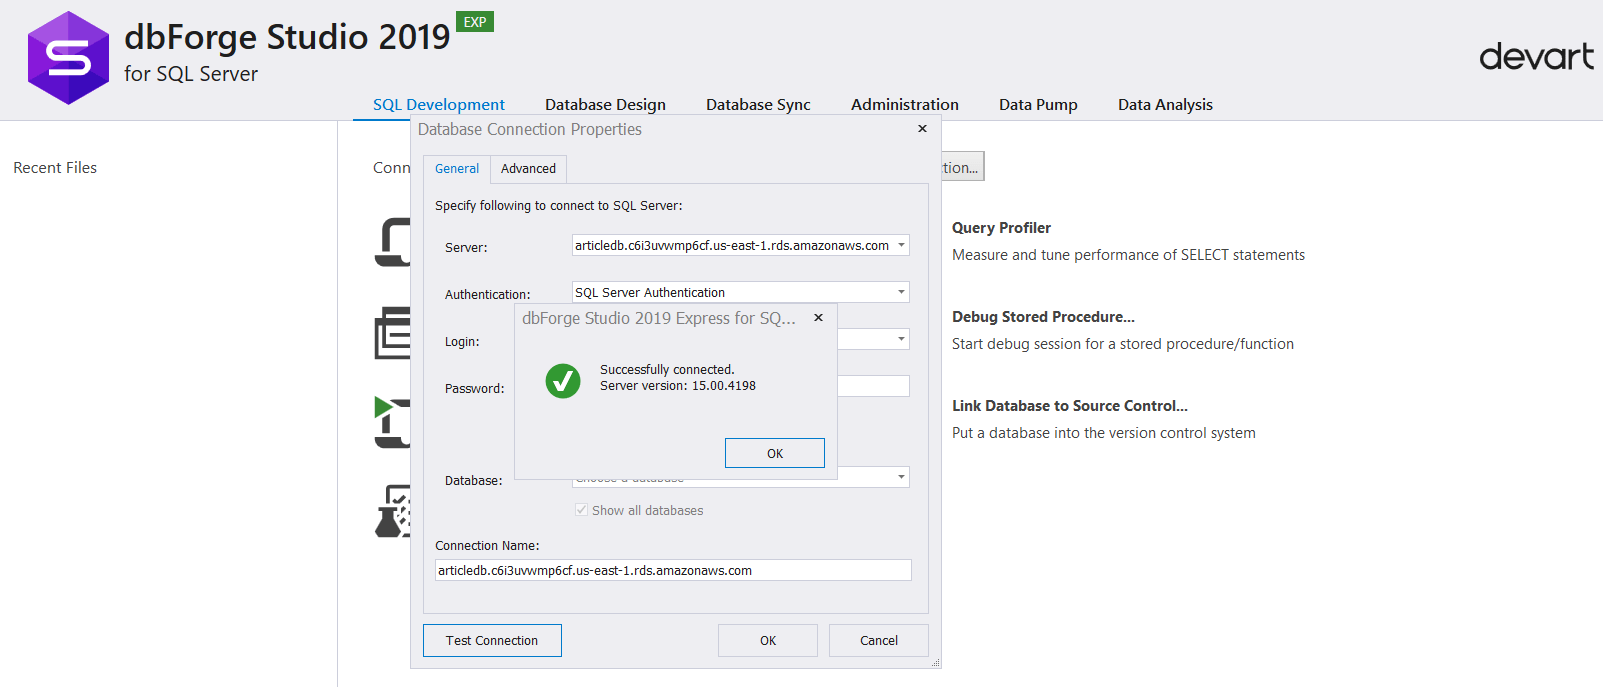 Figure 22: Successful Connection
Using our client tool, dbForge Studio, we shall go ahead and login to explore the instance further (See Figure 23). We can also create an additional user database in the instance (See Figure 23, 24 and 25). Notice the rdsadmin database which is an AWS proprietary database used to store objects for managing the Amazon RDS instance.
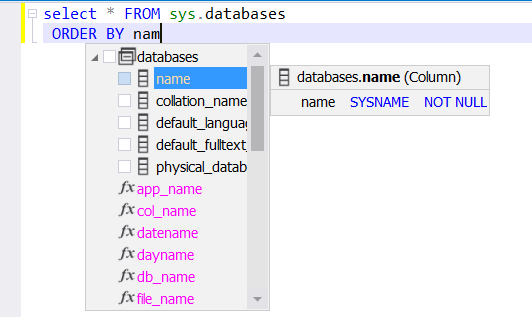 Figure 23: Query Default Databases in the Instance
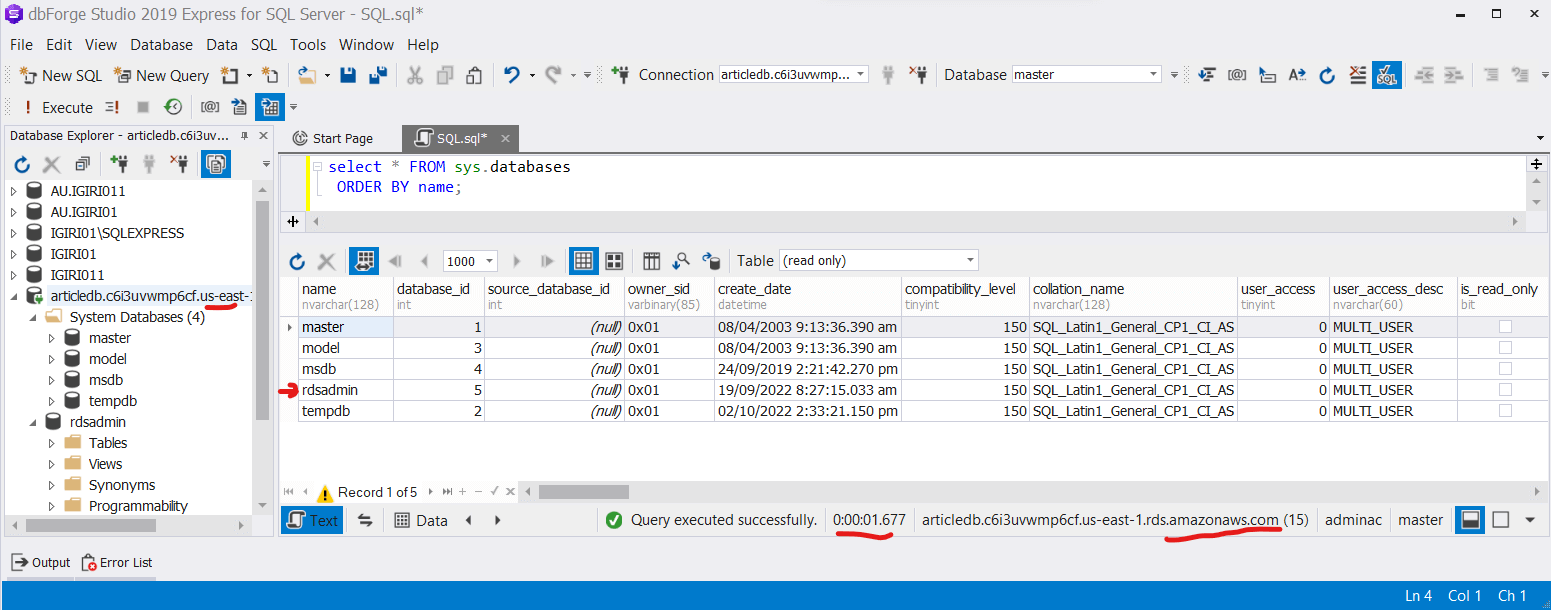 Figure 24: rdsadmin Database
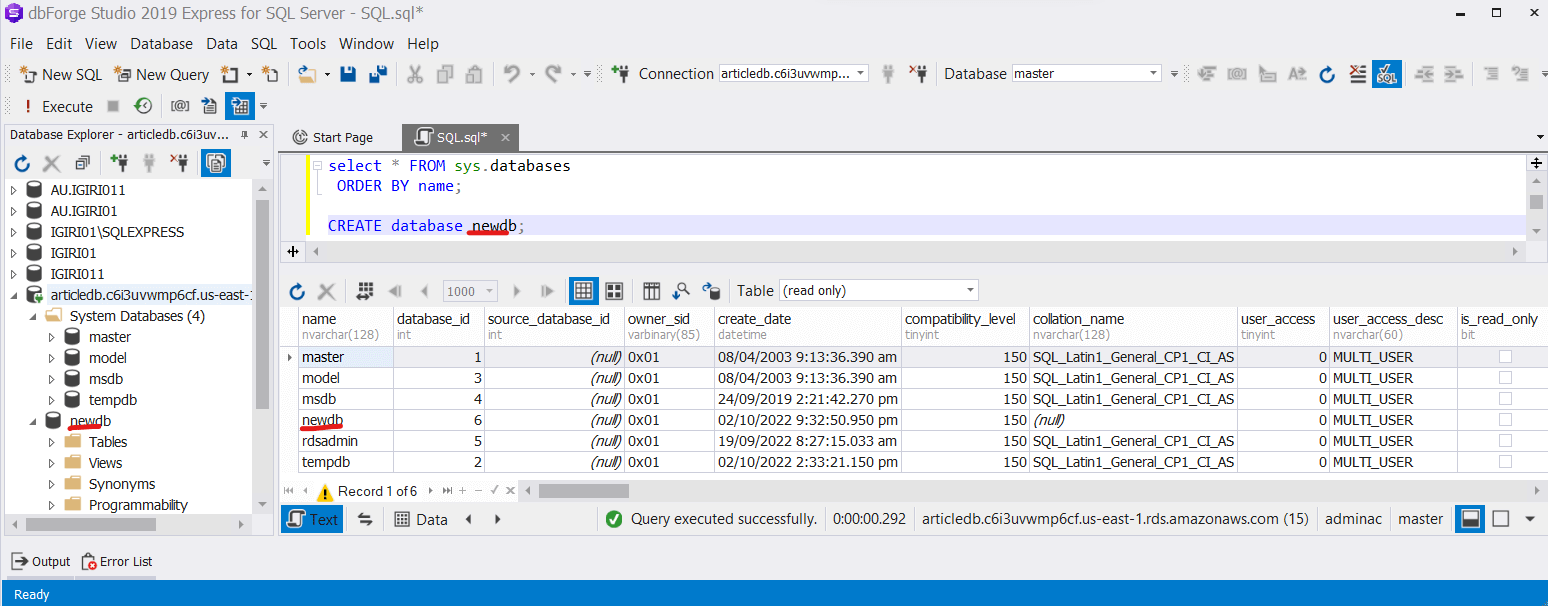 Figure 25: Create NewDB
Further exploring the environment, we query the sys.master_files table and discover that all database files appear to be on the same volume (See Figure 26). Since what we have deployed is an RDS instance, this underlying infrastructure does not matter to us and we do not have access to it anyway.
Conclusion
In this article we have demonstrated the two essential configurations necessary to allow access to an Amazon RDS instance. Connecting directly to Amazon RDS instance is not always required but when it is, the data engineer now knows exactly what to do on AWS to make this happen. We also explored the instance using Devart’s dbForge Studio, a complete IDE which offers such interesting features as advanced intellisense, T-SQL Formatting, Execution History, T-SQL Analysis and more. We also viewed briefly the rdsadmin database from AWS and how datafiles are stored by default in Amazon RDS instances.
