

Introduction
In the previous article, we have seen how to install the SQL Server database engine using Powershell DSC with multiple configurations. We have covered setting up service account credentials, custom installation directories, configuring TempDB and backup locations, defining user database paths, and more. We have also seen the installation of other SQL Server-related services like Integration Services, Analysis Services, and Reporting Services. This was all done using the simplicity and power of PowerShell DSC. In this article, we cover the installation of SQL Server Management Studio (SSMS) using Powershell DSC.
Environment
For the demo part, we use the server, CENTRALSERVER, to install SSMS.
SQL Server DSC Module Installation
Let us prepare the environment for DSC, including installing PowerShell DSC and SQL Server prerequisites in CENTRALSERVER. Open a PowerShell command line or PowerShell ISE tool as Run as Administrator. Then run this code:
# Install PowerShell Desired State Configuration (DSC)
Install-Module -Name SqlServerDsc
You may get this pop-up while installing the SqlServerDsc module. Click Yes to continue.


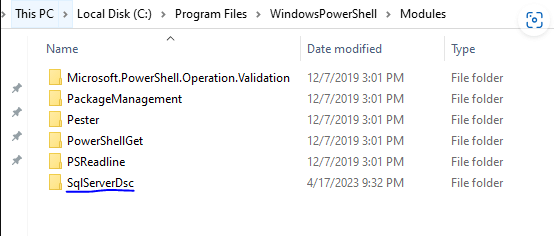
A folder with the module, named SqlServerDsc, will be created in the location C:\Program Files\WindowsPowerShell\Modules as shown below.

Download the SQL Server Management Studio (SSMS) Media File
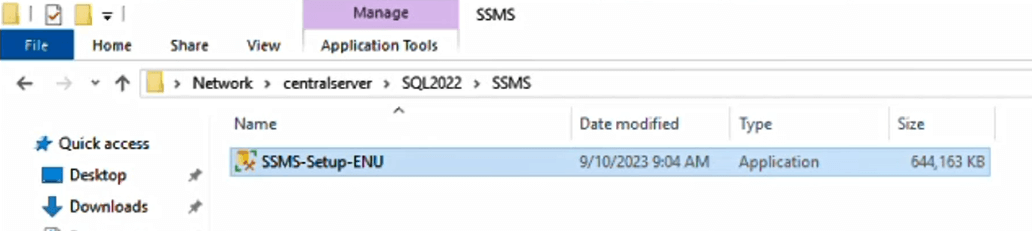
For the demo, we downloaded the SQL Server Management Studio 19.3 binary from the Microsoft site to C:\Downloads. Copy the file then to the CENTRALSERVER. In our case, we created a folder named C:\SQL2022 folder in CENTRALSERVER and made it a shared folder granting access to everyone. However, it is advisable to grant access only to the user performing the installation. We have created a subfolder inside the shared folder named SSMS. Hence the path to copy the SQL Server Management studio binary is \\Centralserver\sql2022\SSMS as shown below.
Create a DSC Configuration File
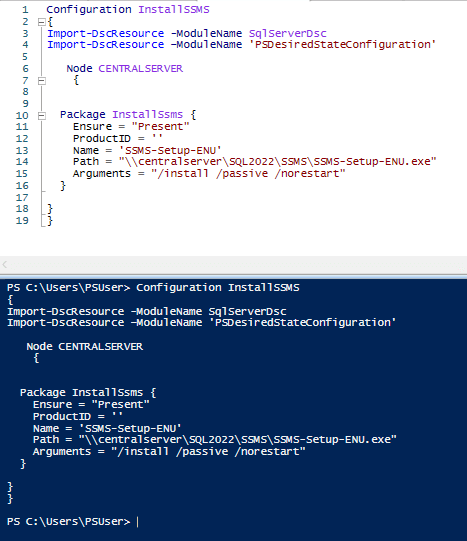
Next, you need to create a DSC configuration file that defines the desired state of the SQL Server Management Studio (SSMS) installation. This file includes resources, named Node and Package. The node resource specifies the server on which the DSC needs to be applied and the Package resource specifies the parameters required to install SSMS, such as the Name, Path, Arguments, ProductID, etc.
Note that ProductID is mandatory but can be an empty value as well. We can also supply the ProductID if we have one from the previous installation.
The below PowerShell script creates the configuration function named InstallSSMS. Ensure the Powershell ISE is opened as 'Rus as Administrator'
Configuration InstallSSMS
{
Import-DscResource -ModuleName SqlServerDsc
Import-DscResource –ModuleName 'PSDesiredStateConfiguration'

   Node CENTRALSERVER
    {

    Package InstallSsms {
        ProductID = ''
        Name = 'SSMS-Setup-ENU'
        Path = "\\centralserver\SQL2022\SSMS\SSMS-Setup-ENU.exe"
        Arguments = "/install /passive /norestart"
                        }

     }
}
The below image shows the output of the configuration function execution.
Compile the DSC Configuration File
After creating the DSC configuration file, you need to compile it into a MOF (Managed Object Format) file. This file is used to configure the server and install SQL Server Management Studio. Here is the PowerShell script to compile the DSC configuration file. Create a folder named C:\DSC for saving the MOF file. Then run the compilation.
# Compile the DSC configuration file
InstallSQLServer -OutputPath "C:\DSC"
This script creates the mof file in the C:\DSC folder, named CENTRALSERVER.mof. The output of the compilation step is shown below

Apply the DSC Configuration
Once you have the MOF file, you can apply the DSC configuration to the server using PowerShell. This will initiate the installation of the SSMS, and DSC will ensure that the installation is completed according to the defined configuration. Here is an example PowerShell script to apply the DSC configuration:
# Apply the DSC configuration
Start-DscConfiguration -Path "C:\DSC" -Wait -Verbose -Debug -Force -ErrorAction SilentlyContinue
The below image shows when the installation is completed
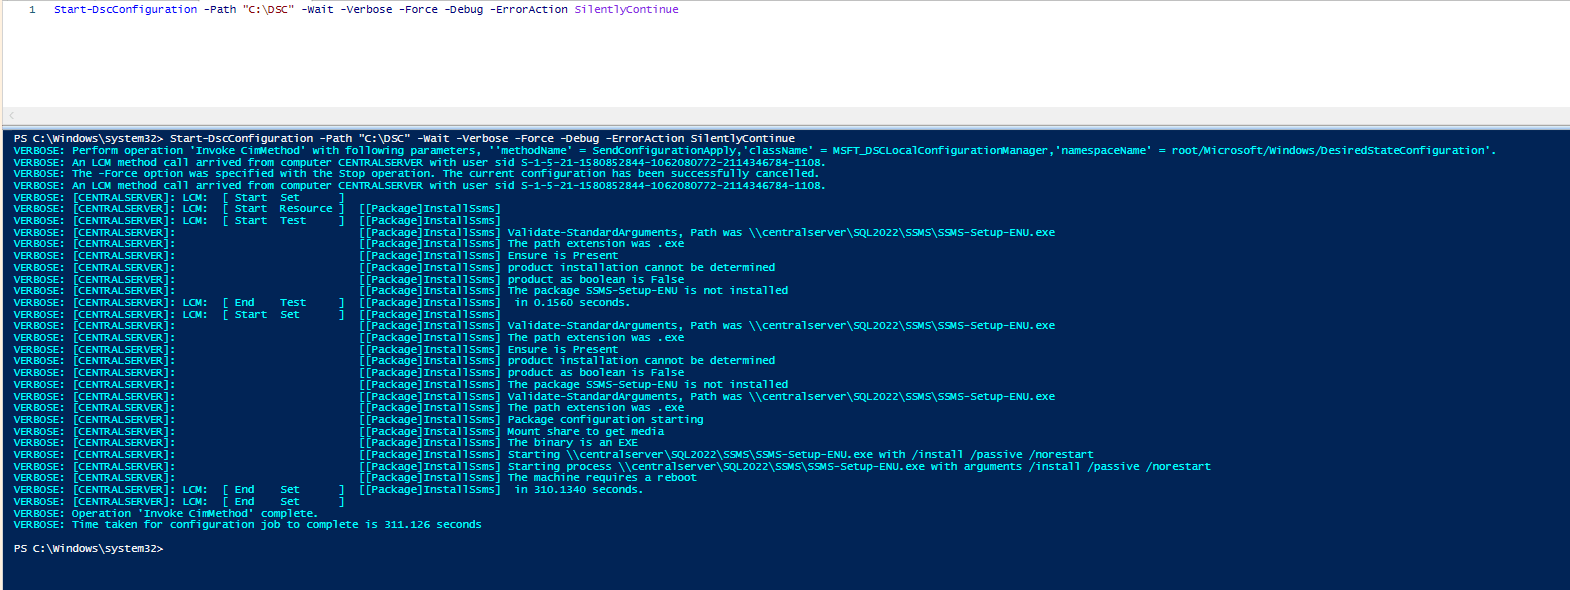
Reboot the server.
Verify the Installation
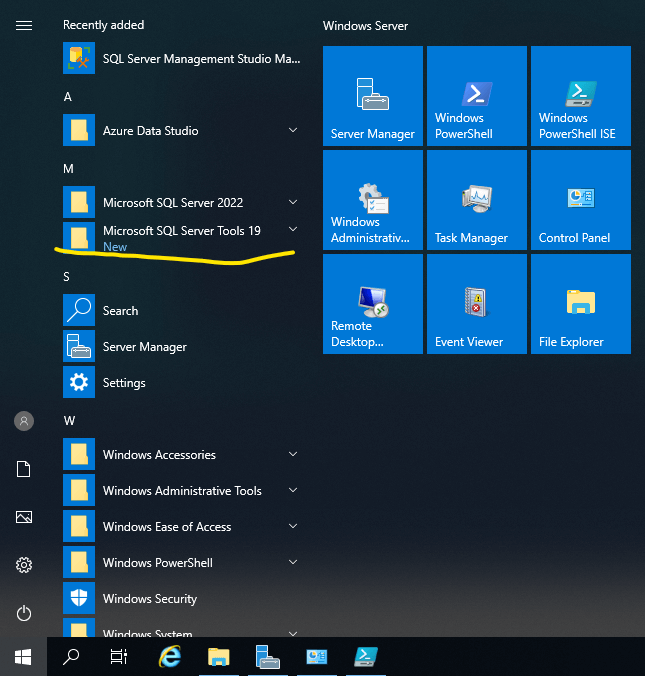
After the installation is complete, you should verify that SQL Server Management Studio is installed properly. For that, we can search the windows for the folder Microsoft SQL Server Tools 19 and ensure we have SQL Server Management Studio inside the folder as shown below.

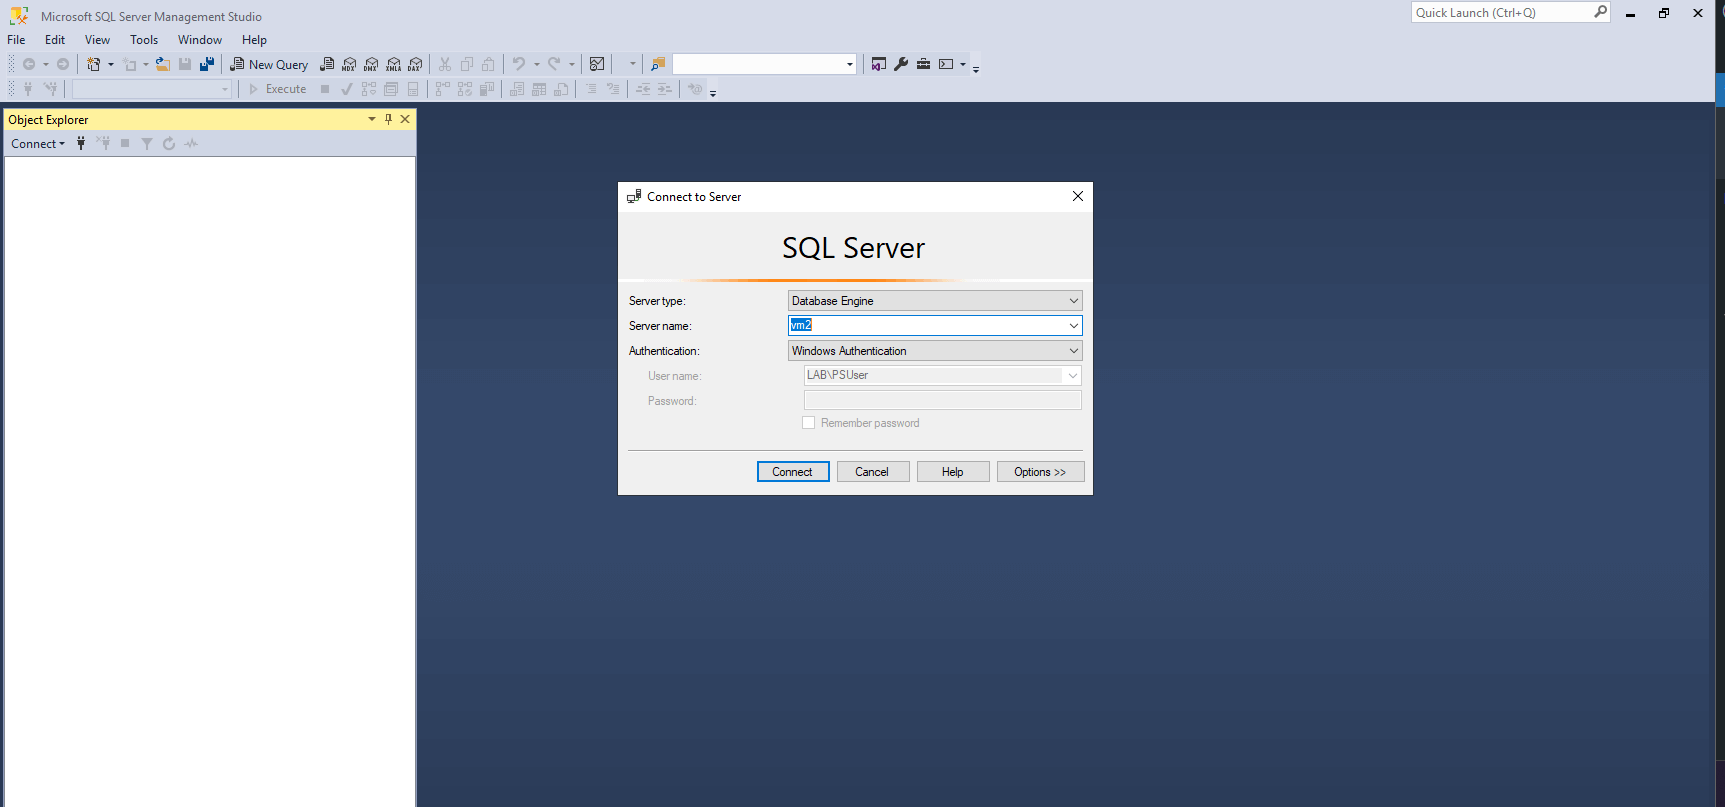
Open the SQL Server Management Studio and check if it is opening properly as shown below.
Summary
The article provides steps on how to use PowerShell Desired State Configuration (DSC) to install SQL Server Management Studio in a local\remote server.
