

When SQL Server was ported to the Linux operating system, Microsoft realized that they needed a tool that could be used to work with SQL Server instances on that platform. Porting SSMS would have been a very large project, and potentially not even possible, but Visual Studio Code was a development GUI that already ran on Windows, Linux, and macOS. Microsoft decided to fork this tool and build a cross platform data management tool.
Azure Data Studio (ADS) is the result. This article will examine how to get started with this tool and connect to your SQL Server instances. We will also cover a few common configuration items that might make working with ADS easier.
I've written a few articles on how ADS works, shown here:
- Getting Started with Azure Data Studio
- Getting Comfortable Writing Code in Azure Data Studio
- Using Notebooks in Azure Data Studio
- Using Azure Data Studio with TFVC
- Using Azure Data Studio with Git
- Editor Tips and Tricks for Azure Data Studio
- Using the Import Extension in Azure Data Studio
- The Profiler Extension in Azure Data Studio
Downloading ADS
The first step in getting started is to download the tool. You can browse to the download page for Azure Data Studio at: https://docs.microsoft.com/en-us/sql/azure-data-studio/download?view=sql-server-2017. Next, find the download file for your operating system.
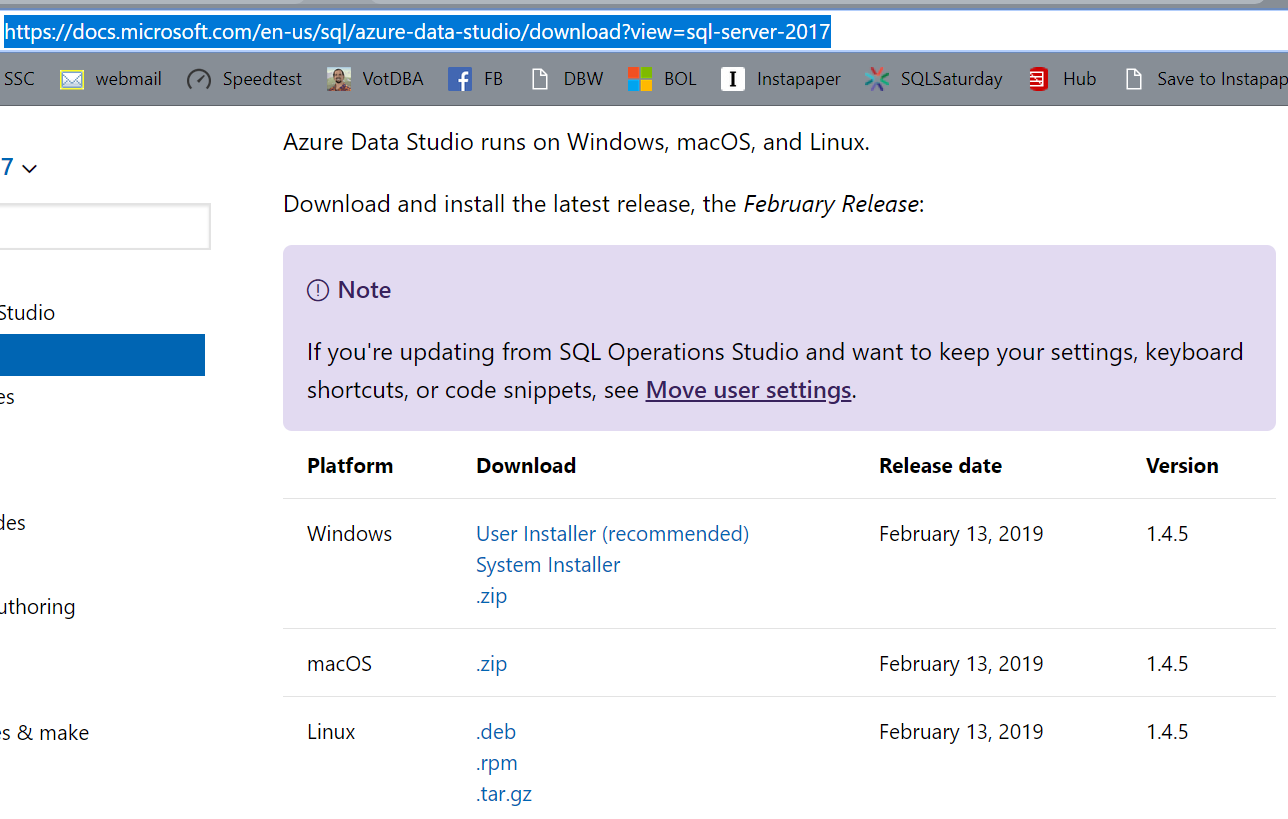
This will start a download for the file you selected. Each operating system is a little different for the install and that page contains instructions for each OS.
I chose the installer file for Windows, and once the download completed, I clicked the executable to start the installation.
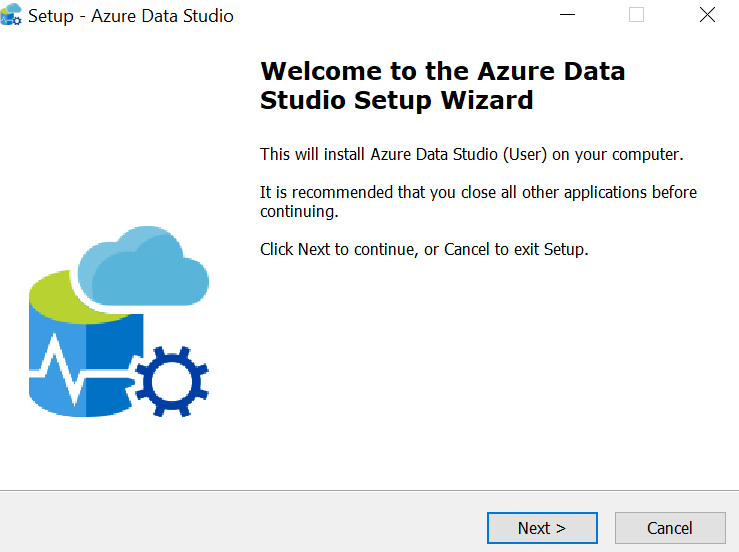
This begins a fairly standard Windows wizard. Welcome screen, accept EULA, pick a path, etc. You can work your way through the install like any other Windows program. The one place to perhaps change the defaults is on this page.
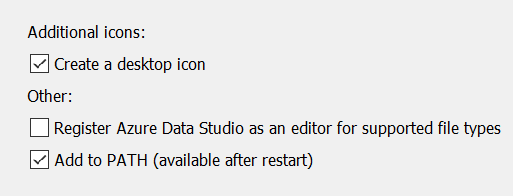
The default for me was not to register this as the editor. I left this alone since I often use SSMS still and prefer that .SQL files open there. You might choose to change this for your system.
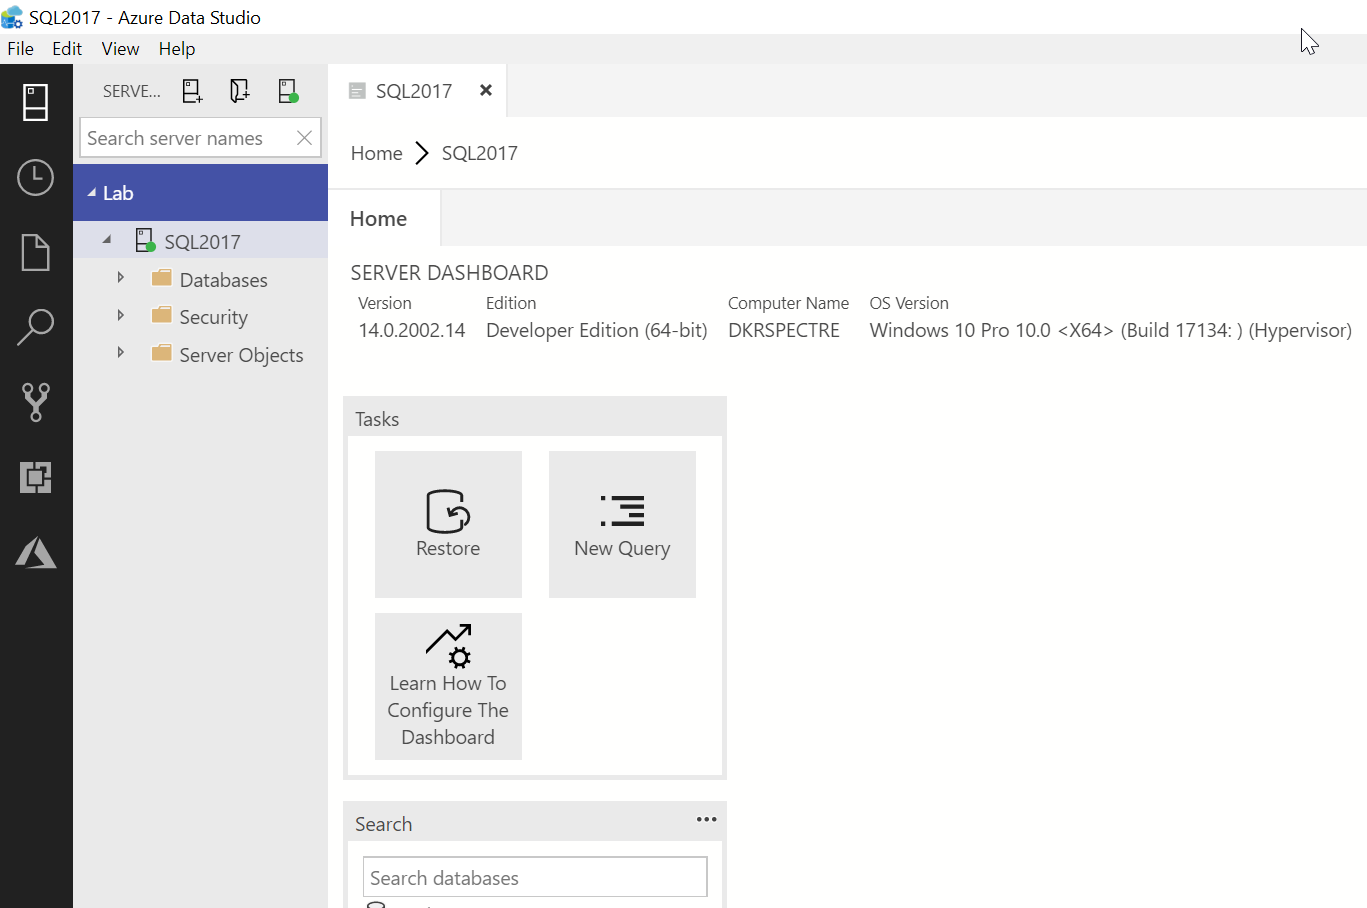
Once the wizard completes the installation, by default this will launch ADS when you click Finish. When ADS launches, you should see this:
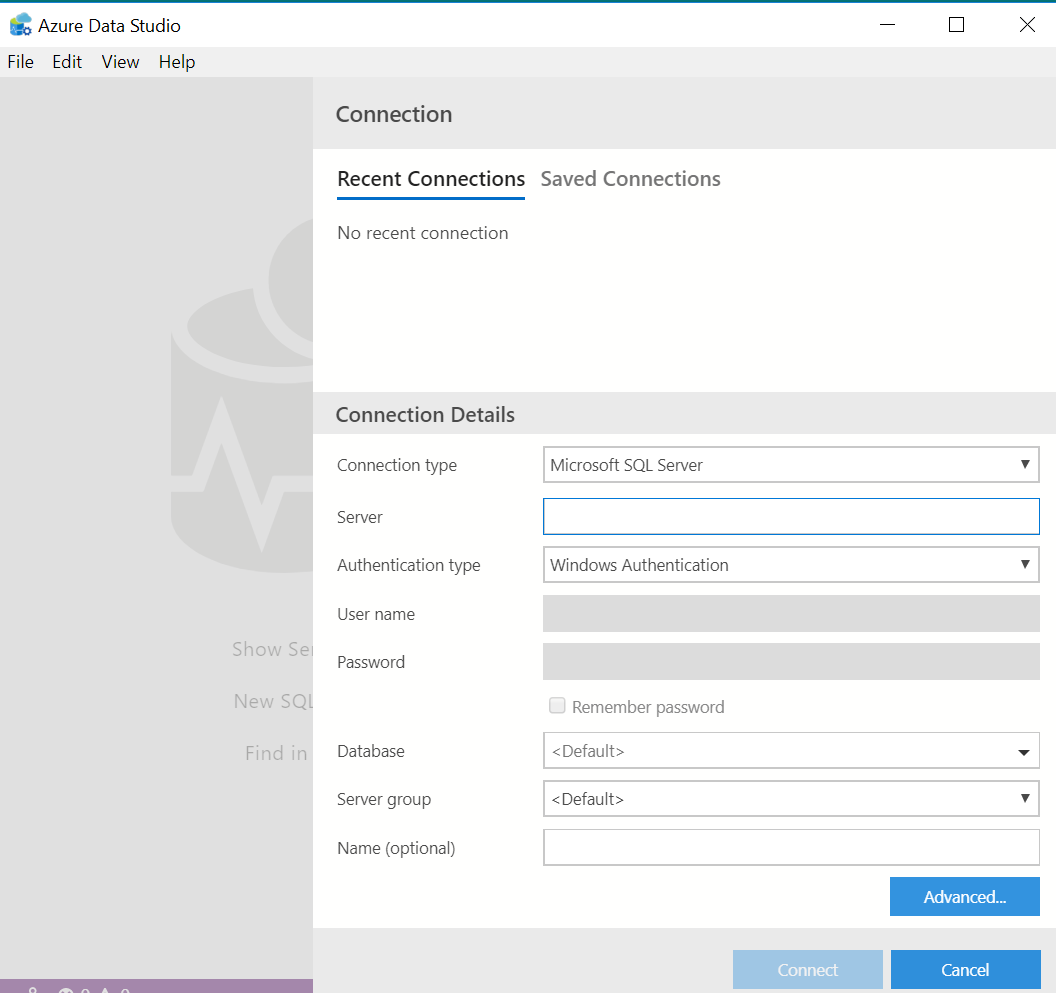
This is the tool with a connection dialog for an instance. Let's see how this works.
Querying an Instance
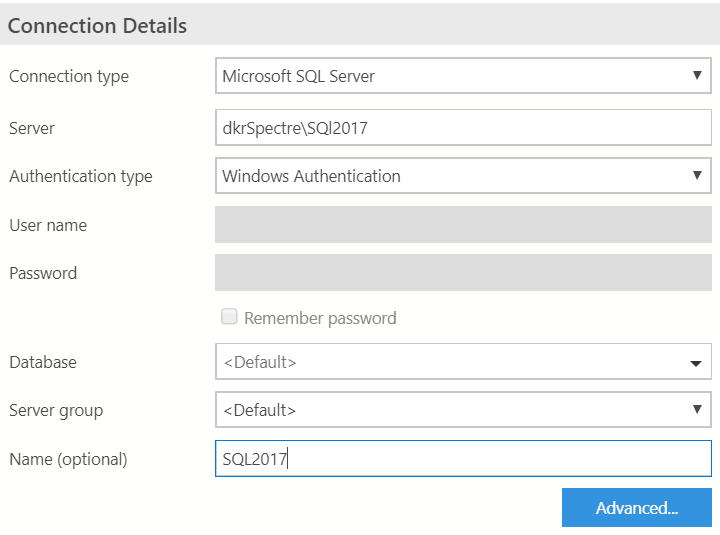
The connection details are the typical items that you expect to use. An instance address in standard format, credentials, a database context, and optionally, a name for this connection. I've filled out mine as shown here.
If you click the "Advanced" button, you get some different options.
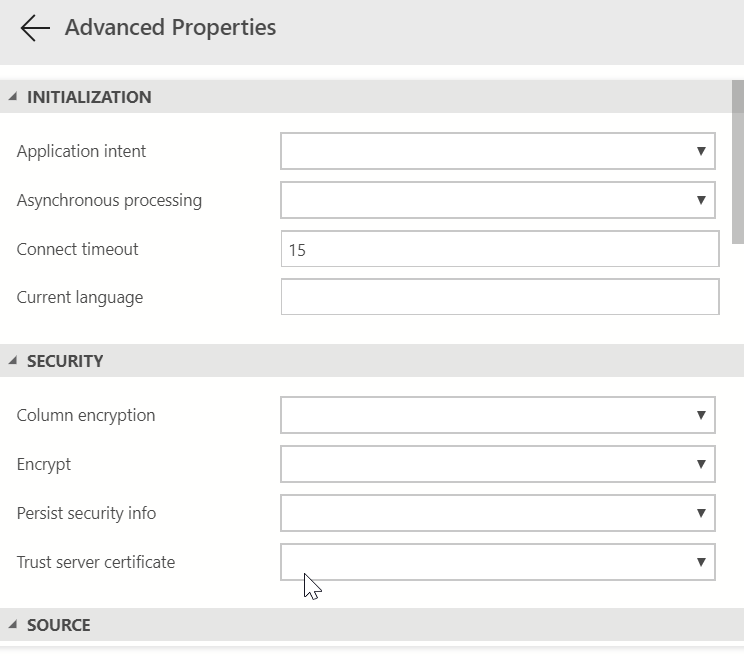
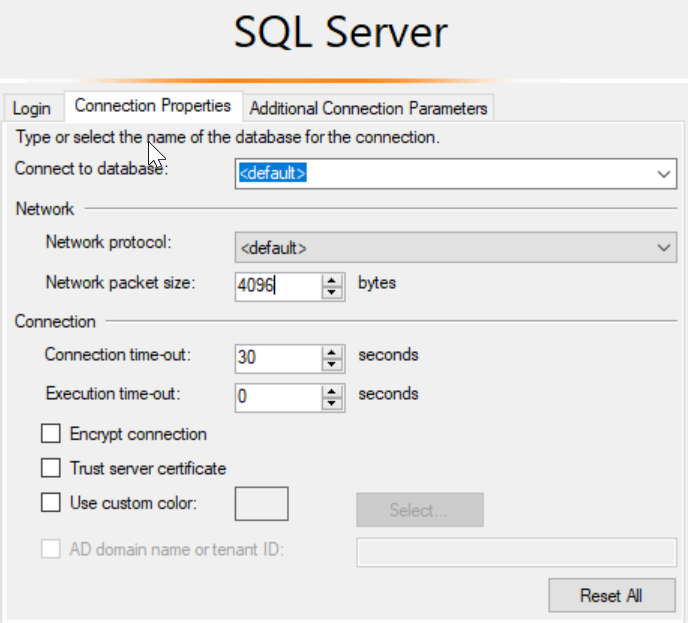
Some of these are the same in SSMS, but some aren't. Here are the options in my SSMS 17.8.1 connection dialog.
Not quite the same, especially for application intent. Of course, SSMS has an ad hoc panel where you can enter other parameters you want to use.
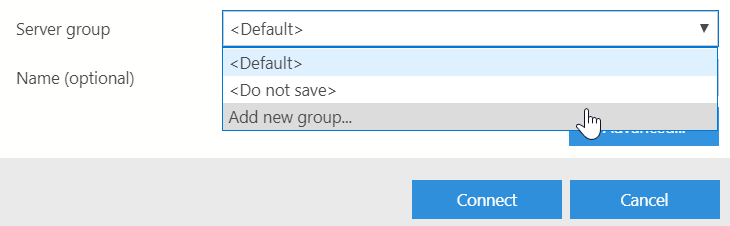
ADS allows us to group servers, as many people would like. A drop down at the bottom of the connection dialog has options for picking an existing group or adding a new one. I will select the "Add new group" option.
Selecting this brings up a new dialog where I can enter a name, description, and choose a color for the connection.
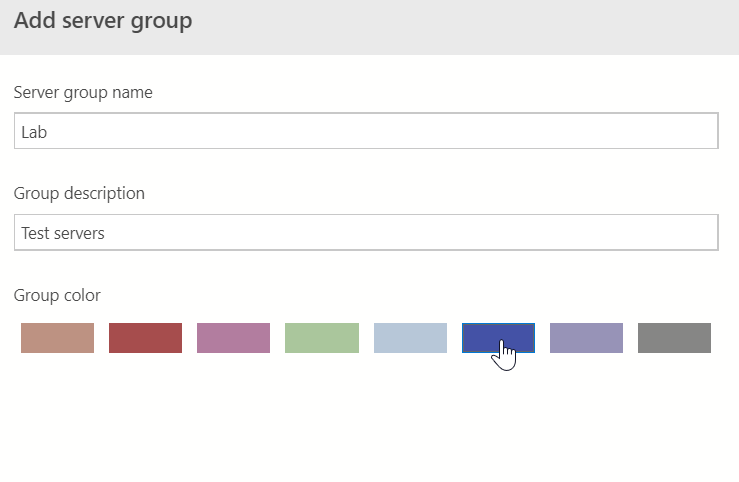
I'll click OK here and then Connect to open a session on my instance. When I do that, ADS will open a connection and give me a dashboard on the right side of the screen. On the left, I'll see my server groups and then a set of menu icons on the far left.
Let's get oriented.
The Sections
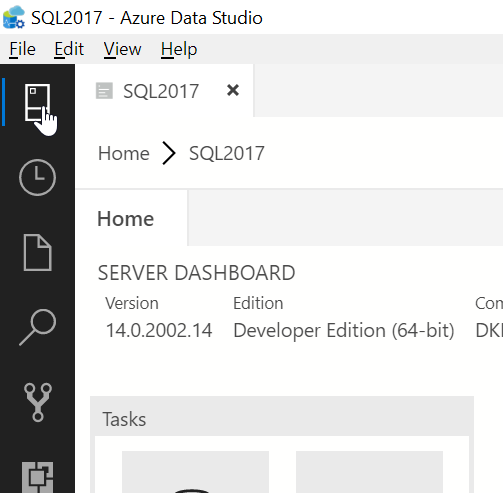
There are really three sections in Azure Data Studio. There are the tabbed areas where you work, which are the large areas. The dashboard takes up one of these areas. On the far left is the menu column, which contains these items:
- Servers
- Task History
- Explorer
- Search
- Source Control
- Extensions
- Azure
Each of these can be clicked and it will open or close the middle column, with details for that menu item. For example, if I click the Servers button, it closes my connection list.
Clicking Explorer opens a different column.
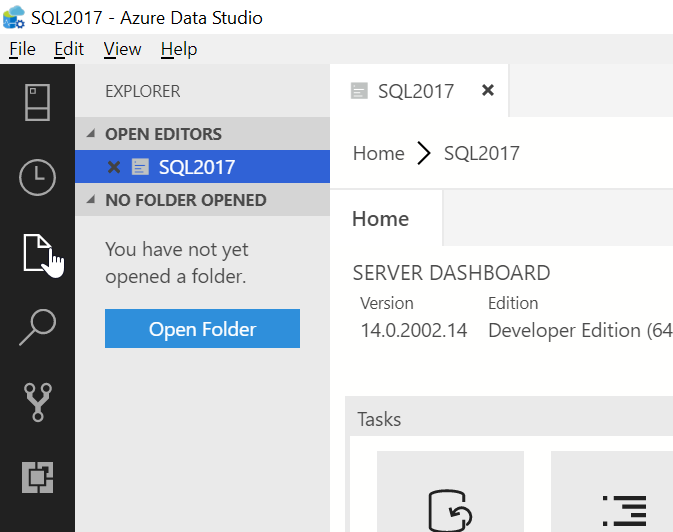
If I just click Source Control, I see this.
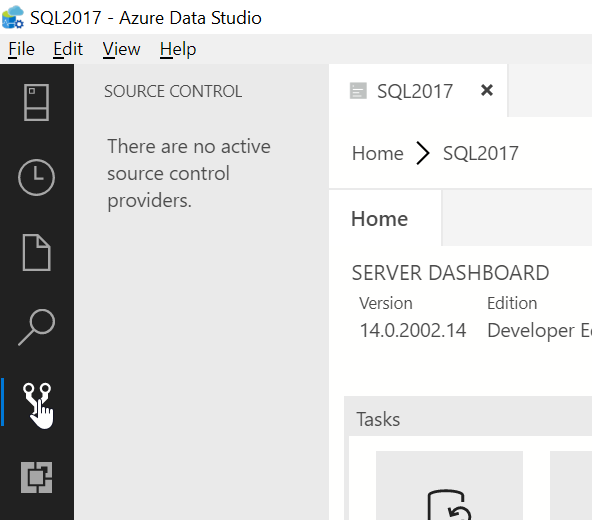
Clicking these will toggle the column open and closed.
The top menu contains File, Edit, etc. with various options that are useful. There are a couple of other items to point out.
Extensions
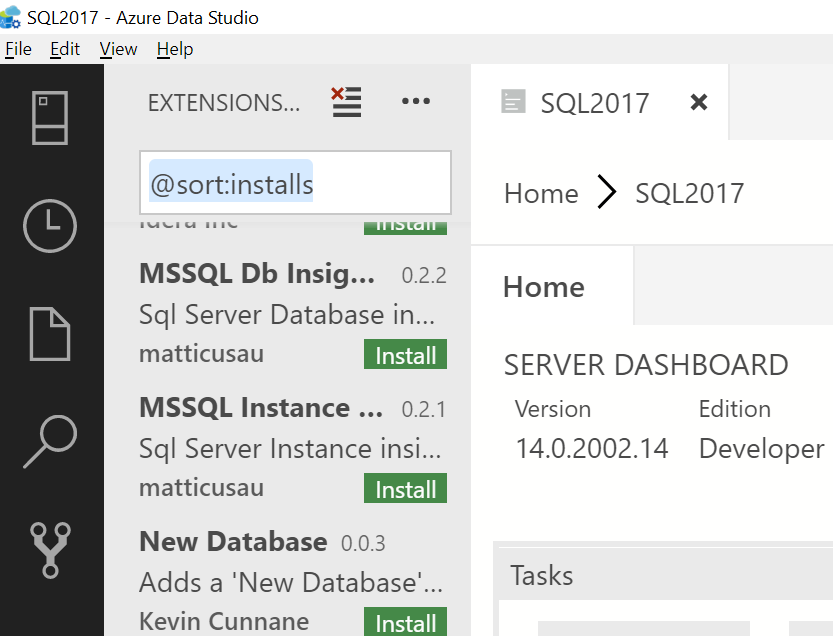
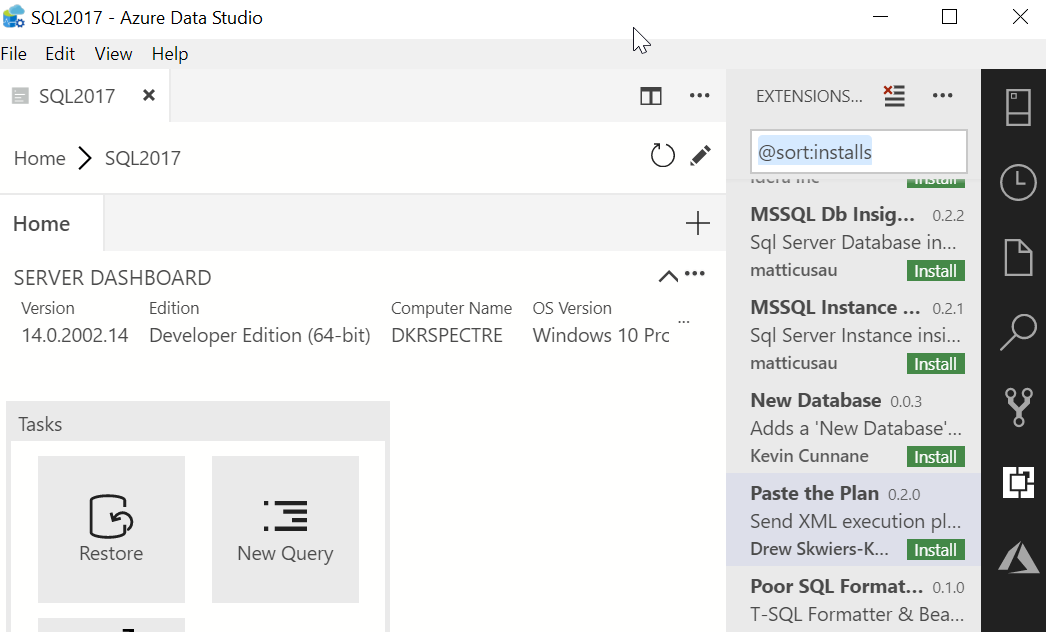
The Extensions menu contains various add-ons for ADS, similar to add-ons for Visual Studio Code. If you click this, you see a list of extensions by Microsoft, other companies, and various individuals.
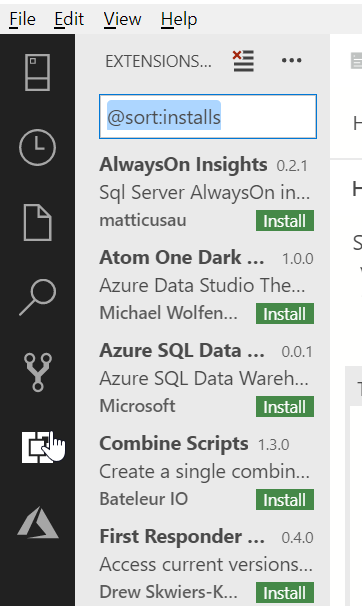
If you click on an extension name, you'll see details in the main tabbed area. Actually, a new tab will open for extensions.
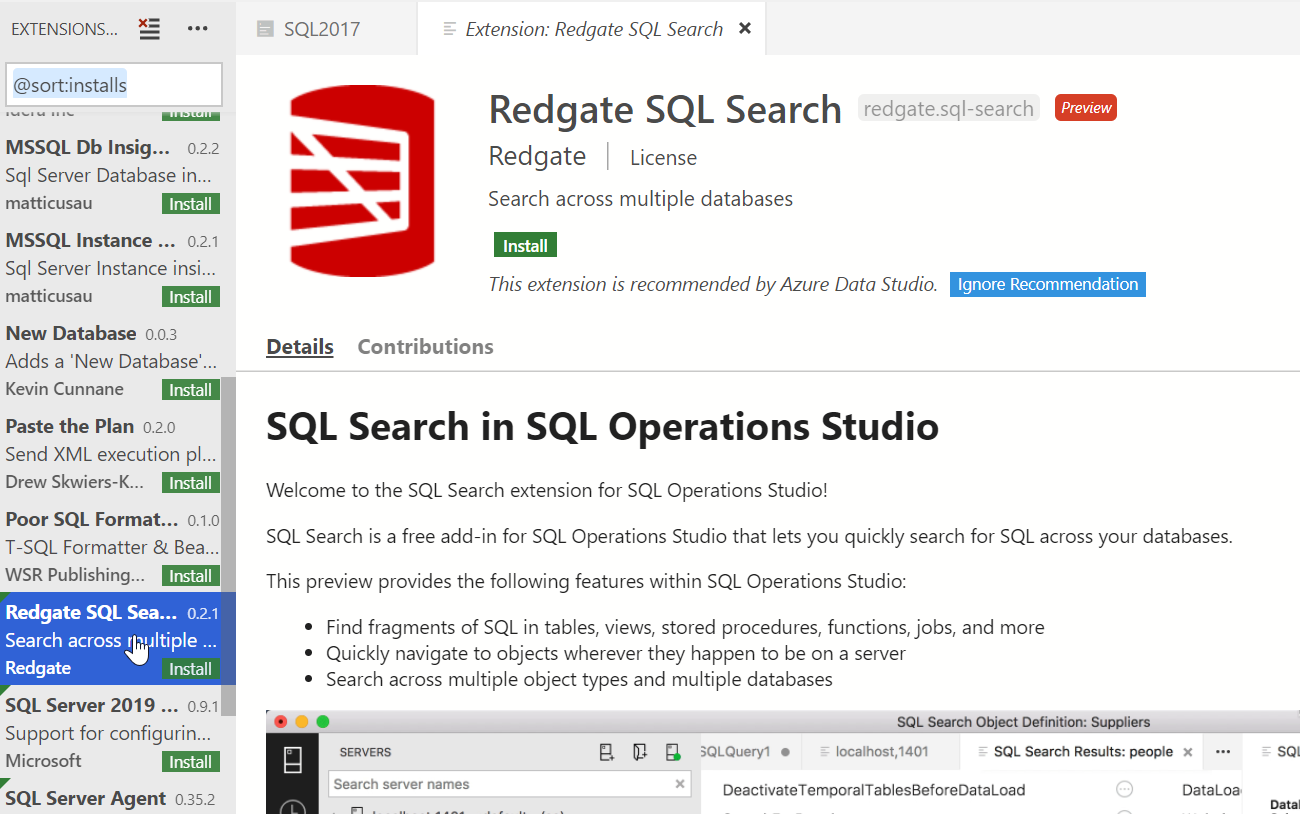
I've written about installing the SQL Search and keymap extensions on my blog. It is easy to do, though not as seemless as I'd like. Read those posts to learn how to install any of these.
The Command Palette
Most, in fact likely all, of the settings and changes you want to make in ADS can be done from the command palette. You can open this from the view menu or click CTRL+Shift+P. This brings up a list of commands, recently used ones at the top, and a search bar.
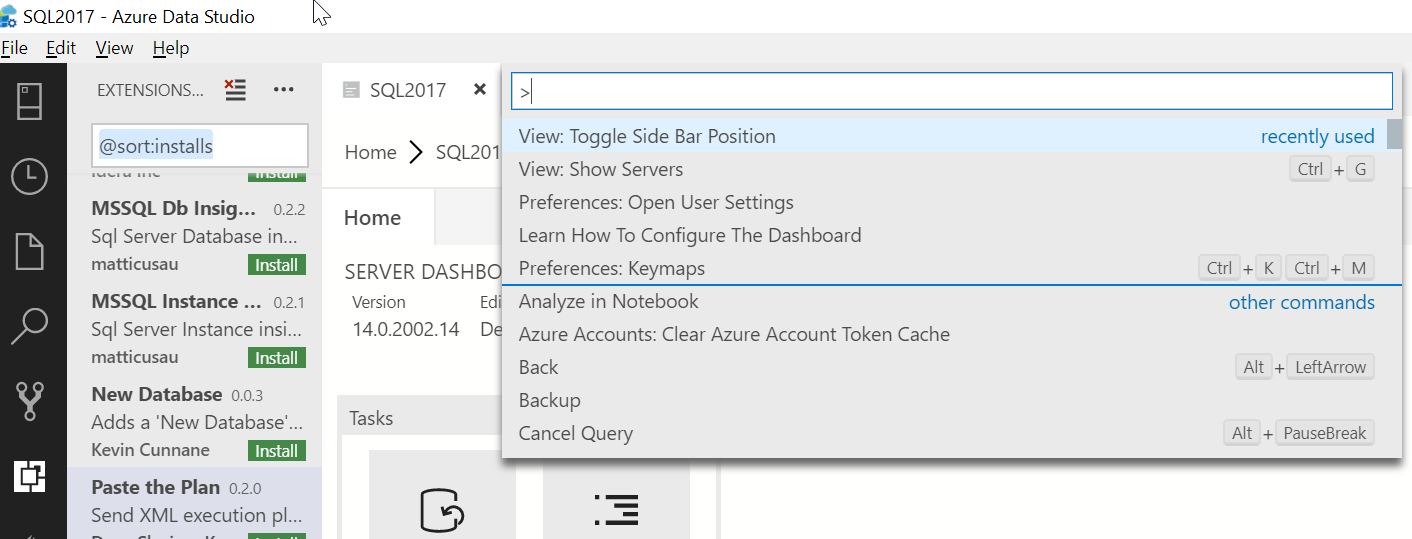
You can type anything in the box and the palette will search for different options. For example, if I type "zo", I see this:
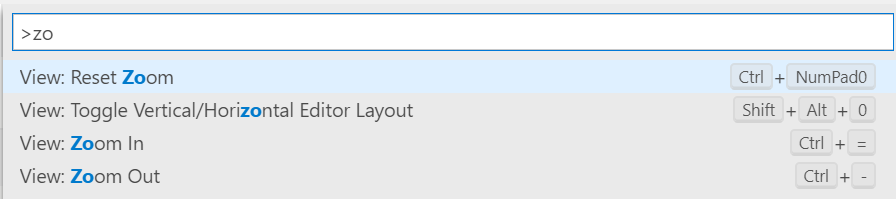
From here, I can arrow down to select a command, or if available, I see the shortcuts on the right side of the palette. If I select Zoom in, and the click CTRL+, I'll get the main part of ADS zoomed in.
One of the main things I like to do is keep the working window still, so I often move the menu items to the right. In my command palette above, toggle sidebar position is shown. If you type "sidebar", you will see "Toggle Sidebar position". Click that and the menus move to the right.
The same option moves them back.
Running a Query
The main purpose behind ADS is to give you a query tool that consistently works on all platforms. Let's see how to run a query. On my Dashboard, I'll click the New Query button. This opens a new tab. I could also do this in the File menu.
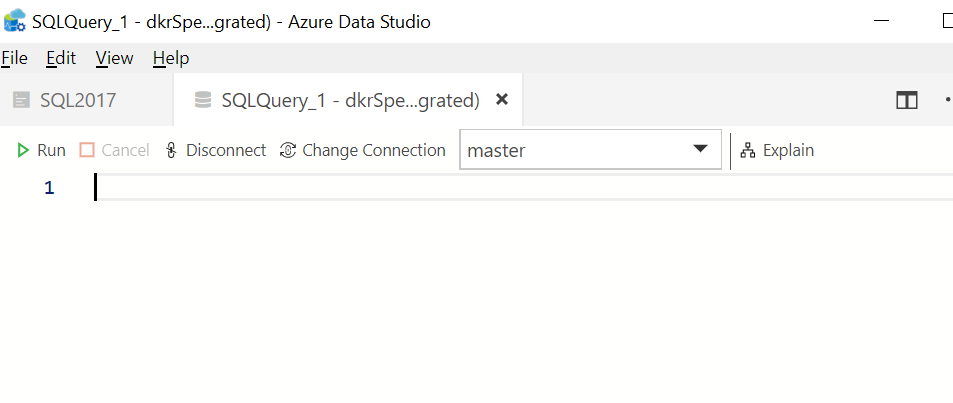
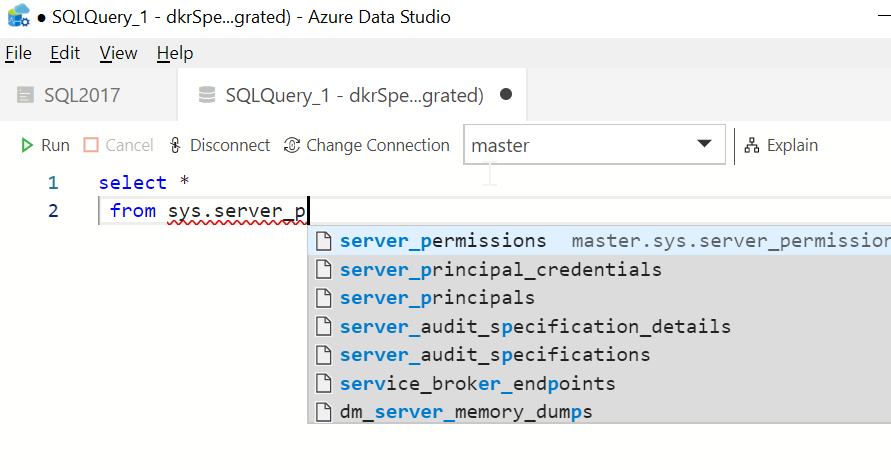
I can start typing a query, like I would do in SSMS. By default, intellisense is enabled and tries to help me.
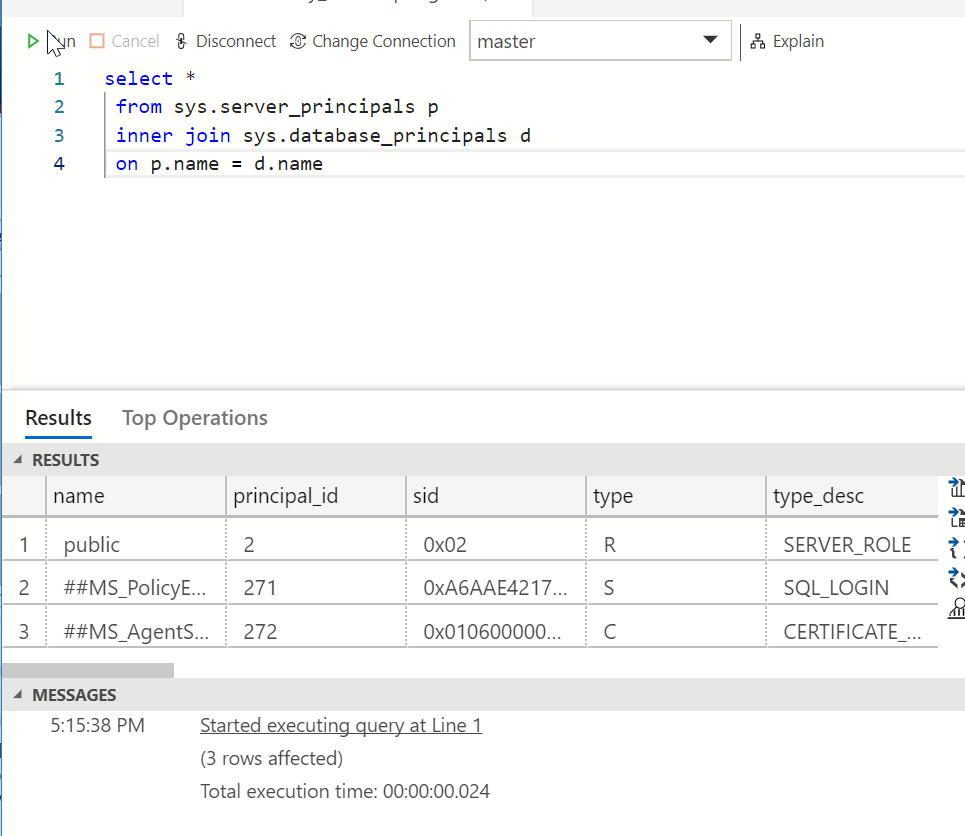
When I have my query written, I can click "Run" at the top. This will run the query and return the results and messages panes below the query.
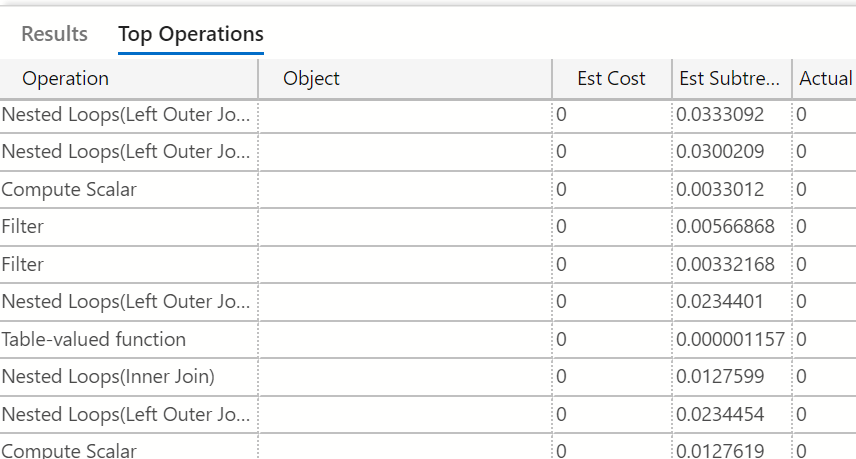
I can click the Top Operations item to see the query plan in a result set format.
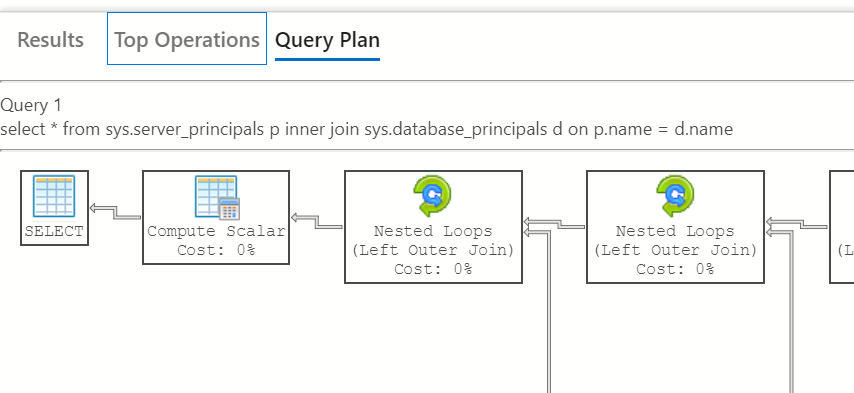
 If you click "Explain" at the top, you will see the graphical query plan.
Those are the basics of running a query, but there's much more to do in the future.
Summary
This is a short introduction to working in Azure Data Studio. We covered the install, a basic orientation of the tool, and ran a query against an instance. Download ADS today and give it a try.
There is much more to explore, and I plan to use this tool to do more and compare it with SSMS. I still prefer SSMS for now, but perhaps that will change over time. In future articles, we will look at how to better use ADS to get your work done more effectively.