

Azure Data Studio (ADS) is a lightweight IDE built on Visual Studio Code. I've written a few articles on how the tool works, and I've got a few more coming. I covered a basic orientation and a more in-depth one on some of the code writing features. In this one, I wanted to cover a handy extension that makes it easy to import files, something that many of us do regularly. This article will look at installing and using the Import extension with csv files. A future article will look at other file types.
I've written a few articles on how ADS works, shown here:
- Getting Started with Azure Data Studio
- Getting Comfortable Writing Code in Azure Data Studio
- Using Notebooks in Azure Data Studio
- Using Azure Data Studio with TFVC
- Using Azure Data Studio with Git
- Editor Tips and Tricks for Azure Data Studio
You can download the tool and read those articles to learn about how to use this in writing code. I've gotten more comfortable with the tool, and while I still like SSMS, there are some features in ADS that I prefer.
The Import Extension
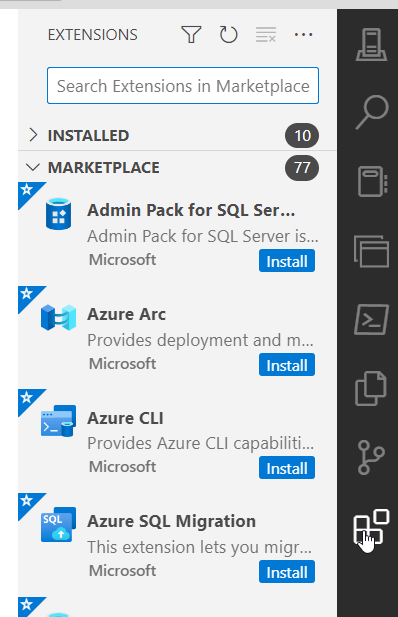
In Azure Data Studio, there is an Extensions item in the side bar. For me, that's on the right, but once you click it, you should see a list of installed extensions and the marketplace. Or at least those entries if you've collapsed them. In the image below, I have collapsed my installed extensions, but you can see a list of Marketplace extensions.
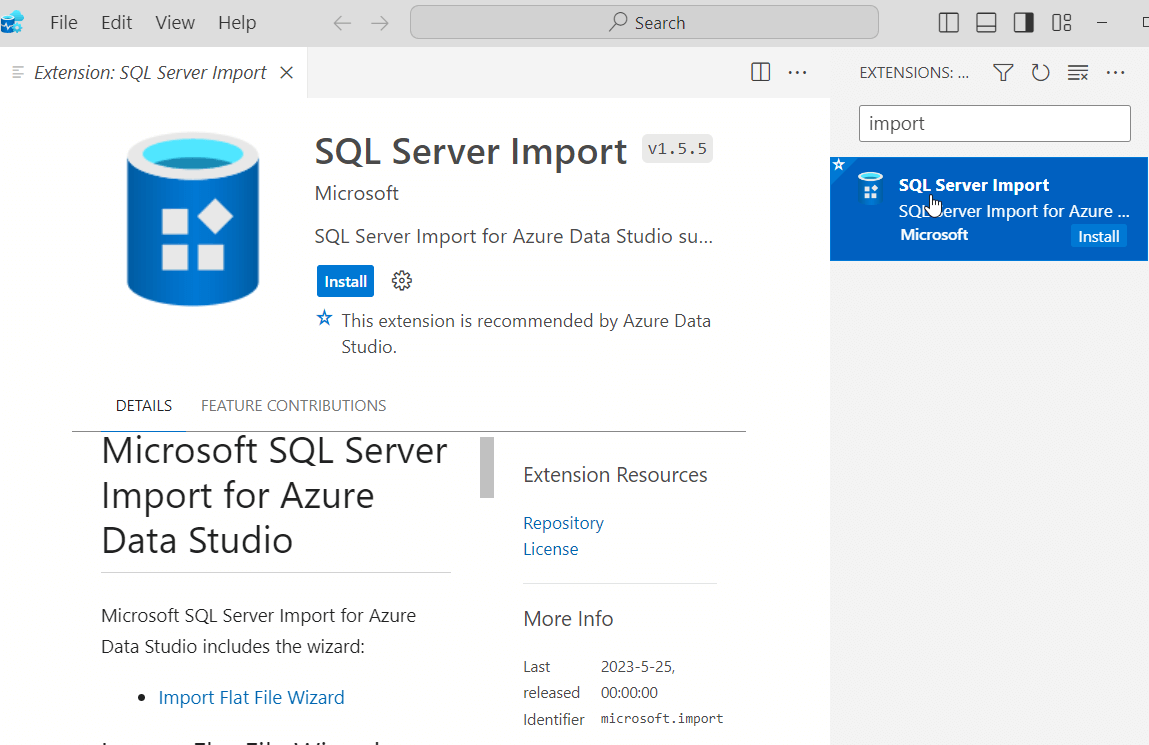
If I type "import" into the search at the top, I will see the extension I want. If I click it in the sidebar, the main description page will open up. As you can see, this isn't installed as there is an "install" button listed. Below this I have some information, such as this includes the Import File Wizard. Click "Install" to add this to ADS.
Once this is installed, this can be launched by clicking Ctrl+I.
Using the Extension
This extension works in a similar way as the Import Flat File Wizard works in SSMS. If I connect to an instance, I can press CTRL+I, or I can right click a database in the server explorer. You can see the import entry in the right click menu below and the shortcut listed.

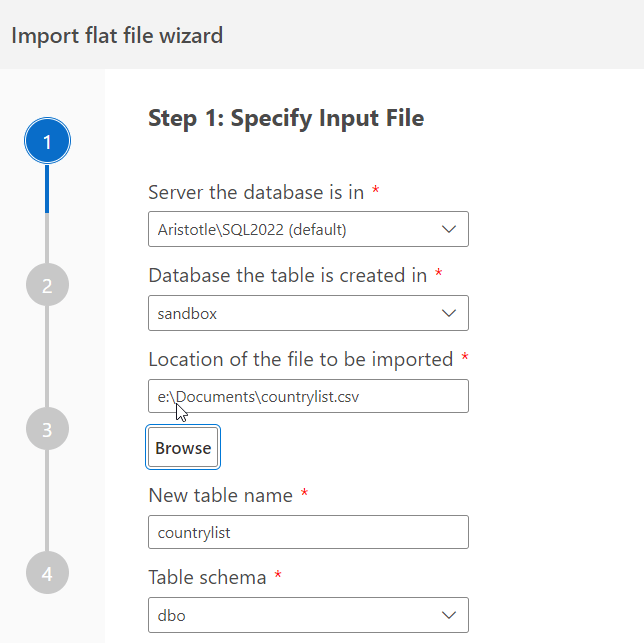
Once the wizard opens, I have to set some parameters. If I've opened this from a connected session (as I did), the instance and database are selected. If I right click and select "Import wizard", I get a connection dialog. Poor context awareness, at least as of Nov 2023.

I don't get to pick an existing table, so for me, this is often a wizard I use to load data, and then I will move it with T-SQL to a destination and drop this staging table. If I have a problem in the import, I'll need to drop the table before I can re-run this and try another load.
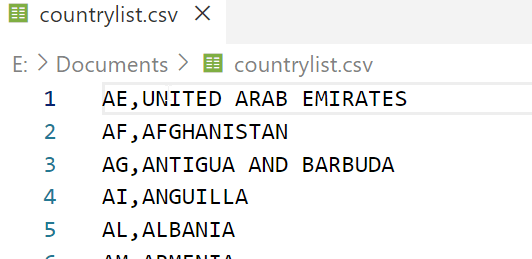
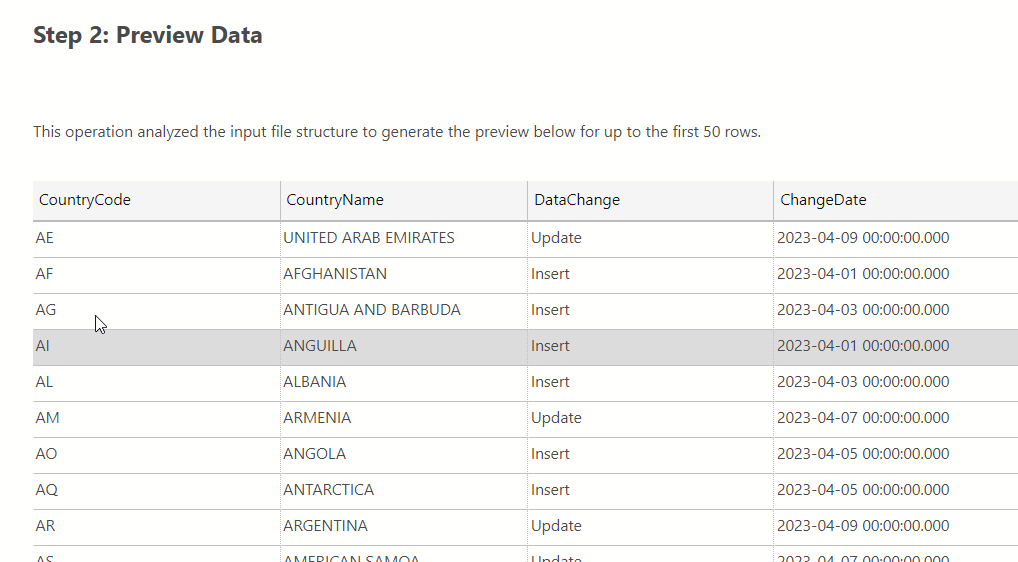
I'll pick the file I have, which is a csv, and then give a new table name. You can see the details below. I've also attached my countrylist.csv file in the Resources section.
When I click Next, I see a preview of my table. This looks good, as I just have two columns. If I had more, I could scroll right to see them. I'll cover the derived column later in this article.
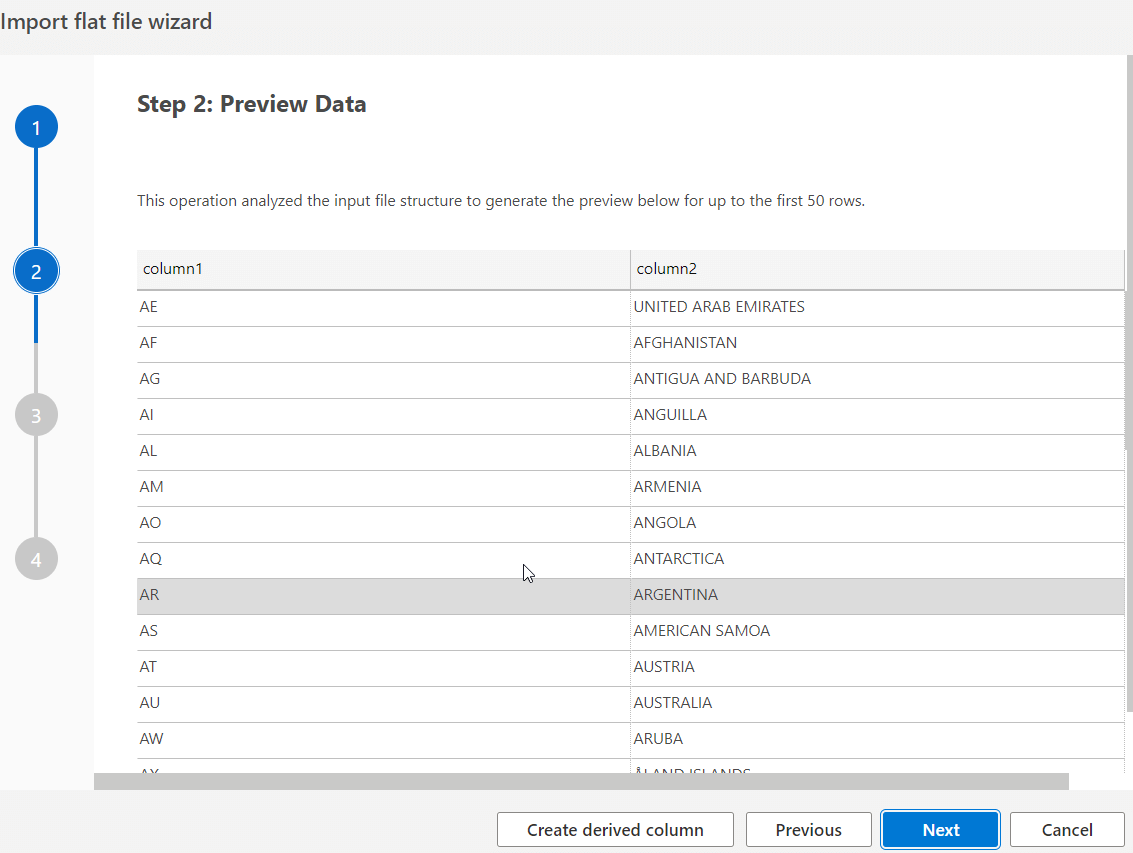
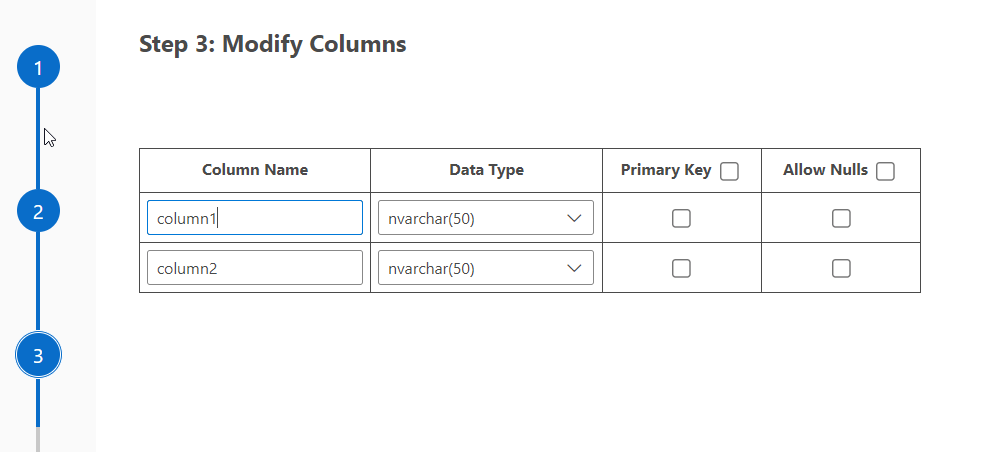
The next step is to structure my destination table. This defaults to the column names in the preview. In my case, you can see my file below and I had no header, so the columns are column1 and column2.
The wizard shows me the two columns, and I can make changes here.
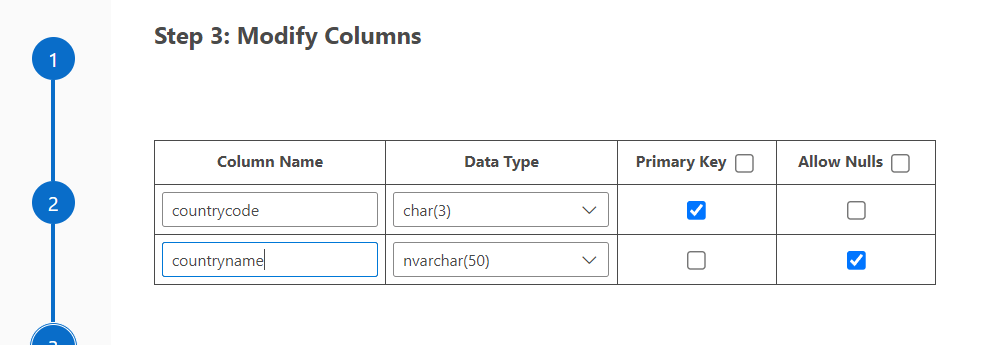
In my case, I want to change these. The first one is a code and the second one is a name, so I'll change those. I'll also set the first column to be the PK and not allow nulls. You can se these edits below.
Now we can import the data. I click Import and the data is pulled in quickly. You can see I receive a summary as well as a message data was imported.

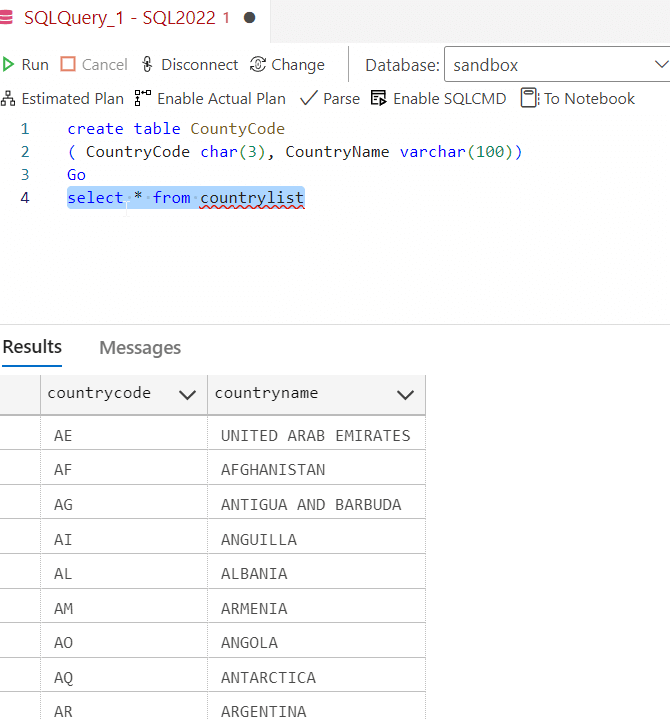
If I close the wizard (click Done) and then run a query, I see data in dbo.countrylist. You can see in the image below I'd already created a table, so I could insert .. select from countrylist into countrycodes.
Everything worked, now let's make a few changes and try different things.
Headers in a CSV File
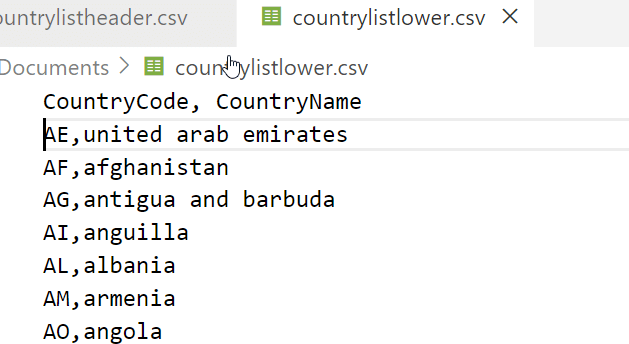
What about headers in a CSV file? Let's add some. In countrylistheader.csv, I've added headers. First, I was wondering why the first row wasn't picked as a header before? There was no checkbox in the wizard to mark a row as a header. I'll add a line to my file like this:
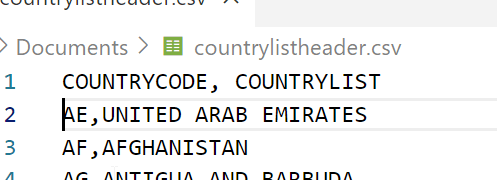
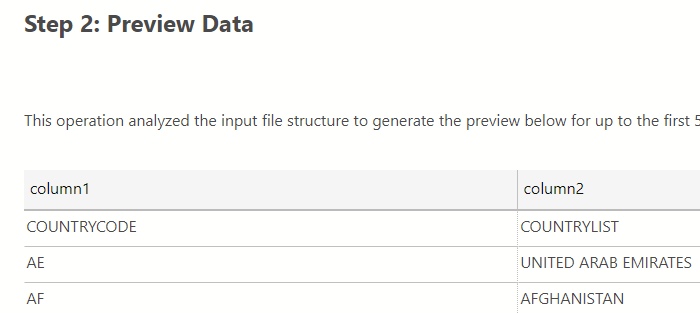
As you can see in the preview, this isn't detected as a header.
Let's cancel and change the file. Now I'll use proper case.
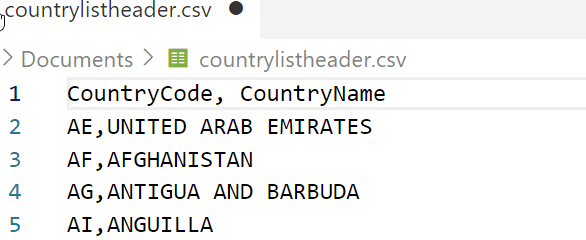
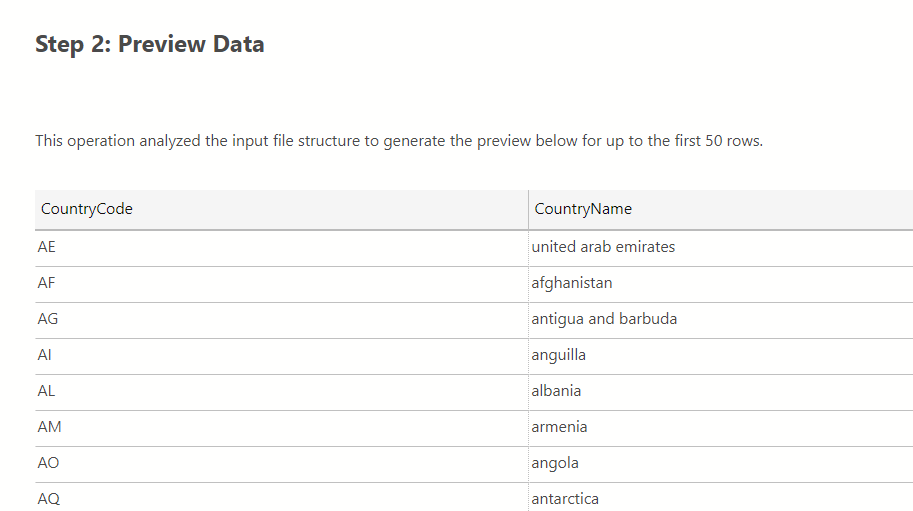
If I run the wizard and see the preview, I see this:
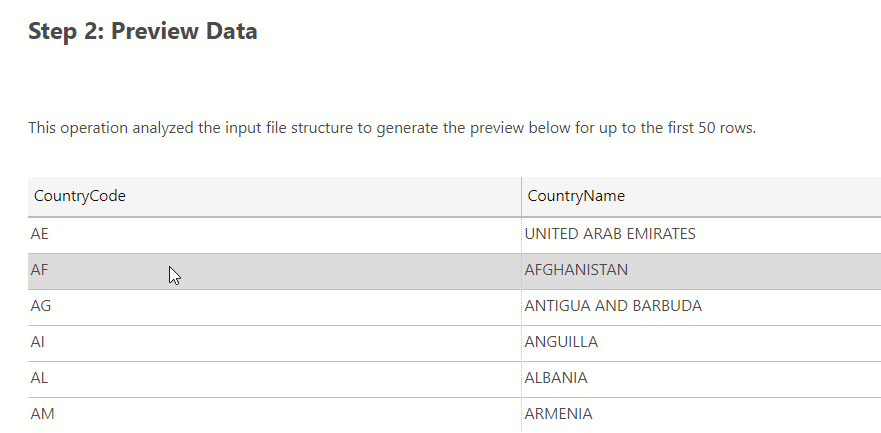
That's interesting. Let me try one more thing. I'll now change the file to not use upper case for the name. My data now looks like:
The preview works.
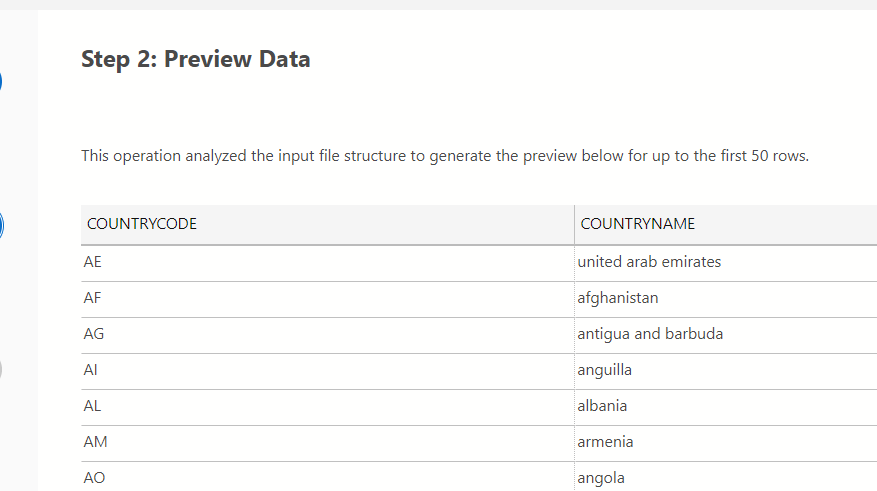
If I change my header row to be all upper case, this still works:
I can only imagine that there is some light detection here of whether the first row looks like data or a header. I imagine that if there is some difference in rows 1 and 2, row 1 is detected as a header.
Derived Columns
I will add two new columns to my CSV. These are auditing columns, which I want to derive something from on import. My data looks like this:
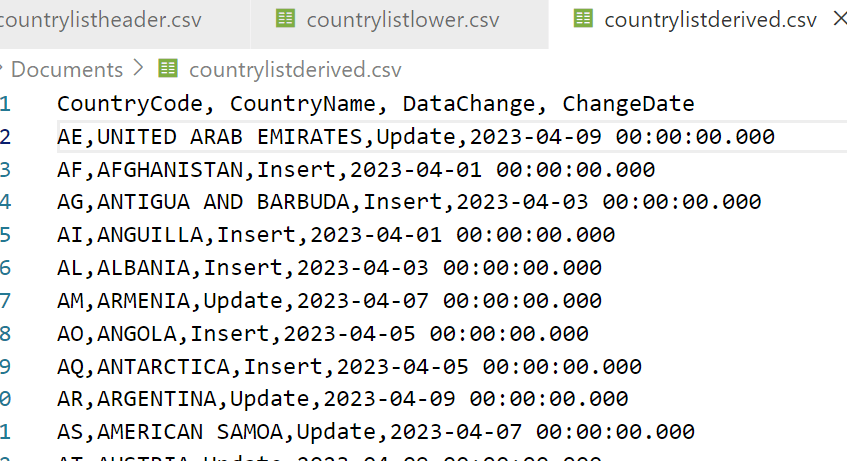
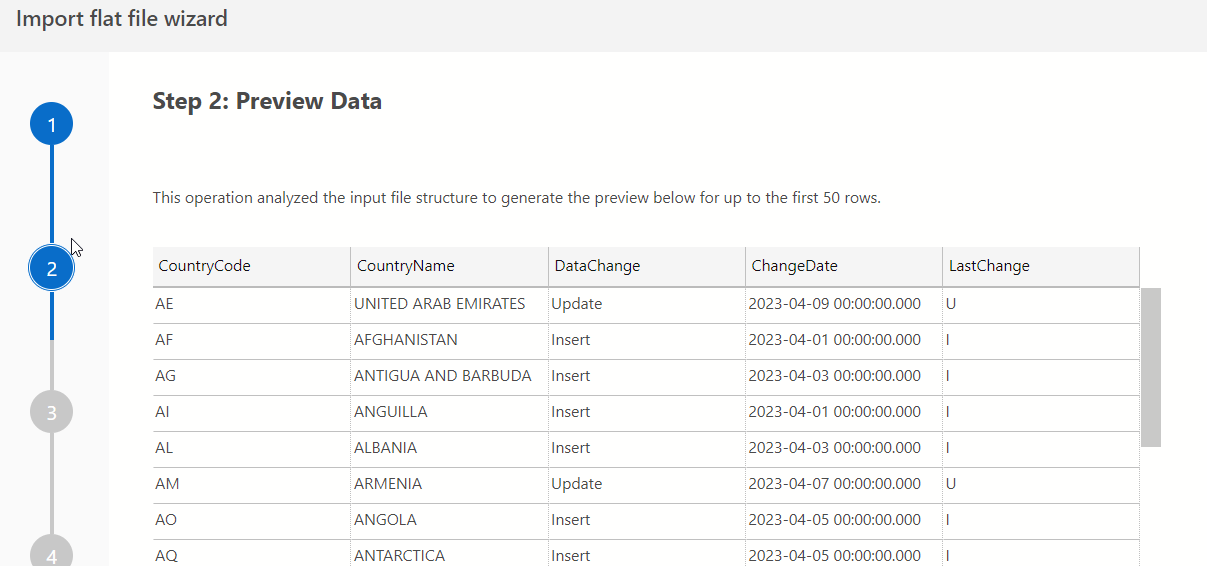
Now I'll choose this file in my Import extension. When I do, I see this preview.
I'll click "Create derived column" at the bottom. This brings up some instructions, which you can see below.
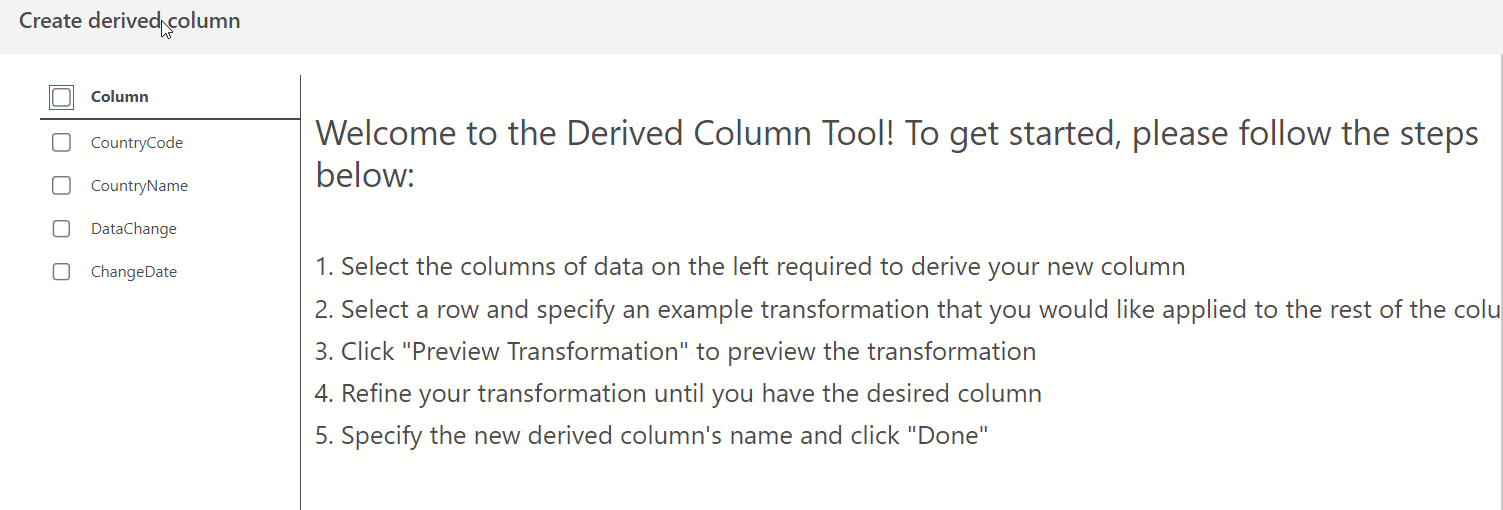
I'll click one column, the DataChange, and I see this. I get a list of data with a new column name at the top and a type of transform.
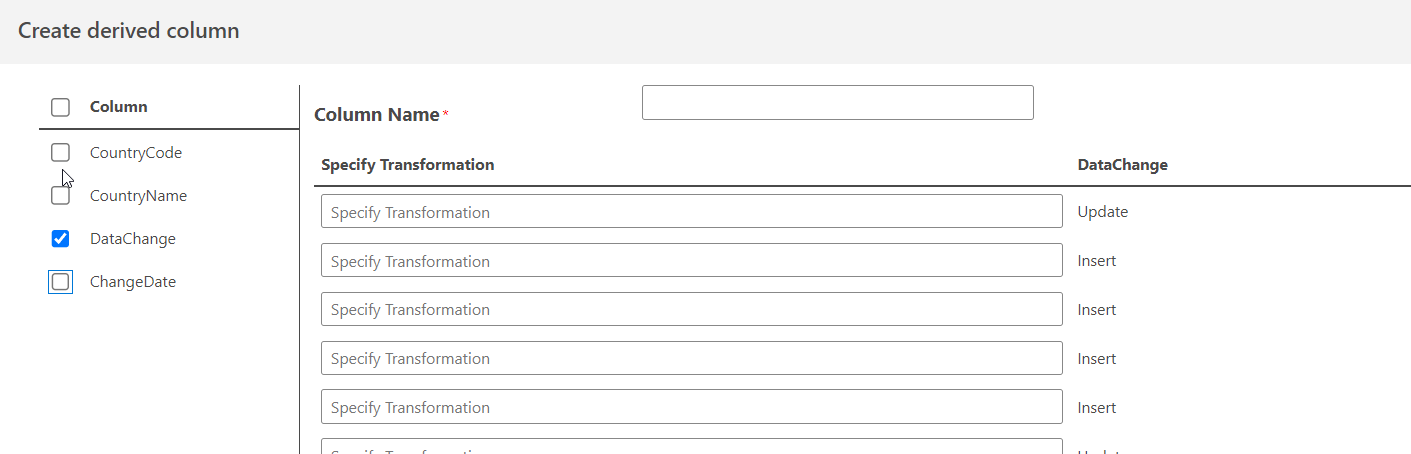
I'll try something. Let me put in a value for update and insert. I'll use single characters.
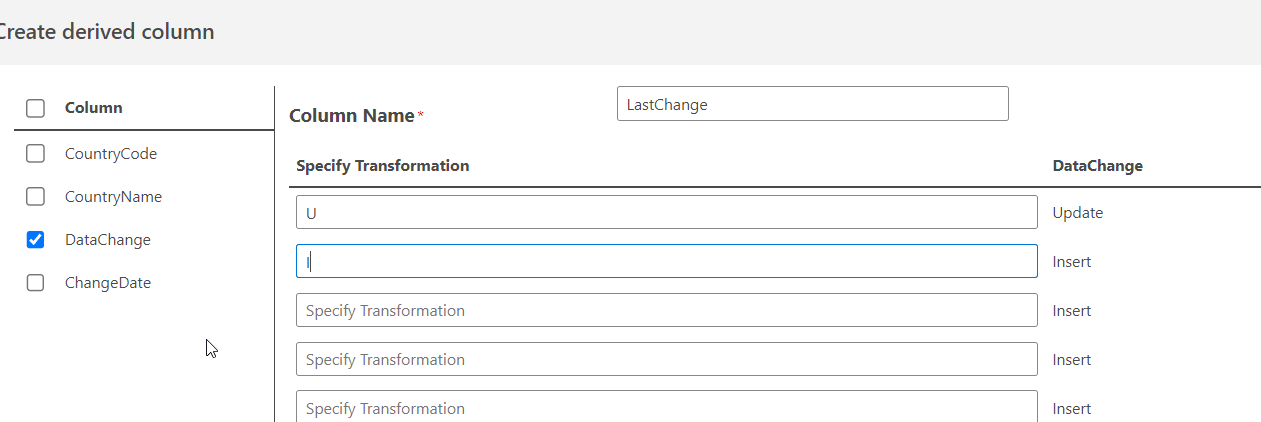
If I click preview, this is expanded to the rest of my rows. Interesting.
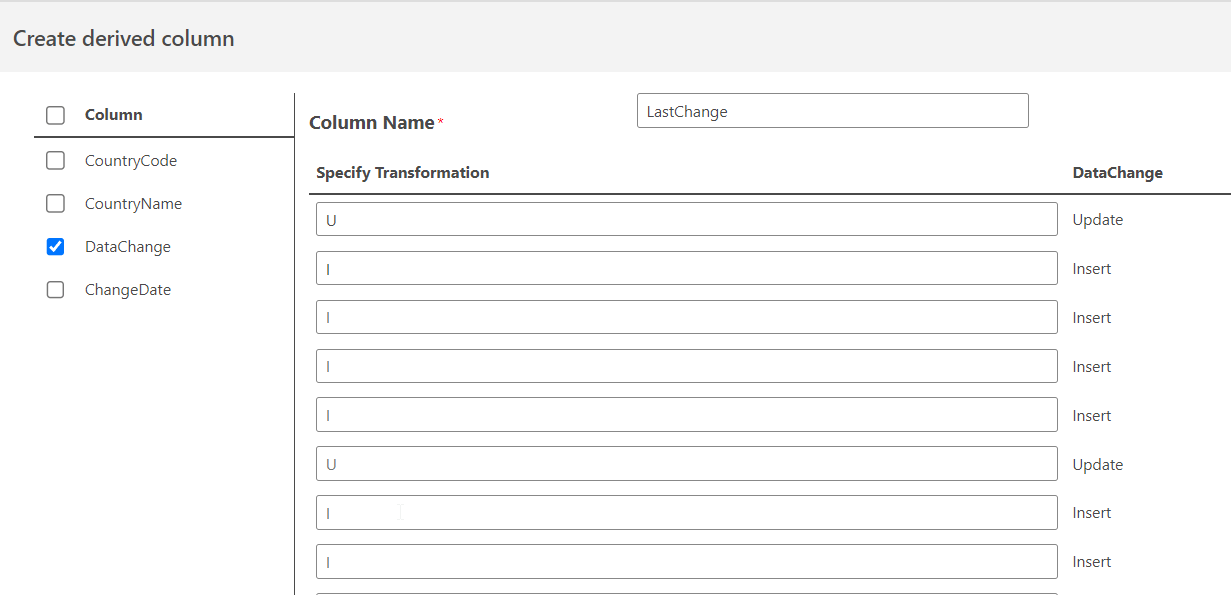
That's interesting. I'll stick with that and return to the preview. I see my new column.
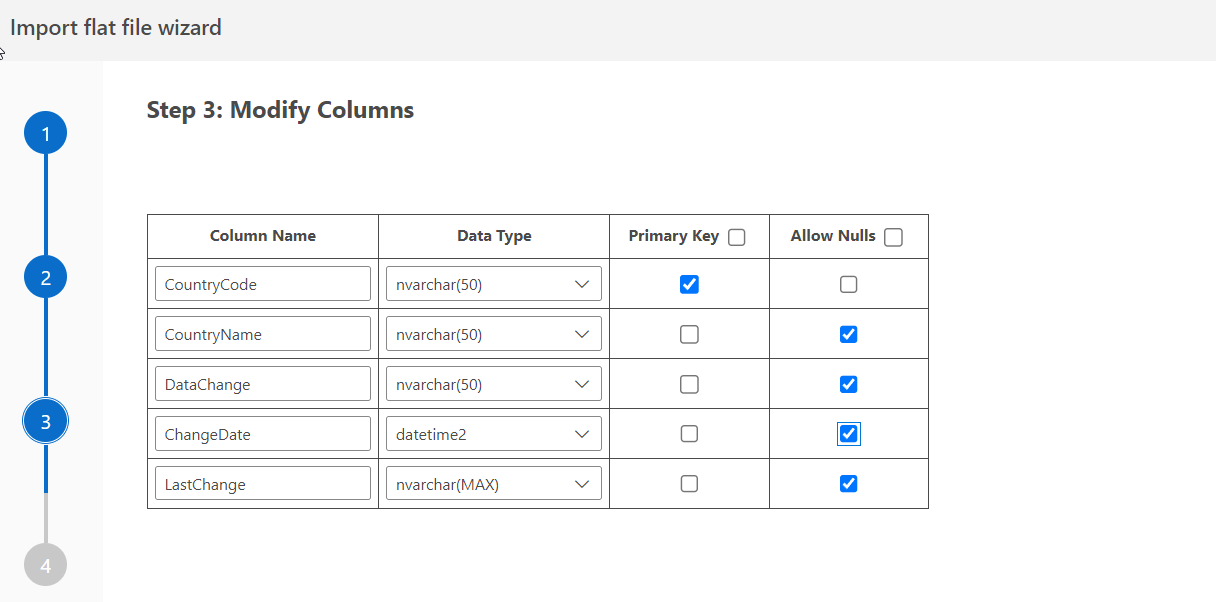
I can continue with the wizard. I'll change the table.
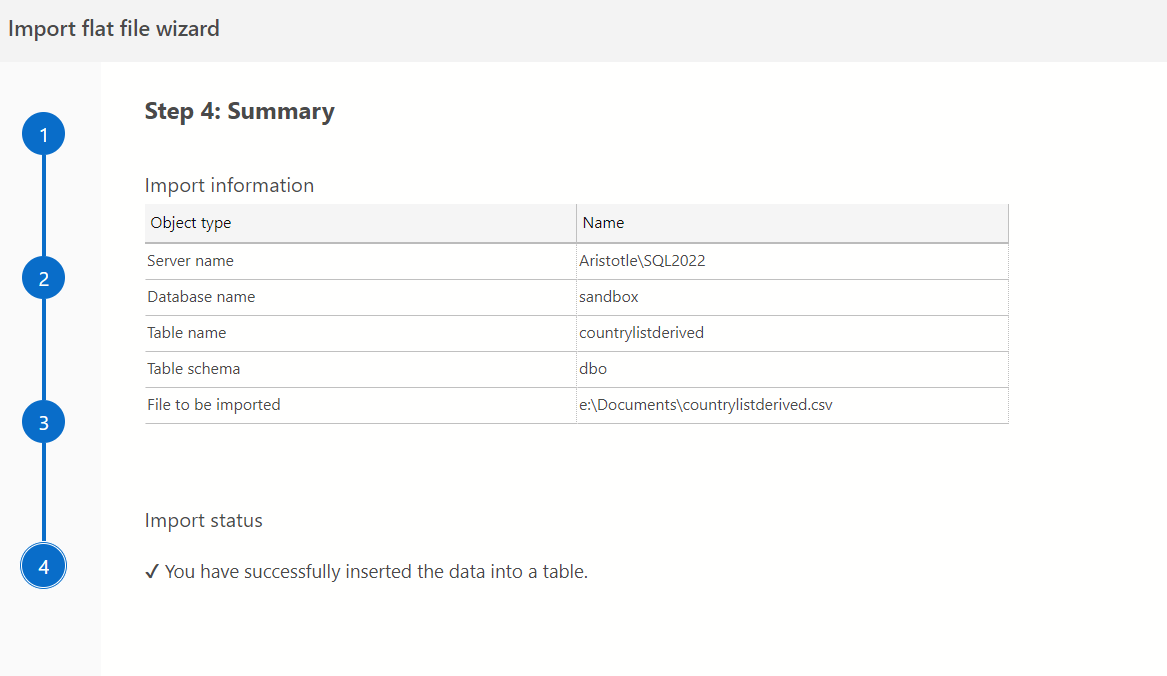
Now let's click import and see the summary.
And if I query the table, I can see my data.
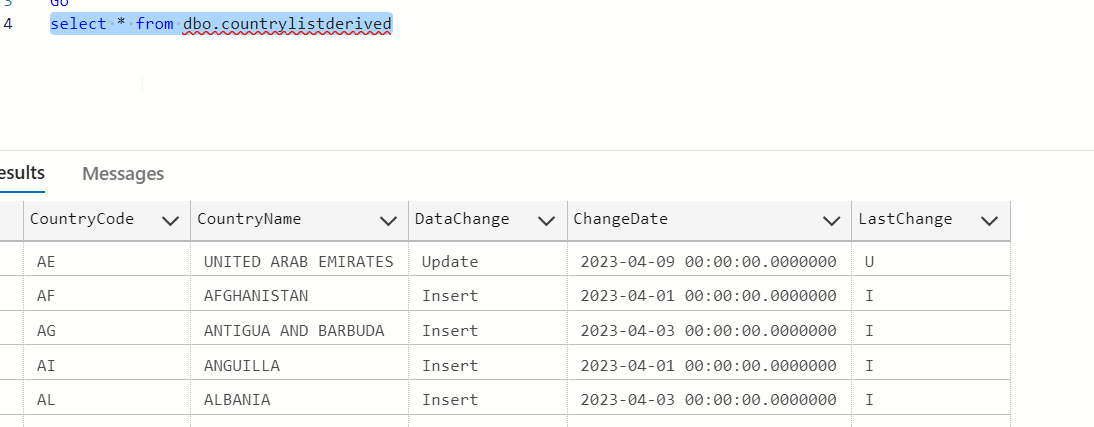
I can change some data and insert as a new column. If I didn't want the DataChange data, I still have to import it here, and then only move the data from LastChange to a new table. This is extra data, so another reason to drop this table after the import is complete.
Summary
I installed and used the Import Extension in Azure Data Studio to load a few CSV files into my database. This is pretty easy, and while I can specify a header, I don't get many options here. It's possible I'd need to modify the the header row, but it's not completely clear how to do this, or what the impact if different changes might be on different types of files.
In the next article, we'll look at these issues and experiment with different types of data, as well as file types.
