

Deploying a DACPAC to an Azure SQL Database is a critical step in ensuring your database changes are effectively moved from development to production. This guide will walk you through the process of deploy DACPAC to Azure SQL database directly from Visual Studio.
Prerequisites:
- Visual Studio with data tools installed on your system.
- An Azure SQL Database set up and accessible.
- A DACPAC file ready for deployment.
Create a DACPAC File
In this post, we cover the process of creating a DACPAC file, a critical artifact that encapsulates the schema and objects of a SQL Server database. Learn how to build and validate your DACPAC files to ensure seamless deployments.
Discover how to open and inspect a DACPAC file in Visual Studio. This guide provides details of how to open DACPAC file in Visual Studio.
Deploy DACPAC to Azure SQL Database from Visual Studio
Follow the below steps to deploy the DACPAC project from visual Studio. You can follow the same below steps to deploy database project to any SQL Server database or Azure Managed Instance. Make sure to select correct target platform and provide applicable connection details.
Launch Visual Studio and open your solution or project. Ensure you have the SQL Server Data Tools (SSDT) installed.
Next, change the target platform of the database project
- Right-click on database project and click properties.
- Change the Target platform to Microsoft Azure SQL Database as shown in the below image.

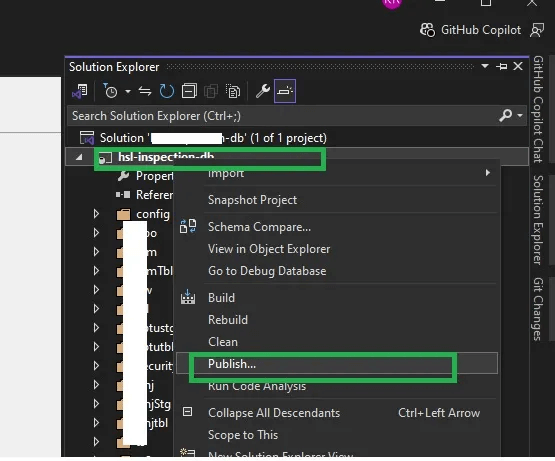
Now we can publish the Database Project. Right-click on the project and select Publish from the context menu. In the Solution Explorer, locate your database project.
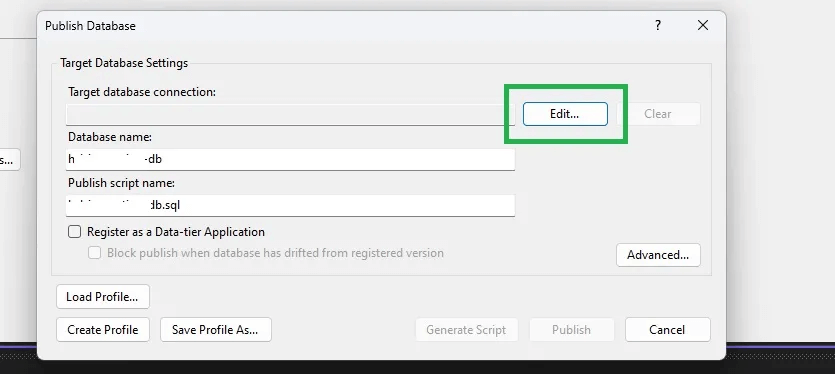
Now we configure the Deployment Target. In the Publish Database dialog, click Edit to specify the target database.
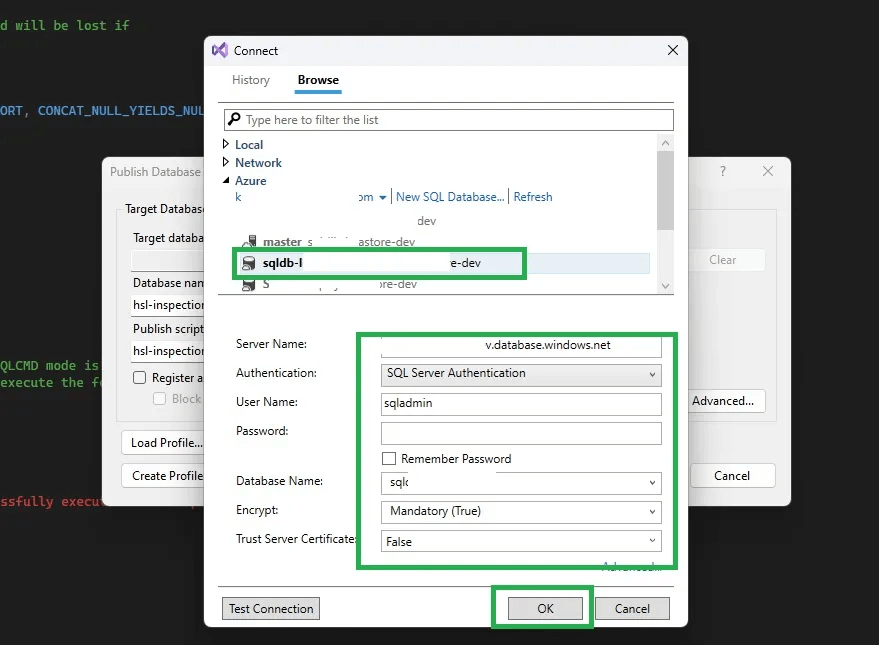
In the Edit Target Database Connection window, select Azure SQL Database as the target. Enter the server name, authentication details, and select the target database. Test the connection to ensure it is valid and then click OK to confirm.
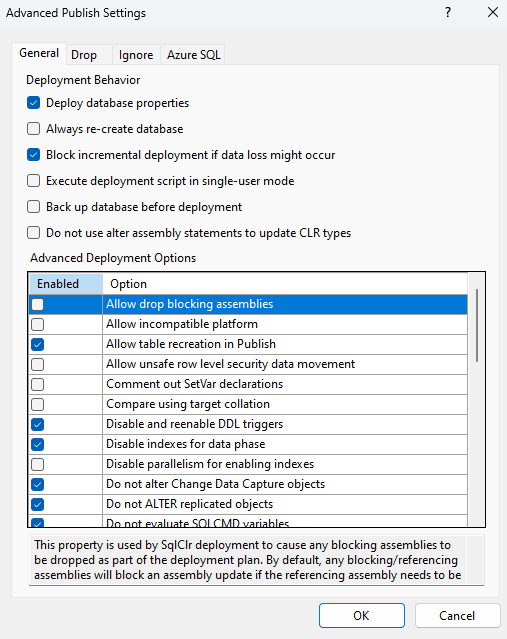
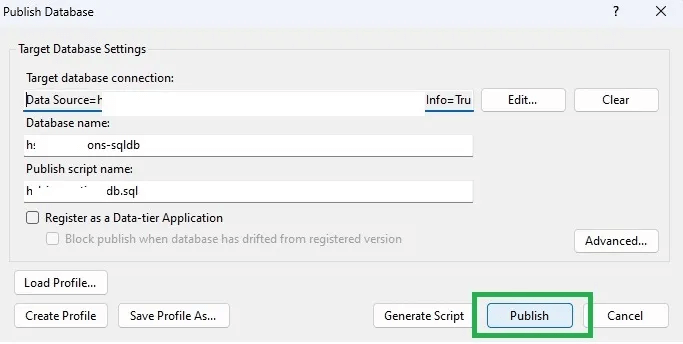
Back in the Publish Database dialog, review the settings to ensure the correct DACPAC file and target database are selected. Optionally, click Advanced to configure deployment options such as excluding certain schema changes as shown in the below image.
Click Publish to start the deployment process.
Monitor the progress of dacpac publish in Visual Studio as shown in the below image. Once the deployment is complete, open SQL Server Management Studio (SSMS) or use Visual Studio’s built-in tools to verify the schema changes in your Azure SQL Database. Run test queries to confirm the database is functioning as expected.

A Few Important tips:
- Refer to this post if you wish to Automate Azure SQL Database deployment using Azure DevOps CICD pipeline.
- If you skip target platform change step during the deployment, you may get an error “A project which specifies SQL Server 2022 or Azure SQL Database Managed Instance as the target platform cannot be published to Microsoft Azure SQL Database v12.”. Refer to this post to learn more about it.
- Test your DACPAC deployment on a local environment before pushing it to Azure.
- Always take a backup of your target Azure SQL Database before deployment.
- Use tools like SQL Compare to identify schema differences between the DACPAC and the target database.

