

Overview
FastAPI is a modern, high-performance Python web framework that uses Python type hints and Pydantic for data validation and auto-generates OpenAPI documentation. Pairing it with PostgreSQL, a robust and feature-rich relational database, yields a powerful solution for building scalable and maintainable APIs.
Project Setup
Run the following commands sequentially to have the project directory and environment setup accomplished.
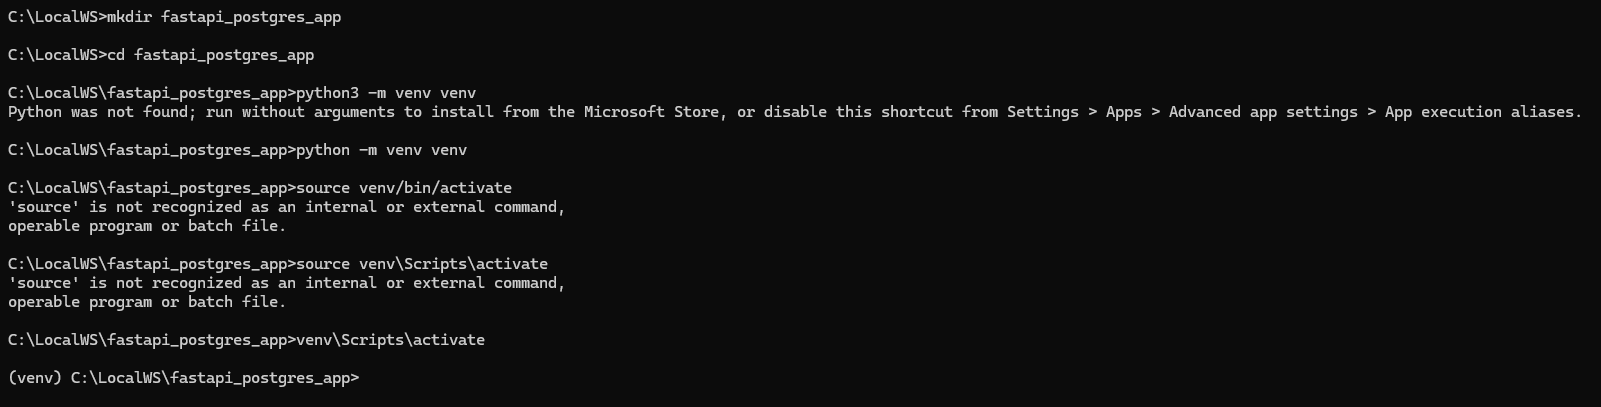
It first creates a directory using mkdir (stands for make directory) command and then navigates into the created folder. Next, it creates a virtual environment and activates the scripts on it.
The below script is for Windows compatible machine. For Linux/Unix/Mac, try running the last command as: source venv/bin/activate
mkdir fastapi_postgres_app
cd fastapi_postgres_app
python -m venv venv
venv\Scripts\activate
Once the above steps are completed successfully, you should see a similar output to what is shown here:
Installing the necessary dependencies
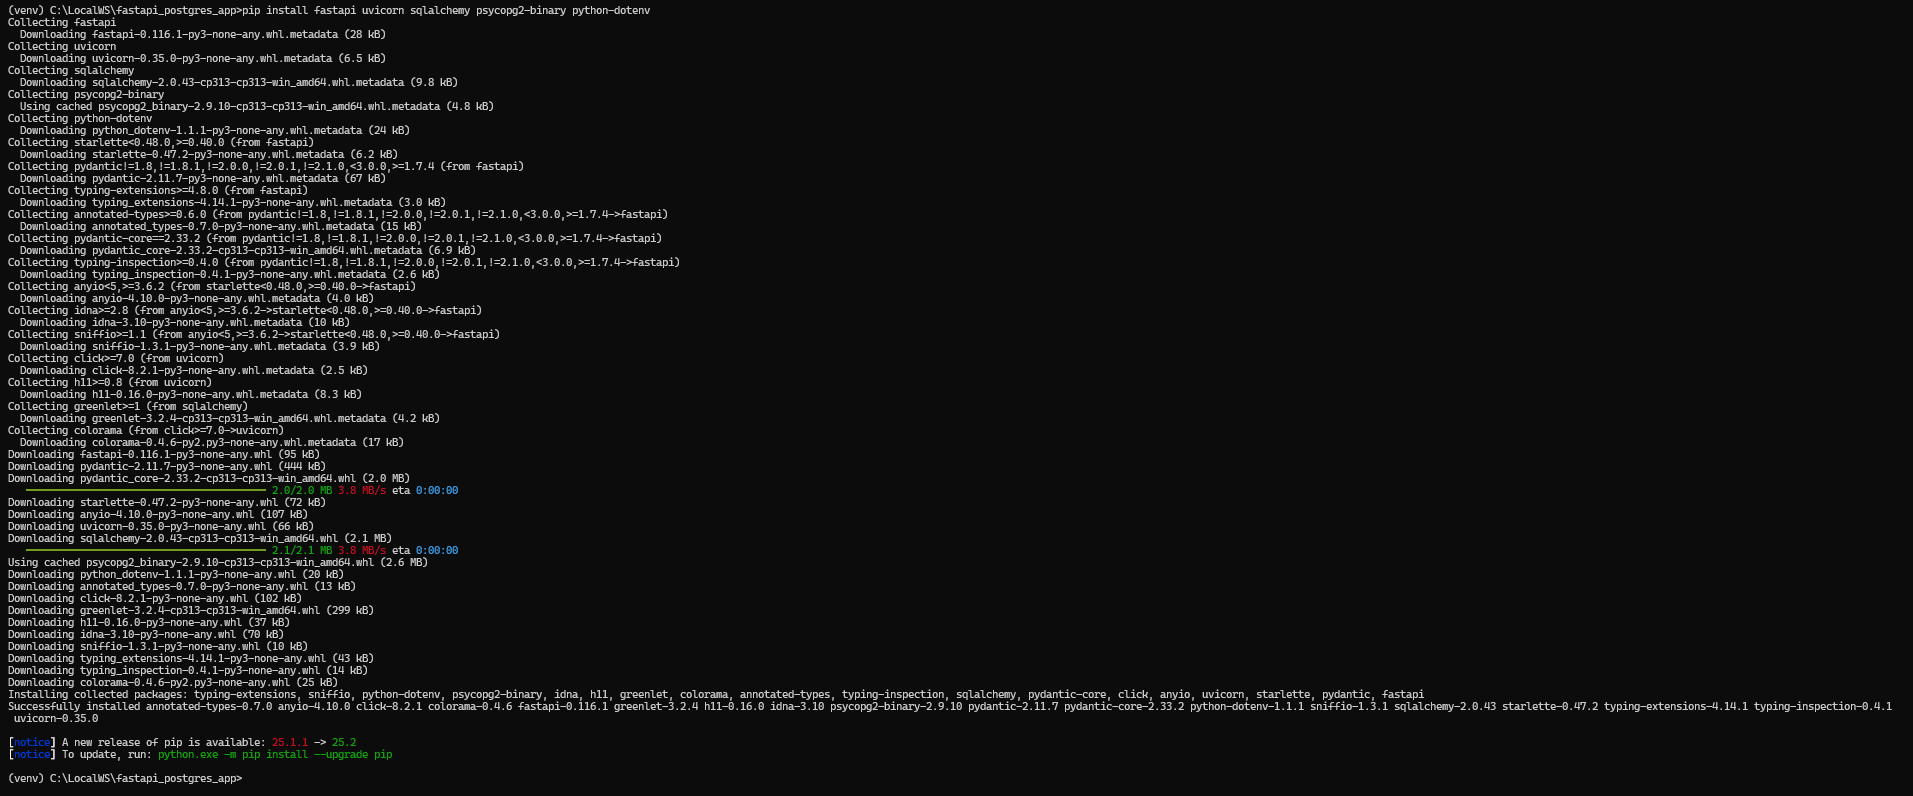
We need to install the required library dependencies to be installed to help us establish the connection and operate on PostgreSQL from python. Run the following command to download and install the required dependencies.
pip install fastapi uvicorn sqlalchemy psycopg2-binary python-dotenv
Once successfully completed, you should see a similar output on your terminal with all necessary dependencies downloaded and installed:
Database Configuration
We will now create a file called database.py which will hold the necessary boiler plate code to establish a connection to our local PostgreSQL database and establish session management.
We'll take a quick look into what the code does.
- It imports the create_engine module which helps to create a database engine and establish connection to the database.
- It also imports the sessionmaker module which helps in creating the database session objects. Also, declarative_base module is imported which helps in creating ORM models.
- Next, we configure the database URL and create the database engine from the database connection.
- Then we are creating a SessionLocal with autocommit=false means that commits will have to be done manually explicitly and autoflush=false means automatic flushing of changes to the database before queries.
- Note: This SessionLocal will be instantiated later to access the database. Finally we create a Base class from which all ORM models will inherit.
from sqlalchemy import create_engine
from sqlalchemy.orm import sessionmaker, declarative_base
import os

DATABASE_URL = os.getenv("DATABASE_URL", "postgresql://user:password@localhost:5432/mydb")

engine = create_engine(DATABASE_URL)
SessionLocal = sessionmaker(bind=engine, autocommit=False, autoflush=False)
Base = declarative_base()
Make sure to replace the username and password in the DATABASE_URL section.
Defining Models & Schemas
First, we will create a model. This will create a table called Users. The below code works as follows:
- We import the Base class (created with declarative_base()) in the previous boiler plate code, which is the base class for all ORM models.
- Next, we define a new ORM model class named User that inherits from Base.
- __tablename__ = "users" : Specifies the name of the database table this model maps to — "users".
- Next, we define the columns with their datatype and constraints mentioned.
from sqlalchemy import Column, Integer, String, Boolean
from database import Base

class User(Base):
    __tablename__ = "users"
    id = Column(Integer, primary_key=True, index=True)
    name = Column(String, index=True)
    email = Column(String, unique=True, index=True)
    is_active = Column(Boolean, default=True)
Next, we will create a schema. The below code does the following:
- We import the BaseModel from Pydantic, which is a powerful library for data validation and settings management.
- Next, we define a base Pydantic model UserBase with three fields. This model ensures these fields are validated when input data is received.
- Next, we define UserCreate model that inherits from UserBase. This is used for user creation requests (same fields as UserBase). No additional fields or behavior are added here.
- Finally, we define a User model that extends the UserBase with an additional id field (as integer).
from pydantic import BaseModel

class UserBase(BaseModel):
    name: str
    email: str
    is_active: bool = True

class UserCreate(UserBase):
    pass

class User(UserBase):
    id: int
    class Config:
orm_mode = TrueNote: orm_mode = True enables compatibility between SQLAlchemy instances and Pydantic schemas.
Create FastAPI App with CRUD Endpoints
The following code implements full CRUD functionality for User resources. The code has GET, PUT, POST, DELETE API endpoints to operate on the User model.
In the below code, we can see that across all the endpoint implementations, we are primarily doing the following:
- from fastapi import FastAPI, Depends, HTTPException
- FastAPI: Used to create the web app
- Depends: Handles dependency injection (e.g., for database session).
- HTTPException: Used to return error responses (e.g., 404 Not Found).
- from typing import List
- List: Used for type hinting when returning a list of users.
- from sqlalchemy.orm import Session
- Session: A SQLAlchemy session used to interact with the database.
- import models, schemas
- models: Contains SQLAlchemy models (i.e., ORM representations of your tables).
- schemas: Contains Pydantic models used for request/response validation.
- from database import SessionLocal, engine, Base
- SessionLocal: Function to create a new database session.
- engine: The SQLAlchemy engine connected to your DB.
- Base: The base class for all SQLAlchemy models (from which they inherit).
- Base.metadata.create_all(bind=engine)
- This tells SQLAlchemy to create all tables defined in models by looking at Base subclasses, using the engine connection.
- app = FastAPI()
- Initializes the FastAPI application object (app) which you use to define routes.
def get_db(): db = SessionLocal() # Create new session try: yield db # Provide it to the request finally: db.close() # Ensure it's closed after request finishes- This function is used as a dependency to get a DB session.
- yield allows FastAPI to inject it into endpoints, and finally ensures proper cleanup.
POST Endpoint understanding to create an user:
@app.post("/users/", response_model=schemas.User) def create_user(user: schemas.UserCreate, db: Session = Depends(get_db)):- Defines a POST route to /users/.
- Takes user as input, validated against UserCreate schema.
- Injects a DB session using Depends(get_db).
db_user = models.User(**user.dict())
- Creates a SQLAlchemy User model instance from the input Pydantic model.
db.add(db_user) # Add to session db.commit() # Commit the transaction to DB db.refresh(db_user) # Refresh to get the latest state (like auto-generated ID) return db_user- Saves the user to the database and returns the created user.
GET Endpoint understanding to retrieve all users:
@app.get("/users/", response_model=List[schemas.User]) def read_users(skip: int = 0, limit: int = 100, db: Session = Depends(get_db)):- GET route that lists all users with optional pagination.
- skip and limit are query parameters. It will skip no records and pickup from the first record and maximum 100 will be picked in a set.
- Injects DB session.
return db.query(models.User).offset(skip).limit(limit).all()
- Runs a SQL query to get users with pagination.
GET Endpoint understanding to get a specific user:
@app.get("/users/{user_id}", response_model=schemas.User) def read_user(user_id: int, db: Session = Depends(get_db)):- GET route to get a specific user by ID.
- user_id is passed as a path parameter.
user = db.query(models.User).filter(models.User.id == user_id).first()
- Looks for a user with the given ID.
if not user: raise HTTPException(status_code=404, detail="User not found") return user- If user doesn't exist, raise 404 error. Otherwise, return the user.
PUT Endpoint understanding to update a specific user:
@app.put("/users/{user_id}", response_model=schemas.User) def update_user(user_id: int, user: schemas.UserBase, db: Session = Depends(get_db)):- PUT route to update a user.
- Accepts user_id as path param and a UserBase body (with updated fields).
db_user = db.query(models.User).filter(models.User.id == user_id).first()
- Fetch the existing user. It tries to match with the user_id passed and in case there are users with duplicate user_id (which ideally should not happen), then only the first matching record will be fetched.
if not db_user: raise HTTPException(status_code=404, detail="User not found")- If user doesn't exists with the user_id mentioned, then an exception will be raised with status code as 404 and appropriate error message.
for key, value in user.dict().items(): setattr(db_user, key, value)- Dynamically update each field in the user object.
db.commit() db.refresh(db_user) return db_user- Save changes and return updated user.
DELETE Endpoint understanding to delete a specific user:
@app.delete("/users/{user_id}", response_model=schemas.User) def delete_user(user_id: int, db: Session = Depends(get_db)):- DELETE route to remove a user by ID. The user with the specific path parameter user_id mentioned will be deleted, if available.
user = db.query(models.User).filter(models.User.id == user_id).first() if not user: raise HTTPException(status_code=404, detail="User not found")- Look up for the user with the user_id mentioned. If user is not found with this user_id, return an exception with status code as 404 and appropriate error message.
db.delete(user) db.commit() return user- Delete the user and return the deleted record.
The full code for the CRUD operation explained above is as follows:
from fastapi import FastAPI, Depends, HTTPException
from typing import List
from sqlalchemy.orm import Session
import models, schemas
from database import SessionLocal, engine, Base

# Create tables
Base.metadata.create_all(bind=engine)

app = FastAPI()

# Dependency to get DB session
def get_db():
    db = SessionLocal()
    try:
        yield db
    finally:
        db.close()

@app.post("/users/", response_model=schemas.User)
def create_user(user: schemas.UserCreate, db: Session = Depends(get_db)):
    db_user = models.User(**user.dict())
    db.add(db_user)
    db.commit()
    db.refresh(db_user)
    return db_user

@app.get("/users/", response_model=List[schemas.User])
def read_users(skip: int = 0, limit: int = 100, db: Session = Depends(get_db)):
    return db.query(models.User).offset(skip).limit(limit).all()

@app.get("/users/{user_id}", response_model=schemas.User)
def read_user(user_id: int, db: Session = Depends(get_db)):
    user = db.query(models.User).filter(models.User.id == user_id).first()
    if not user:
        raise HTTPException(status_code=404, detail="User not found")
    return user

@app.put("/users/{user_id}", response_model=schemas.User)
def update_user(user_id: int, user: schemas.UserBase, db: Session = Depends(get_db)):
    db_user = db.query(models.User).filter(models.User.id == user_id).first()
    if not db_user:
        raise HTTPException(status_code=404, detail="User not found")
    for key, value in user.dict().items():
        setattr(db_user, key, value)
    db.commit()
    db.refresh(db_user)
    return db_user

@app.delete("/users/{user_id}", response_model=schemas.User)
def delete_user(user_id: int, db: Session = Depends(get_db)):
    user = db.query(models.User).filter(models.User.id == user_id).first()
    if not user:
        raise HTTPException(status_code=404, detail="User not found")
    db.delete(user)
    db.commit()
    return user
Running the Application and Interactive Documents
To run the app, from your terminal, run the following command:
uvicorn main:app --reload
Once the command executes successfully, you should see a similar output in your terminal:

You should see the message: Application startup complete.
Now, the interesting part is that FastAPI auto-generates interactive documentation. To validate, you can navigate as follows:
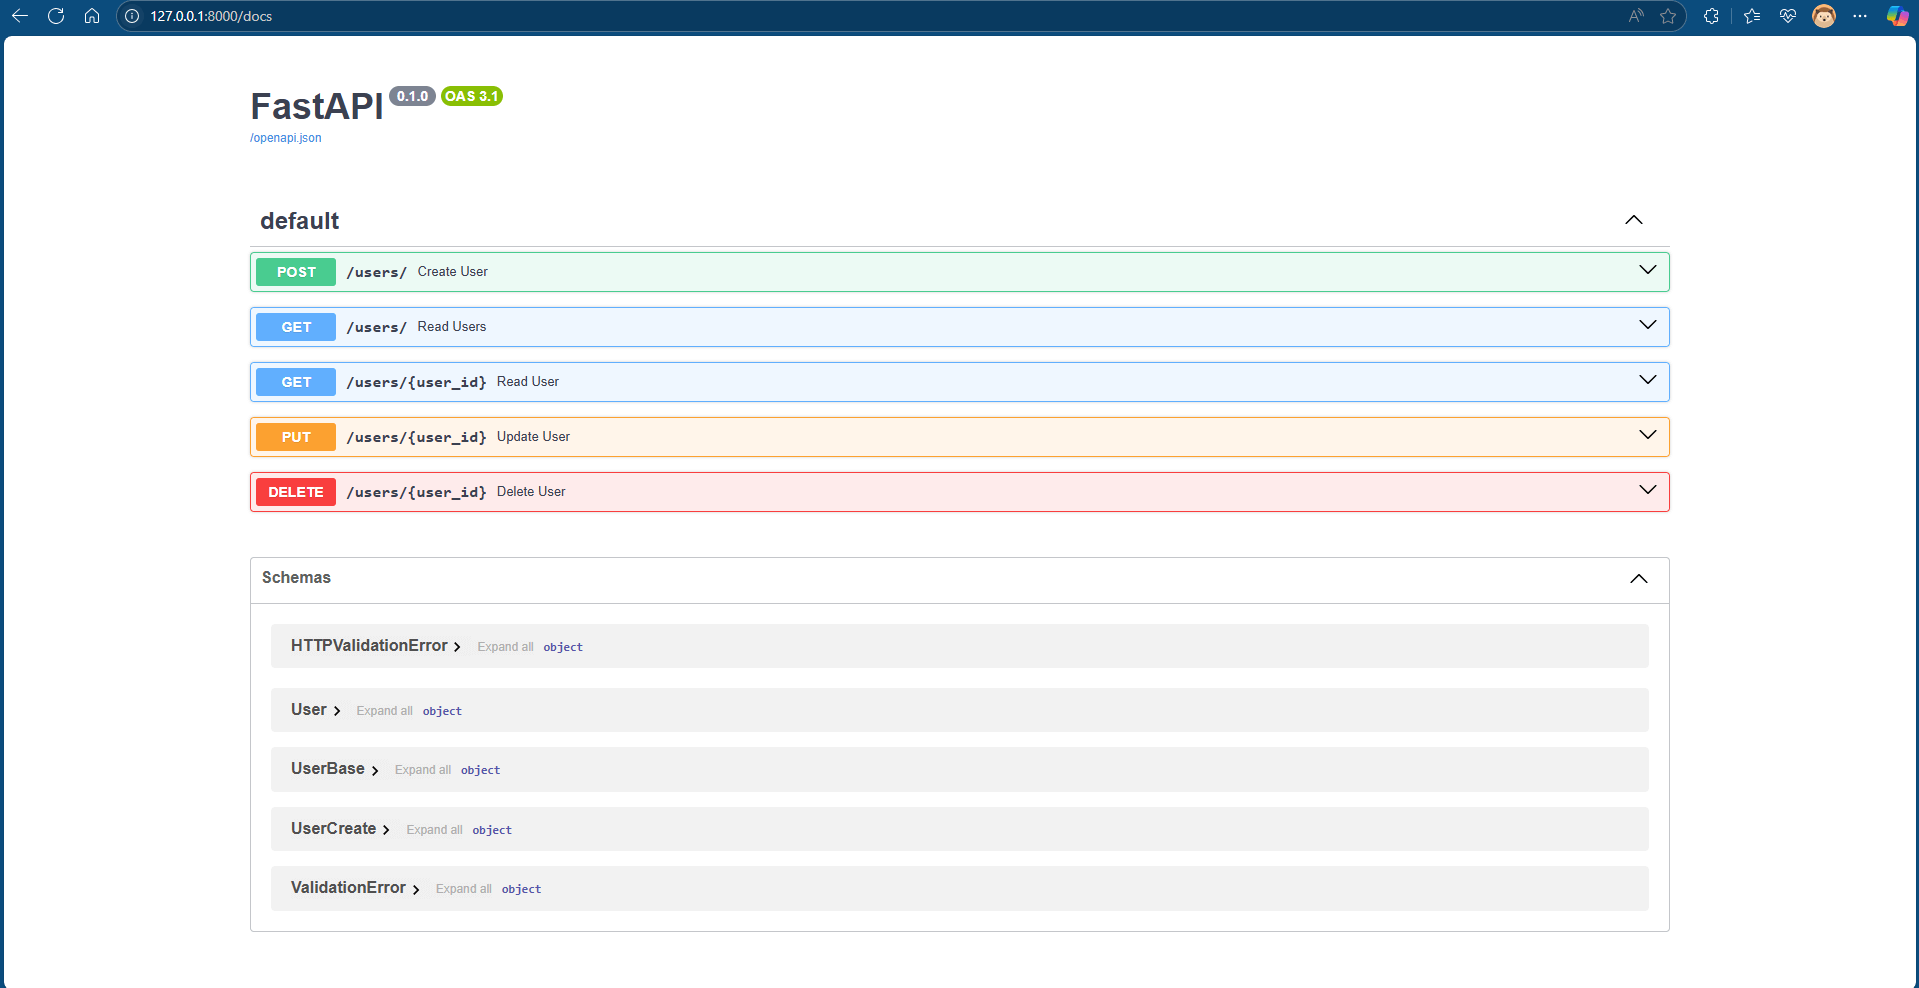
For the Swagger UI, use this URL http://127.0.0.1:8000/docs
This page lists down all the endpoints we created as a part of our CRUD operation. On clicking each of the colored endpoints, we can see the details of the request body and the response body structures, path/query parameters (if any) and other necessary details like the datatypes of the request body fields. A user trying to access any API can refer this page and read the swagger documentation and create API in postman to interact accordingly.
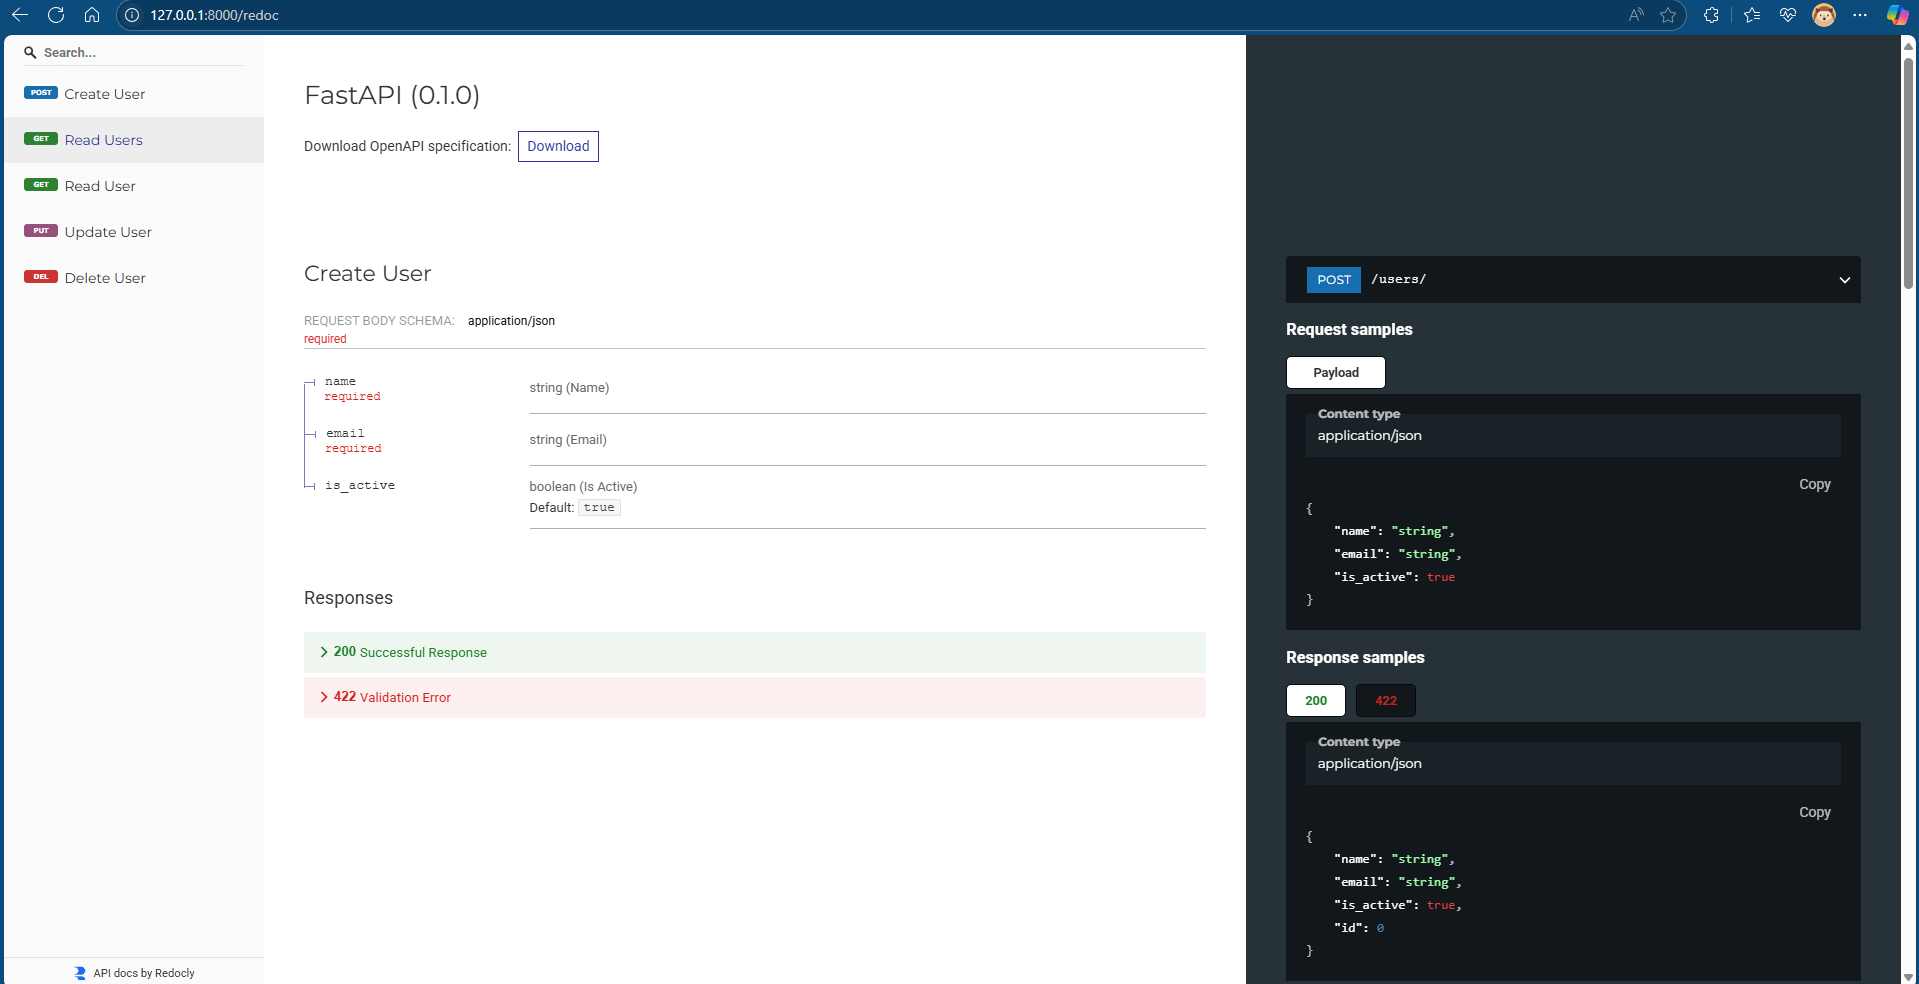
For the ReDoc, use this URL: http://127.0.0.1:8000/redoc
This is the API documentation. Similar to swagger documentation, this gives a detailed layout about the API structuring and all information that is needed to configure the API endpoint in local POSTMAN (or similar API invoker tool) and access the endpoints.
Testing out the APIs
Let us try creating a user using the API documentation from Swagger UI. We will create a new request in POSTMAN (as we are using POSTMAN for API testing) and configure the endpoint as per swagger documentation. The endpoint has to be POST and the URL will be: http://localhost:8000/users.
We can copy the request body from the swagger/API documentation (as shown above) and update the fields with text of our choice and click SEND to create a user. A successful operation will return the details about the created user in the response body.

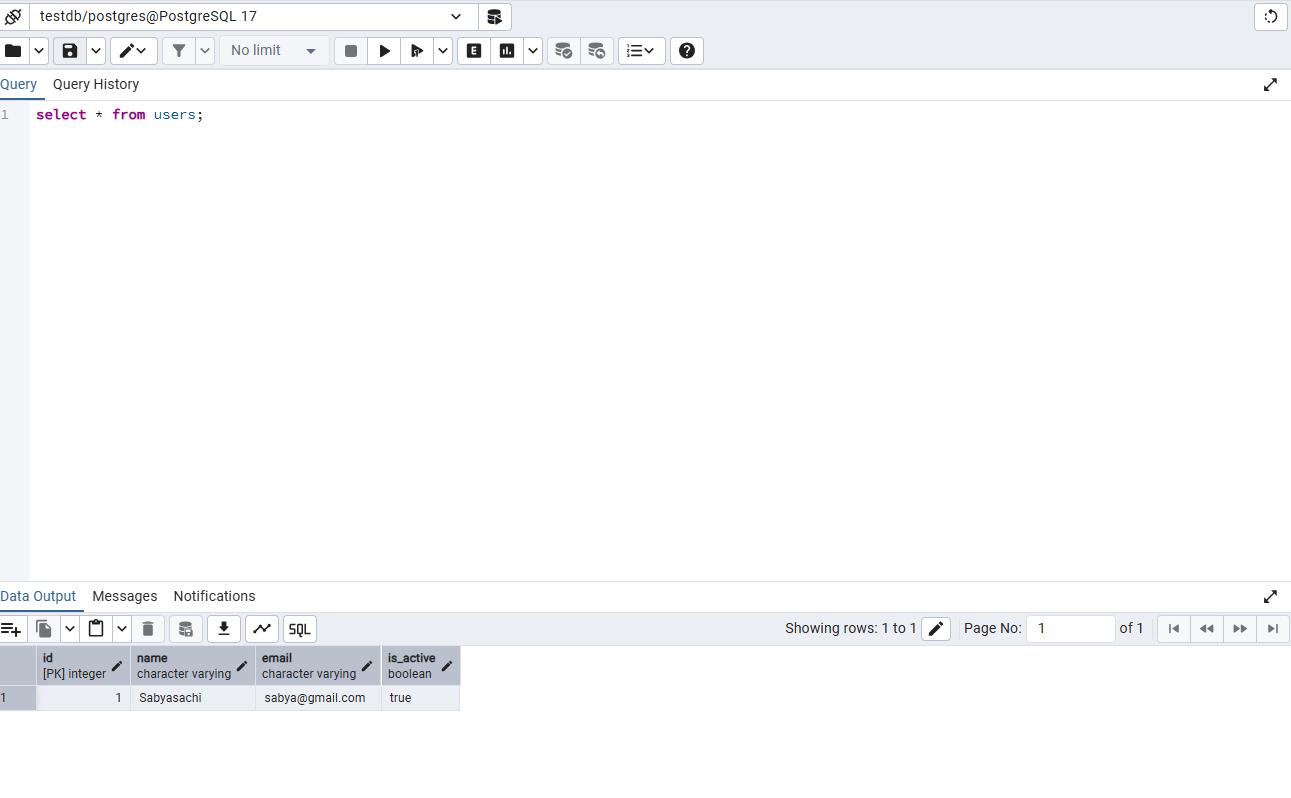
You can check the PgAdmin to validate the creation of the user:
Similarly, we will test out one more API, the DELETE API (you can check out all of them individually too).
We will create a new request in POSTMAN and configure the request as per swagger documentation. The endpoint this time will be DELETE and the URL will be: http://localhost:8000/users/1. The path parameter: 1 here means that the user with id 1 should be deleted. Click SEND to submit the request. Upon successful operation, the details about the deleted user will be returned in the response.

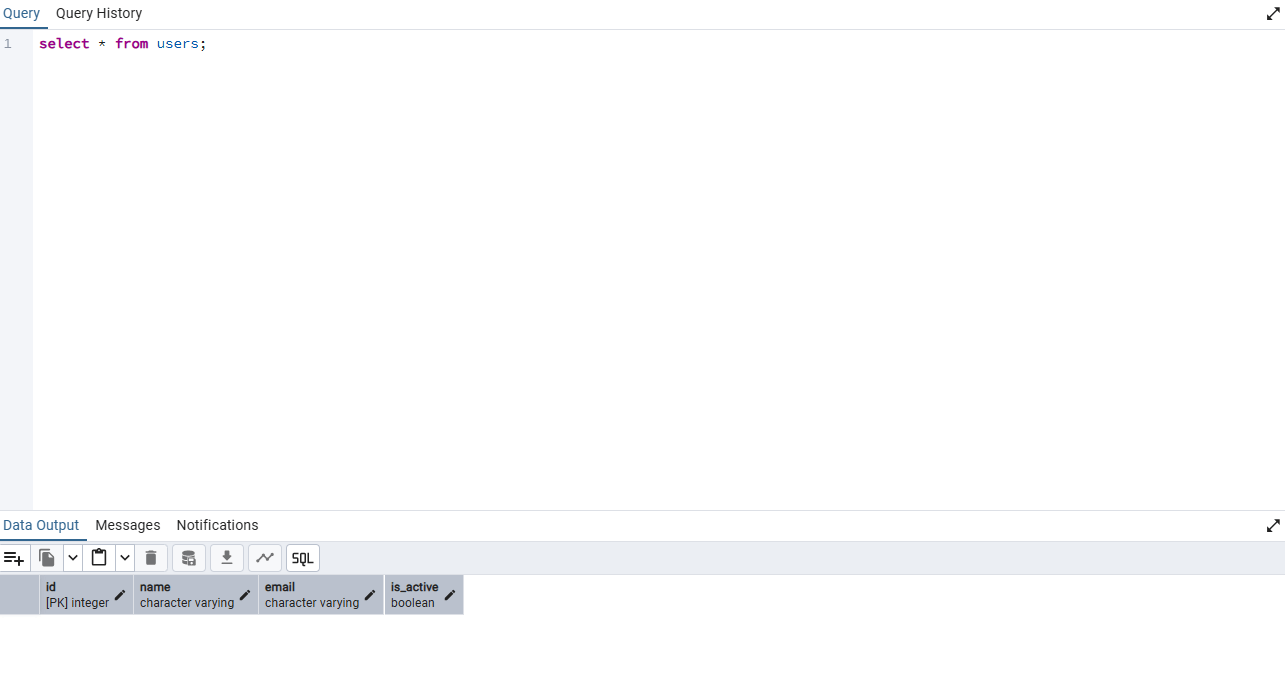
Checking the same from the PgAdmin, we can confirm if the user has been successfully deleted.
Conclusion
We just walked through on how we can use FastAPI to build REST APIs to connect to PostgreSQL database and create, read, update and delete data from the database.
