

Database migrations to the cloud can be a daunting proposition for many database administrators and data stewards. A new extension available in the Azure Data Studio marketplace, called Azure SQL Migration, aims to simplify and streamline the process of moving SQL Server databases to Azure.
The Azure SQL Migration extension uses the Azure Database Migration Service to enable both online and offline database migrations to Azure SQL Managed Instance or SQL Server on Azure Virtual Machines. This article will walk through the steps to install the Azure SQL Migration extension, detail both the online migration process using both local network storage as well as Azure Blob storage, and finally perform a cutover from a source SQL Server instance to Azure SQL Managed Instance. A follow-on article will explore offline migration scenarios as well as migrations to SQL Server on Azure Virtual Machines. Let’s get started.
Prequisites
There are only two prerequisites for using the Azure SQL Migration extension in Azure Data Studio, and one of them is optional depending on the source of the database backups that will be used for migrations.
The first prerequisite is that you have Azure Data Studio installed. Azure Data Studio is bundled with the latest versions of SQL Server Management Studio or it can be downloaded independently from this location.
The second prerequisite is to download and install the self-hosted integration runtime on a machine on your local network. The installation and configuration of the self-hosted integration runtime is out of scope for this article, but the process is straightforward and is detailed here.
Note that as mentioned above, the self-hosted integration runtime is only required if you plan to perform database migrations using backups stored on a local network share. For example, \\MyNetworkShare\FolderName. Database backups stored in Azure Blob storage do not require the self-hosted integration runtime since there is no need to copy backups from a local network share to Azure Blob storage.
The full list of prerequisites for the Azure Database Migration Service are detailed here.
Azure SQL Migration Extension Installation
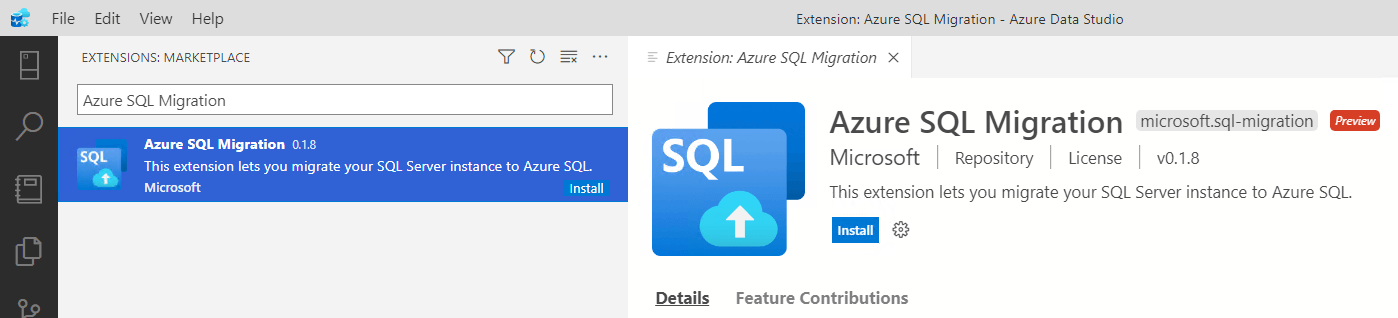
Installation of the Azure SQL Migration extension in Azure Data Studio is straightforward. Inside Azure Data Studio, open the Extensions: Marketplace section from the menu on the left (or right) and search for "Azure SQL Migration". Choose "Install" and within just a few seconds the extension will be installed and ready for use.
Online Migration Using Local Network Storage
With the extension installed, let's try a database migration. For the first migration, we'll perform an online migration from an on-premises SQL Server 2012 instance to Azure SQL Managed Instance. An online migration means that the database is available during the entire migration phase and only experiences a short outage during the cutover process, which is typically just a few minutes.
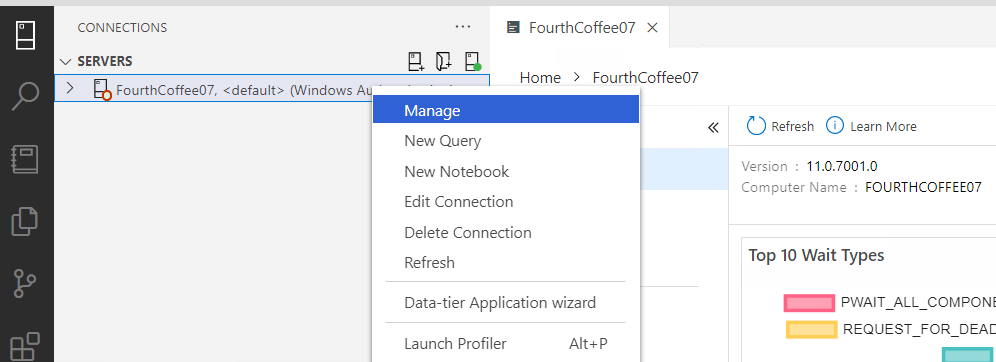
In Azure Data Studio, right-click on the source SQL Server and choose "Manage".
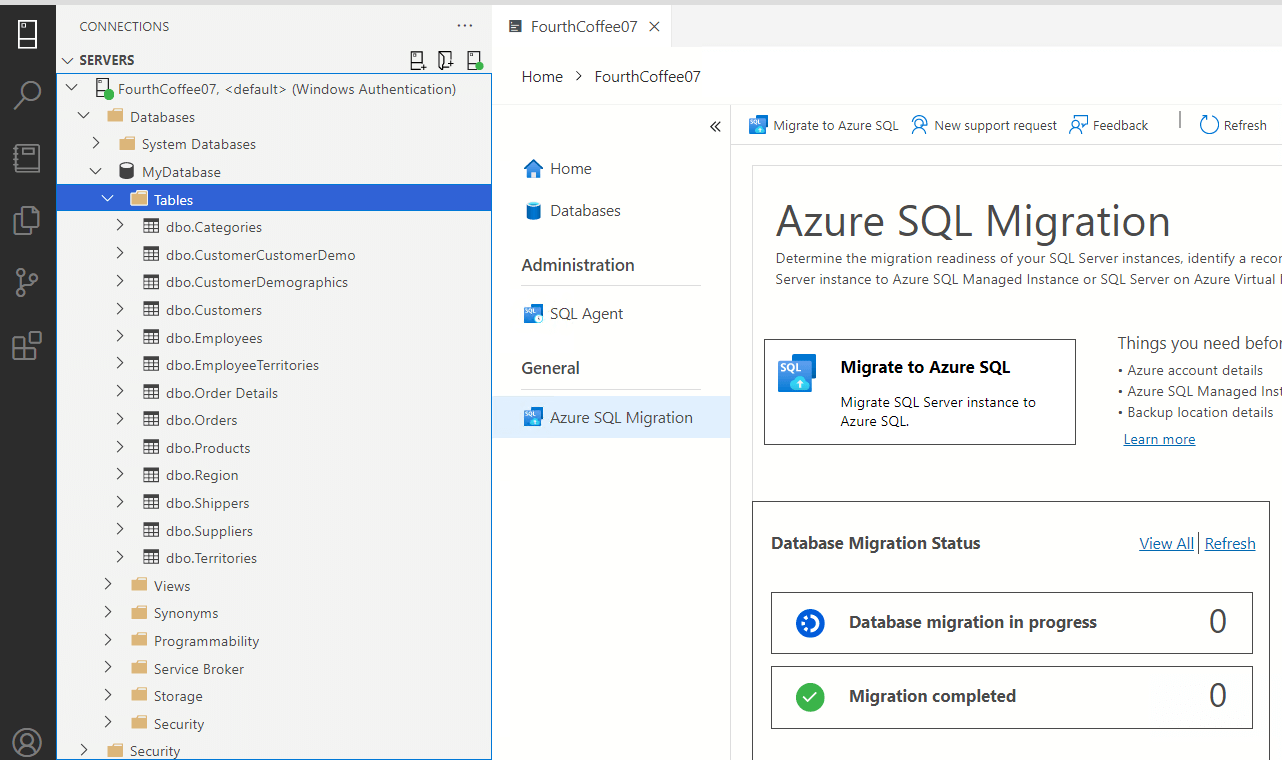
Once connected a new server overview tab will appear. Choose Azure SQL Migration under the General heading.

This will launch the Azure SQL Migration blade, as you see below.
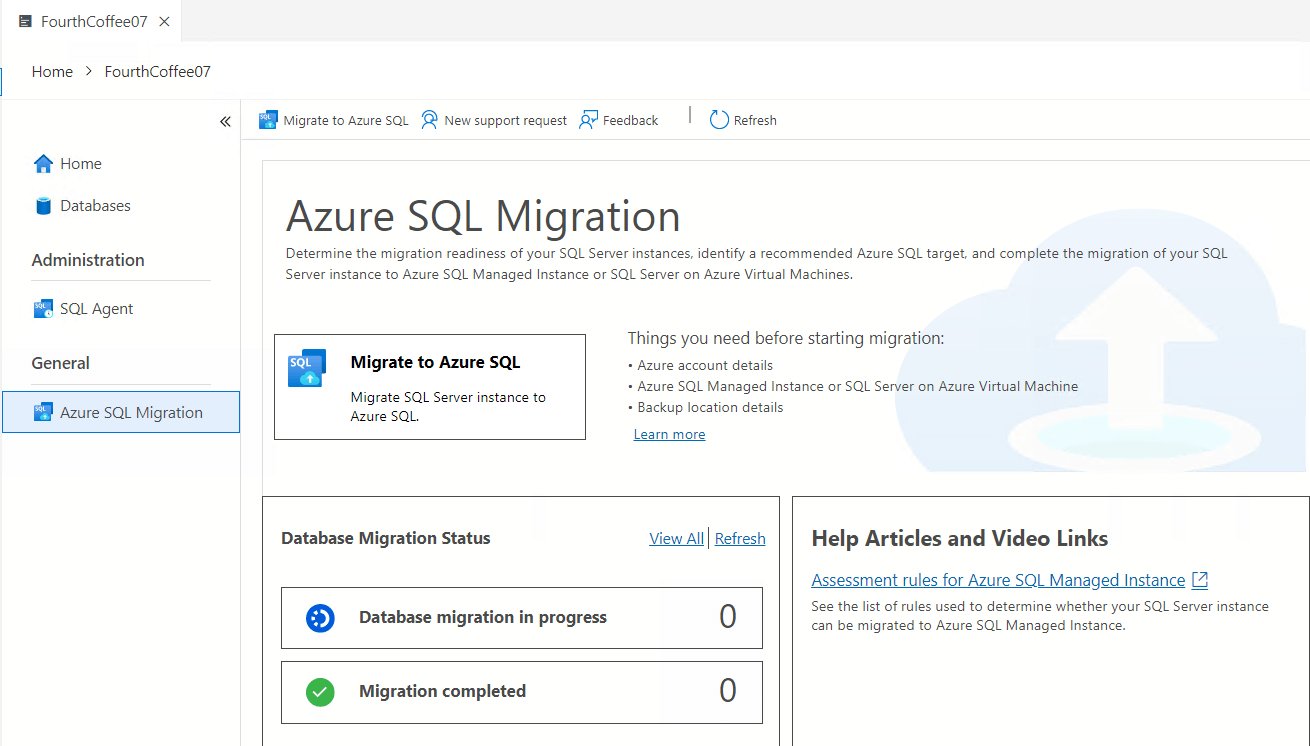
Choose one of the two "Migrate to Azure SQL" buttons on the Azure SQL Migration blade to start the migration wizard.
The migration wizard is comprised of six steps requiring user input and a seventh page simply displaying a summary of the selected migration properties. We will go through each one below.
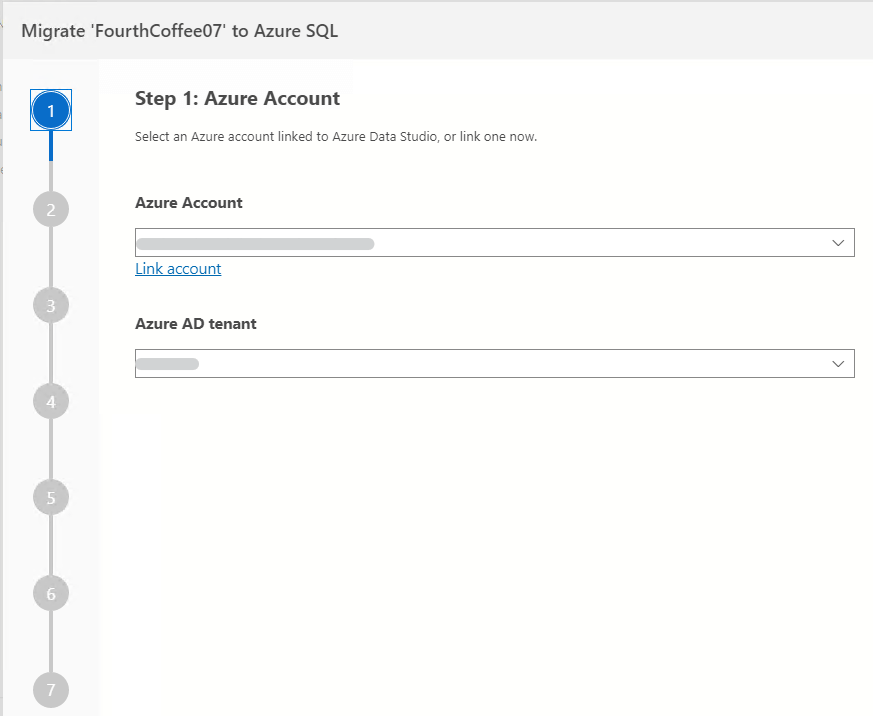
Step One
The first step in the migration is to choose the Azure account under which the migration will run. You can link an Azure account in this step or choose from an existing account linked in Azure Data Studio.
Step Two
In step two of the migration wizard, you choose the database or databases to migrate. In my environment, I have one database, "MyDatabase", in the SQL Server instance.

An assessment of the database is performed to determine which Azure SQL target is available for migration. The assessment process uses the Microsoft.SqlServer.TransactSql.ScriptDom namespace referenced here.
Step Three
In step three, you select the Azure SQL target. For my database "MyDatabase", the assessment determined that there are no migration blockers and both target migration options are available. I can migrate to either Azure SQL Managed Instance or SQL Server on an Azure Virtual Machine. For this migration we will choose Azure SQL Managed Instance.
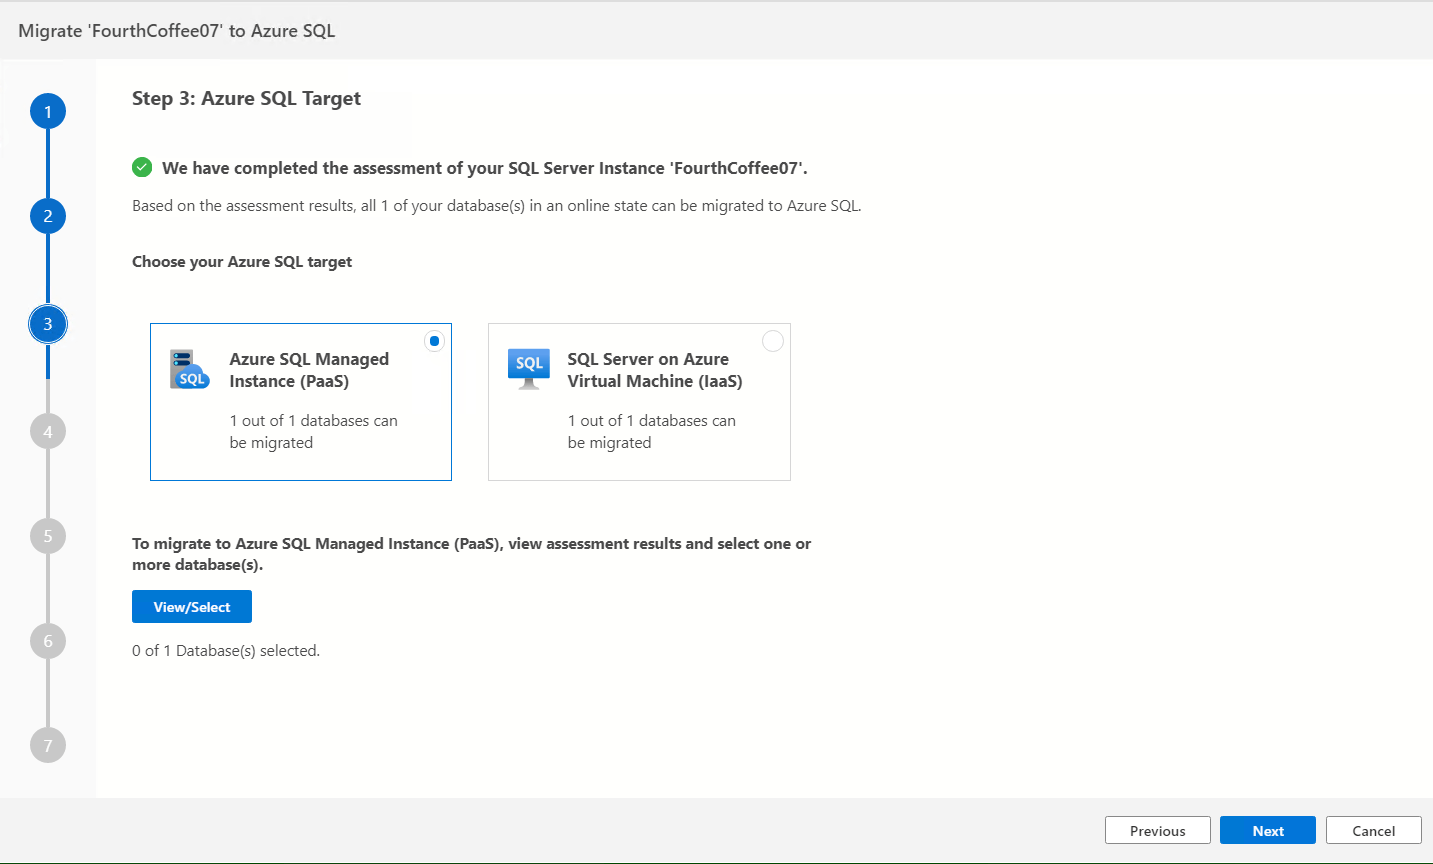
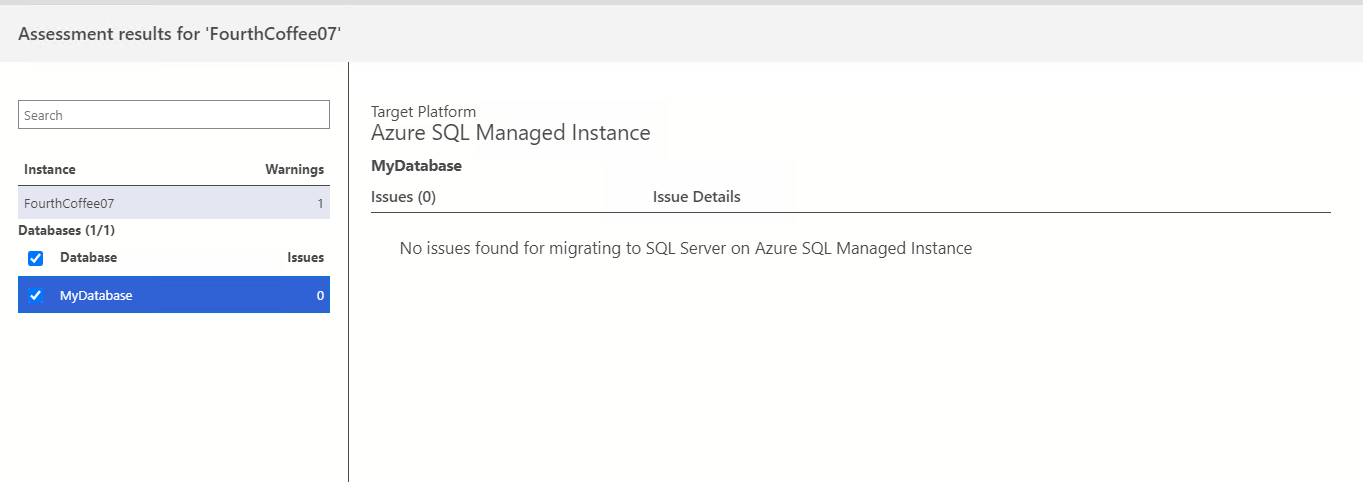
Choose the "View/Select" button to review the assessment results and choose the database or databases for migration.
Next, select the Subscription, Location (Azure Region) and Resource Group containing the target Azure SQL Managed Instance.

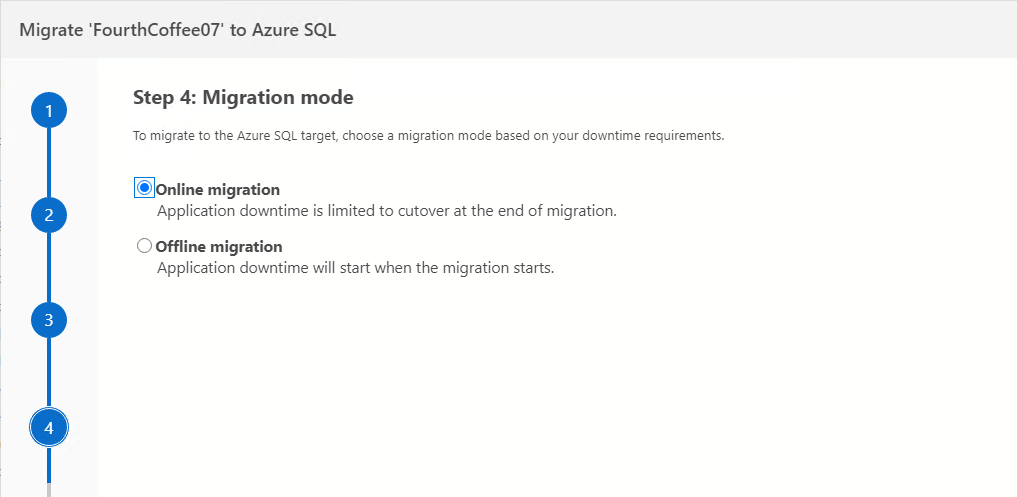
Step Four
In step four of the migration wizard, select either an online or offline migration mode.
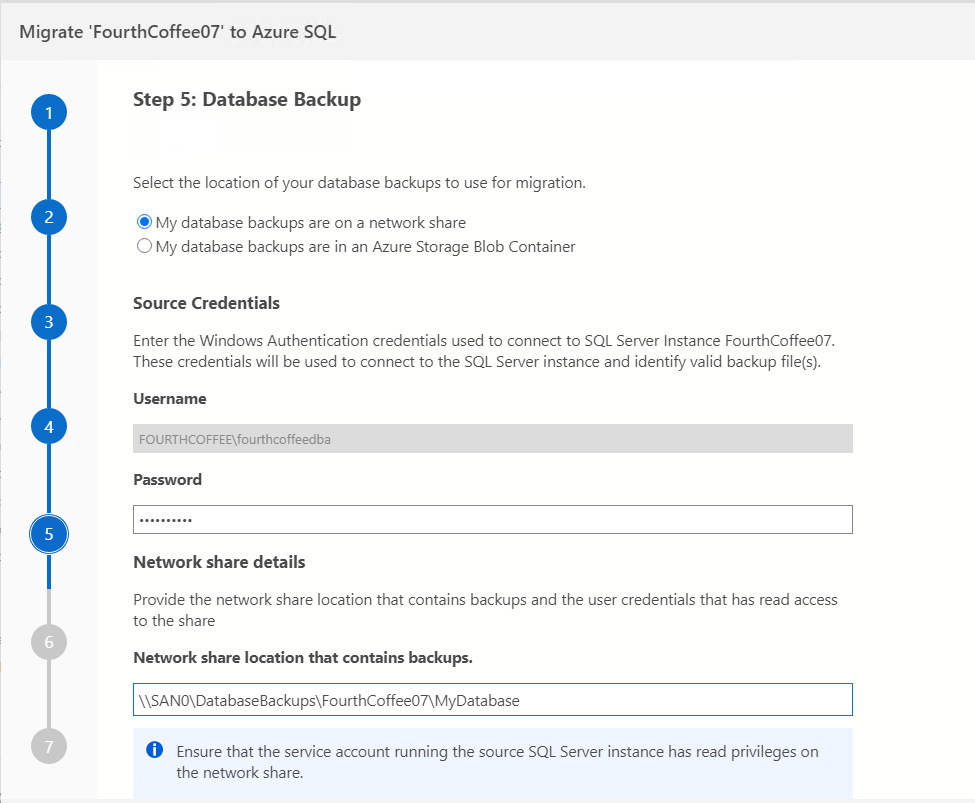
Step Five
Step five of the migration wizard allows you to specify the location of the database backups. You can use either a local network share (SMB) or an Azure Storage Blob Container. For this migration, we'll use a network share as the source location for the database backups.

When network share is selected, the wizard will prompt you for a few additional details.
- Source Credentials: The specified account must have a minimum of CONTROL SERVER permissions to identify valid database backup files.
- Network share details: Specify the network location (SMB) where the database backup files are located. This is the location that the self-hosted integration runtime will periodically check for new database backups.
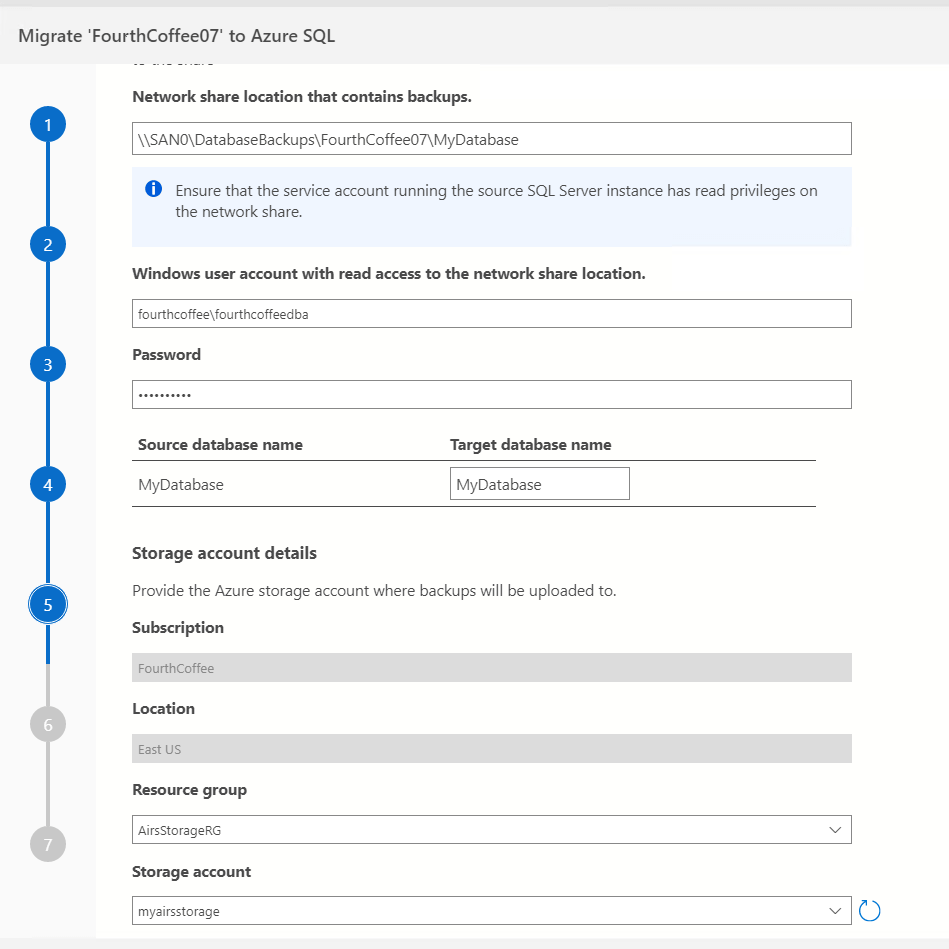
- Windows user account with access to the network share: User account and password with read access to the network share containing the backups.
- Target database name: The Azure SQL Migration extension supports renaming of a database during migration, if desired.
- Storage account details: The Resource Group containing the Azure Storage account to which database backups will be uploaded.
Note that the Azure Storage account information is needed because the Azure Database Migration Service, using the self-hosted integration runtime, copies backups from the local network share to Azure Blob storage before restoring to Azure SQL Managed Instance.
Also note that database backups used for migration should specify the WITH CHECKSUM option, detailed here. An example database backup command is shown below:
BACKUP DATABASE [MyDatabase] TO DISK = '\\SAN0\DatabaseBackups\FourthCoffee07\MyDatabase\MyDatabase.BAK' WITH CHECKSUM,COMPRESSION
Step Six
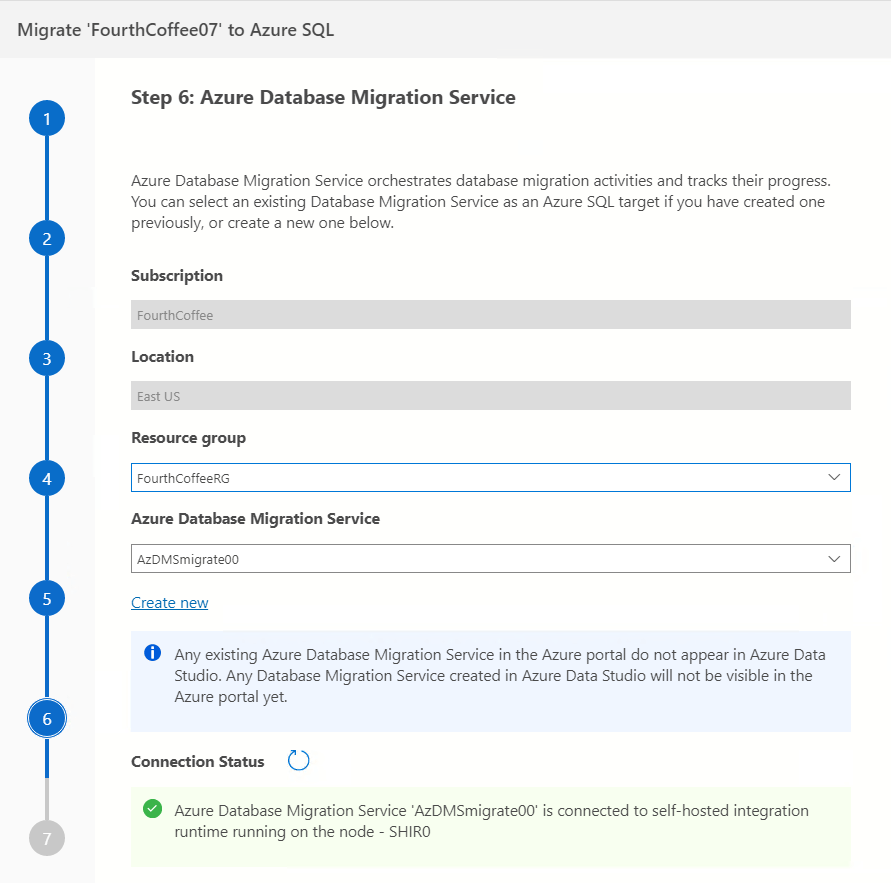
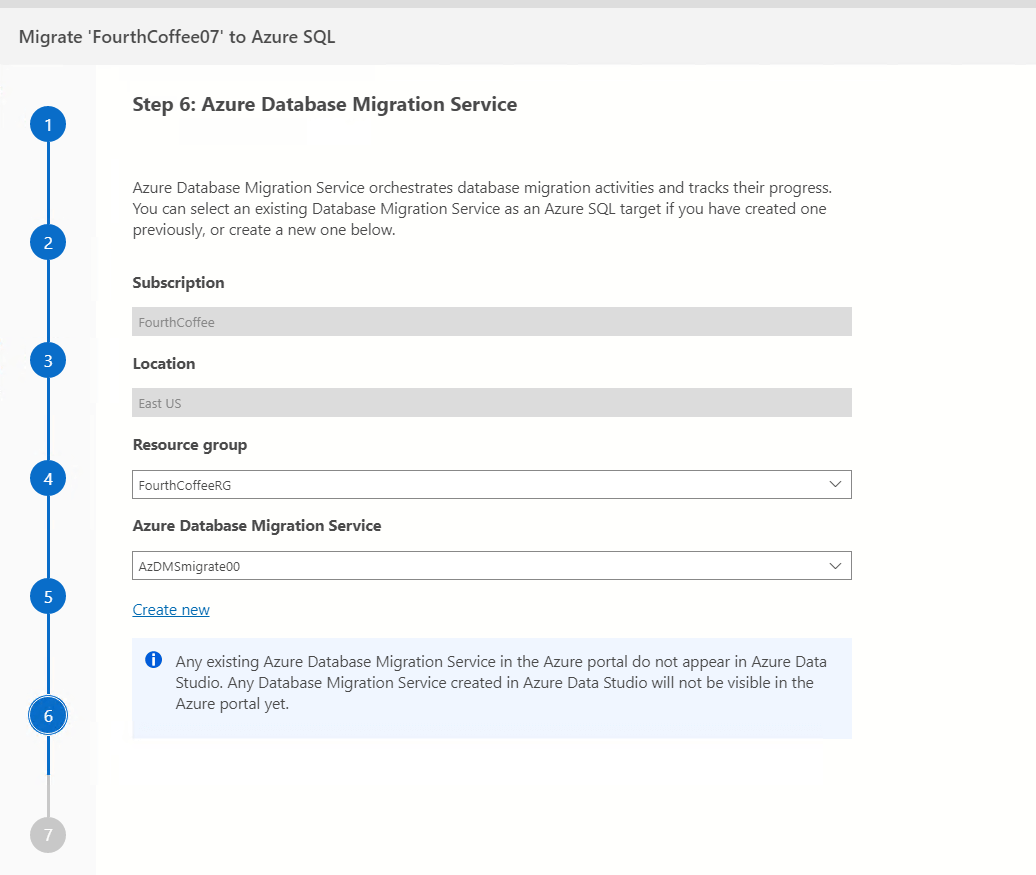
For step six of the migration wizard, select the Resource Group containing the Azure Database Migration Service as well as the Azure Database Migration Service itself.
Note that as with other steps in the migration wizard, many of the drop-down selections auto-populate. So, when the Resource Group is chosen, the drop-down for selecting the Azure Database Migration Service will auto-populate with a list of available services in the selected Resource Group.
Step six of the migration wizard also shows the status of connectivity between the self-hosted integration runtime and the Azure Database Migration Service.
Note that if you do not already have an Azure Database Migration Service provisioned, one can be created directly through step six of the migration wizard. Choose the "Create new" link, select an existing Resource Group or create a new one and specify a name for the Azure Database Migration Service.

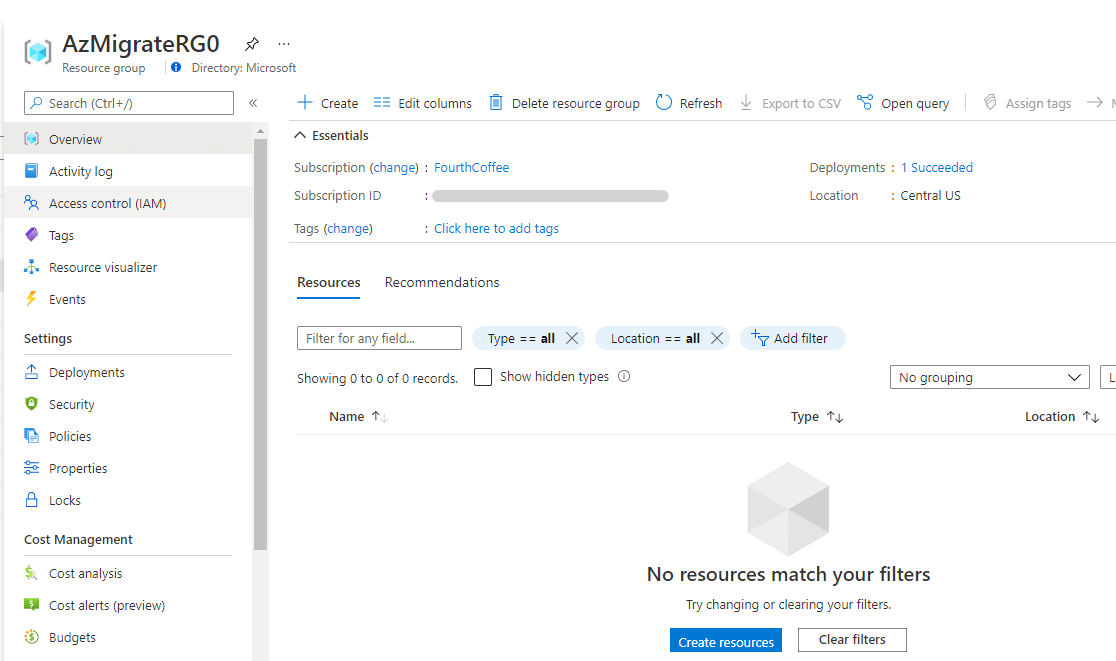
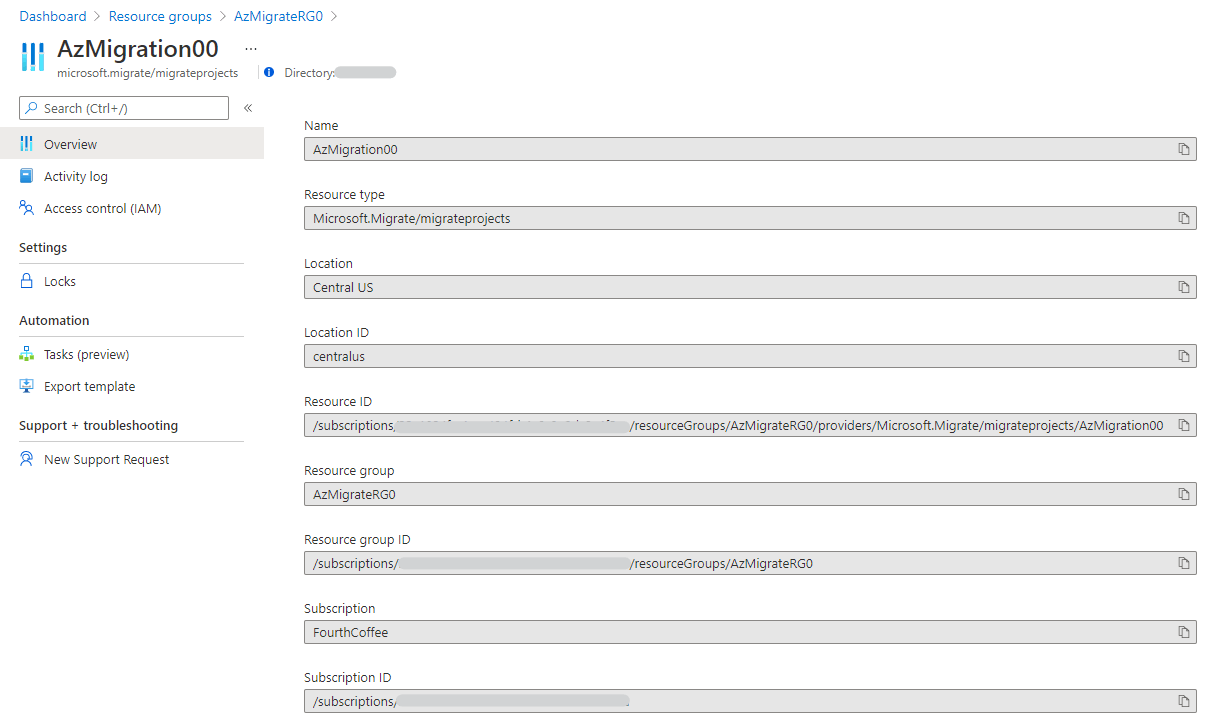
An interesting point regarding the Azure Database Migration Service created through the Azure SQL Migration wizard. If you use the Azure portal and browse to the Resource Group specified when creating the Azure Database Migration Service, the Azure Database Migration Service will not be visible.
Select the "Show hidden types" check box to make the Azure Database Migration Service resource visible.

Note that you cannot make any changes to the Azure Database Migration Service, only view Properties. This is because the resource is controlled by Microsoft for the purposes of Azure Migration Service through Azure Data Studio and is provided at no cost.
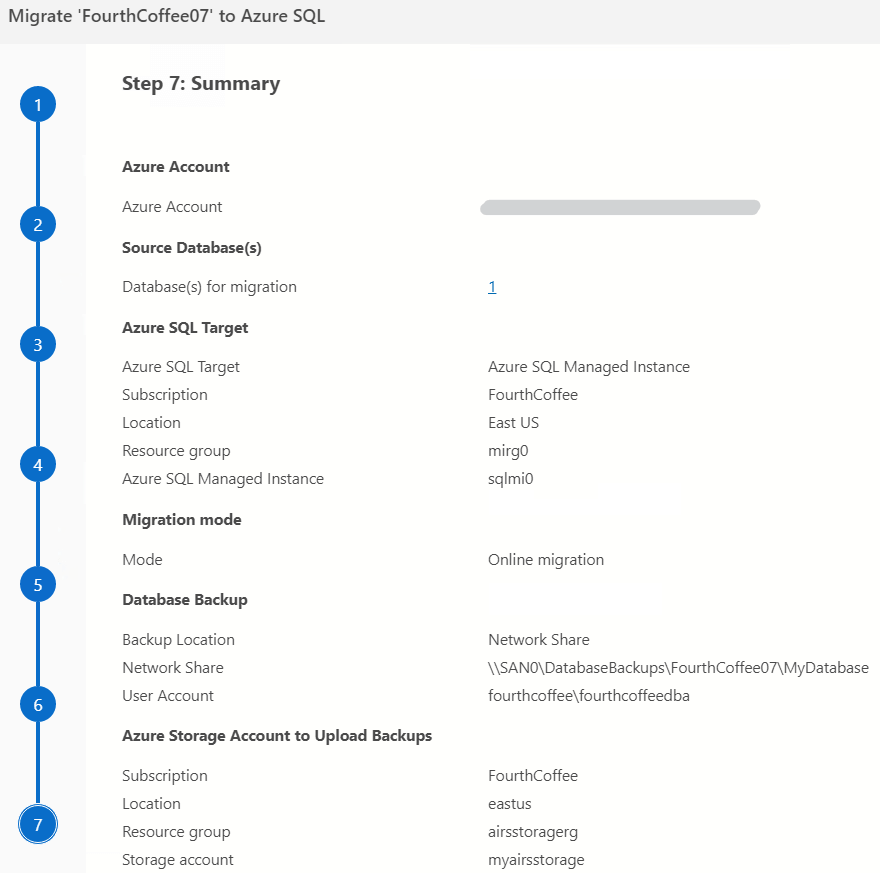
Step Seven
Step seven of the migration wizard provides a summary of the migration. Choose "Done" in the lower right corner to begin the migration.
A pop-up will appear in the lower right corner of Azure Data Studio indicating that the migration has started.
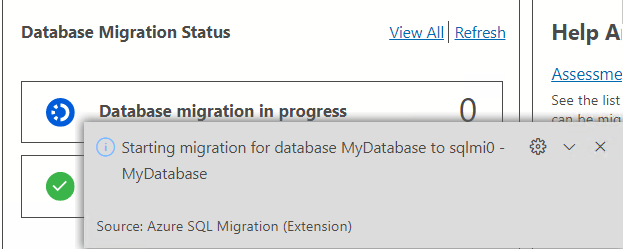
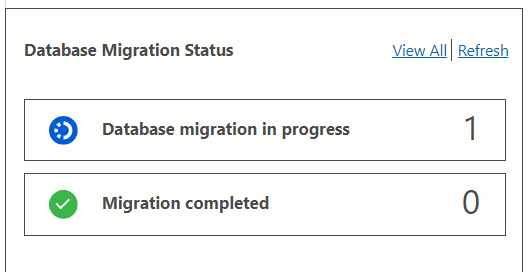
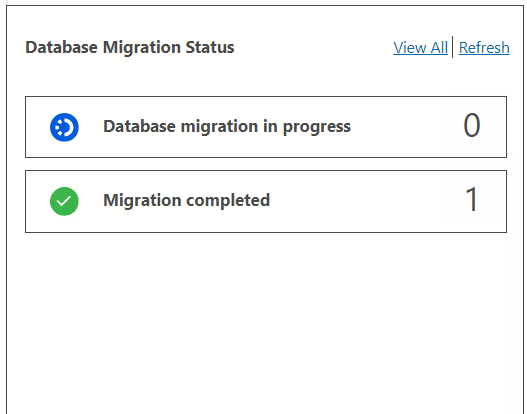
The Database Migration Status section of the Azure SQL Migration tab will also indicate the number of migrations that are in progress. Choose "Database migration in progress" to view migration details on the Migration Status screen.
The Migration Status screen will contain one entry per migrated database. Choose a database from the list to view detailed migration status information.

For our "MyDatabase" migration, we can see specific details regarding overall migration status, the database backup files discovered and uploaded as well as file size and copy throughput.
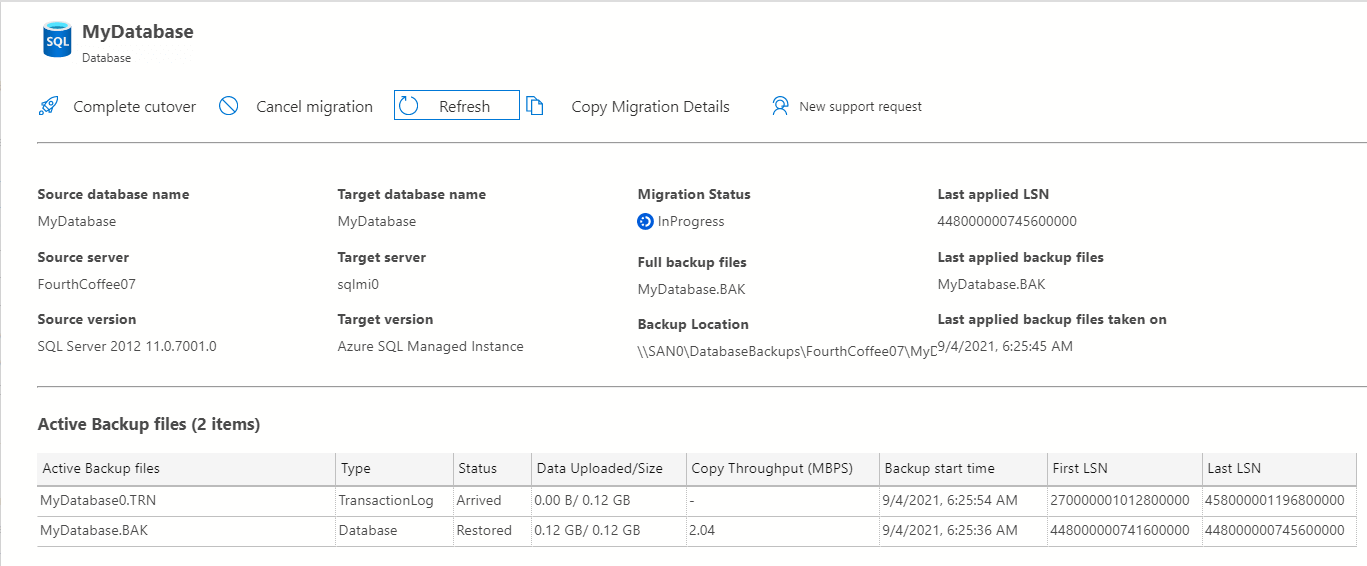
When you are ready to complete the migration and cutover to Azure SQL Managed Instance, choose "Complete cutover" . The "Complete cutover" blade will appear from the right side of the screen asking for verification that no additional transaction log backups should be restored before cutover.
Select the confirmation checkbox and choose "Complete cutover" button.

A pop-up will appear in the lower right corner indicating that the cutover is in progress.

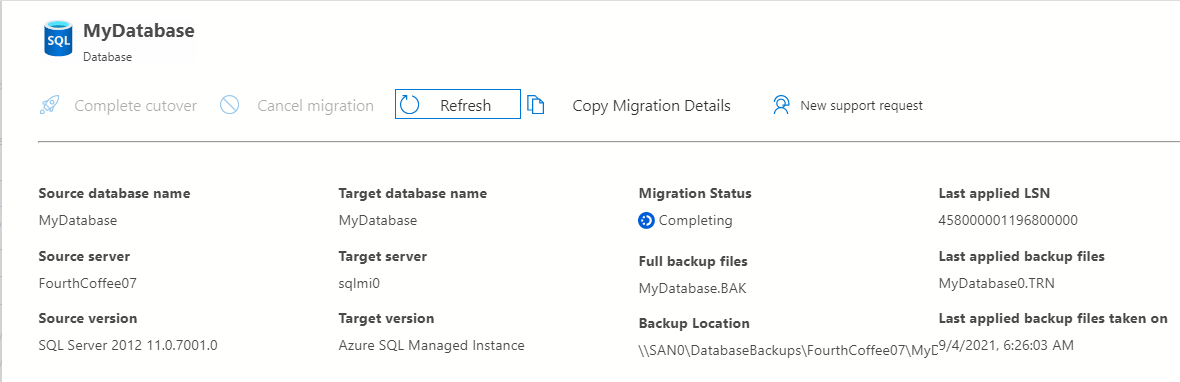
Note that the Migration Status has changed to "Completing"
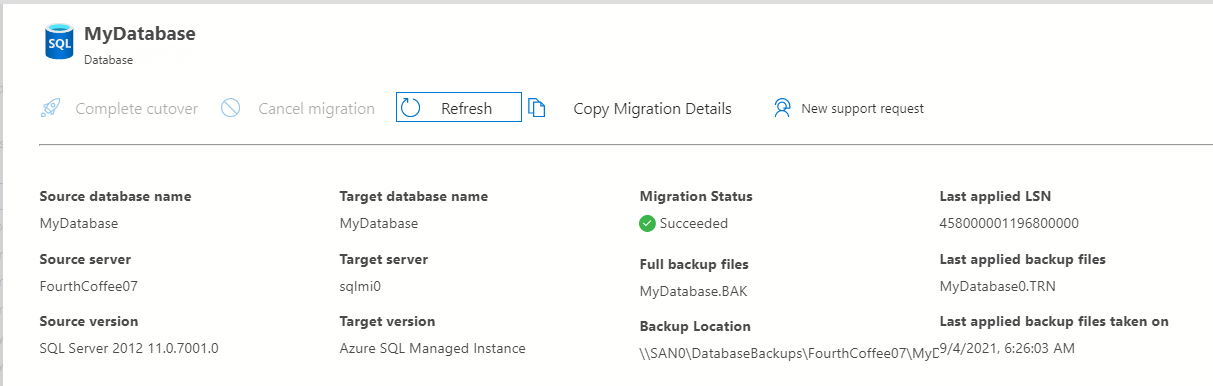
Once cutover is completed, the Migration Status will indicate "Succeeded".
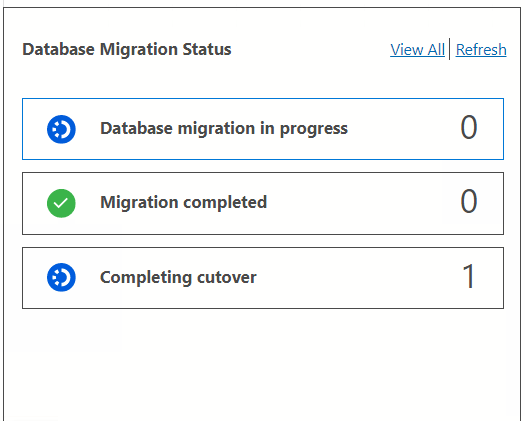
The Database Migration Status section on the Azure SQL Migration screen will also update accordingly.
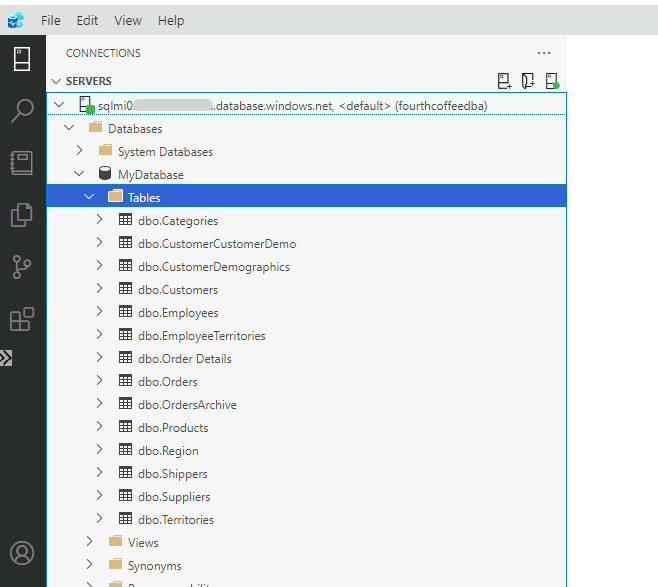
In the target Azure SQL Managed Instance, the database is online and available for use.
Online Migration Using Azure BLOB Storage
In this section, we'll cover a few of the differences that you will encounter in the Azure SQL Migration extension migration experience when using Azure Blob Storage as a source for the database backups.
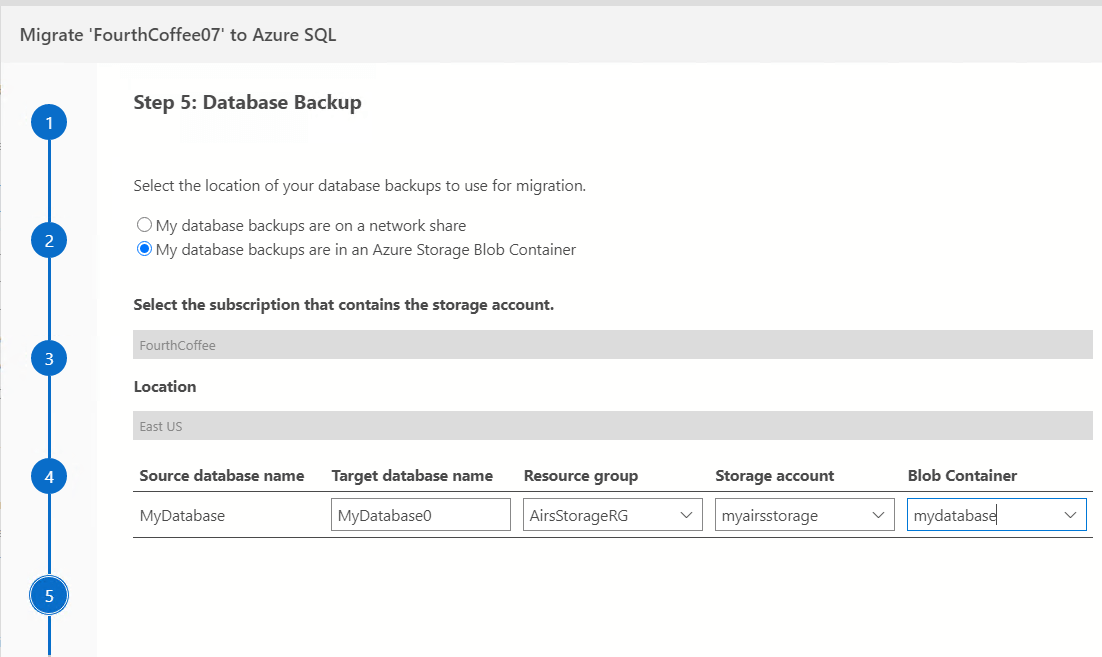
In step five of the migration wizard, select "My database backups are in an Azure Storage Blob Container" instead of the network share selection that we used in the previous section. Once selected, that migration wizard will display several dropdown menus for selecting the blob container. Note in the example below, the migration wizard has detected that a database named "MyDatabase" already exists on the target Azure SQL Managed Instance.

Moving from left to right, select the Resource group that contains the Storage account that contains the Blob Container that contains the database backups to be restored to the target.
Step six of the migration wizard using Azure Blob storage will look very similar to the experience when using local network storage. The only notable difference is that no connection status information between the Azure Database Migration Service and the self-hosted integration runtime is displayed. When using Azure Blob storage as a source for the database backups, the self-hosted integration runtime is not needed to facilitate copying backups from a local network share.
Conclusion
In six easy steps we migrated an on-premises database running in SQL Server 2012 to Azure SQL Managed Instance. The Azure SQL Migration extension is a great addition to Azure Data Studio and provides an easy, low-friction method for migrating databases to Azure.
In the next post, we’ll walk through offline migrations scenarios as well as migrations to SQL Server on Azure Virtual Machines.
