

Introduction
Azure Automation is a cloud-based service that provides consistent management capabilities across Azure and non-Azure environments. Visual Studio Code (VS Code), in my opinion, is a next-gen code editor that is based on open-source. It is available free of cost. On January 12, 2023, Microsoft combined the power of these two by announcing the public preview of Azure Automation Visual Studio Code Extension. The extension is also free of cost however, the source code on GitHub is not made public yet. While the extension is free, keep in mind that Azure Automation has a price tag associated. Please refer to the Automation - Pricing for cost details on process vs. configuration vs. update management.
The extension uses the Azure Account extension and offers powerful features like single-sign-on, support for all the automation runtime stack - PS5/7, Python2/3 runbooks, management of automation assets like certificates, variables, credentials etc.
In this article, we will go through the process of integrating this extension with VS Code and execute a simple task.
Pre-requisites
- An Azure subscription
- VS Code
- Locally installed PowerShell modules and Python packages
- Azure Automation Account
The next few sections will walk through how to get started with this new extension and deploy your own automations.
Azure Automation Account
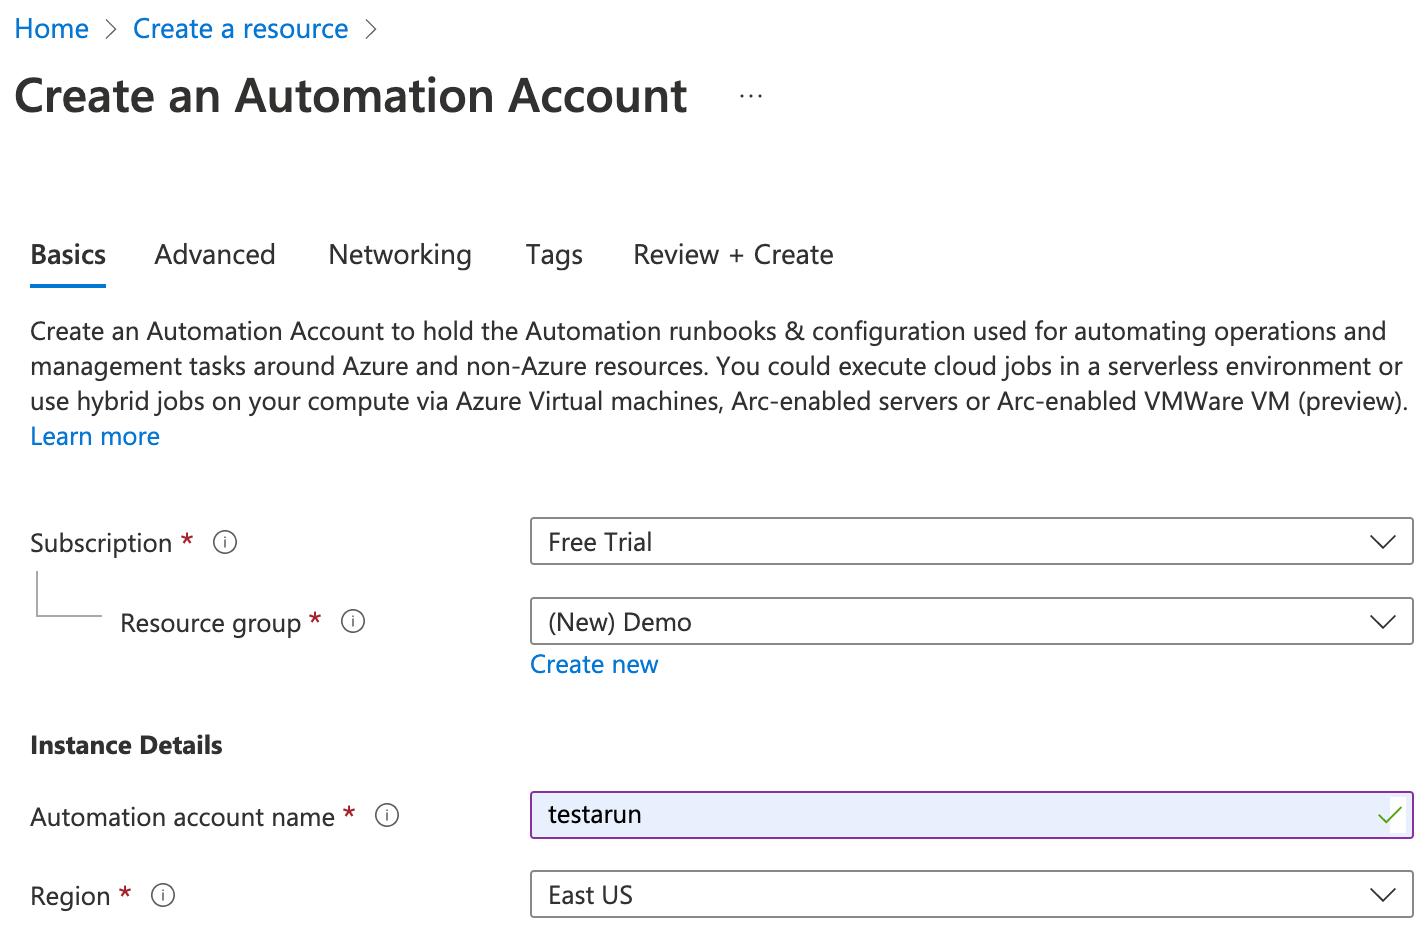
Create an Azure Automation Account, if you do not already have one. You do this by logging on to the Azure portal. Navigate to Home --> Create a resource. Under Automation, click on "Create".
On the Basics tab, choose your Subscription, and Resource Group (Create New, if it does not exist already), provide a new account name and select an appropriate Azure region.
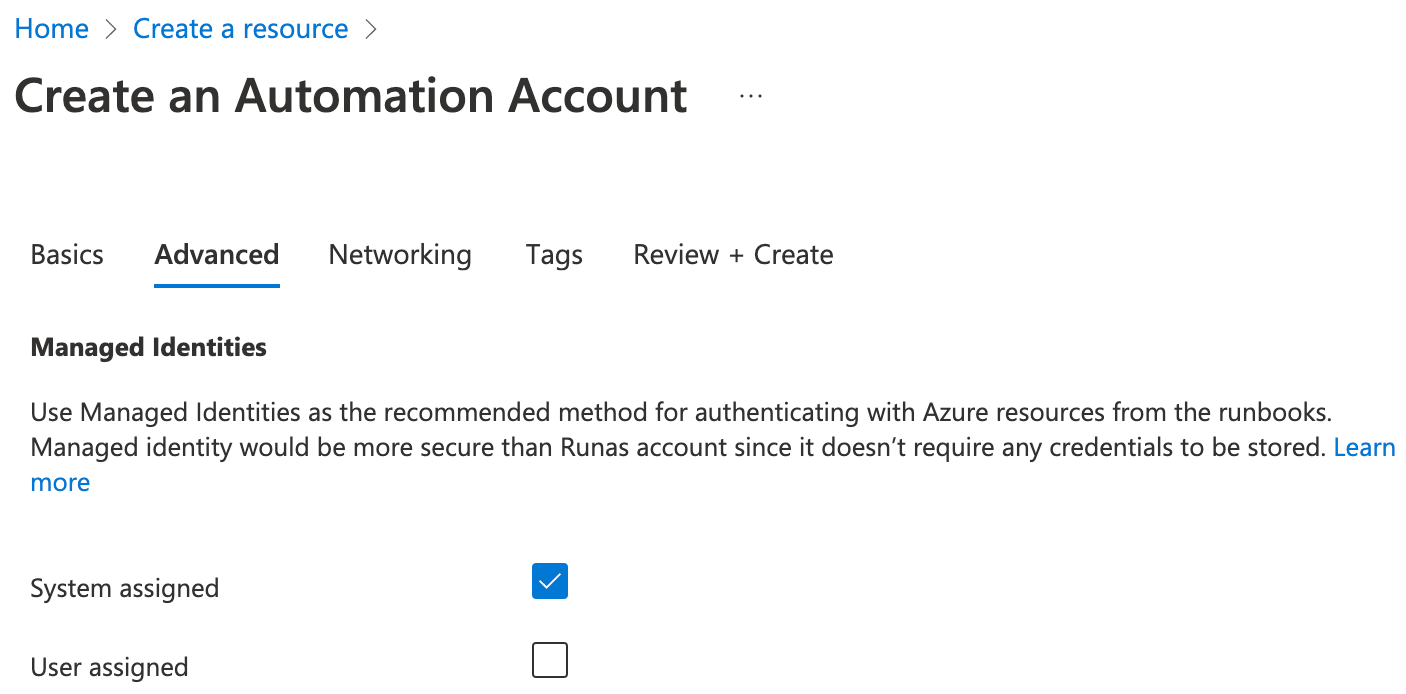
Under the Advanced tab, choose System assigned Managed Identity. This is a recommended way to authenticate in your runbooks.
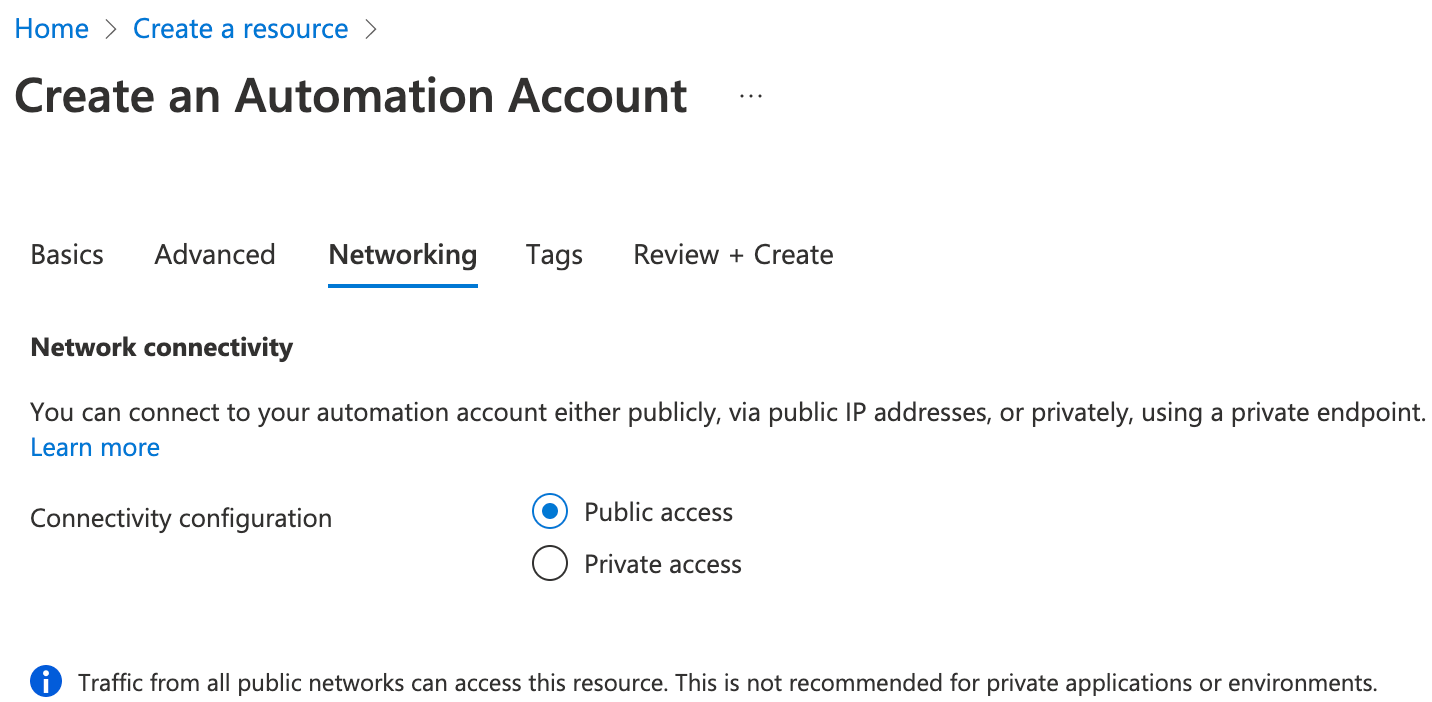
For the purpose of this article, I chose "Public access" on the Networking tab however, this is not a recommended option in production. One should choose "Private access" enabled via private endpoint connections.
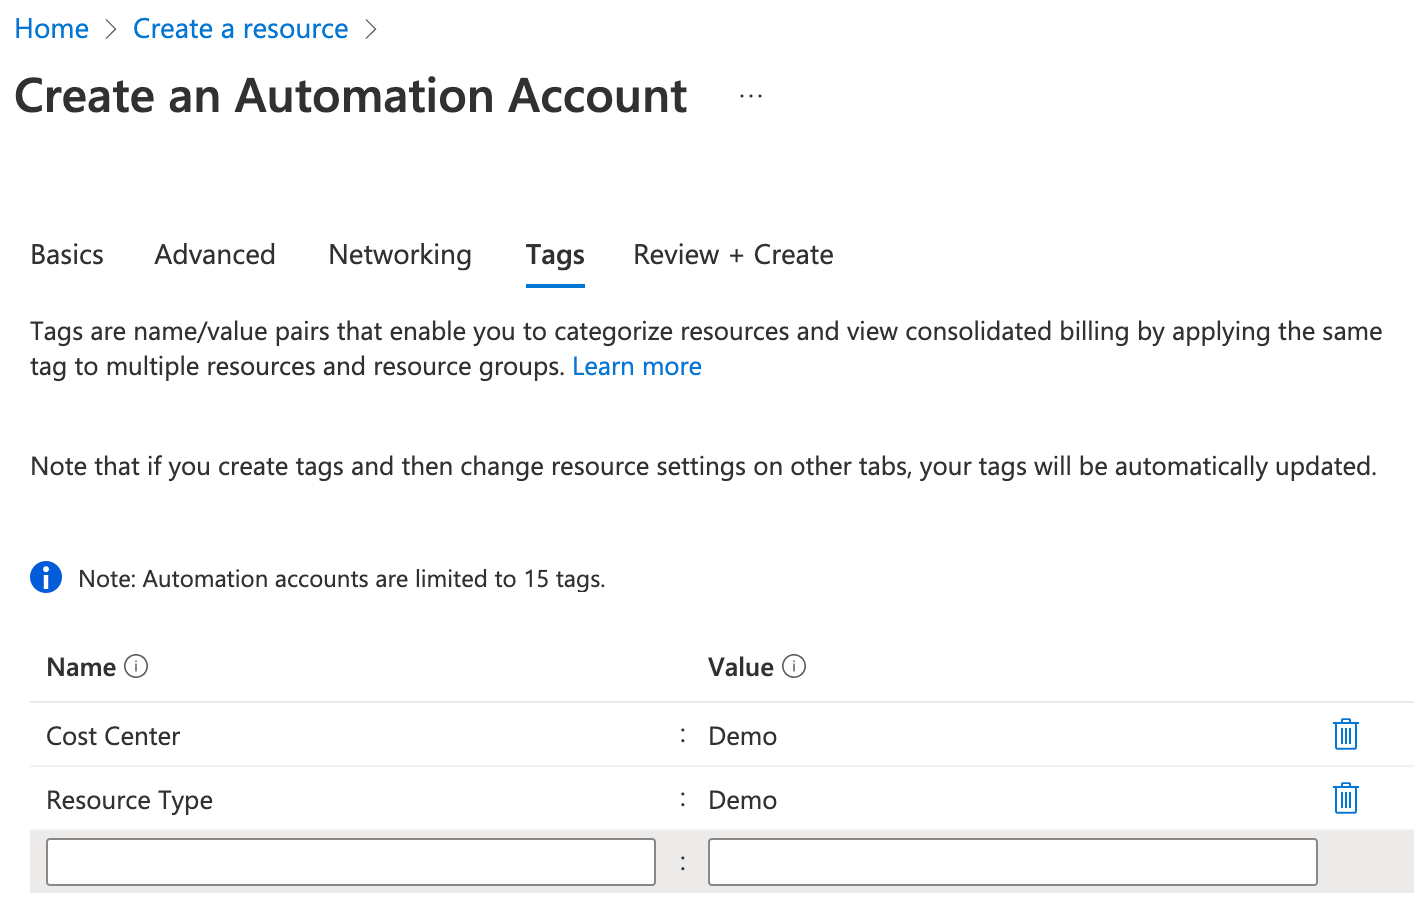
On the Tags tab, assign appropriate tags for the Automation Account and click "Review + Create".
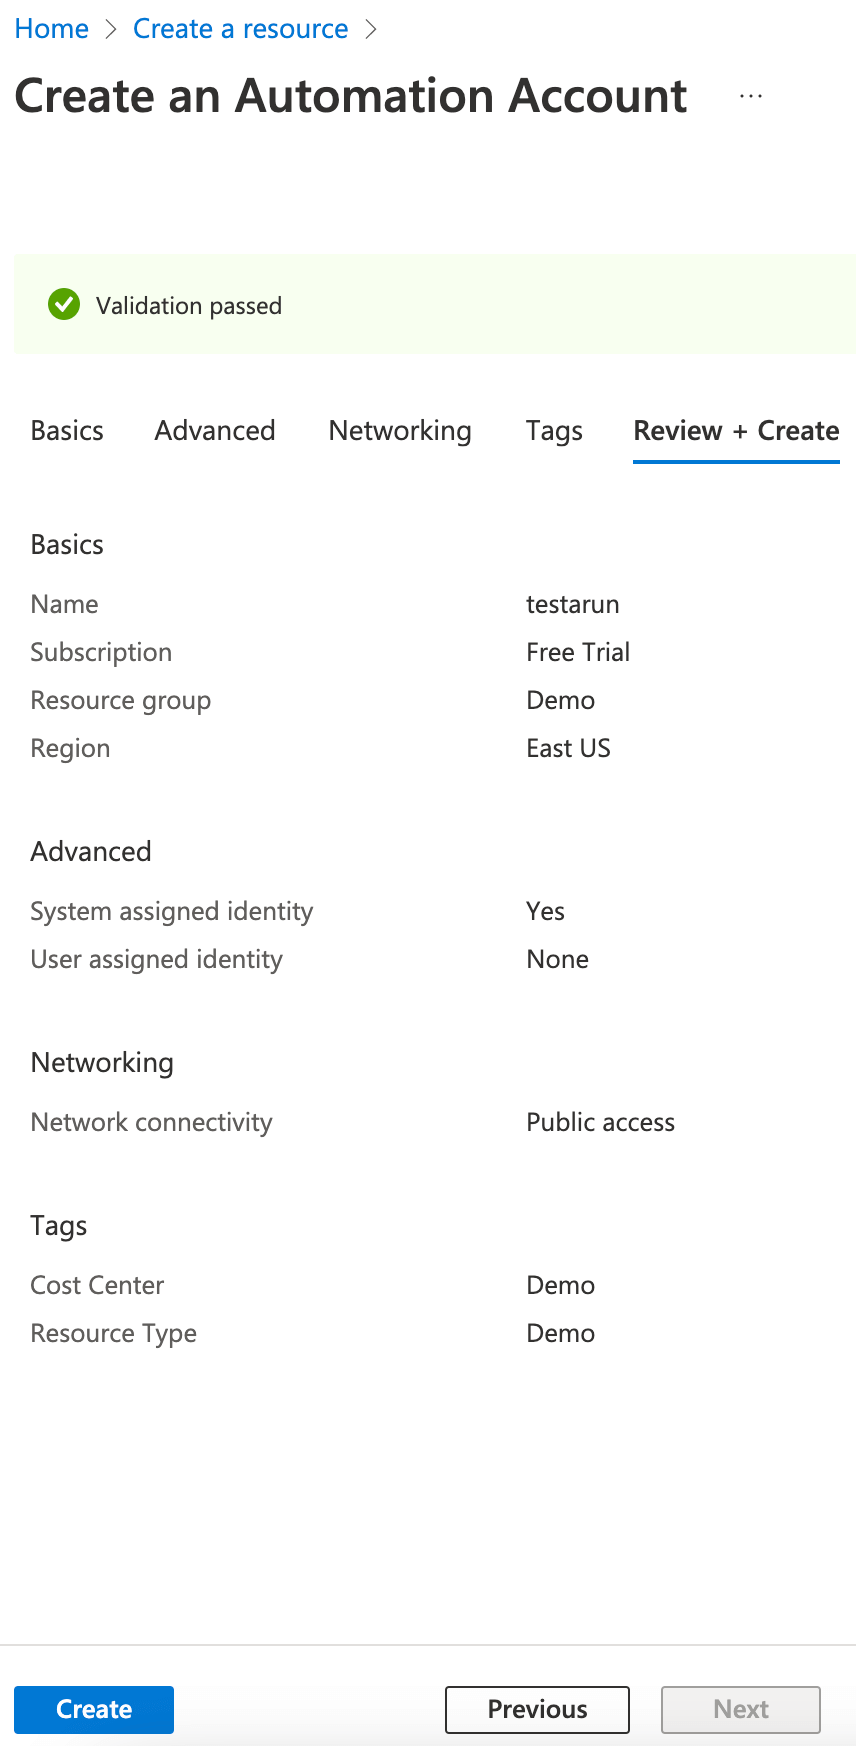
The next screen will show all the chosen values and if it passed the validation, click "Create" now.
Enable the Azure Automation Extension in VS Code
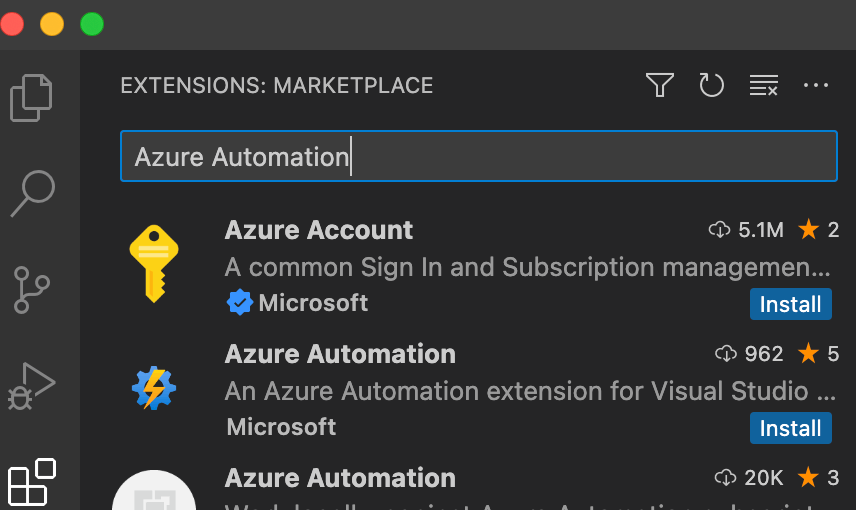
Open VS Code, from the menu bar, go to Extensions, and in the search box, type Azure Automation. Click Install. This will install the Azure Automation Extension, and Azure Account extension, if not already installed.
Restart/ Reload VS Code.
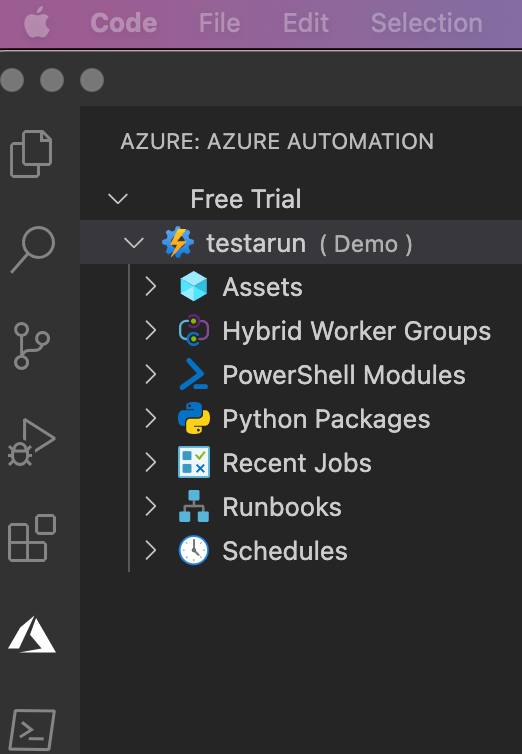
Access Azure Automation Resources via VS Code
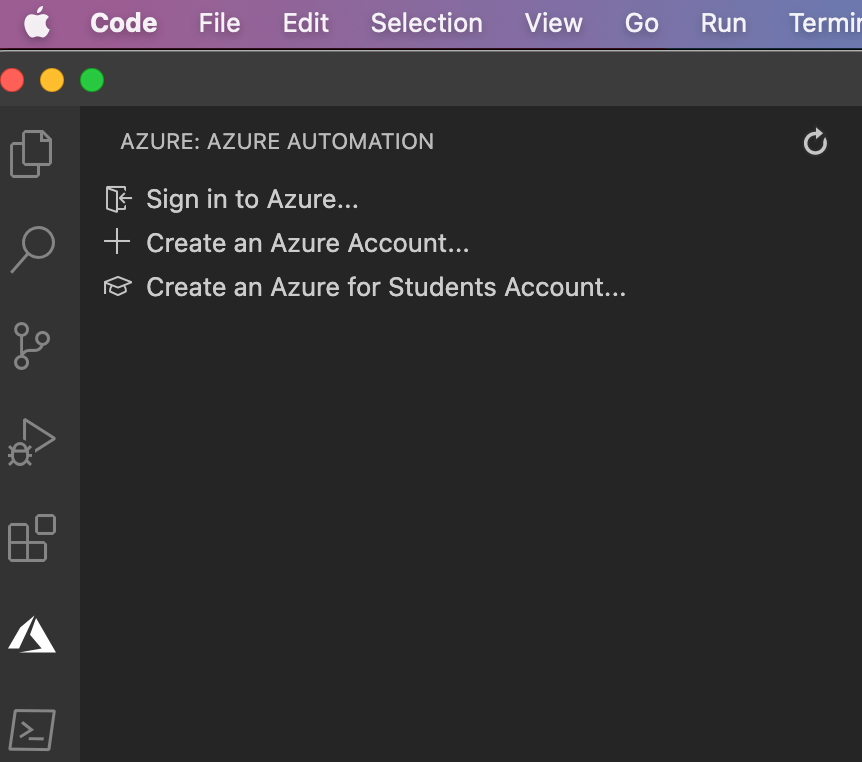
Open VS Code. You would notice that there is a new icon on the menu bar now for Azure. You can sign in to Azure by either one of the following ways:
- Click on the Azure icon on the left menu bar and click on "Sign in to Azure", or
- Use the Azure: Sign-in command (For Mac: Shift + Command + P)
Either way, you will be redirected to your default browser window to enter credentials. Once authenticated, close the browser window and return to VS Code.

Upon login, you will be able to explore the Azure Automation resources.
Execute a Sample Task
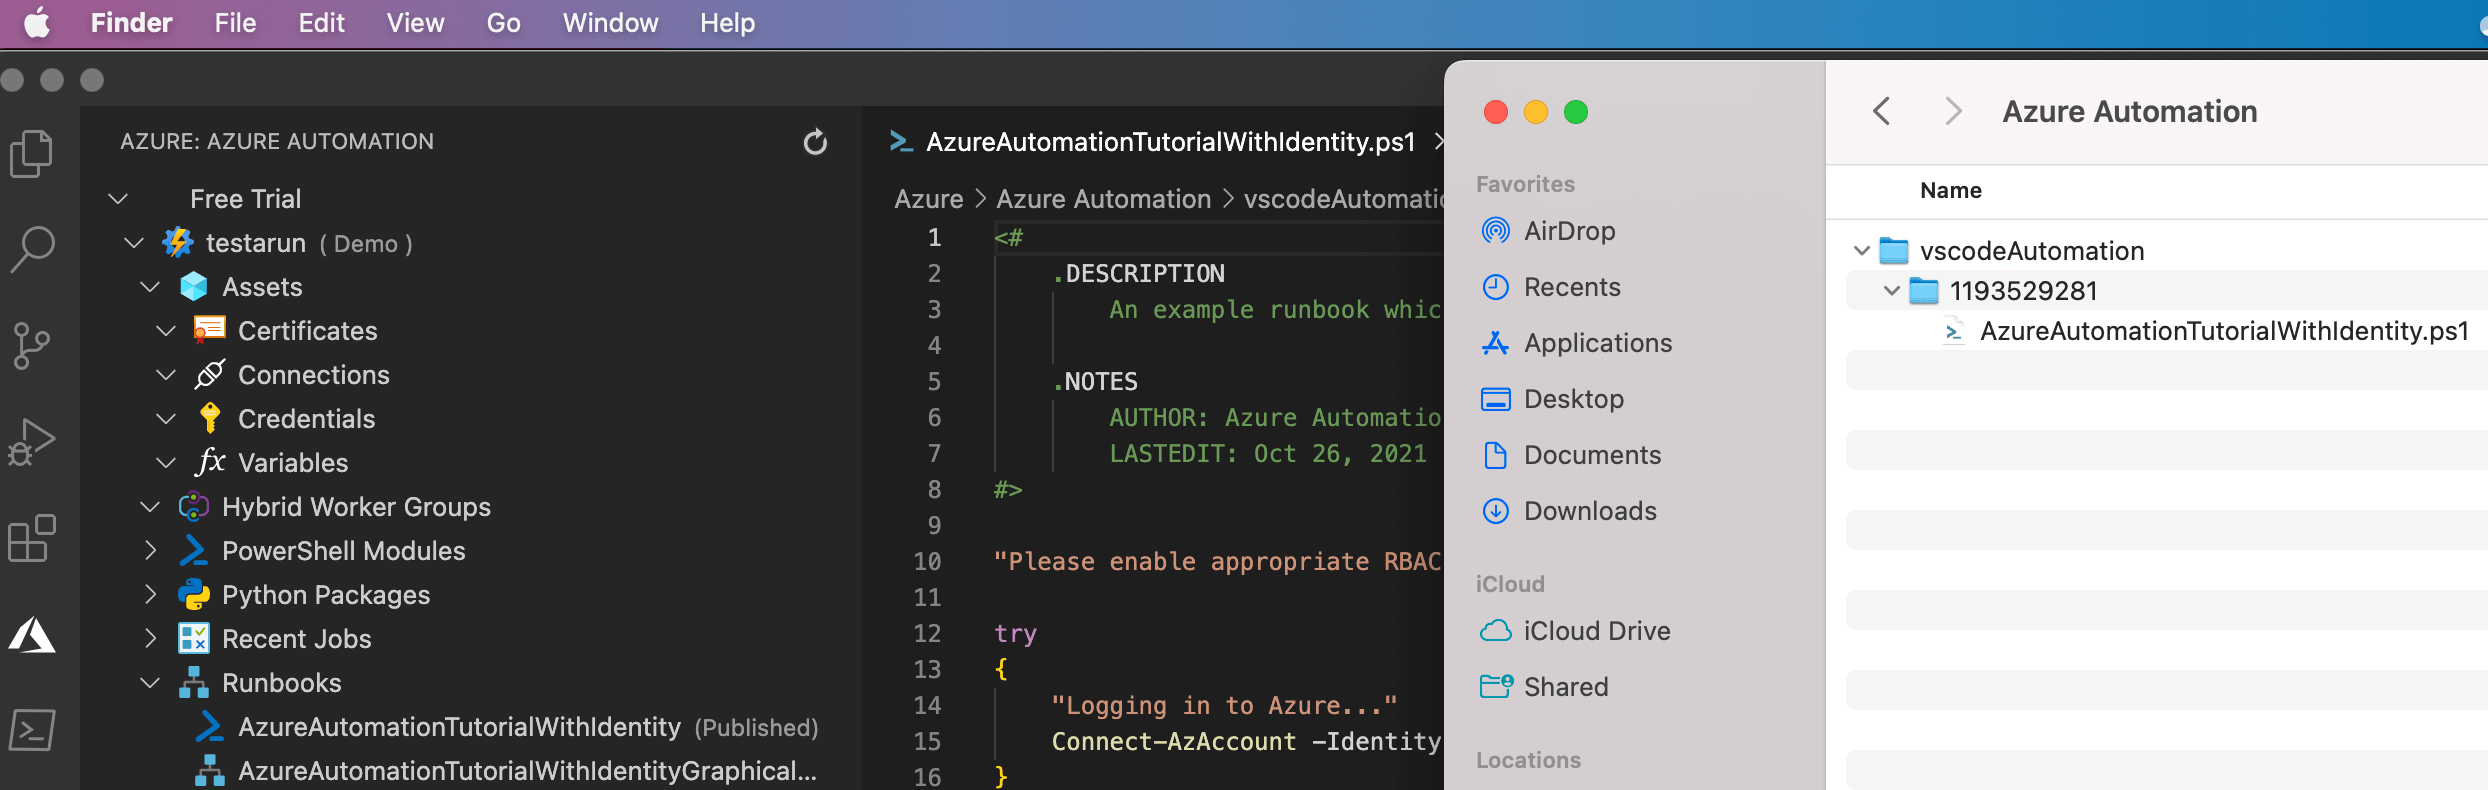
The next step is to set up a base directory that will download a local copy of the Azure Automation resources. You can set, or change the default directory using the command palette and the command >Azure Automation: Change Directory.
Once the base directory is set, let us expand "Runbooks" from the menu bar on VS Code and select the default published runbook. This will download a local copy of the runbook. You can navigate to the local folder to confirm.
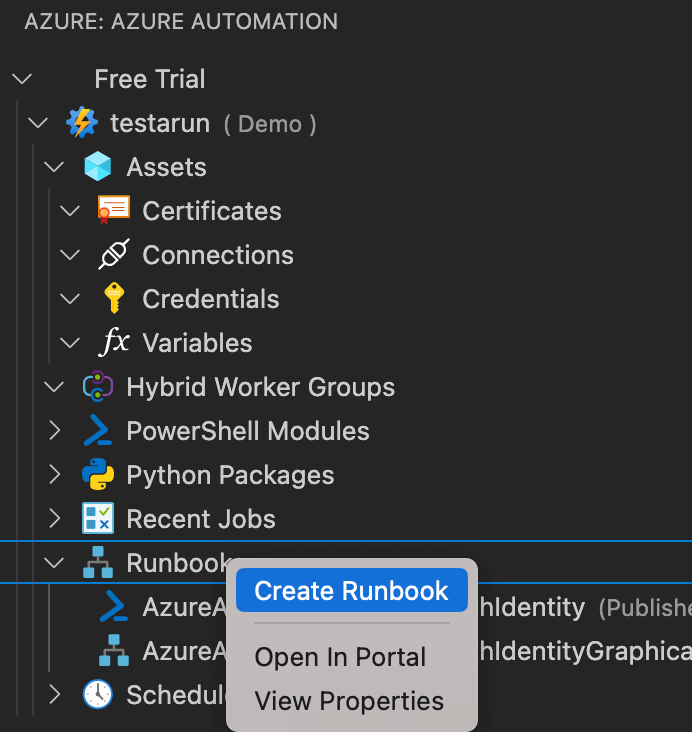
Create a Sample Runbook and Test it Locally
Right-click on Runbooks and click "Create Runbook".
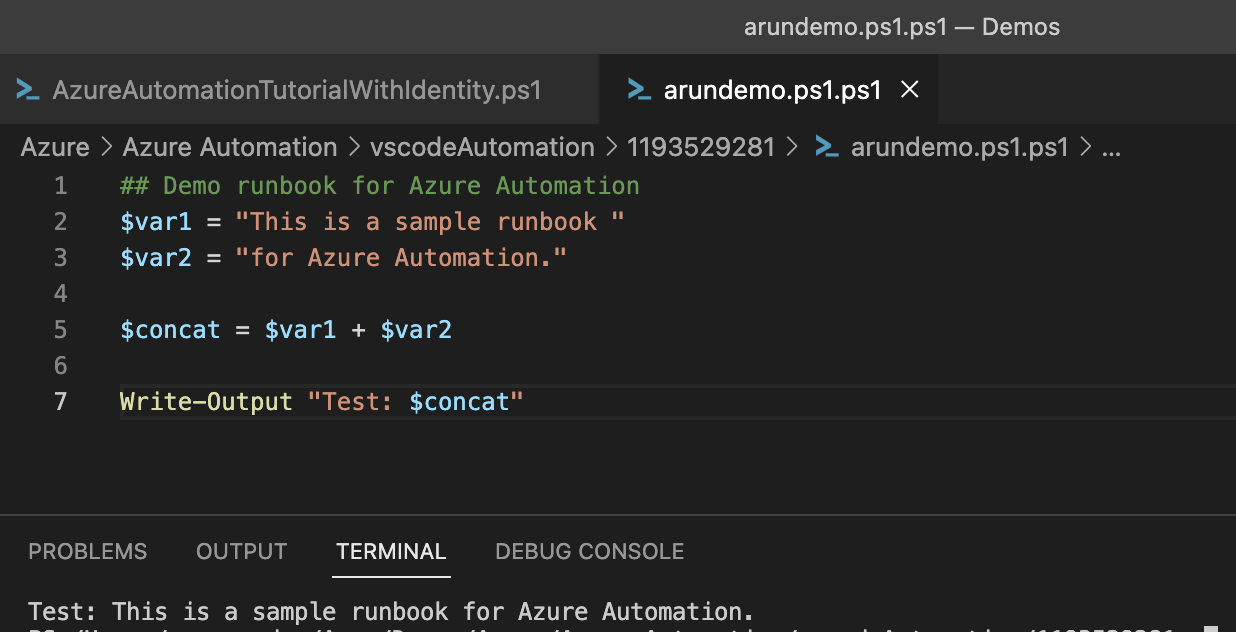
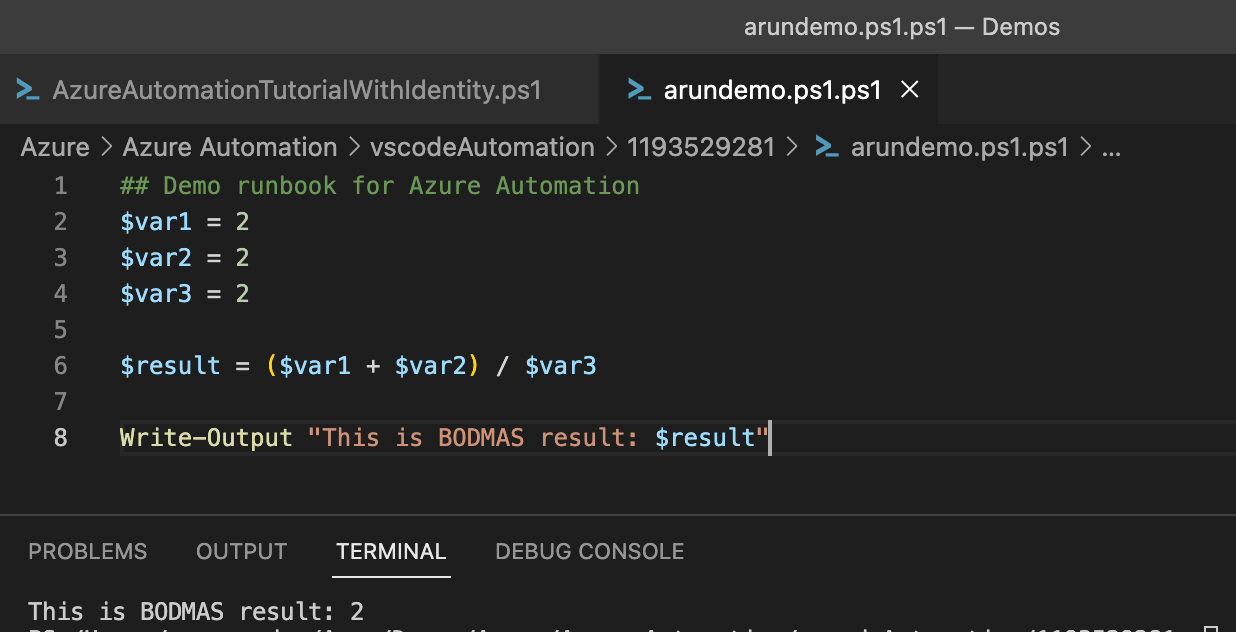
Copy and paste any of the below code into the runbook you just created and save.
## Demo runbook for Azure Automation
$var1 = "This is a sample runbook "
$var2 = "for Azure Automation."

$concat = $var1 + $var2

Write-Output "Test: $concat"
## Demo runbook for Azure Automation
$var1 = 2
$var2 = 2
$var3 = 2

$result = ($var1 + $var2) / $var3

Write-Output "This is BODMAS result: $result"
To test a local copy of the runbook in debug mode, right-click on the runbook and click "Run Local in Debug Mode".
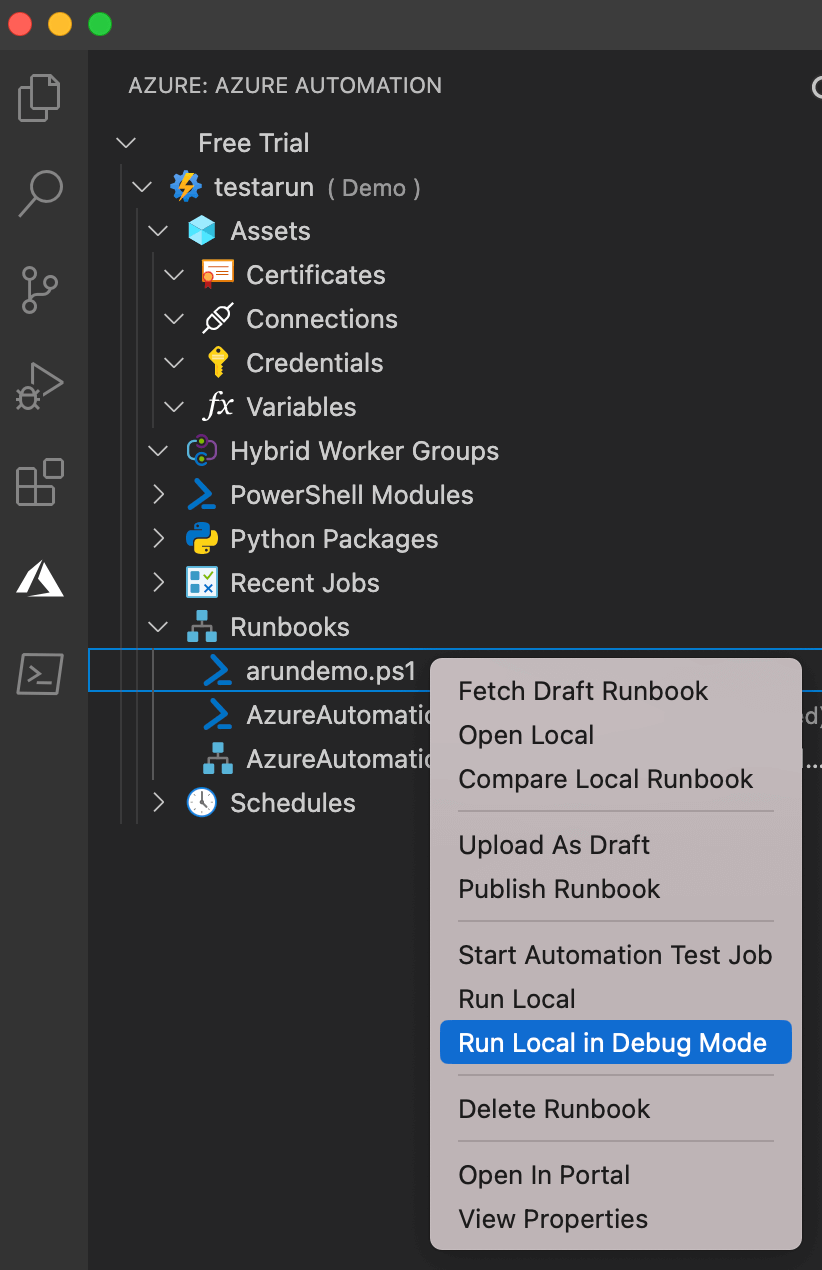
In the argument, just hit Enter and you should be able to see the desired output in Terminal.
Publish a Runbook
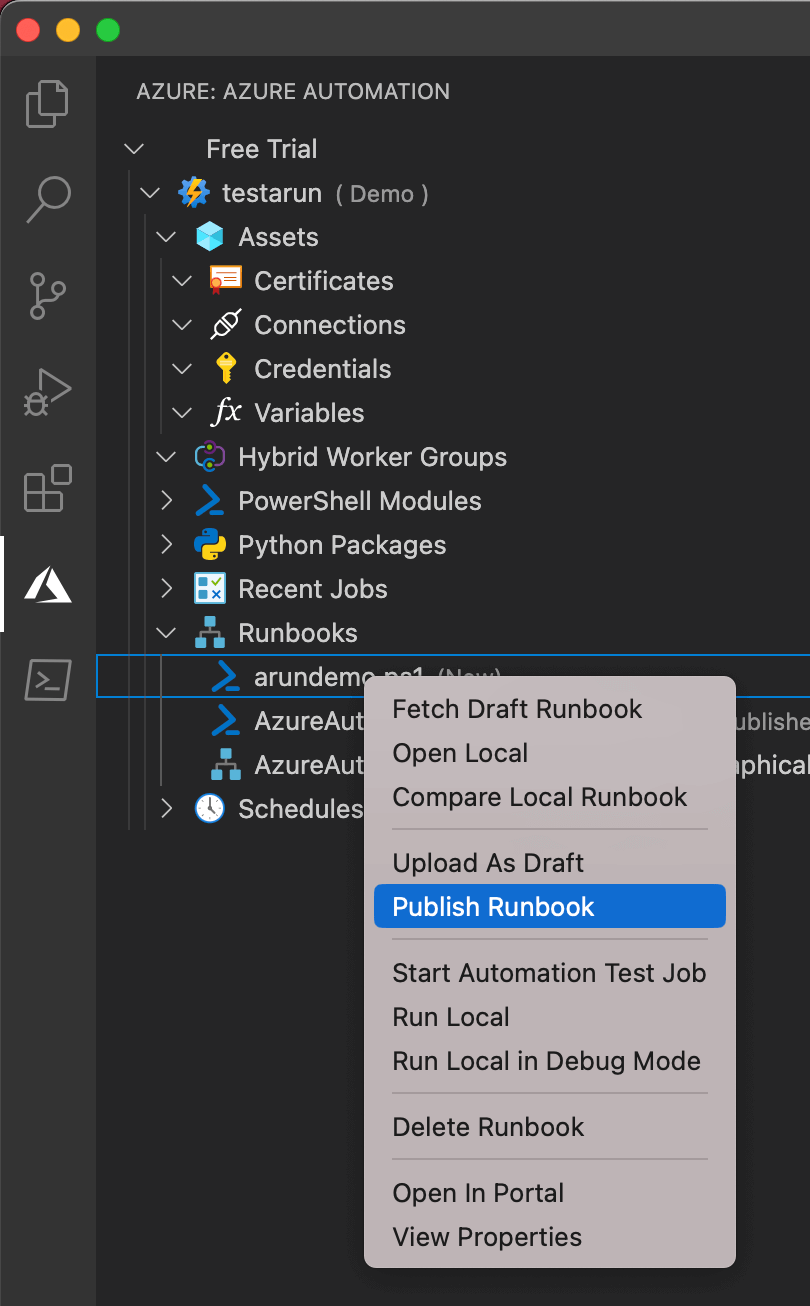
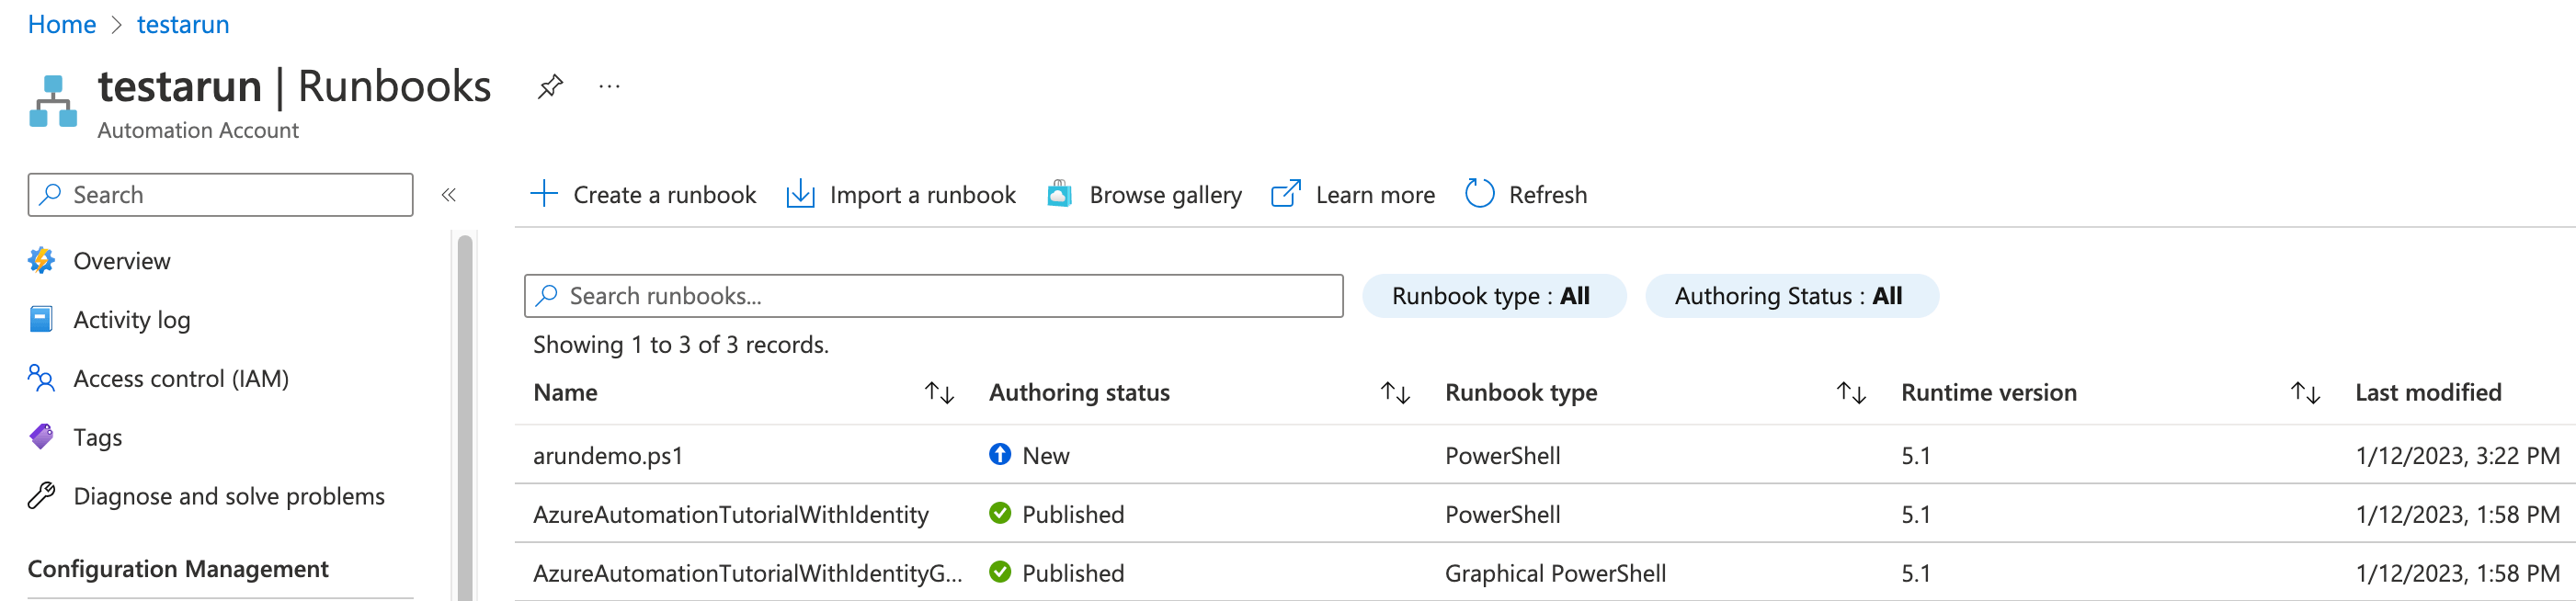
Once a runbook is tested, and you are satisfied, right-click on the runbook and click "Publish Runbook". You should be able to verify by logging on to the Azure portal in your browser and navigating to Runbooks under "Process Automation" of your Automation Account.
Conclusion
Both Azure Automation and VS Code are powerful tools. In this article, we saw how the Azure Automation extension for VS code combines the power of these two and enables administrators to create and test Azure Automation runbooks locally. Refer to the below links to learn more about managing and working with Azure Automation runbooks:
