

Introduction
Azure Cloud Shell is a browser-based tool that allows the creation, configuration, and management of Azure resources using a shell. Azure Cloud Shell supports Azure PowerShell and Bash Command Line Interfaces. This tool is comparable to other cloud shells offered by Google Cloud and AWS. Cloud Shells enhance the convenience associated with managing resources in the cloud. The administrator can use the tool from any computer anywhere in the world without the need for a client install.
In today’s article, we shall briefly explore the Azure Cloud Shell and demonstrate its use by creating an Azure SQL Database using PowerShell cmdlets.
How to Launch Azure Cloud Shell
When logged in to Azure Portal, you can launch the Azure Cloud shell by clicking the icon shown in Figure 1. The result is a pane on the lower part of the screen bearing a welcome message and a prompt to choose either Bash or PowerShell (See Figure 2). Your selection is a matter of preference based on the language you are more familiar with. Unix-oriented admins will likely choose Bash, while Windows-oriented admins will choose PowerShell. For the purpose of this article, we chose PowerShell.
Azure PowerShell is equivalent to the regular PowerShell that has been around for a while and can also be installed as a client tool. Azure Cloud Shell in the background offers an installation of PowerShell deployed on Debian Linux, so it gives you the option of using both PowerShell and Bash on the same high-end computer.
This offering has just enough configuration options to let you be productive as a cloud administrator from wherever you are.
 Figure 1: Launch Azure Cloud Shell
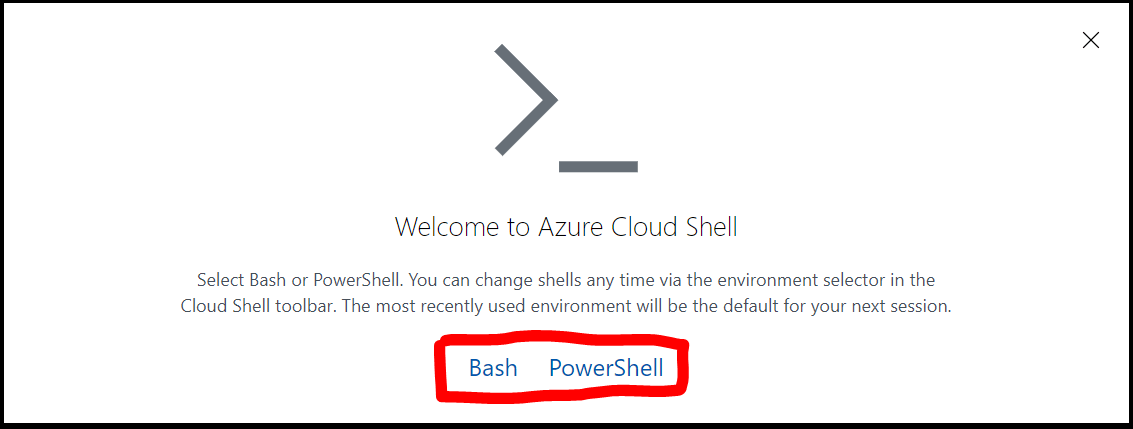 Figure 2: Choose Between Bash & PowerShell
Benefits of Using Azure Cloud Shell
Using a browser-based offers some key benefits when compared to having a client tool on-premises. It saves the administrator the time required to set up an environment for interacting with Azure. Admins can write and store scripts in the cloud for reuse from anywhere in the world.
This second benefit also implies that using Azure Cloud Shell requires that you create storage in Azure. Figure 3 illustrates this. This configuration step has cost implications, like the creation of any other resource on Azure.
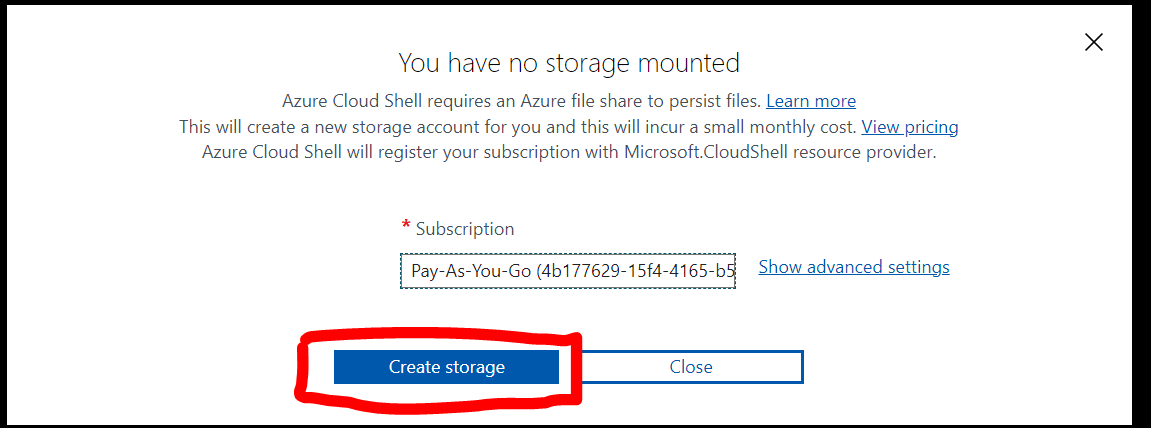 Figure 3: Create Storage for Azure Cloud Shell
Figure 4 illustrates that the storage account created is quite similar to any other storage account one would have created independent of Azure Cloud Shell.
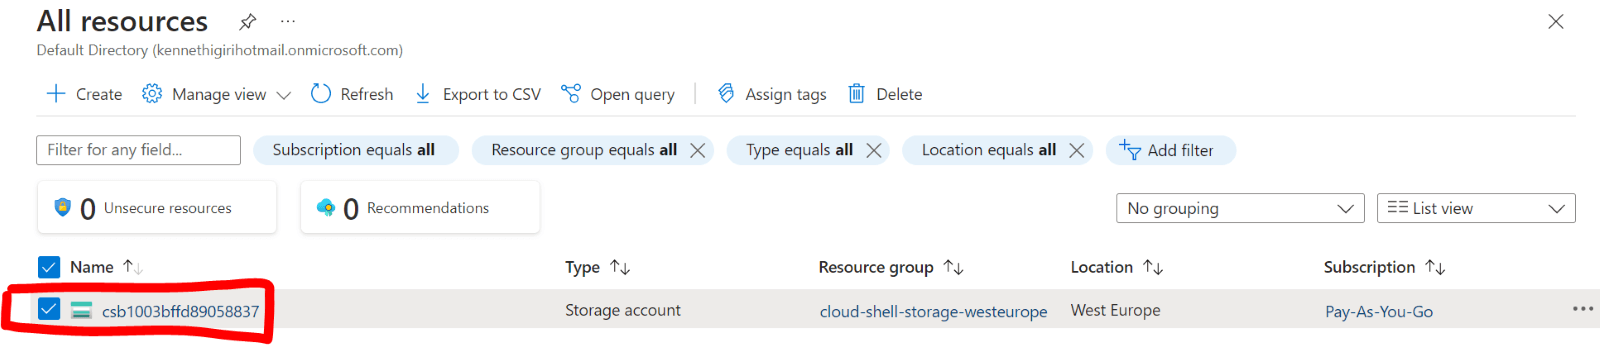 Figure 4: Cloud Storage on Azure Portal
The storage account created is a standard, locally-redundant storage general purpose V2 storage. It will cost about $30 a month at 6GB based on information from Azure Pricing Calculator. You may be able to adjust the size and read/write operations to get a better deal based on your intended use (See Figure 5).
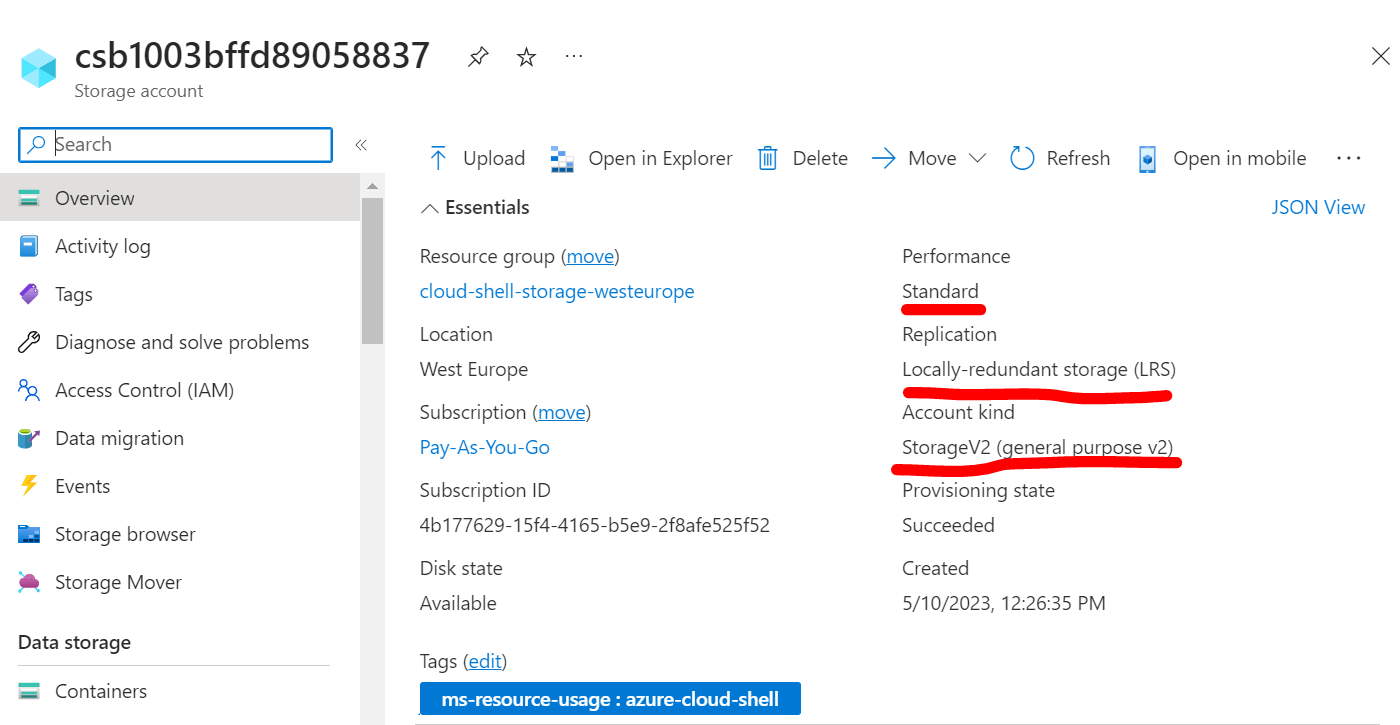 Figure 5: Cloud Storage Details
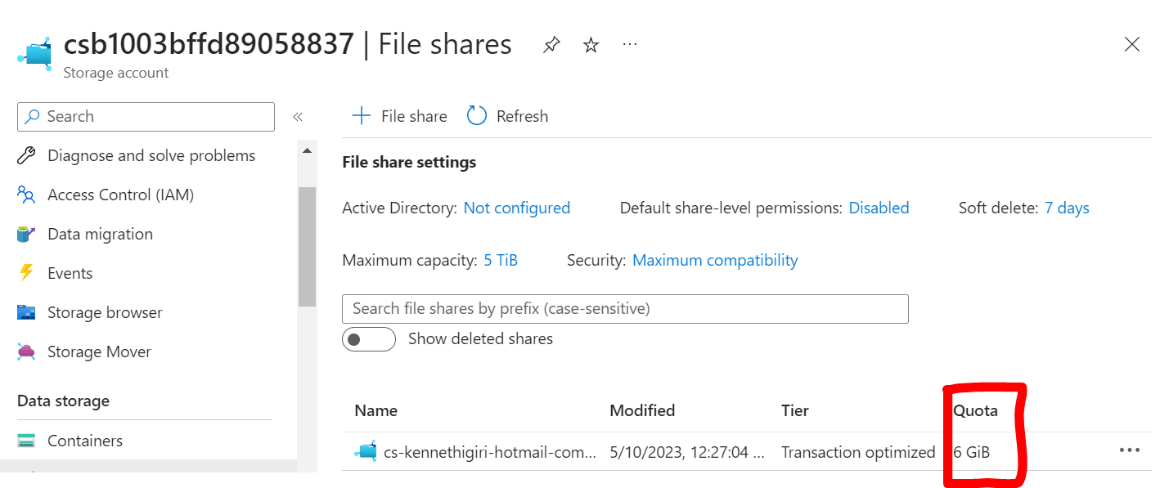 Figure 6: Cloud Storage Size
Azure Cloud Shell Interface
Once Azure Cloud Shell is set up, we can see that it is much the same as a Windows PowerShell interface. The setup procedure establishes a connection to Azure and set up the drive.
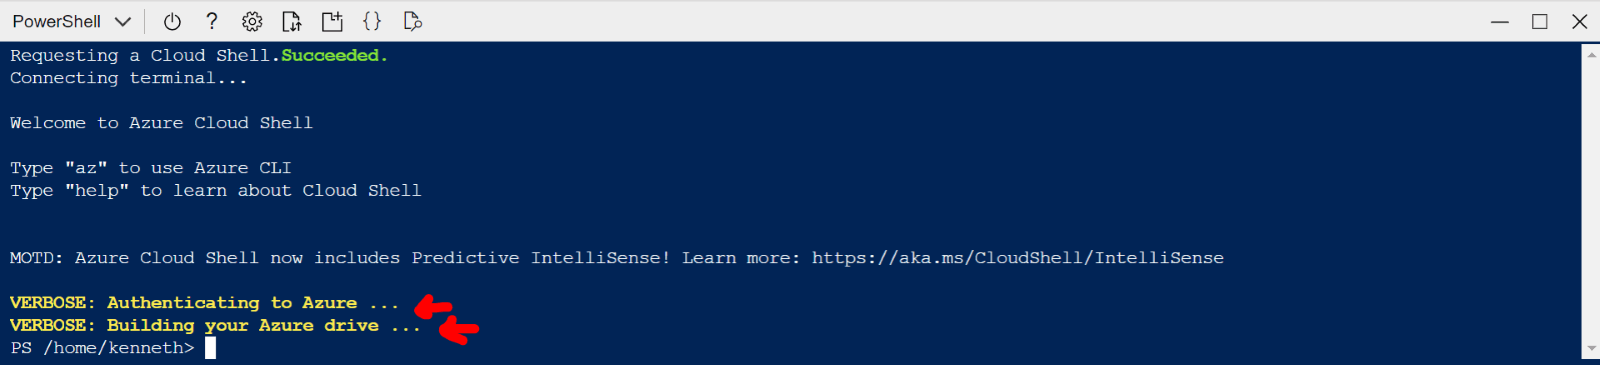 Figure 7: Azure Cloud Shell Interface
Azure Powershell has seven menu items, as shown in Figure 8.
- Restart Cloud Shell
- Help
- Settings
- Upload/Download Files
- Open New Session
- Open Editor
- Web Preview
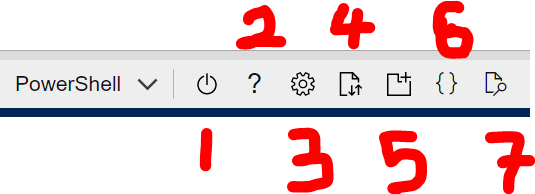 Figure 8: Azure Cloud Shell Menu
Let's Explore these menu items one after the other.
Restart Cloud Shell
This button simply restarts the active session and reloads Azure Cloud Shell.
Help
The help button opens up options for loading documentation for the tool. Particularly helpful among these links is the Azure PowerShell reference (See Figure 9).
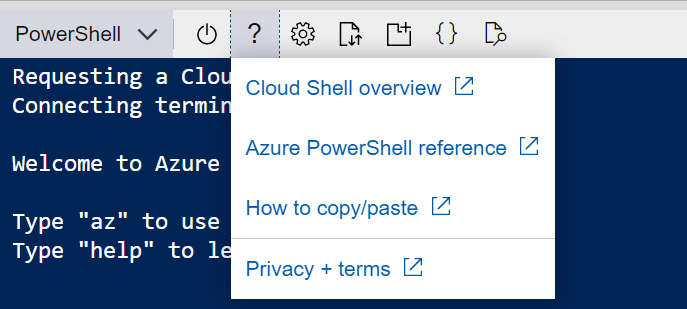 Figure 9: References to Documentation
Settings
The settings button allows you to manipulate basic options such as the text size and font (See Figure 10).
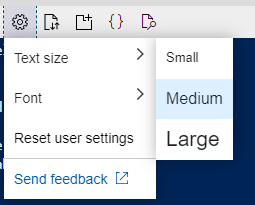 Figure 10: Settings
Upload/Download Files
This button allows you move files in and out of your Storage Account. You can find out more about this and related features here.
Open a New Session
This button opens up a new shell in a separate browser tab. It is useful to gain more “real estate” and operate multiple windows when scripting (Figure 11).
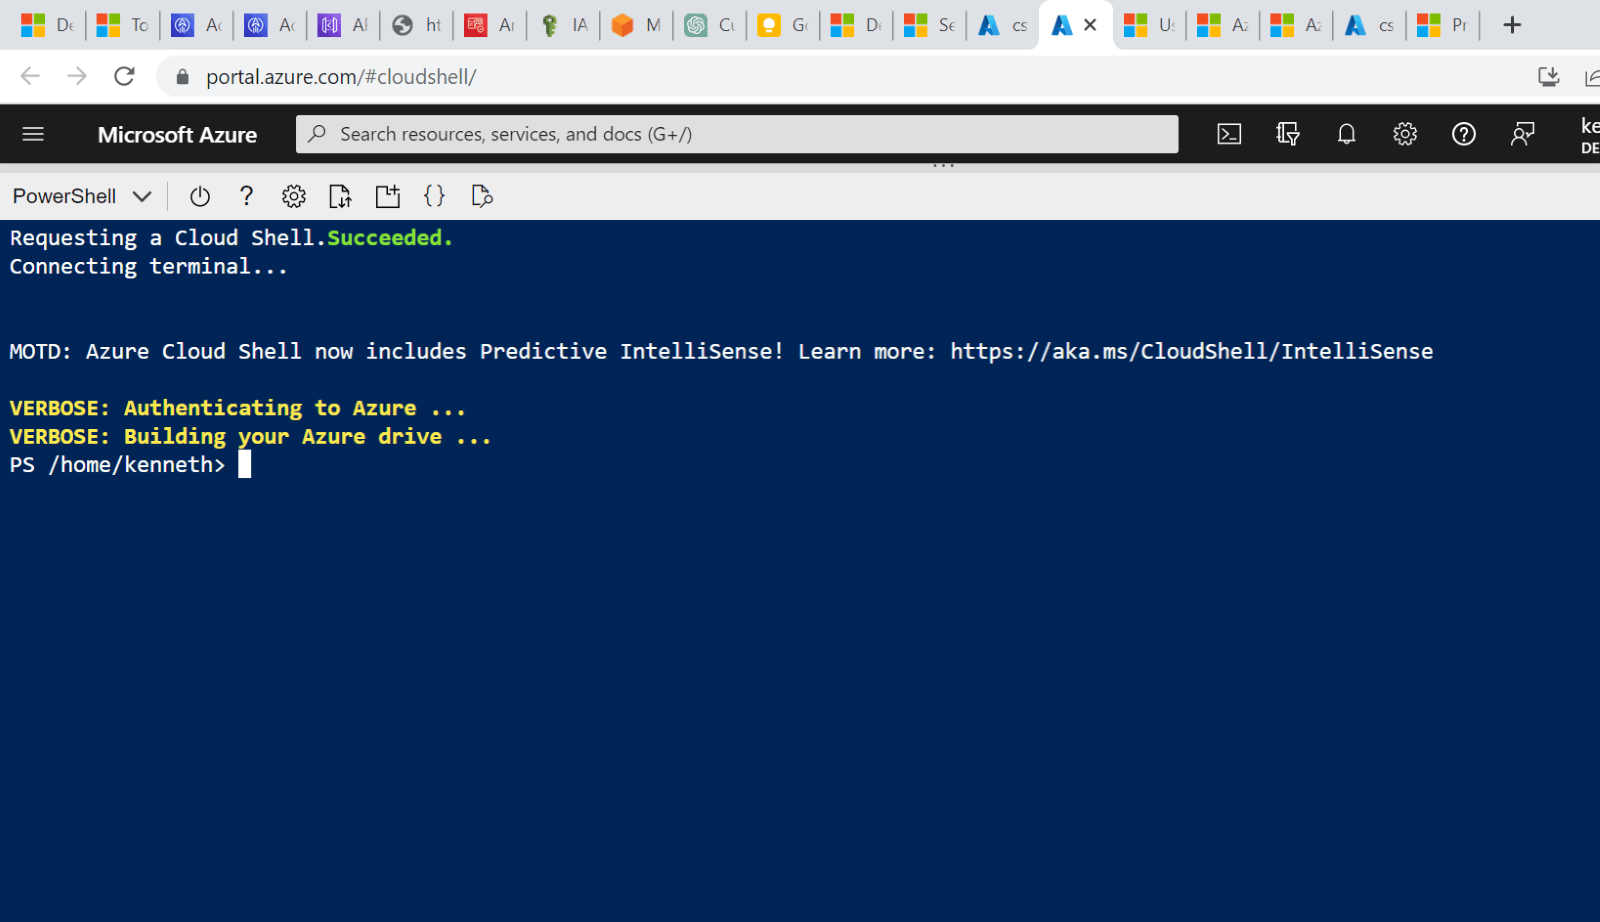 Figure 11: Azure Cloud Shell in a New Window
Open Editor
The editor allows you to create and interact with existing text files. On the left pane once can navigate the directories on Azure and open files.
 Figure 12: Editor
Web Preview
Web preview allows you to run full-blown web applications in the cloud shell container as a test before deploying to production. There is a defined range of port numbers, that you can use for this purpose (See Figure 13).
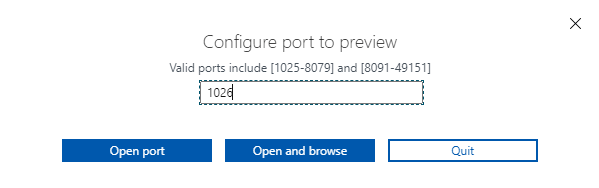 Figure 13: Web Preview Port Configuration
Creating an Azure SQL Database
In this section, we shall use Azure Cloud Schell to create a simple Azure SQL Database. Assuming we were unfamiliar with the commands necessary to do this, we would consult the documentation or simply use the help feature (See Figure ). Notice that the help command calls the well-known Get-Help cmdlet.
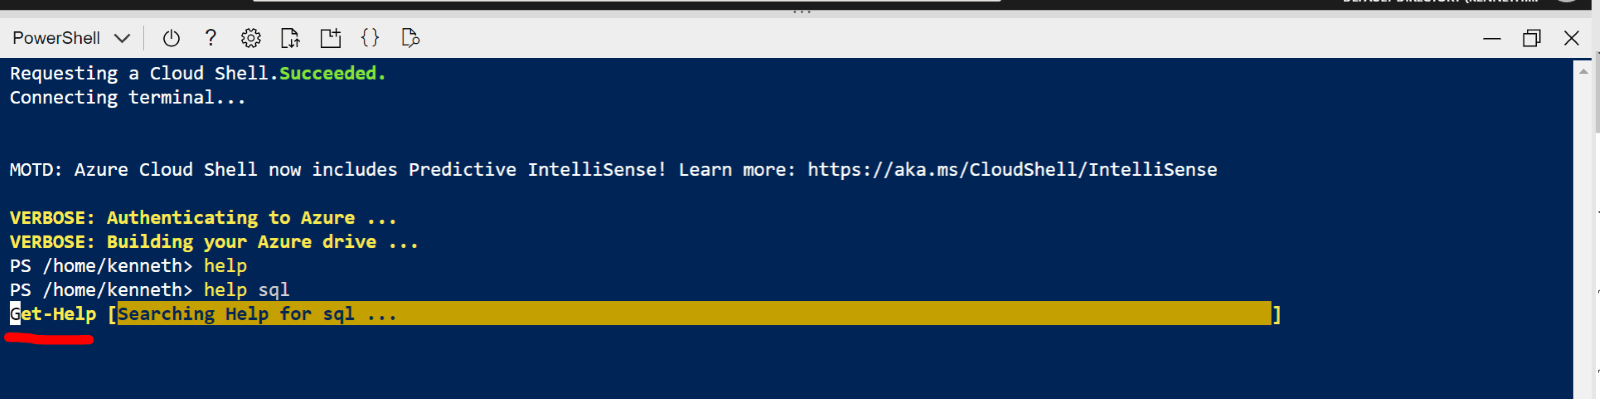 Figure 14: Using Help to Discover "SQL-Like" Commands
“Help SQL” returns a list of all the cmdlets that have the string “SQL” as part of the name (Figure 15).
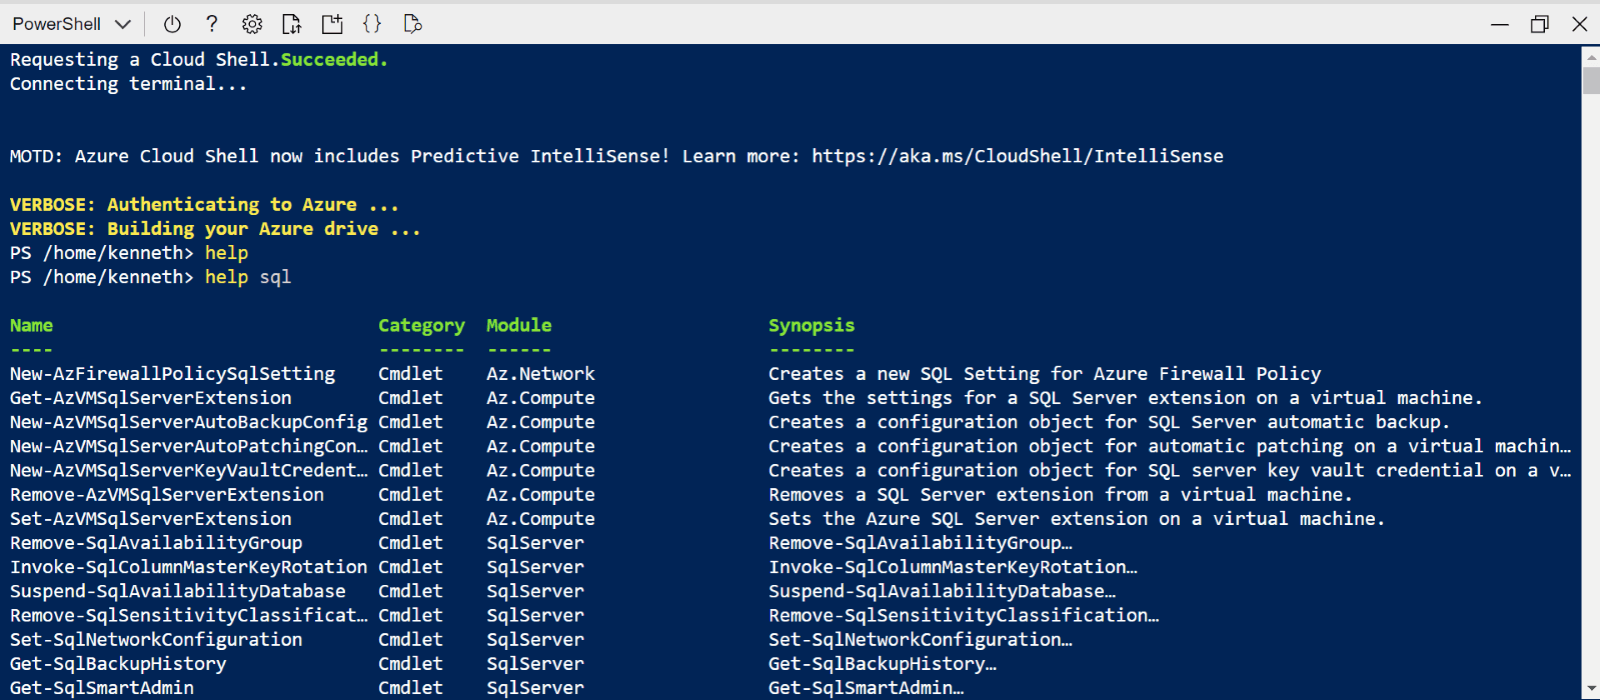 Figure 15: List of "SQL-Like" Cmdlets
We can look through this list to find the cmdlet we need to create an Azure SQL instance. More specifically, we can use the command “help new-azsql” to retrieve the command shown in Figure 16.
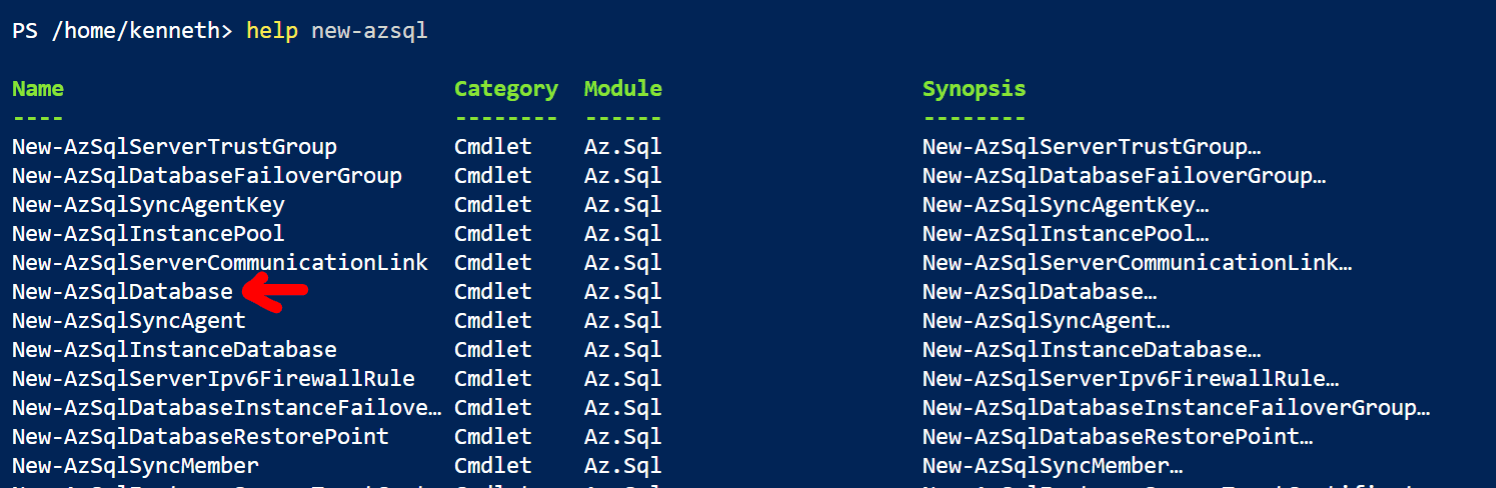 Figure 16: The New-AzSqlDatabase Cmdlet
When we run this cmdlet, we are asked for three parameters – DatabaseName, ServerName, and ResourceGroupName. However, we cannot successfully run the script by supplying these parameters on the fly. We must have an existing Resource Group and SQL Server to create an Azure SQL Database.
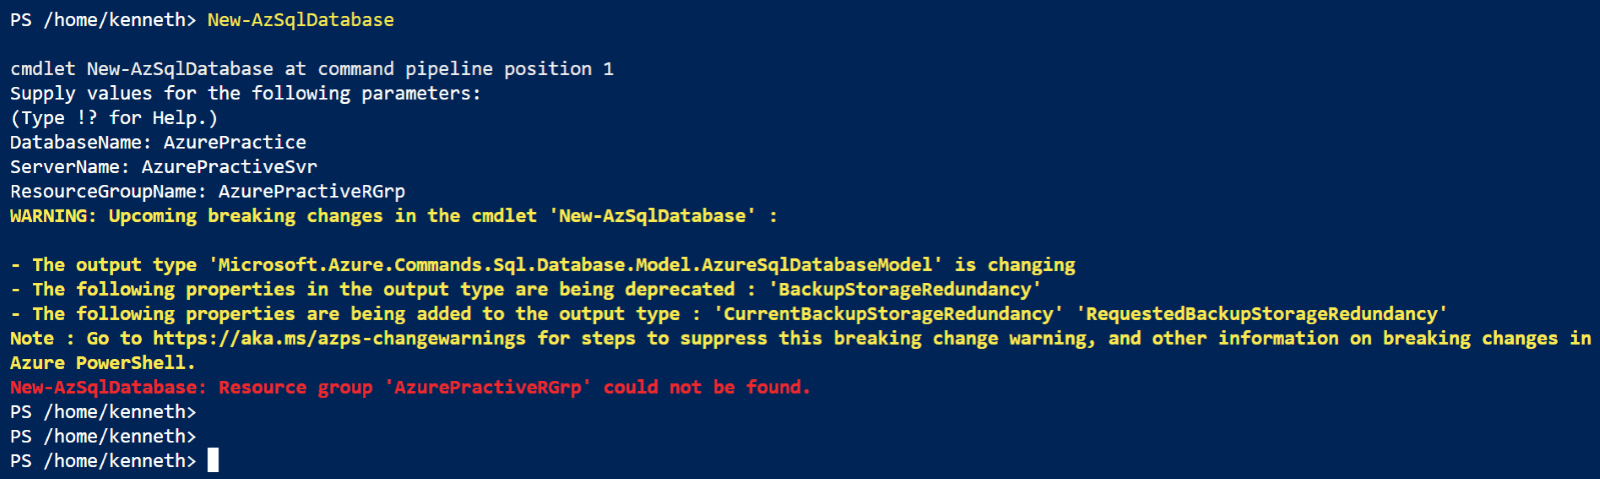 Figure 17: Failed New-AzSqlDatabase Command
How to Create an Azure SQL Database
First, create a Resource Group. Microsoft defines a Resource Group in Azure as “a container that holds related resources for an Azure solution”. Resource Groups are a way of logically organizing all the resources that are deployed to deliver a single solution. To create a new Resource Group for our use case, we run the command (See Figure 18):
New-AzResourceGroup -Location 'Central US' -Name 'AzurePracticeRGrp'
We are deploying our Resource Group called 'AzurePracticeRGrp' in the Central US region.
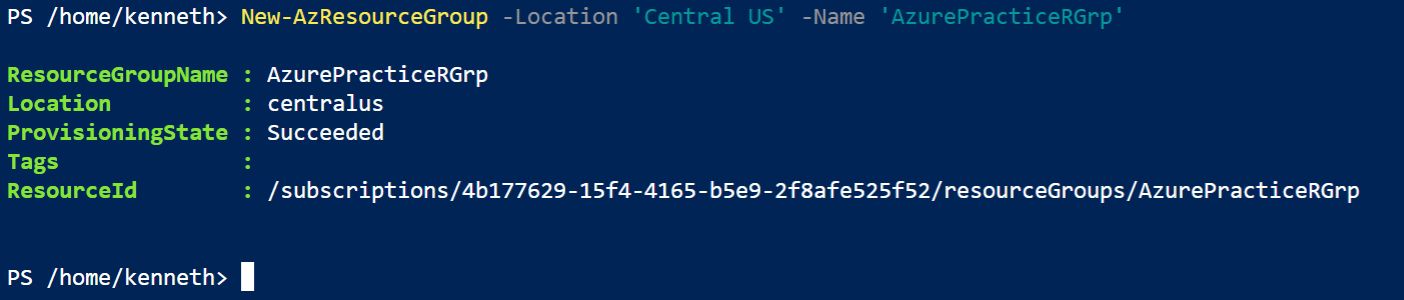 Figure 18: Create Resource Group
Next, Create an Azure SQL Server. We create a new, logical SQL Server instance, which will host the Azure SQL Database using the following command.
New-AzSqlServer -ServerName 'azurepracticesvr' -Location 'Central US' -ResourceGroupName 'AzurePracticeRGrp' -EnableActiveDirectoryOnlyAuthentication -ExternalAdminName 'Kenneth Igiri'
The arguments we have supplied imply that we are again using the Central US region. We want only AD Authentication and ‘Kenneth Igiri’ is the admin for this instance. We have also specified the Resource Group we created in the previous step. (See Figure 19).
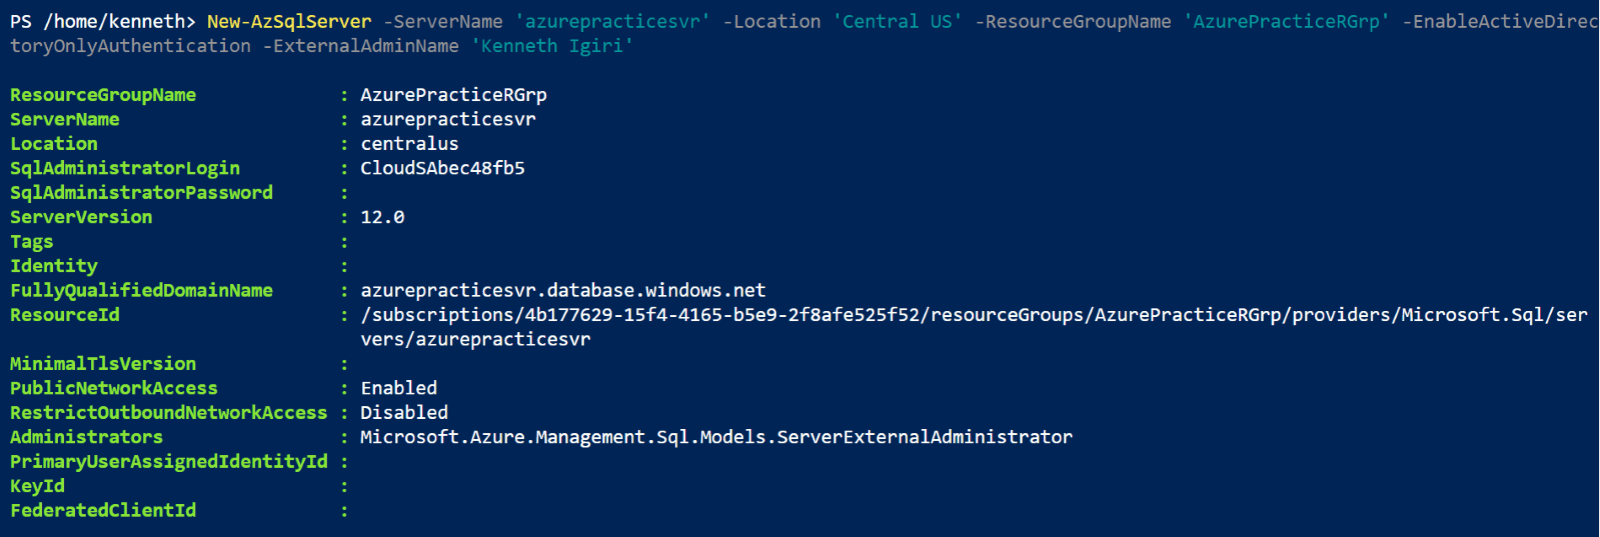 Figure 19: Create SQL Server
Next, Create an Azure SQL Database. With our Resource Group and Server in place, we can now retry our database creation command as follows (See Figure 20):
New-AzSqlDatabase -DatabaseName 'AzurePractice' -ServerName 'azurepracticesvr' -ResourceGroupName 'AzurePracticeRGrp' -ReadScale Disabled
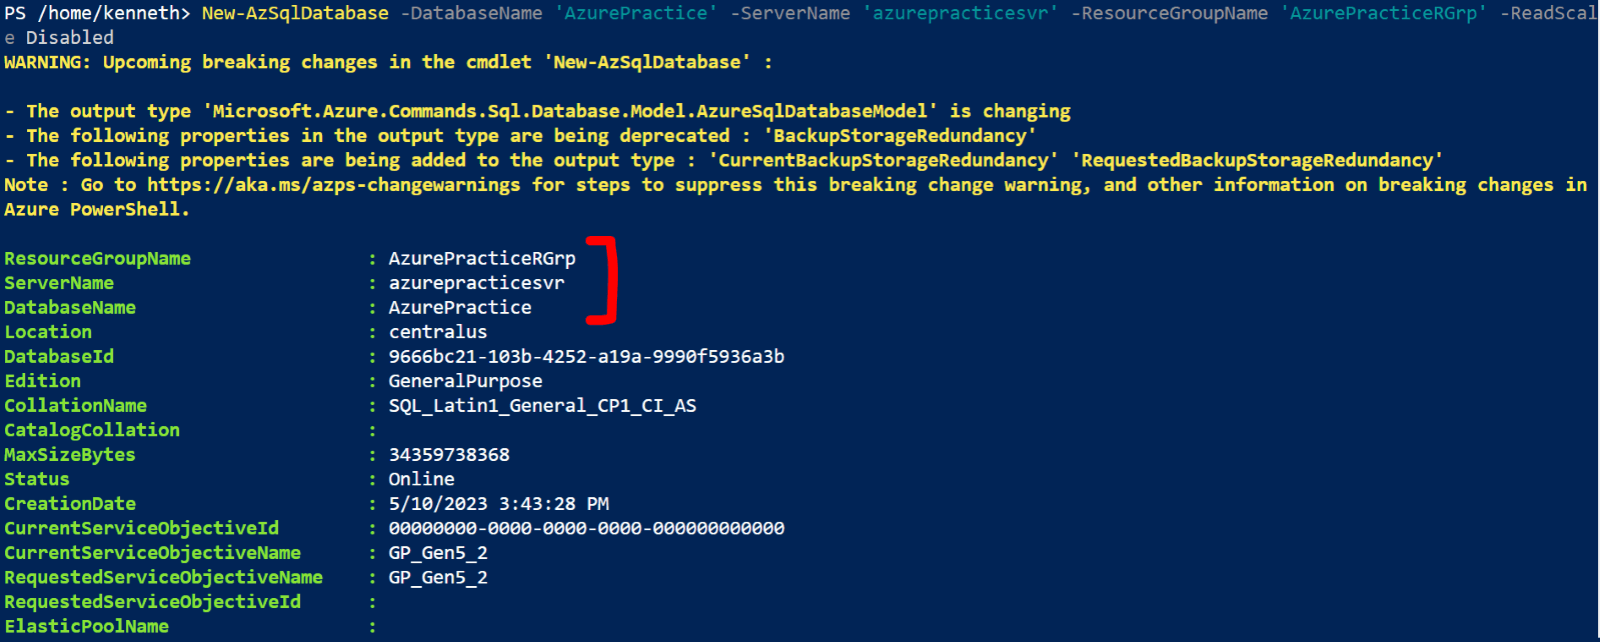 Figure 20: Create Azure SQL Database
To validate what we have done, we can retrieve details of the server and the database with Azure Cloud Shell Cmdlets. We can also view the resources using the Azure Portal GUI. Notice the endpoint for connecting to this instance. This will be useful in connecting to the instance.
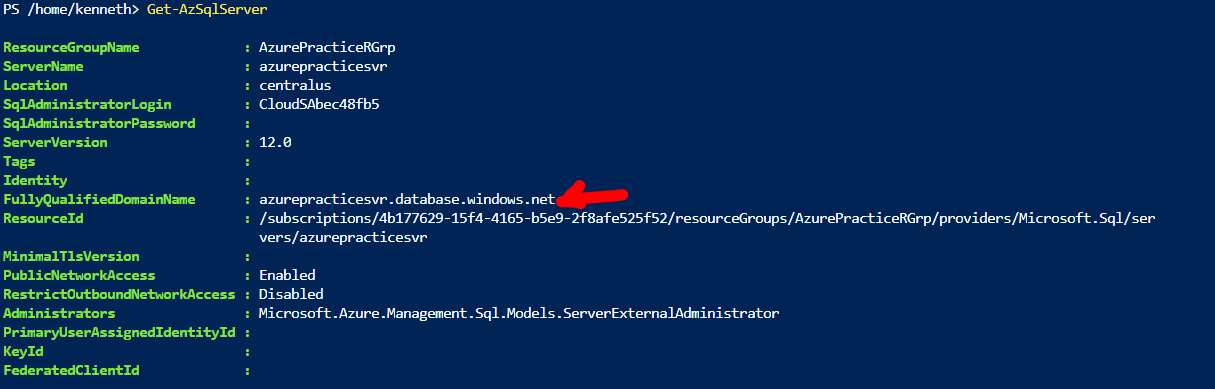 Figure 21: Validate SQL Server
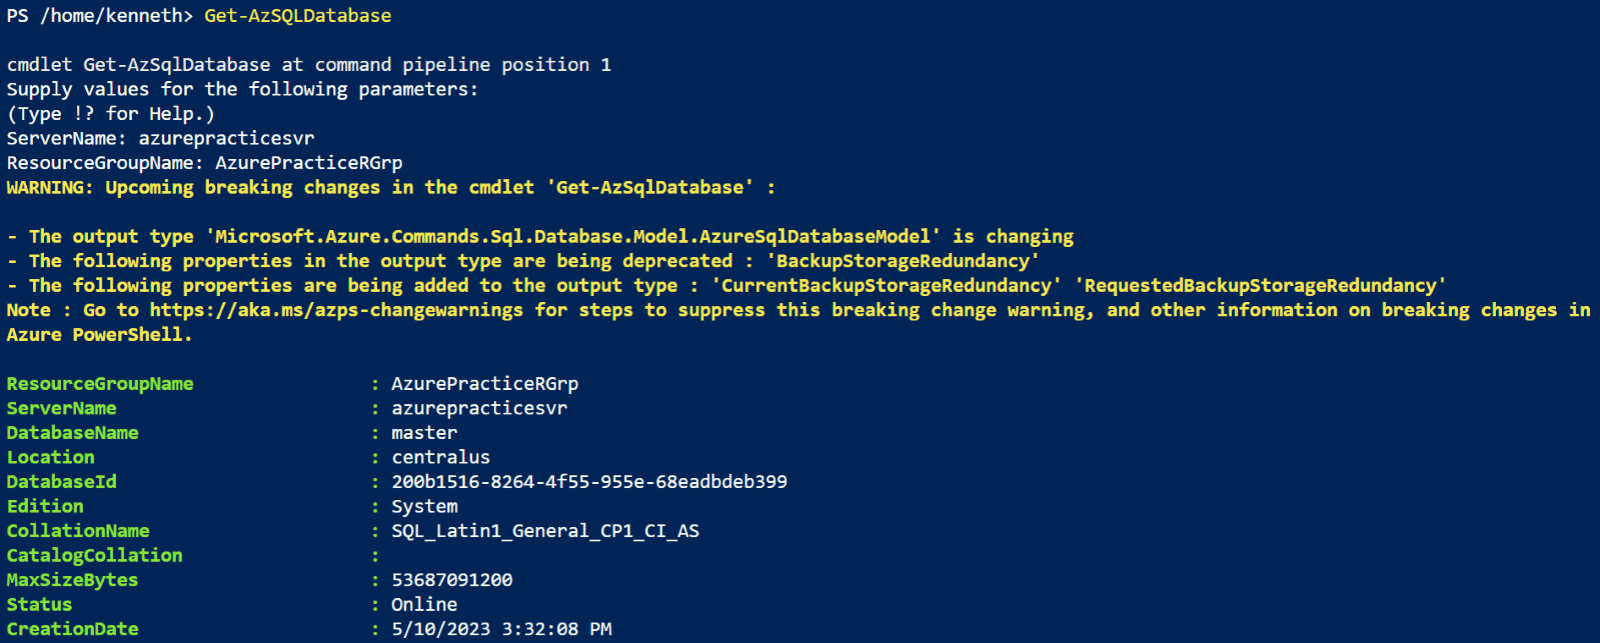 Figure 22: Validate Database
Conclusion
In this article, we explore Azure Cloud Shell and use the tool to create an Azure SQL Database. The complete script that would accomplish this might look like the following:
New-AzResourceGroup -Location 'Central US' -Name 'AzurePracticeRGrp'


New-AzSqlServer -ServerName 'azurepracticesvr' -Location 'Central US' -ResourceGroupName 'AzurePracticeRGrp' -EnableActiveDirectoryOnlyAuthentication -ExternalAdminName 'Kenneth Igiri'


New-AzSqlDatabase -DatabaseName 'AzurePractice' -ServerName 'azurepracticesvr' -ResourceGroupName 'AzurePracticeRGrp' -ReadScale Disabled


Get-AzSqlServer


Get-AzSQLDatabase
In a subsequent article, we shall discuss connecting to this instance using client tools such as dbForge Studio for SQL Server, Azure Data Studio, and SQL Server Management Studio.