

In this article our objective is to showcase how to leverage Azure Data Factory (ADF) and a custom script to upload data in Azure MySQL database when we have CSV files with different schemas.
As there is no straightforward way to upload data directly using ADF for this given scenario, it will actually help to understand how a custom activity will help. We will use this activity to handle various tasks that cannot be accomplished directly in ADF.
Problem
There are the files coming from multiple vendors with different column names and orders. Those files need to be loaded in a default schema a MySQL database on Azure. As there are over 100 vendors then there will be 100 different column formats and column orders that need to merged into single schema. The name and order of columns in the table are fixed.
Whenever a new vendor is added, their file should be automatically accommodated by the solution.
Challenges:
- While creating this solution using Azure Data Factory, we would have to create 100 source and destination sinks. For each new client, there would be a new pipeline. Also, when you try to make the columns dynamic in storage, the columns stored in data base should be read once.
- While lookup you can only read first row or you need to go for foreach to read all rows.
For implementing this solution will use below services in Azure
- Azure Batch Account
- Azure Data Factory – Custom Activity
- Azure MySQL database
- Azure Blob Storage
Blob Storage : We will keep the CSV files in blob storage and copy the storage key to a text file, as it will be used in configuring.
Batch account : We also need to create an Azure Batch account. Batch accounts are free in Azure, and the cost for these is associated with a VM that runs the batch jobs. There are low priority VMs available, which are priced very low comparing to normal VM.
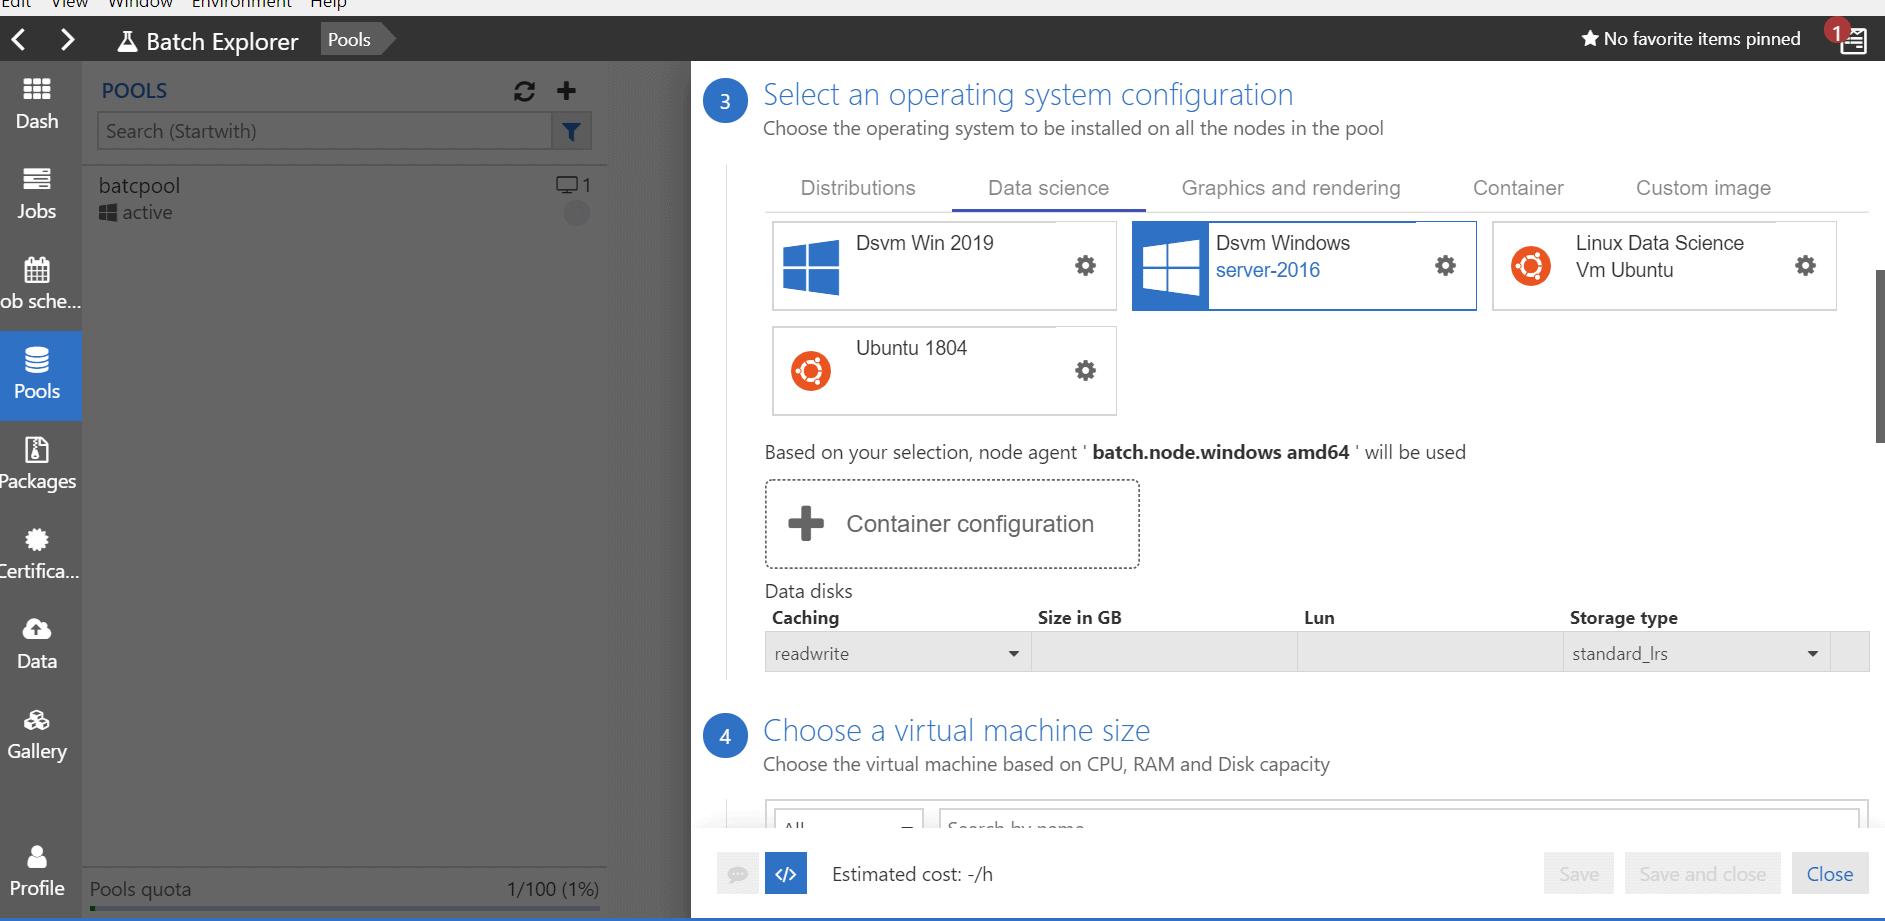
Once the batch account is created, we need to create a batch pool. In the batch pool, we need to select the VM and node details. For this solution I have created the pool using the Batch Explorer tool. After providing the basic details for the pool, VMs can be selected as shown in the below screen shot. For this example the data science category VMs have been created as they have pre-installed Python and other software.
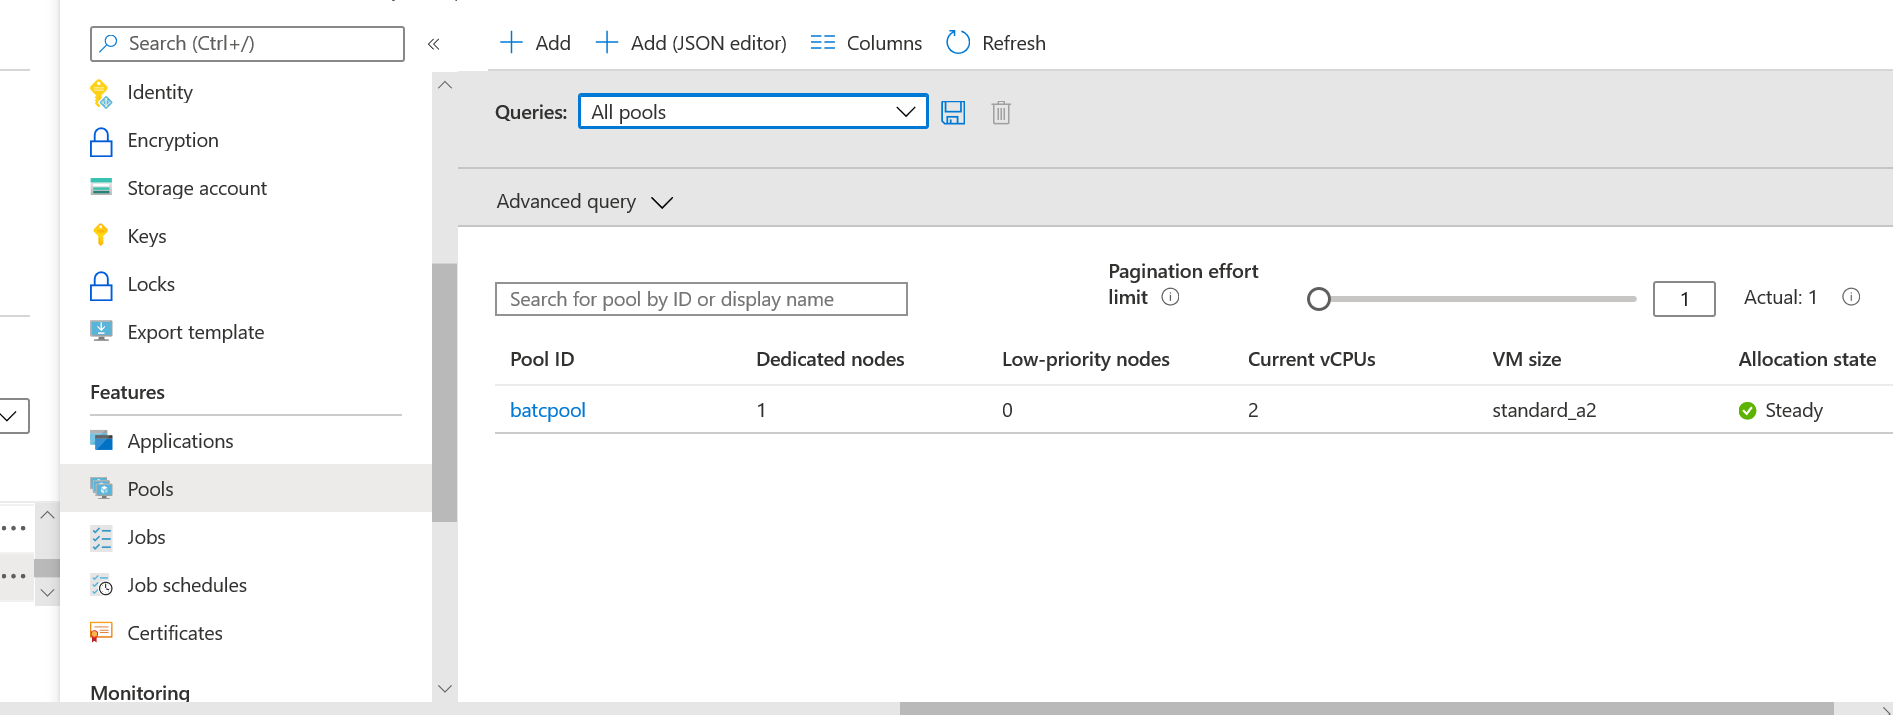
Once the pool is created, it will look like the below screen shot in the Azure Portal.
Note: for more details on the pools, you can check the documentation .
To move the data, we need to develop a Python script to access blob storage, read the files, and store the data in an Azure My SQL database. The MySQL database will have two tables. The first table contains metadata, which stores details about the flat files, i.e., what columns are required to be fetched from the flat files and mapped to destination columns. The second table is the destination table.
Below is the python code to read files, connect to the database, and add the data to the table. We are leveraging Azure Batch and Python because this is using a MySQL database. The ADF Stored Procedure activity only executes stored procedures in a SQL Server database.
Python Script Description
We need some Pyhon packages for the script, so we need to load these:
pip install azure-storage-blob
pip install pymysql
pip install mysql-connector-python
pip install pandas
We then need to import these packages as they are required to execute our code.
import os,uuid
import mysql.connector
from azure.storage.blob import BlobServiceClient, BlobClient, ContainerClient
import json
import time,datetime
from requests import get, post
import pandas as pd
from io import StringIO
The package, azure.storage.blob, will allow you to connect to Azure Blob Storage and retrieve files. For this part of the code, we will be using the account key to access Azure Blob Storage.
#connecting to BlobStorage
connect_str = "DefaultEndpointsProtocol=https;AccountName=< your Account name >;AccountKey < ----- >;EndpointSuffix=core.windows.net"

source_conainer_name = '<source container name>'
The script needs to be changed to provide the details to connect to storage. Login in your Azure Storage account to get the account keys.
Once connected to Blob Storage, the client will return the list of files (blobs), which are in the folder. You need to read these blobs one by one and fetch the relevant column list from the database metadata table. The metadata table will return the list of source columns, and we will use the list to fetch data from source data frame.
Once the source data for is read from the CSV, it is stored in a data frame. The data frame will have all the data for a particular CSV file. Since we are doing a dynamic mapping, we need to pull the list of source file columns.
for blob in blob_list:
    ini_string=blob.name
    leng=ini_string.find('.')
    sstring = ini_string[leng-4:leng]

#Getting mapping source columns from the Database
mycursor.execute("SELECT group_concat(Columns_Name_Sheet) FROM Metadata where Vendor_Name=" +"'" + sstring + "'")
myresult = mycursor.fetchall()
newList=listToString(convertTuple(myresult))
my_list = newList.split(",")
blob_client = blob_service_client.get_blob_client(container=source_conainer_name,      blob=blob.name)
data = blob_client.download_blob().readall()s1=str(data,'utf-8')
We also need a temporary fix for newline in this dataset
s=s1.replace('\r\n",','",')

data2 = StringIO(s)
Next, we read the CSV files from blob client into data frame
my_cols = [str(i) for i in range(71)]

df=pd.read_csv(data2,sep='[:,|_]',names=my_cols,engine='python',index_col=False)

headers = df.iloc[0]

new_df  = pd.DataFrame(df.values[1:], columns=headers)

for col in new_df.columns:
We need to select the columns from the data frame as saved in MySQL.
nd2=new_df[my_list]

print(nd2)

cols = "`,`".join([str(i) for i in nd2.columns.tolist()])
Next, we insert DataFrame records one by one into the MySQL.
for i,row in nd2.iterrows():
    print(row)
    print((len(row)-1))
    sql = "INSERT INTO `patient_details`  VALUES (" + "%s,"*(len(row)-1) + "%s)"
    print(sql, tuple(row))

cursorpy.execute(sql, tuple(row))

connectionPY.commit()
Using above solution and code snippets and modifying them as per your requirement, you can create a pipeline to dynamically load data. +
