

Unlike an on premises SQL Server, Integration Services (SSIS) works very differently on Azure. If there are requirements to run our existing SSIS packages on Azure, then we need to understand our options. In this article we will talk about our options for migrating SSIS to Azure and what components are required to migrate SSIS packages.
Options to Migrate SSIS to Azure
When we talk about migrating SSIS packages to Azure, there are two options:
- Migrate SSIS to IaaS
- Migrate SSIS to PaaS
Each of these is discussed below.
Migrating SSIS to IaaS
SSIS to IaaS works same as it works for migrating between on premises SQL Server instances. In an IaaS environment, you spin a Virtual Machine on Azure infrastructure, according to your requirements for resources. On this virtual machine you install SQL Server Integration Services. After Installation you can deploy your packages on SSIS DB or file system.
When using IaaS, you need to manage everything on your own, from software updates to all other management tasks, just as if this were a machine you owned in your own data center.
Migrating SSIS to PAAS
The second option to migrate SSIS is using Azure Data Factory. This is the lift and shift approach for migrating SSIS packages on Azure. Azure Data Factory provides an SSIS Integration Runtime to run Integration Services on Azure. Assuming that you know how to create or open a Data Factory, we will explain how to create an Integration Runtime in SSIS.
Creating an ADF Integration Runtime
Once you click the Author & Monitor link on the ADF start page , it will open a window where you can create pipelines and do various other data factory related activities. In this window, click on Manage (the highlighted briefcase symbol in the image below) at the left side of the page. On the Manage page you can see connections on the left. Select the Integration runtimes from this list.
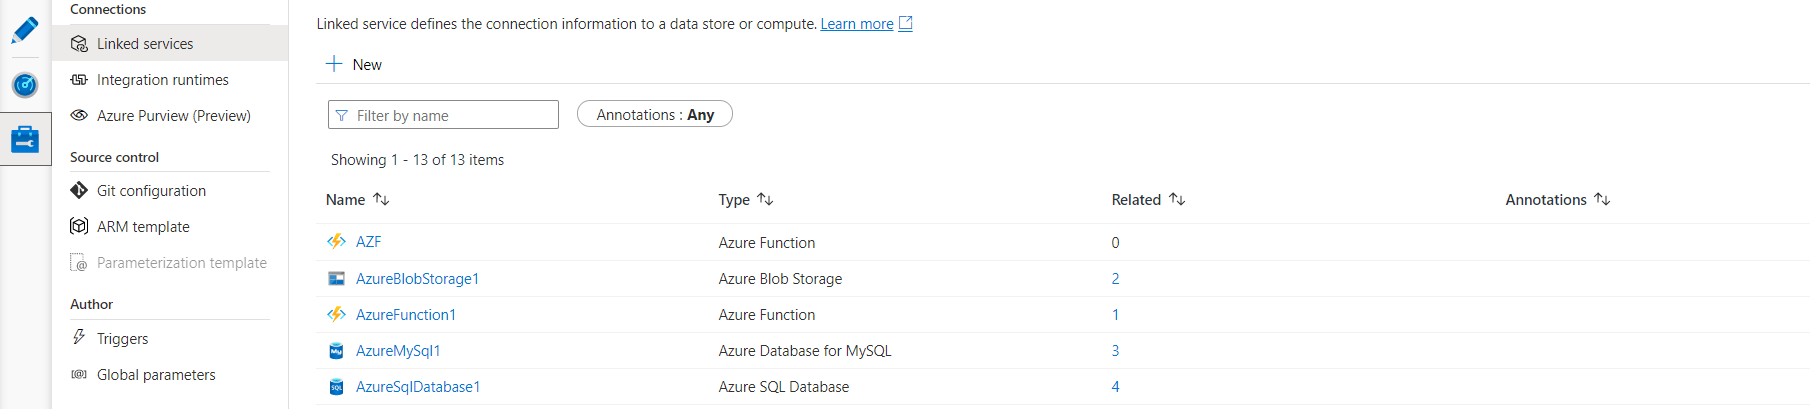
After selecting "Integration runtimes", click on the New, or + symbol, to add a new Integration runtime. When we click the link, we can see popup on the right side. This popup shows two options: Azure, Self-Hosted and Azure-SSIS. We need to select Azure-SSIS to lift and shift our SSIS packages. Then click Continue.
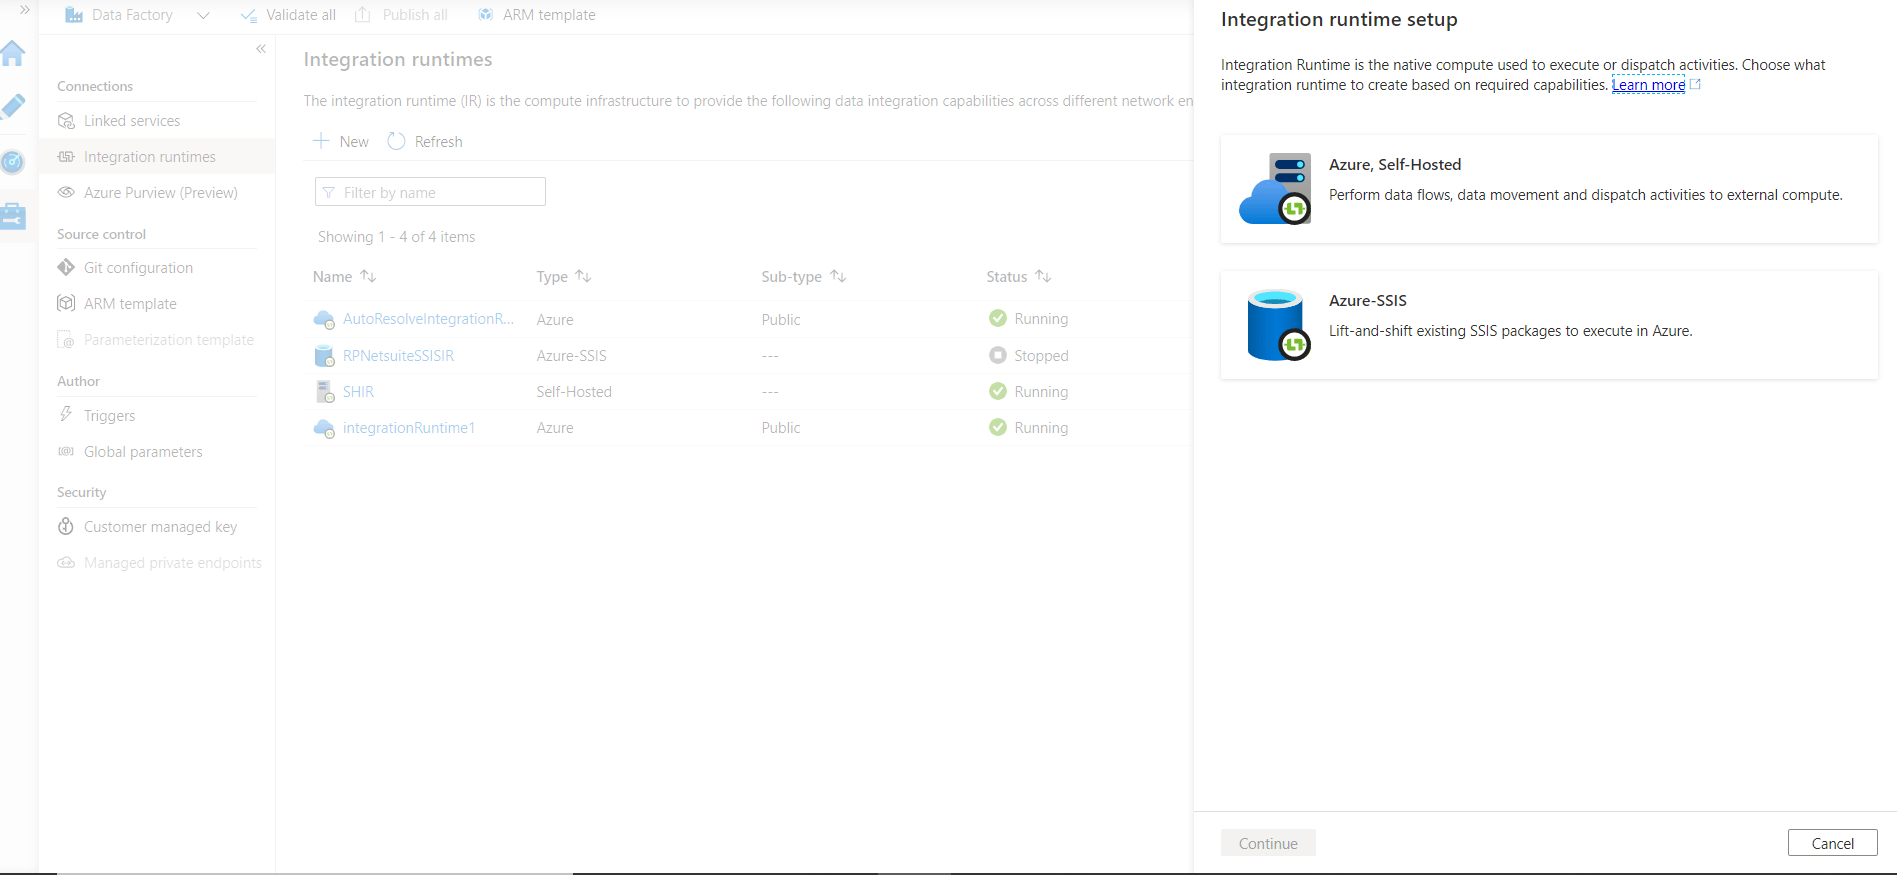
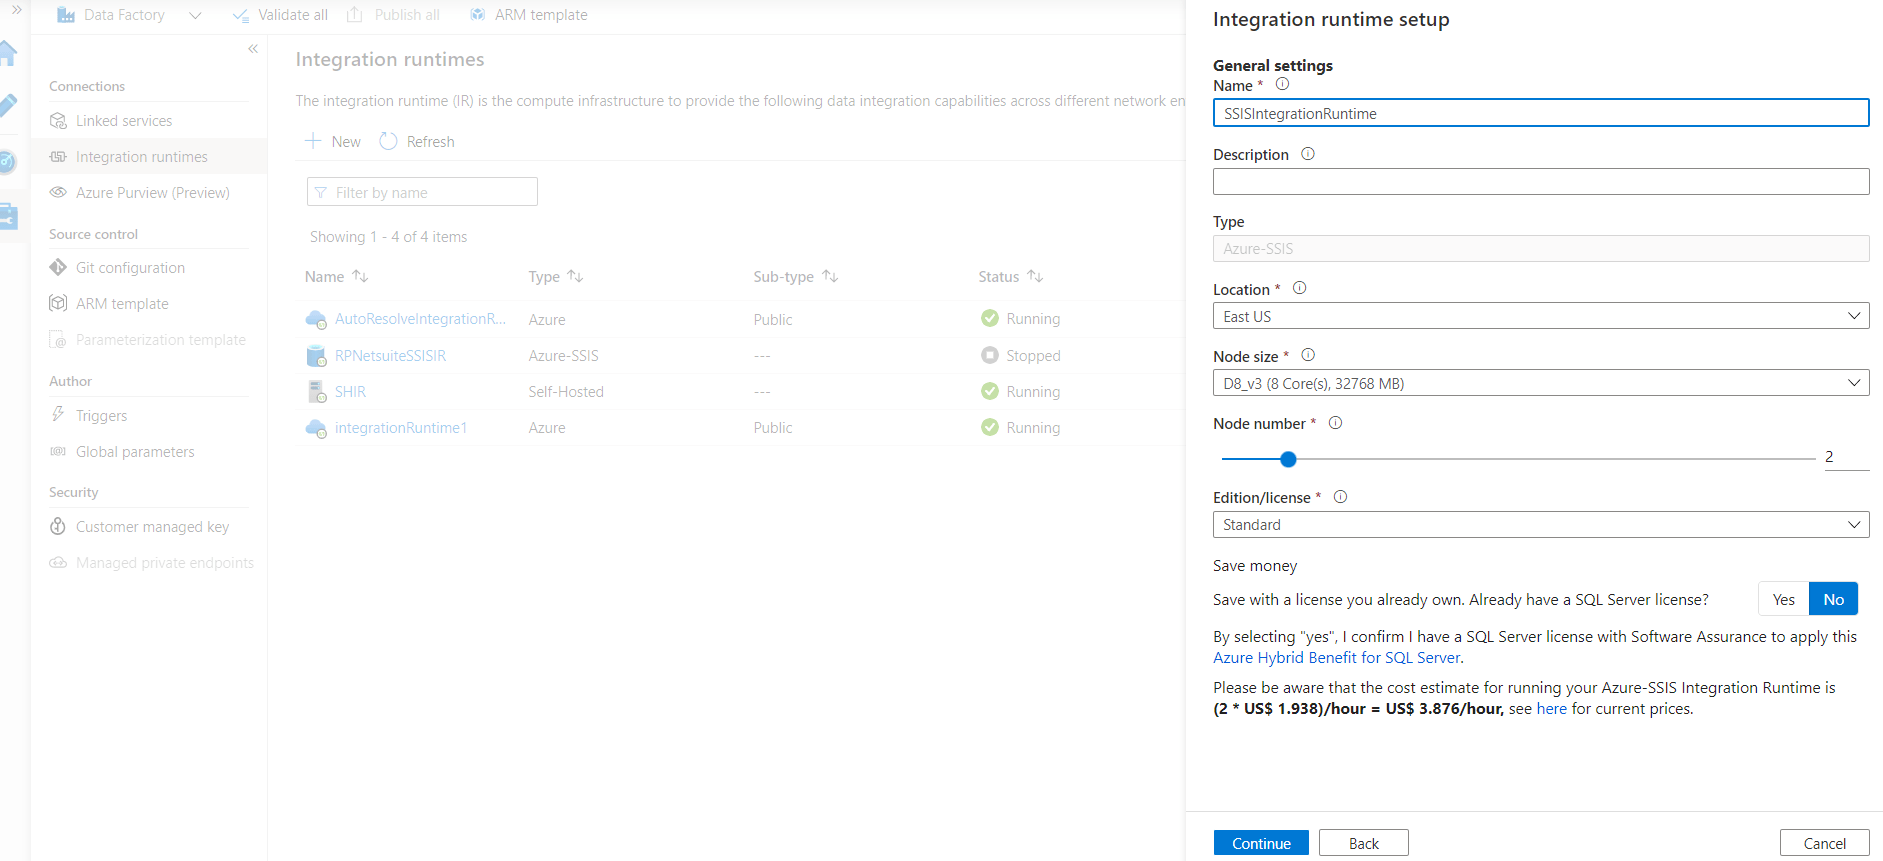
On the next window, we need to provide some details. You need to select the configuration of the virtual machines that will be used to run SSIS. In the background of an ADF Integration runtime, there are the virtual machines. which run SSIS.
There is also the open of selecting license or edition where you can use your existing on-premise license to get hybrid benefits as shown in below screen shot.
As per your selection, the hourly price is will be shown at the bottom. You should note that you will be charged for all the time your Integration runtime is not stopped as there are VMs running behind it. You can set up a start and stop for the VMs, so the uses can be reduced. However, you will want to plan this carefully as the VM start takes significant time.
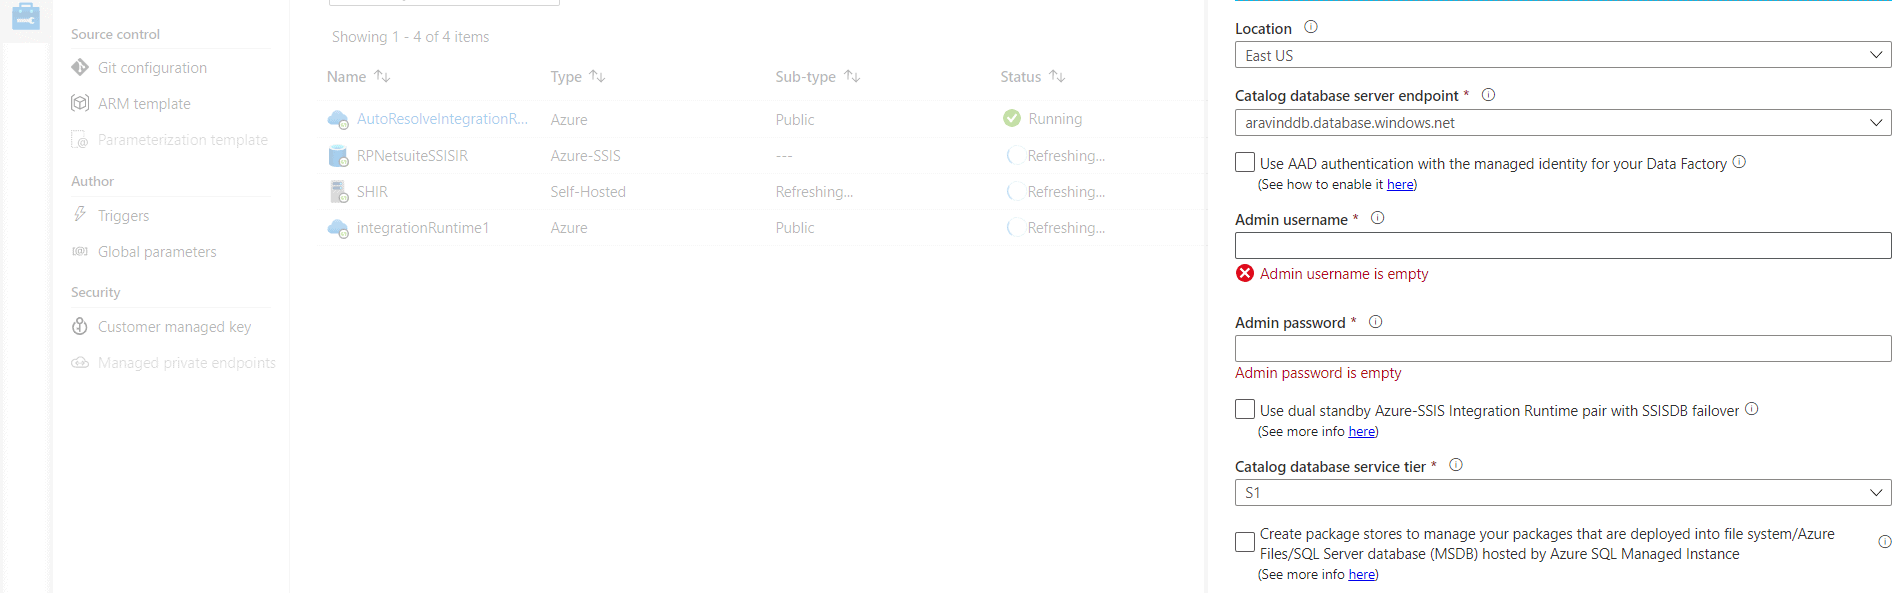
After filling the details, click continue. In the next window, we need to put in the details for the Catalog database, which will hold the SSIS packages. You can provide the details of an Azure SQL Database. The Integration runtime will create a new database or use an existing database, as per the values you enter in the form.
After this you can change a few advanced settings and then create the SSIS integration runtime. It will take some time to deploy the SSIS integration runtime.
Deploy SSIS solution on Azure
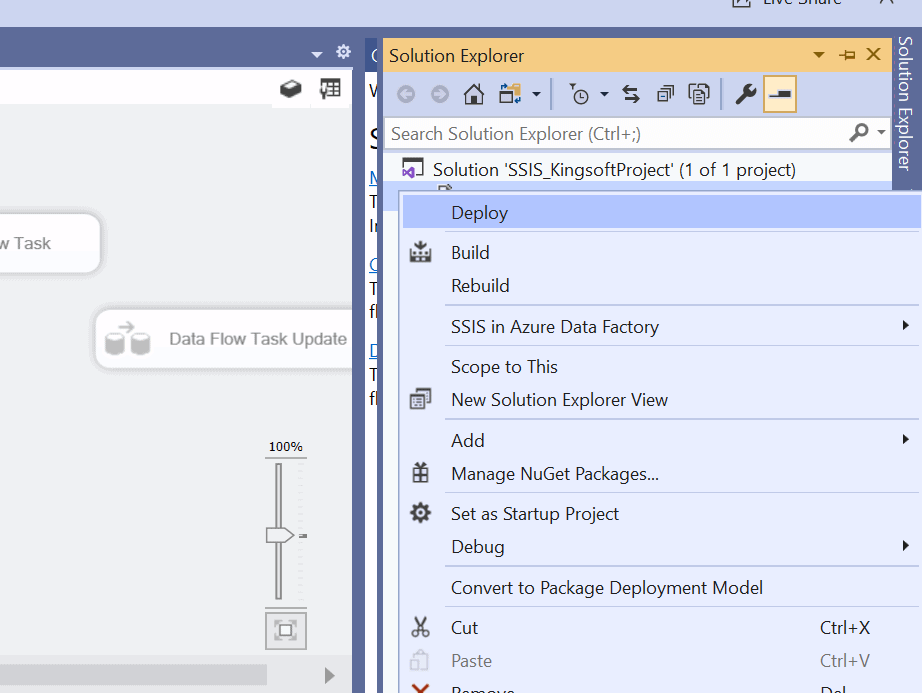
Once this is complete, we will deploy the SSIS packages to Azure. For this we will use a Visual Studio solution with our SSIS packages. Right click on your SSIS solution project and select Deploy on the menu, as displayed in below screenshot.
There is another option, SSIS in Azure Data Factory, which is used for Azure Enabled projects, i.e. at the time of the SSIS project is created, we can select if the project is Azure Enabled or not.
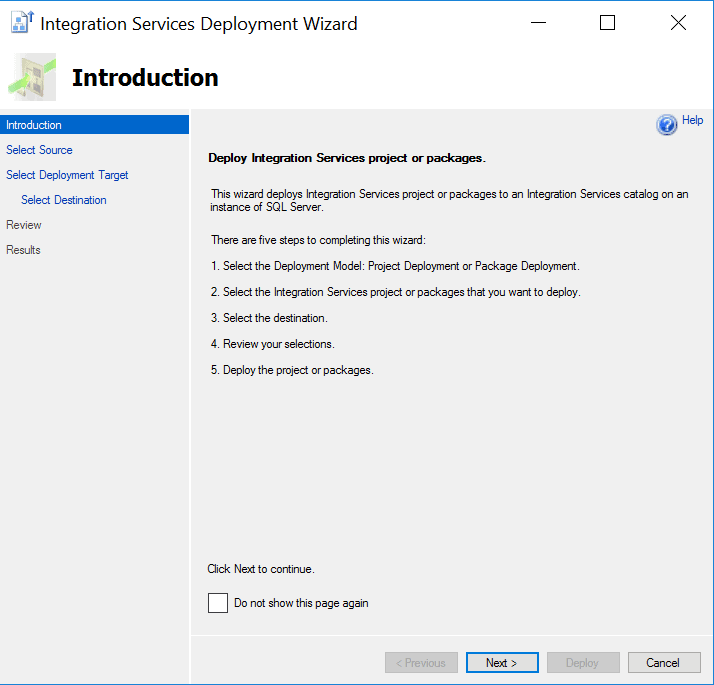
After clicking deploy you will get wizard as shown in below screenshot. We can see there are 4 steps.
The Introduction page explains the details for the next steps. In this deployment wizard we will select all the basic details related to deployment.
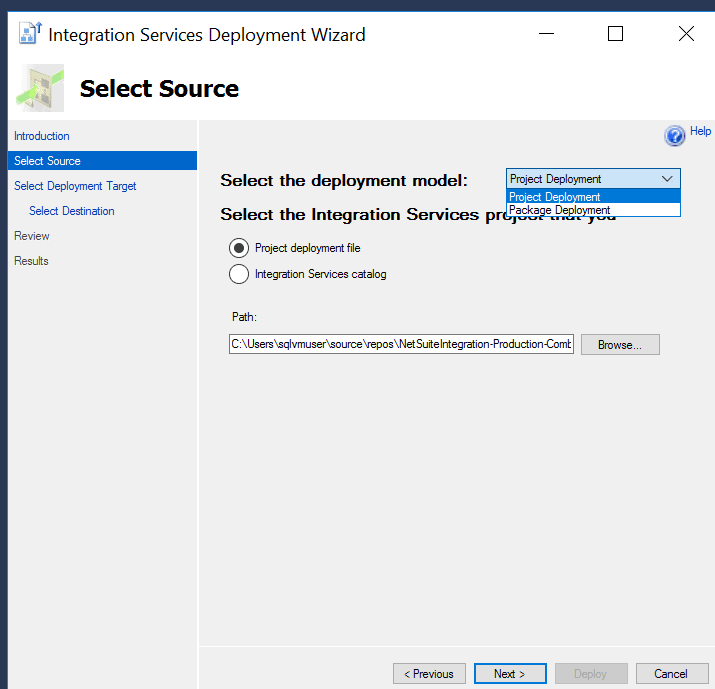
The next page allows us to select a Source. There are two types of deployment: project deployment and package deployment. You can select the type of deployment as per your requirements. We will select project deployment and browse to the project file. You can see there is another option, using the Integration Services Catalog. With this option, you can deploy your project from a SQL Server instance. The option we selected will deploy the files from Visual Studio to Azure.
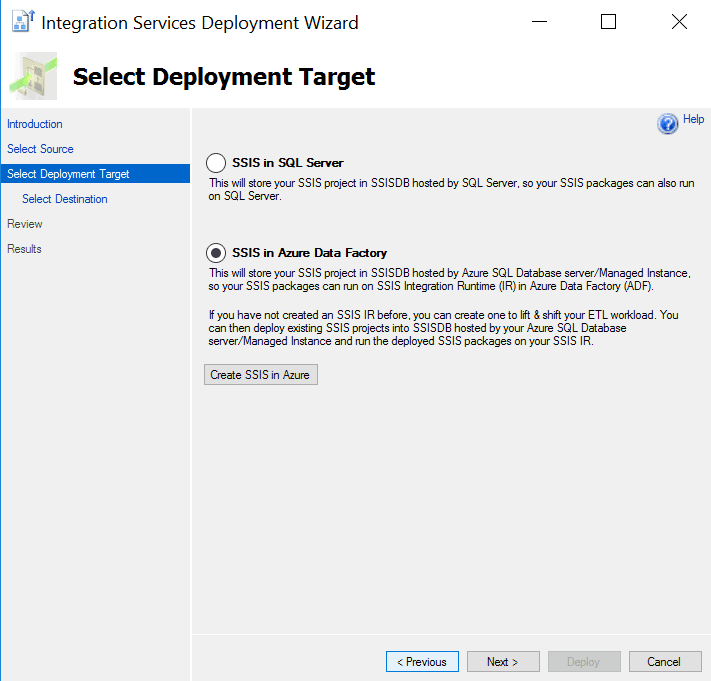
In the next step we will select the deployment target. The wizard provides two options to deploy the project, as shown in below screen shot. Option 1 is for a SQL Server on premises deployment, which we are not covering. Option 2 is the Azure Data Factory deployment. We will select this. You can also see the option below that says "Create SSIS in Azure", from which you can create your SSIS Integration Runtime from here by providing subscription and other details.
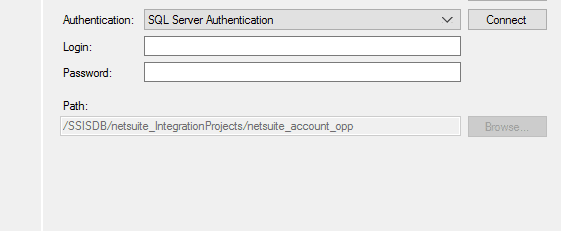
In next step you need to provide the details of the SSIS DB where you will deploy the SSIS package, as shown in below screen shot.
After providing the details you can deploy the project or package on SSISDB on Azure. Now in our next steps we will see how to run SSIS package in Azure Data Factory Pipeline.
Execute an SSIS Package in an ADF Pipeline
After we have deployed our SSIS package on Azure, we can execute it using an ADF Pipeline. Go to your ADF section in the Azure Portal and click Author and Monitor. Then the ADF development window will open. Click on Edit the pencil symbol to open the ADF pipelines. Create a new pipeline using the Add pipeline window.
In the pipeline General section, pick the Execute SSIS package activity, as show in below screen shot.
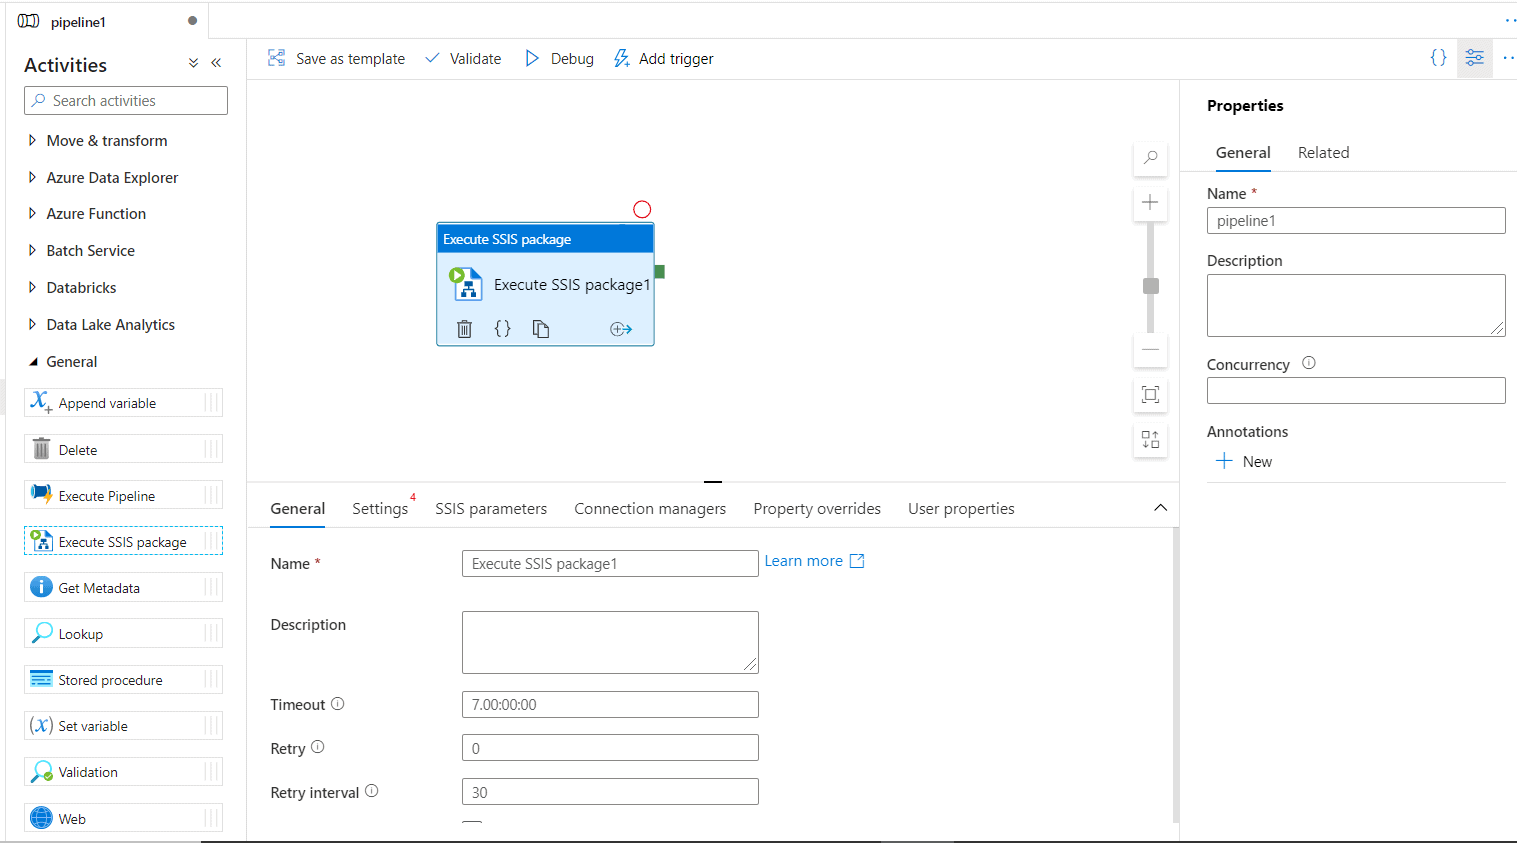
The Execute SSIS package activity executes your package in ADF. We can setup the environment details and package details in the Settings tab. This is below the icon for the Execute SSIS package activity, shown below.
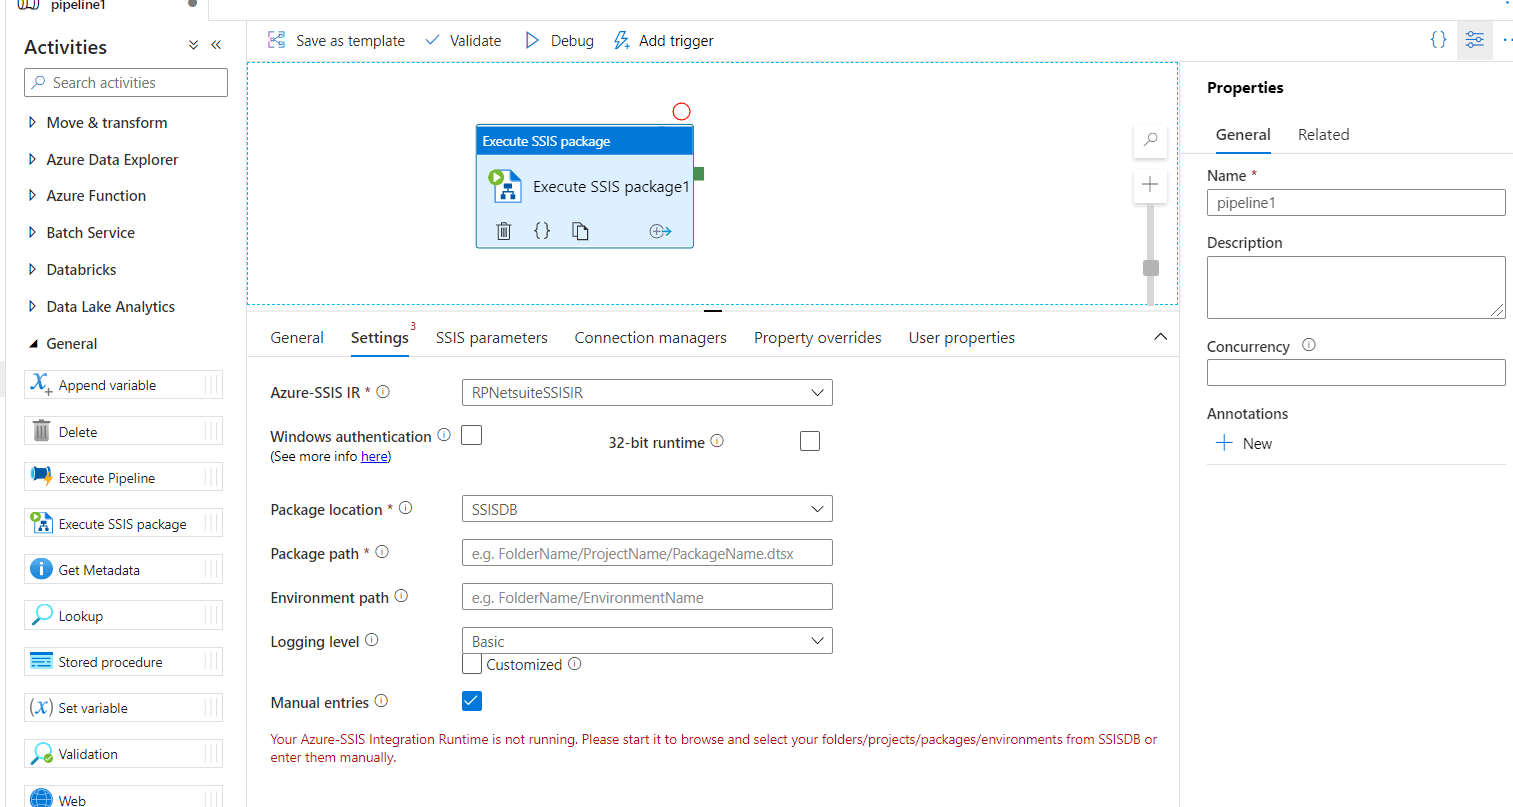
In settings, we need to provide the name of the SSIS integration runtime that we created to run our SSIS package. We then need to select the package location, whether you are accessing the package from a database or the filesystem. There are other options to also fill out, depending on which location you select. The folder path for the project name and the package name must be provided. Once you select the project, the other two dropdowns will become visible you can select your deployed project and package.
Once all values populates you can run you pipeline to execute the package.
Conclusion
As you can see, it is easy to migrate your existing SSIS packages to Azure Data Factory. As ADF is also a UI based tool, similar to SSIS, understanding it won’t be an issue.
You can use this article to move one SSIS package and try it by yourself. Once you know how this works, you can migrate all your existing packages.