

If you’re new to Azure Data Factory (ADF), it can be difficult to know where to start. Even if you have some experience with SSIS, everything in ADF looks both familiar and different at the same time! In this article I step through creating a basic ADF pipeline to load a CSV file into a database table.
Prerequisites
You will need three things:
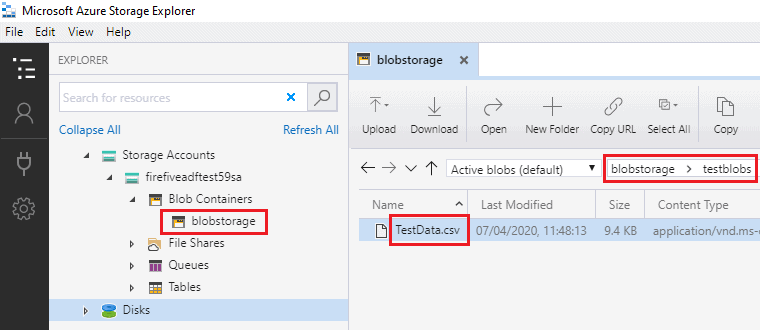
- a blob container in an Azure storage account – you'll store the CSV file for loading here. This screenshot of Azure Storage Explorer shows the source file “TestData.csv” stored in the “testblobs” folder of my “blobstorage” container:
“TestData.csv” contains a subset of cities data from Microsoft’s WideWorldImporters sample database:
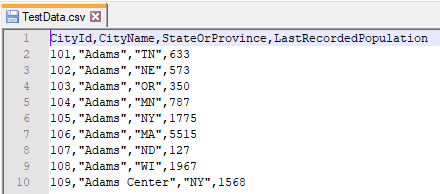
You can download it here and upload it into your own storage account.
- An instance of Azure SQL DB – this contains the table into which you will load the file’s data. This SSMS screenshot shows the structure of the target table [dbo].[TestData] in database [MyAdfTest]:
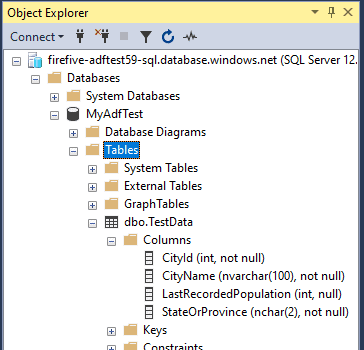
You can download a script to create the table here.
- An instance of ADF v2 to do the work.
I won’t talk about creating these resources here – if you need, the links to documentation above will help you get started.
Resource Explorer
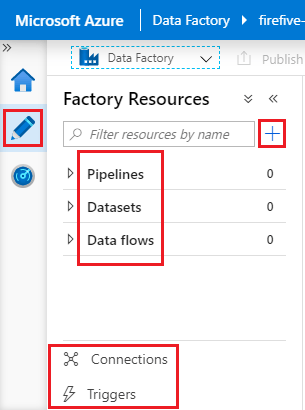
Log into your ADF instance at https://adf.azure.com. On the left is a sidebar headed Factory Resources – this is the Resource Explorer. If you don’t see it, make sure you’re on the Author page by clicking the pencil icon on the far left. The resource explorer contains several items:
- at the top, you see Pipelines, Datasets and Data flows. If your ADF instance is git-enabled, you will also see Templates
- at the bottom, you see Connections and Triggers
- you use the + (plus symbol) button to the right of the search box to create new resources.
For the purposes of this article, we’re interested in linked services (a type of connection), datasets and pipelines:
- a linked service is a type of connection that links ADF to external resources, for example a specific blob storage location or SQL database
- a dataset describes a specific object or set of objects accessed through a linked service, for example a CSV file or database table
- a pipeline defines the process for moving and transforming data between datasets.
Resources required for this task
To load the contents of file “TestData.csv” into table [dbo].[TestData], you will create:
- a linked service connecting to your source storage account and a dataset representing file “TestData.csv”
- a linked service connecting to your target database and a dataset representing table [dbo].[TestData]
- a pipeline to copy data from the source dataset to the sink dataset (ADF refers to a target/output dataset as a sink).
Create the data file linked service and dataset
We will first create the linked service and then add a dataset for our file.
Creating the data file linked service
First, create a linked service to access your blob storage by following these steps:
- In the resource explorer pane, click Connections. A new connections tab opens with two pages: Linked services (selected) and Integration runtimes.
- On the Linked services page, click the + New button. Here you choose the type of data store you want to connect to.
- Find and select Azure Blob Storage then click Continue. The New linked service window for blob storage is displayed:
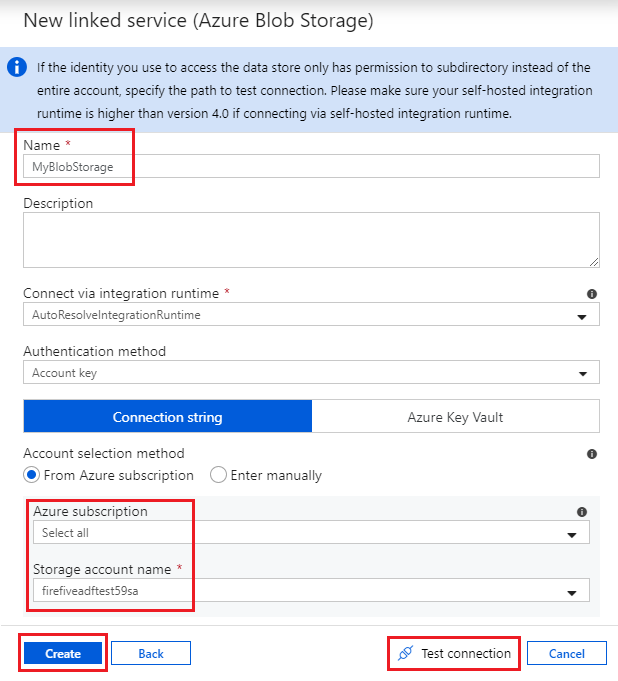
- Give the linked service a name and select your storage account from the appropriate subscription. Here I have called the linked service “MyBlobStorage”. Click Test Connection to check the linked service is working, then click Create.
Creating the data file dataset
Now you can create the dataset representing the CSV file:
- In the Resource Explorer pane, click the + button to the right of the search box and select Dataset. Here you choose the type of data store you want to connect to.
- Find and select Azure Blob Storage then click Continue. On the next page choose the DelimitedText format and click Continue again. Now you can set dataset properties:
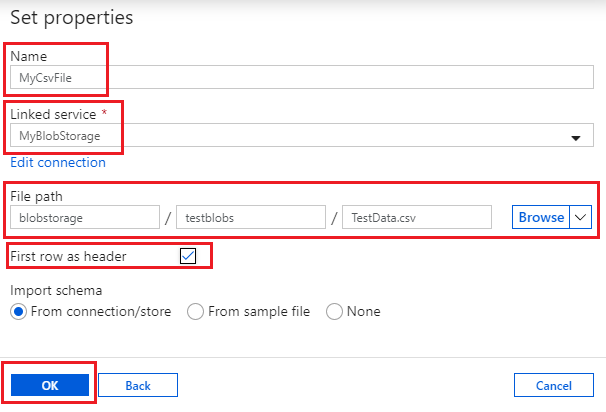
- Give the dataset a name and select the linked service you just created. This causes the other options shown above to appear. I have called the dataset “MyCsvFile” and chosen the “MyBlobStorage” linked service. I have also:
- specified the path to “TestData.csv”, given in three parts: the container “blobstorage”, the folder path “testblobs” and the name of the file itself. (Instead of typing these in, I just selected the file path using the Browse option on the right).
- ticked the “First row as header” box – you will notice in the screenshot of the file that “TestData.csv” has a header row.
Click OK to create the dataset.
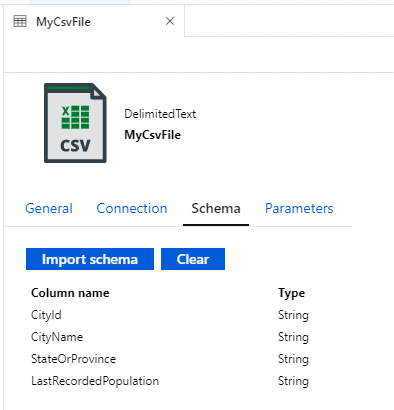
- Expand the Datasets list in the resource explorer to see your new dataset. Clicking on the dataset name opens a tab where you can inspect (and if necessary modify) its properties. Notice the Schema tab which now contains a list of column names – these have been read from the first line of the file:
You may be thinking that a dataset that represents a single file is not very flexible – and you’d be right! Normally you will parameterise the file path, so that you can use the dataset to represent any CSV file in the selected storage account. I’m not doing that here just to keep things simple.
Saving your changes
How you save your changes depends on whether your ADF instance is git-enabled or not.
- If git-enabled (recommended), at this point a Save All button will be visible in the top toolbar. Click Save All to commit your changes to your git repository.

- If not git-enabled, the Publish all button will be highlighted in the top toolbar. Click Publish all to publish your changes to your Data Factory immediately. (If your ADF instance is not git-enabled, this is the only way to save your work).

Create the SQL table linked service and dataset
Creating the SQL database linked service
Start by creating a linked service to access your SQL database:
- In the resource explorer pane, click Connections, then on the connections tab’s Linked services page, click the + New button
- Find and select Azure SQL Database then click Continue. The New linked service window for Azure SQL databases is displayed:
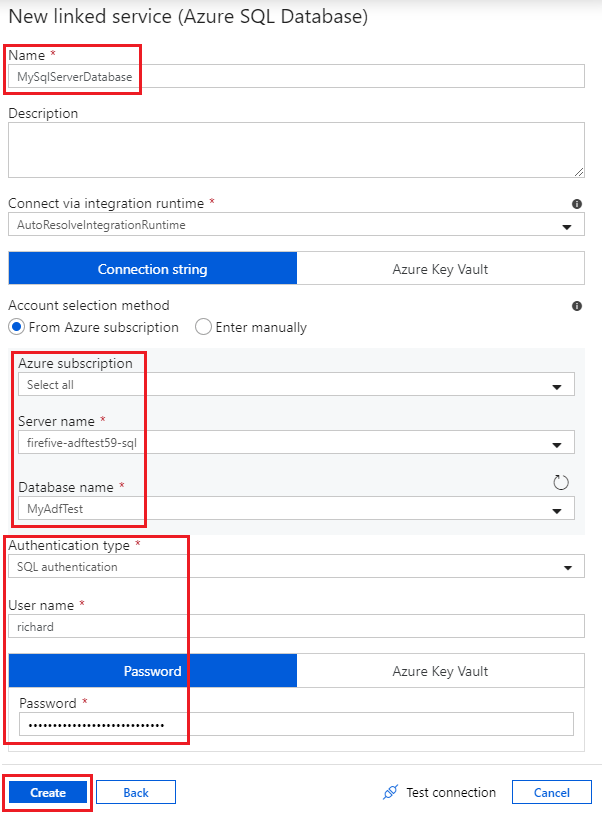
- Give the linked service a name – mine is called “MySqlServerDatabase” – and select your SQL Server and database from the appropriate subscription. Choose an authentication type and specify the relevant details. Here I am using SQL (username/password) authentication. Click Test Connection to check the linked service is working, then click Create.
Creating the database table dataset
Now create the dataset representing the database table:
- In the resource explorer pane, click the + button to the right of the search box and select Dataset. Find and select Azure SQL Database then click Continue. Now you can set dataset properties:
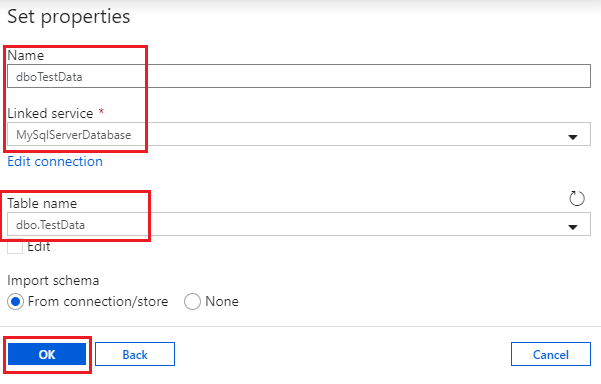
- Give the dataset a name and select the database linked service you created. I have called my dataset “dboTestData” and selected the table [dbo].[TestData] from the Table name dropdown (populated automatically from the database linked service). Click OK to create the dataset.
- Expand the Datasets list in the resource explorer to see your new dataset. Again, notice the Schema tab which now lists the table’s column names and types.
Create the pipeline
Now you’re ready to create a pipeline to copy data from the source file to the sink table!
- In the resource explorer pane, click the + button to the right of the search box and select Pipeline. A new pipeline tab opens, in three sections:
- the large blank pane is the pipeline designer surface, containing your empty pipeline definition
- the tabbed pane at the bottom contains pipeline-level information, like the pipeline’s name and other details
- the sidebar on the left is the Activities toolbox
On the General tab at the bottom of your screen, enter a name for your pipeline.
- An activity is an operation performed by a pipeline. Expand Move & Transform in the activities toolbox, then drag the Copy data activity onto the designer surface.
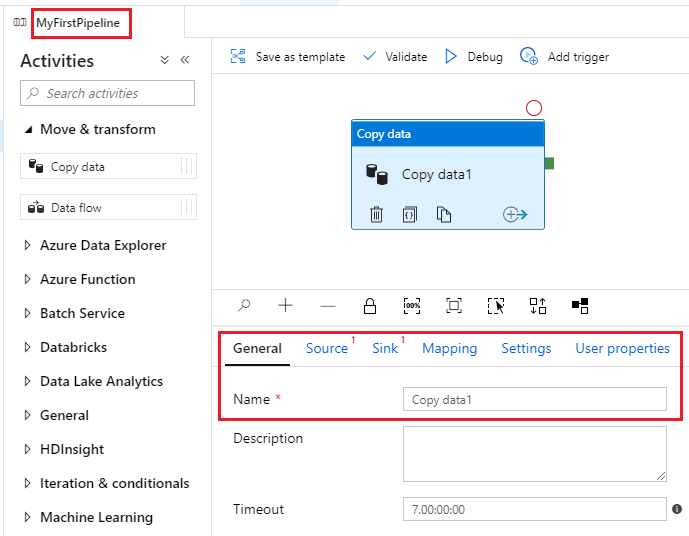
In the screenshot, you can see my pipeline is called “MyFirstPipeline”. The tabbed area at the bottom displays the properties of the copy data activity on the designer surface.
- Configure your copy data activity as follows:
- If you wish, change its name (on the General tab)
- On the Source tab, choose your source file dataset – in my case this is “MyCsvFile”. When you select the dataset more options will appear – you don’t need to change anything, but you can inspect the file’s contents by clicking Preview data to
- On the Sink tab, choose your sink table dataset – for me this is “dboTestData”.
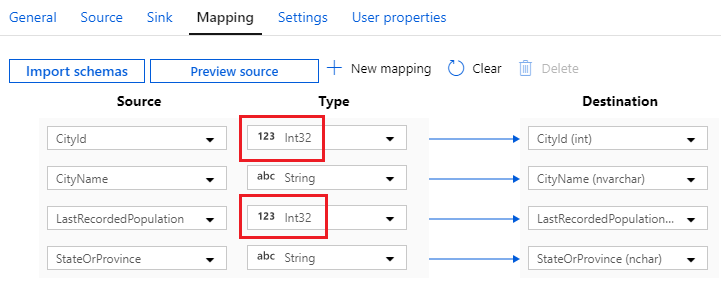
- Select the Mapping tab of your copy data activity and click Import schemas to populate it. ADF automatically maps columns based on matching names – you can change the mapping here when necessary, but in this case it’s correct. There is a problem though: [CityId] and [LastRecordedPopulation] are of type
Stringin the file dataset and typeintin the database table. If you run the pipeline with these mappings, it will fail – you must change the source types appropriately:
Run the pipeline
To test the pipeline, click the Debug button at the top of the designer surface. ADF will automatically display the pipeline’s Output pane at the bottom of the screen, showing the progress of pipeline activities. To start with, you will see your copy data task with a status of Queued – this changes to Succeeded after the activity has successfully executed. At that point, you will be able to see that data has been imported into your sink table.
To run your pipeline outside Debug mode, it must be published.
- If your ADF instance is git-enabled, you do this by clicking the Publish button in the toolbar.
- If it isn’t git-enabled, you have probably already published your work (unless you haven’t been saving any changes!).
Once published, you can create triggers to execute pipelines as required – this is a whole new article in itself, so I won’t say any more about them here.
Summary
You’ve created and run your first ADF pipeline! To recap:
- A dataset represents one or more objects in an external resource, accessed through a linked service.
- A pipeline consists of one or more activities. The Copy data activity copies data from one dataset (its source) into another (its sink). A dataset can act as a source or a sink: here we used a text file source and a database table sink, but we could do it the other way around, or use completely different resources as source and sink.
I have simplified the example pipeline here as far as possible, with the result that it isn’t very flexible! Here are some improvements you could consider:
- Define parameters in the CSV file dataset to represent the container, folder path and file name. The copy data activity will need to provide parameter values, but the dataset can be re-used for any file in the linked storage account.
- Store the SQL database connection string in an Azure Key Vault. This prevents you from having to store it in more than one place – if the password changes, just update the connection string in the vault.
- Define parameters in the database table dataset to represent schema and table names. The copy data activity will need to provide parameter values, but the dataset can be re-used for any table in the linked database.
- This pipeline provides a very simple pattern for staging data. In staging patterns a common requirement is to truncate the sink table before each run – you can do that by adding a Pre-copy script to the sink definition in the copy data activity.