

In this article, we will review how to join a Ubuntu 16.04 server to a Microsoft Active Directory Domain, install SQL Server, and configure the SQL Server on Ubuntu 16.04 to use Microsoft Active Directory Authentication. The following are the steps involved in configuring the SQL Server to use Microsoft Active Directory authentication on the Ubuntu 16.04 server.
- Join the Ubuntu 16.04 server to a Microsoft Active Directory Domain
- Installing the SQL Server on Ubuntu 16.04 Server
- Creating a key tab file for Kerberos authentication
- Creating a Windows login in the SQL Server
Let’s go over these steps one by one.
Join the Ubuntu 16.04 server to Active Directory
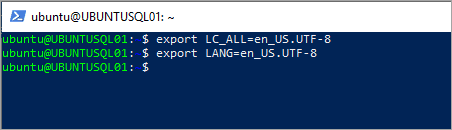
Log in to the Ubuntu server using SSH and set your locale settings by executing the following scripts on the terminal.
export LC_ALL=en_US.UTF-8

export LANG=en_US.UTF-8
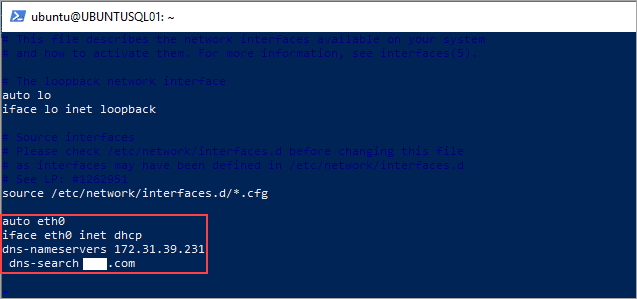
Update the domain search list by editing the network interface in the Ubuntu server. Please execute the below script to edit the network interface configuration.
sudo vi /etc/network/interfaces
Add the following lines to the file with the IP address of your domain controller and the domain name. Press the Esc button and then :wq + enter to save the file.
auto eth0

iface eth0 inet dhcp

dns-nameservers 172.31.39.231

dns-search testd.com
Please refer to the below image that shows /etc/network/interfaces file after editing. In this case, IP address of my domain controller is 172.31.39.231 and the domain name is testd.com.
Save the file and restart the network service. Please execute the following script to restart the network service.
sudo ifdown eth0 && sudo ifup eth0
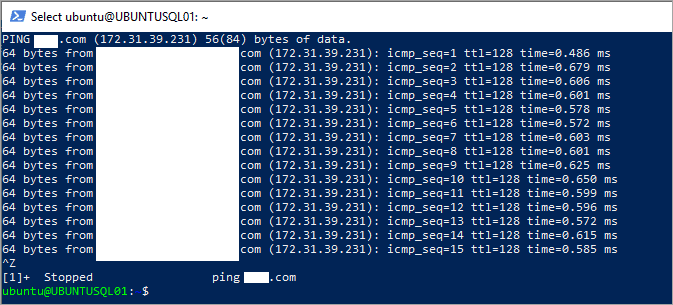
Test the connectivity to your domain by using ping command and see if you are getting a response.
ping testd.com
Verify if your domain controller IP address and domain name are updated in the /etc/resolv.conf file. Please refer to the below image that shows the updated resolv.conf file with the domain details you entered in the /etc/network/interfaces file.
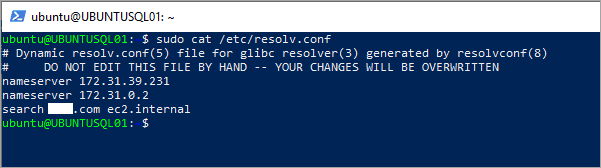
If you do not find the domain details in resolv.conf file, please check the above steps and make sure you complete them without any errors. Please do not try to edit resolv.conf file as your changes will be discarded.
Install the realmd, sssd, Kerberos client packages, and other required packages to join the Ubuntu server to the Microsoft Active Directory Domain and use Windows authentication for SQL Server on Ubuntu. Execute the following script to download and install the realmd, sssd, and Kerberos client packages.
sudo apt-get update

sudo apt-get -y install realmd sssd sssd-tools samba-common krb5-user packagekit samba-common-bin samba-libs adcli ntp
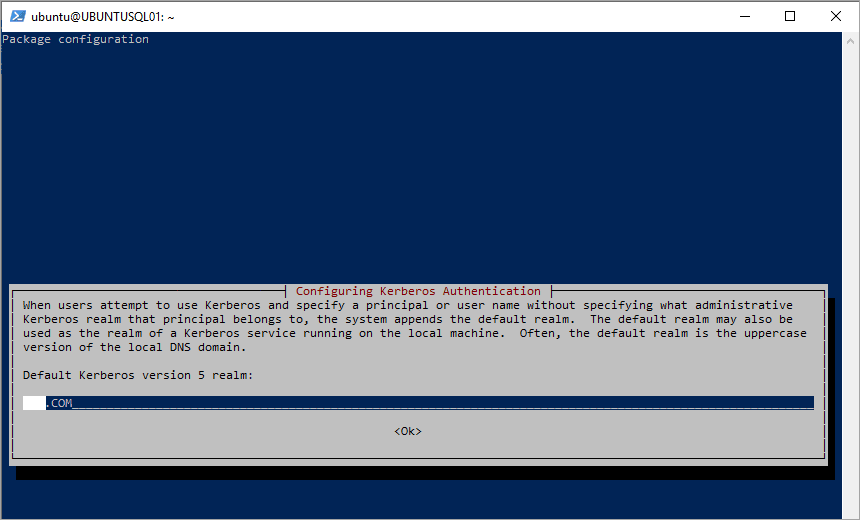
You will be prompted to enter the realm name, Enter the domain name and click on OK. In this case, I entered TESTD.com Please refer to the below image.
Now we need to configure realmd. Create the realmd.conf file using the following script.
sudo vi /etc/realmd.conf
Add the following lines in the realmd.conf file and save the file by pressing the esc button, then :wq and press enter button. Replace the domain name with your domain name.
[users]

default-home = /home/%U

default-shell = /bin/bash

[active-directory]

default-client = sssd

os-name = Ubuntu Server

os-version = 16.04

[service]

automatic-install = no

[testd.com]

fully-qualified-names = no

automatic-id-mapping = yes

user-principal = yes

manage-system = no
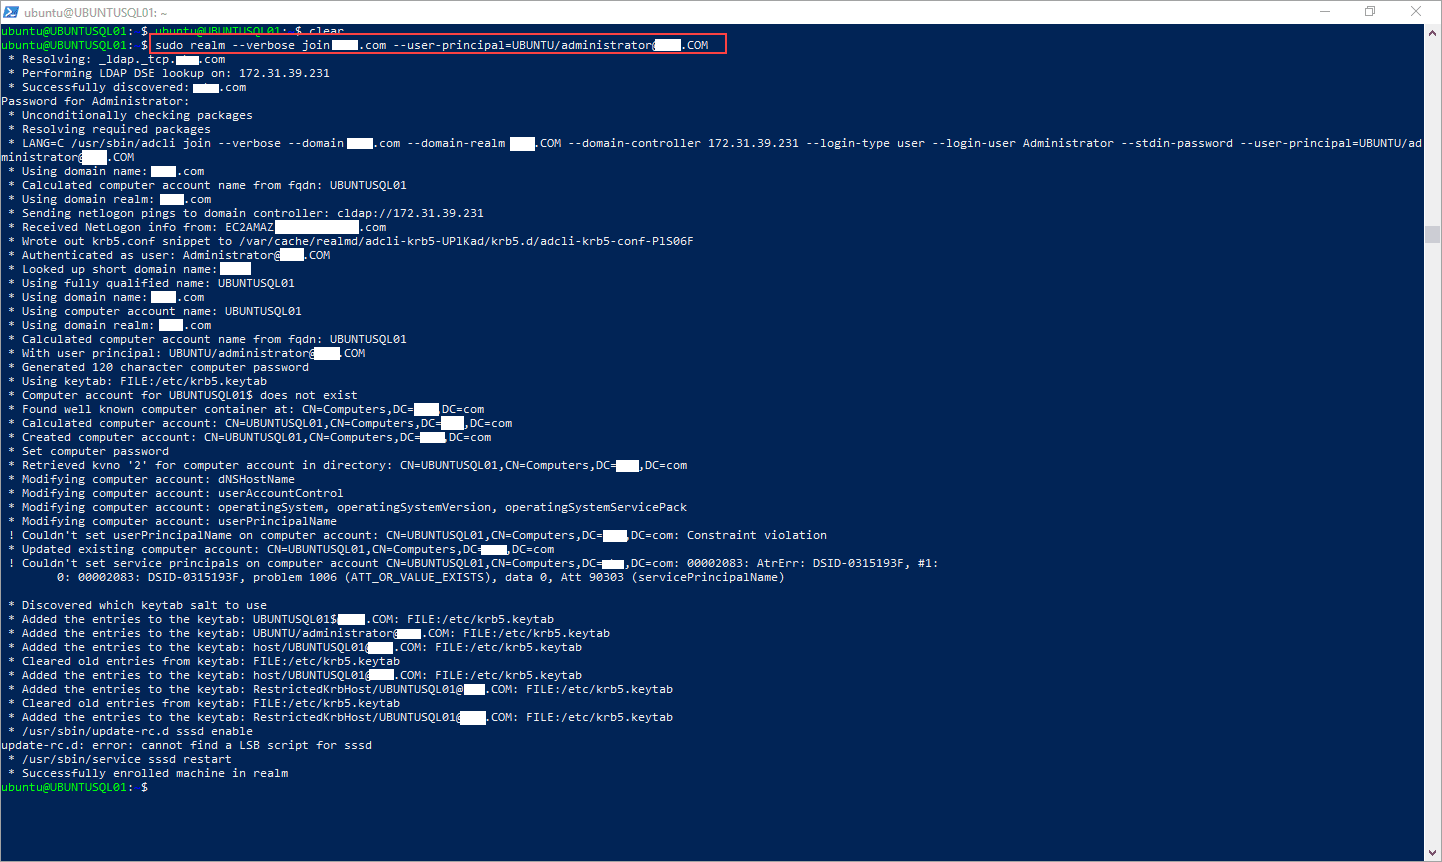
Now join the Ubuntu server to the Microsoft Active Directory domain and configure SQL Server on Ubuntu to use windows authentication. Replace the domain name with your domain name. Enter the password of the user Administrator when prompted. Make sure the user has appropriate permissions to join the server to a Microsoft Active Directory Domain. Use this command.
sudo realm --verbose join testd.com --user-principal=UBUNTU/administrator@TESTD.COM
After joining the Ubuntu server to the domain you will see a message “successfully enrolled machine in realm” as shown in the below image.
We have successfully joined the Ubuntu server to the Microsoft Active Directory Domain. Now let us proceed with installing the SQL Server on the Ubuntu server and creating a key tab file for Kerberos authentication.
Installing the SQL Server on Ubuntu 16.04 Server
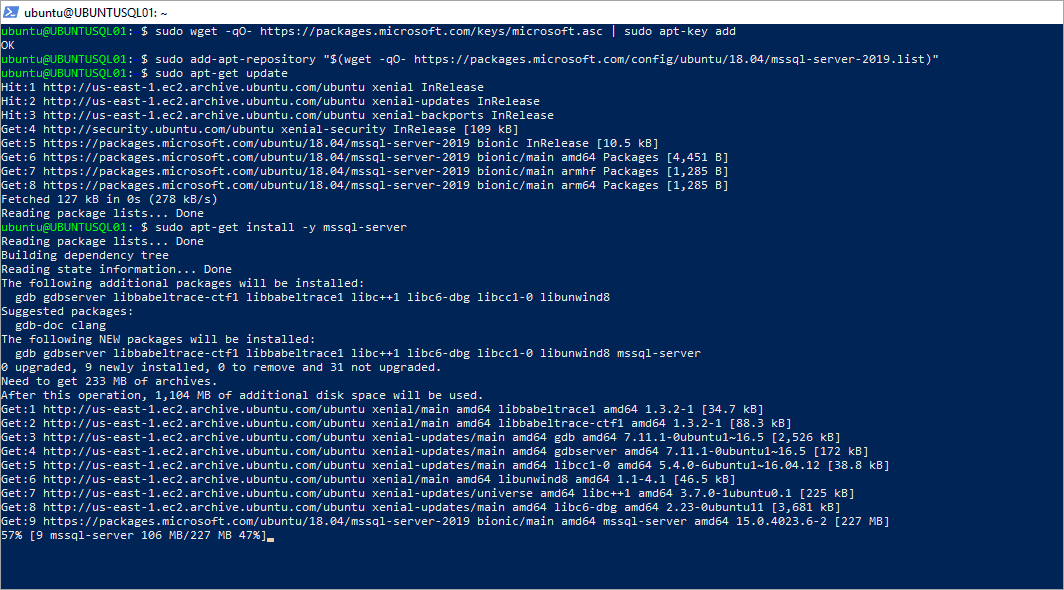
To install the SQL Server on Ubuntu we need to import GPG keys. Execute the following script to import public GPG keys.
sudo wget -qO- https://packages.microsoft.com/keys/microsoft.asc | sudo apt-key add –
After adding the public GPG keys, we need to register the Microsoft SQL Server Ubuntu repository. Please execute the following script to register the Microsoft SQL Server Ubuntu repository.
sudo add-apt-repository "$(wget -qO- https://packages.microsoft.com/config/ubuntu/18.04/mssql-server-2019.list)"
Now download the package information and install SQL Server on the Ubuntu server by executing the following commands.
sudo apt-get update

sudo apt-get install -y mssql-server
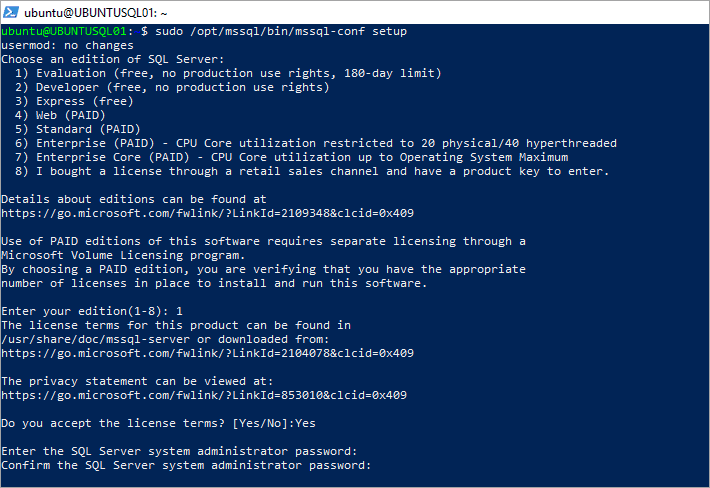
After installing the SQL Server package, set up the SQL Server by executing the following script.
sudo /opt/mssql/bin/mssql-conf setup
Choose the SQL Server edition, accept the terms and conditions and enter your sysadmin (sa) password. For demo purposes, I choose the evaluation edition. After a successful setup of SQL Server on Ubuntu, you will see a message “Setup has completed successfully. SQL Server is now starting”. Please refer to the below image.
We need to install the SQL Server command line tools and setup the environment variables. The mssql-tools package will install SQLCMD and BCP utilities. SQLCMD is used to connect and query the SQL Server and BCP is used to import and export data from the SQL Server.
Execute the following script to install SQL Server command line tools. Accept the terms and conditions when prompted.
curl https://packages.microsoft.com/keys/microsoft.asc | sudo apt-key add –

curl https://packages.microsoft.com/config/ubuntu/16.04/prod.list | sudo tee /etc/apt/sources.list.d/msprod.list

sudo apt-get update

sudo apt-get install mssql-tools unixodbc-dev
Execute the following commands to set the environment variables for accessing SQLCMD.
echo 'export PATH="$PATH:/opt/mssql-tools/bin"' >> ~/.bash_profile

echo 'export PATH="$PATH:/opt/mssql-tools/bin"' >> ~/.bashrc

source ~/.bashrc
Now log in to the SQL Server using SQLCMD and test the connectivity to the SQL Server on Ubuntu. Please refer to the below syntax for connecting SQL Server using the SQL Server login. Replace below script with your server name and login credentials.
sqlcmd -S SERVERNAME -U sa -P 'password'
Installing the SQL Server on Ubuntu is completed by this step and now let us create a key tab file for Kerberos authentication.
Creating a key tab file for Kerberos authentication
Create a user in the Active Directory and enable the option, password never expires. For demo purposes, I created a login, sqlsvcac. Execute the following command on the domain controller using PowerShell to set ServicePrincipalName (SPN). Enter the FQDN of the host machine where the SQL Server is installed.
setspn -A MSSQLSvc/UBUNTUSQL01.testd.com:1433 sqlsvcac
Now create a key tab file that will be used for Kerberos authentication using the ktutil command. ktutil is a command that is used to read, write or modify the entries in the keytab file.
sudo kinit sqlsvcac@TESTD.COM

sudo kvno MSSQLSvc/UBUNTUSQL01.testd.com:1433
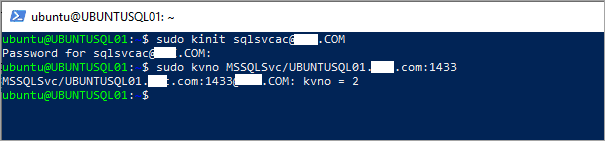
The kvno returned from the above command will be used in the ktutil command to create a keytab file. In this case, the kvno returned 2.
Execute the following commands to create a keytab file and save it in the location, /var/opt/mssql/secrets/
sudo ktutil

addent -password -p MSSQLSvc/UBUNTUSQL01.TESTD.COM:1433@TESTD.COM -k 2 -e aes256-cts-hmac-sha1-96

addent -password -p MSSQLSvc/UBUNTUSQL01.TESTD.COM:1433@TESTD.COM -k 2 -e rc4-hmac

wkt /var/opt/mssql/secrets/mssql.keytab

exit
We need to secure the keytab file and give the read permission to the mssql user only. Execute the following commands to change the permissions of the keytab file.
sudo chown mssql:mssql /var/opt/mssql/secrets/mssql.keytab

sudo chmod 400 /var/opt/mssql/secrets/mssql.keytab
Change the SQL Server configuration to use the keytab file for Kerberos authentication. Restart the SQL Server on Ubuntu after changing the configuration.
sudo /opt/mssql/bin/mssql-conf set network.kerberoskeytabfile /var/opt/mssql/secrets/mssql.keytab

sudo systemctl restart mssql-server
Creating a Windows login in SQL Server
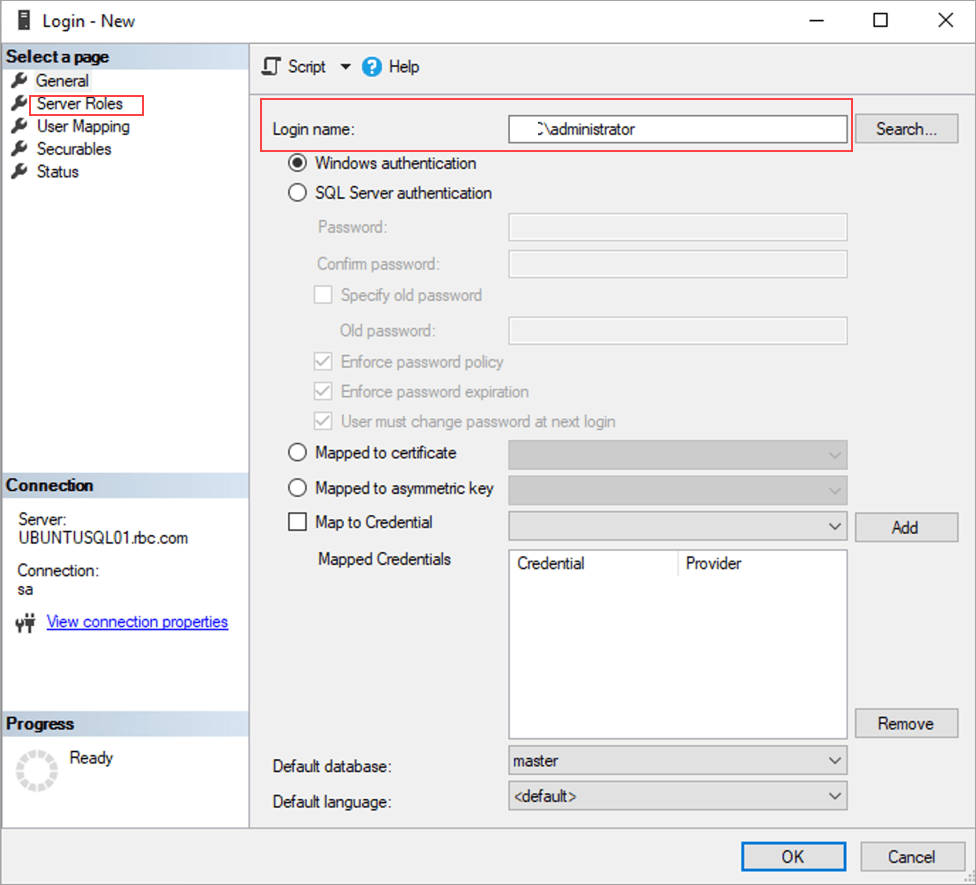
Login to the SQL Server using SQL Server Management Studio (SSMS) installed on a Windows machine that has connectivity to SQL Server running on Ubuntu and creates a login with Windows authentication.
You can also create a login using SQLCMD utility. Log in to the Ubuntu server using SSH and use SQLCMD utility to connect the SQL Server and execute the following commands to create a windows login and adding it to the sysadmin role.
USE [master]
GO
CREATE LOGIN [TESTD\administrator] FROM WINDOWS WITH DEFAULT_DATABASE=[master]
GO
ALTER SERVER ROLE [sysadmin] ADD MEMBER [TESTD\administrator]
GO
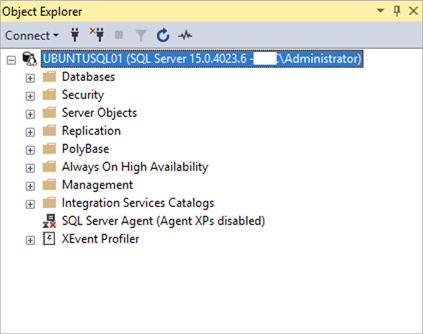
After creating a Windows login in the SQL Server on Ubuntu, open SSMS on any Windows machine that has connectivity to the Ubuntu Server and use Windows Authentication to log in to SQL Server. Please refer to the below image that shows user logging into the SQL Server running on Ubuntu using Windows Authentication.
Conclusion
In this article, we explored how to join the Ubuntu server to a Microsoft Active Directory Domain, install SQL Server on Ubuntu 16.04 Server and set up the SQL Server on Ubuntu 16.04 to use the Active Directory Authentication. In case you have any questions, please feel free to ask in the comment section below.

