
Article 16 in this Stairway series gave a glimpse of how PowerShell can be used to manage your Azure Data Lake. This time around, we expand the theme, as we take a closer look at how PowerShell can help us with our Data Lakes.
If you want to follow along, you need to ensure you have installed the Windows Azure PowerShell module before continuing.
Logging in to Azure
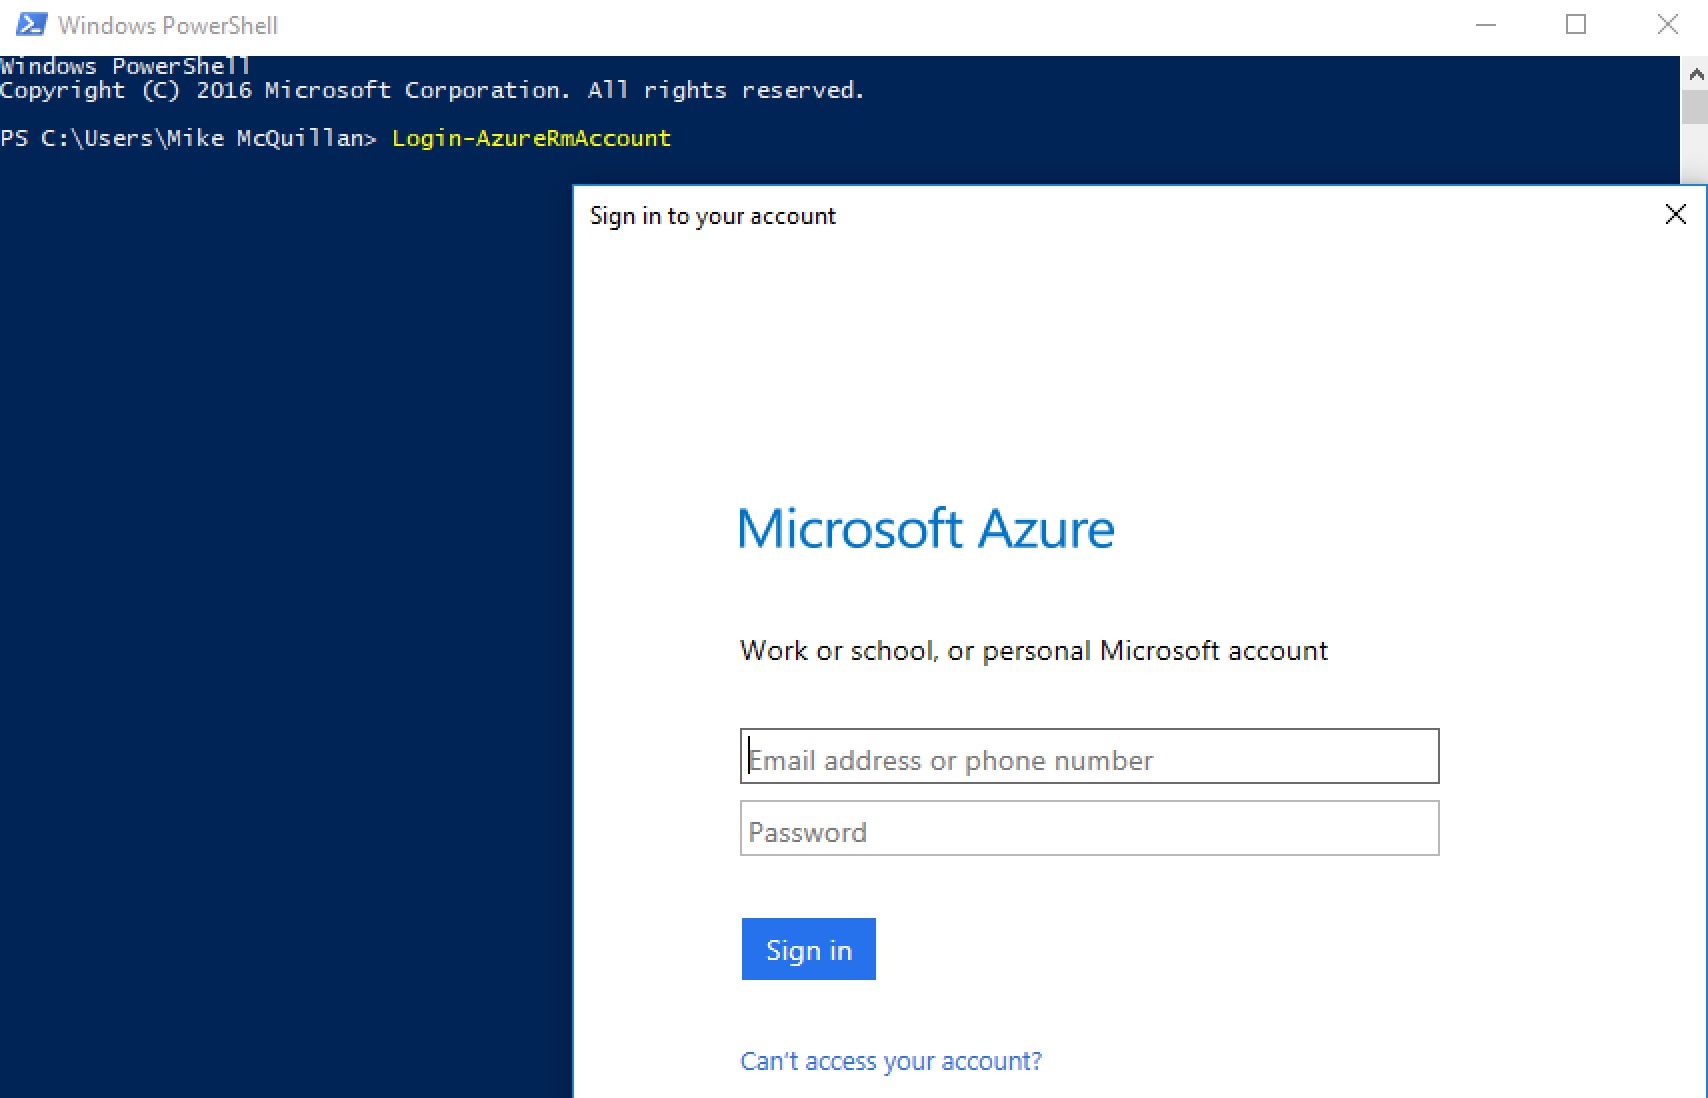
Before we can run any of the scripts we’re going to see, we need to log into Azure. After opening a PowerShell command prompt, we can use this cmdlet to do that:
Login-AzureRmAccount
This displays a login dialog, into which you must enter your user name and password.
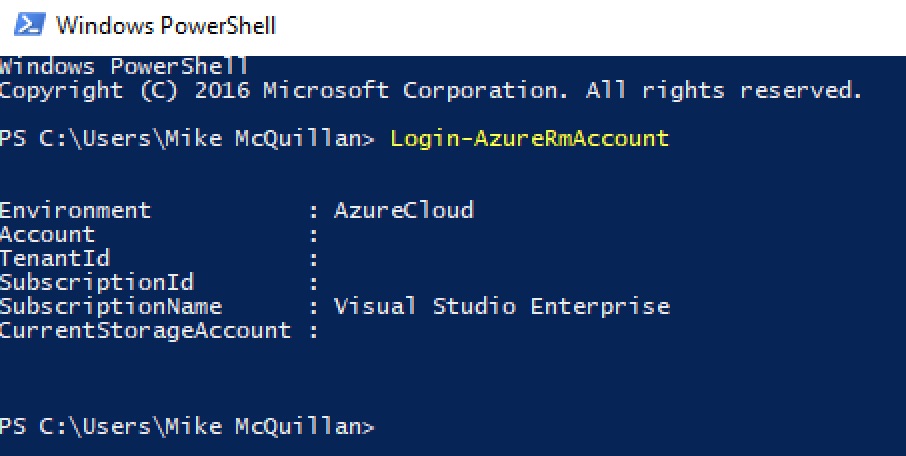
Once you’ve successfully logged in, you’ll see your Azure account details displayed as confirmation.
All well and good, and we can now execute PowerShell scripts against our Data Lake. But what if we want to automate this process? We can’t schedule a script to execute at a certain time, only for it to block by displaying a login prompt. What we have to do is save the context of our login to a file, which can then be referenced in any scripts we may create.
Saving the Azure Context
To save the context, execute this command, substituting the path you wish to save the context to as required.
Save-AzureRmContext -Path "c:\temp\azurecontext.json" -Force
The file contains a JSON structure, representing your context. Note that you must be logged in before you execute the Save cmdlet. With the context saved, we’re ready to create a PowerShell script of our own!
Managing the Data Lake with PowerShell
You can manage just about any aspect of your Data Lake using PowerShell. In fact, everything we’ve covered in the Stairway up to now can be handled by PowerShell. We can inspect our database and our files, upload and remove files and execute U-SQL scripts. The next few articles in this Stairway will concentrate on using PowerShell with the Data Lake, as it allows us to execute things autonomously and can also be used as part of a DevOps or data loading process.
Creating a Database using PowerShell
I talked about using PowerShell way back in article 1, and here we are at last! The script we’ll see in this article will create the UkPostcodes database. Here’s what the script needs to do:
- Obtain an Azure context by using the file we saved earlier
- Check if the UkPostcodes database already exists and drop it if it does
- Execute a script to create the database
- Execute a script to create the Postcodes schema
- Execute scripts to create the tables within the Postcodes schema
The script will break these individual tasks down into functions.
Creating a New PowerShell Script
If you’re a PowerShell newbie, you may be surprised to learn Windows comes complete with a PowerShell development environment. It’s called PowerShell ISE (Integrated Scripting Environment). Typing PowerShell ISE into your Start Menu will find it. Once it opens, you are presented with an empty script.
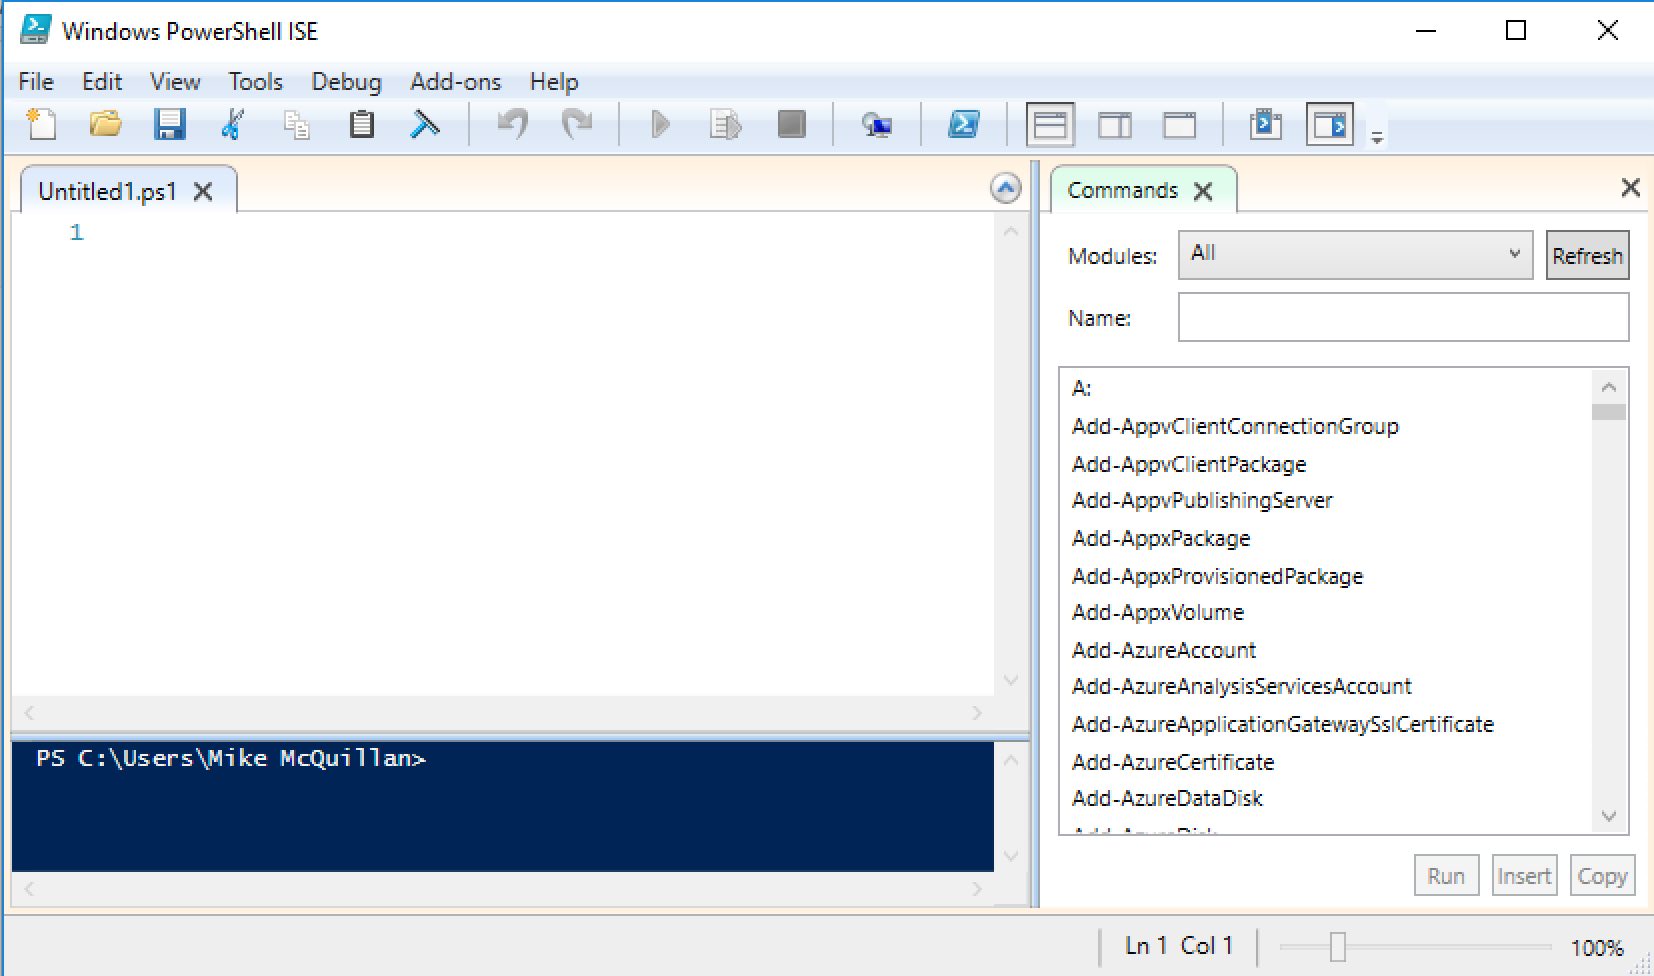
Time to start making magic!
Creating a Login Function
I’m not going to turn this into a PowerShell tutorial – there are lots of other people who’ve already done that far better than I could. If you want a guide on how to use PowerShell with SQL Server, you could do a lot worse than Bryan Cafferky’s Pro PowerShell for Database Developers. I will explain the functions as best I can though.
Here is the code for the login function.
# Login to the Data Lake using a context file
function Perform-AdlLogin ([string] $contextPath)
{
 $contextFileExists = Test-Path $contextPath
 Write-Output "Logging in using $contextPath"

 Try
 {
  if ($contextFileExists)
  {
   # Login to Azure using saved context
   Import-AzureRmContext -Path $contextPath
  }
  else
  {
   Write-Output "The context file does not exist: $contextPath"
   break
  }
 }
 Catch
 {
  Write-Output "Logging in from context file failed - check your context file."
  break
 }
}
The first line beginning with # is a comment – yep, another different comment identifier to remember! The function is called Perform-AdlLogin, and it takes a single string parameter called $contextPath.
function Perform-AdlLogin ([string] $contextPath)
PowerShell variables always begin with a $ symbol (similar to the @ symbol of T-SQL variables). The code in the function is wrapped in curly braces. Let’s take a look at the next two lines:
$contextFileExists = Test-Path $contextPath
Write-Output "Logging in using $contextPath"
Test-Path is a built-in PowerShell function, and it tells us if the specified path exists. This returns a Boolean, which is stored in the $contextFileExists variable. The Write-Output call just spits out a status message to the console.
Next comes the meat of the function – a Try/Catch block.
Try
{
 if ($contextFileExists)
 {
  # Login to Azure using saved context
  Import-AzureRmContext -Path $contextPath
 }
 else
 {
  Write-Output "The context file does not exist: $contextPath"
  break
 }
}
Catch
{
 Write-Output "Logging in from context file failed - check your context file."
 break
}
If the context file exists at the specified path, we attempt to login using that context file. Everything should go smoothly, at which point the function ends. If the file doesn’t exist or something goes wrong during the login attempt, we display a message and the script will fail further on down the line, as we didn’t manage to log in.
Executing U-SQL Scripts via PowerShell
There are two ways to execute U-SQL scripts in PowerShell – using a script file or embedding script code directly within the code. This article will demonstrate both methods. We need a function to execute a script file, and another function to execute an embedded script.
Here is the function to execute a U-SQL script from a file.
function Execute-Script ([string] $accountName, [string] $scriptPath, [string] $scriptName, [string] $dbName)
{
 $dbScript = -join($scriptPath, $scriptName)
 $currentJob = Submit-AdlJob -Account $accountName -ScriptPath $dbScript -Name "Execute $scriptName"
 Wait-AdlJob -Account $accountName -JobId $currentJob.JobId
}
This script takes an account name parameter (required by the Submit-AdlJob cmdlet – this is the name of your Data Lake Analytics account, e.g. sqlservercentral), a path to the script file (excluding the script name), the name of the script file, and the database name to execute the script against.
There is no need to have separate $scriptPath and $scriptName variables. I’ve done it this way to introduce the –join function, which is a handy little command to know about. It also saves me duplicating the path in another function we’ll write shortly.
The script is executed via the Submit-AdlJob cmdlet. The last parameter is the name of the job, which I’ve hard-coded as “Execute [whatever script name was passed in]”.
Now, U-SQL jobs run asynchronously. Once the job has been successfully submitted, control returns to the PowerShell script and it continues on its merry way. How do we monitor the progress of the job?
Monitoring U-SQL Job Progress
There are a couple of ways to monitor job progress. To be able to monitor the job, it’s important you store the job object that is returned when you execute a script. Submit-AdlJob returns a job object – in the code above, I’ve assigned this to a variable called $currentJob. If I wanted to check the progress of my submitted job, I could execute:
$currentJob = Get-AdlJob -AccountName $accountName -JobId $currentJob.JobIdThe Get-AdlJob cmdlet returns the current status of the job. However, if you want your PowerShell script to wait for the job to finish before proceeding, Get-AdlJob isn’t going to cut it – you’d need to write a timed loop of some sort and call the cmdlet periodically. This might be what you need in certain circumstances, but there’s also a way to block the script until the job has completed.
The last line in the Execute-Script function is:
Wait-AdlJob -Account $accountName -JobId $currentJob.JobId
Wait-AdlJob does exactly what it says on the tin – it sits waiting until the specified job has completed. You should think carefully about when it’s appropriate to use this cmdlet – you probably don’t want a script to sit waiting for a five-hour data load to complete! But for the purposes of a database creation script, where scripts will be executed relatively quickly, this is ideal. We want each script to execute sequentially in turn, and using Wait-AdlJob guarantees the previous job has executed before we start the next one.
Executing Embedded U-SQL Code in PowerShell
Now we know how to execute a U-SQL script and also how to monitor it. To complete the set, we need to know how to embed and execute U-SQL code directly within the PowerShell script. We’ll add a new function to check if the UkPostcodes database exists, dropping it if it does so. This function will cunningly be called Drop-Database.
function Drop-Database ([string] $accountName, [string] $dbName)
{
 $dbExists = Test-AdlCatalogItem -Account $accountName -ItemType Database -Path $dbName

 # Drop the database if it exists
 if ($dbExists)
 {
  Write-Output "$dbName database already exists...dropping"

  $dropScript = "USE master; DROP DATABASE IF EXISTS $dbName;"
  $dropDbJob = Submit-AdlJob -Account $accountName -Script $dropScript -Name "Drop $dbName Database"
  Wait-AdlJob -Account $accountName -JobId $dropDbJob.JobId
 }
}
This function starts by using the Test-AdlCatalogItem cmdlet we met at the end of the last article, to check if the database already exists (this cmdlet returns a true or false response).
If the database does exist, the U-SQL code to execute is assigned to a variable.
$dropScript = "USE master; DROP DATABASE IF EXISTS $dbName;"
This is subsequently passed to Submit-AdlJob. The script is passed to a –Script parameter; when specifying a script file, a parameter called –ScriptPath is used instead. Make sure you use the correct parameter!
With the job submitted, the function finishes by calling the Wait-AdlJob cmdlet, which as we’ve seen simply blocks until the job reports completion.
All that’s left to do now is create the main function, which will call the functions we’ve created so far before creating the database.
Creating the Database
All of the supporting code has been written, so let’s have a look-see at the code to create the database.
function Create-Database([string] $accountName,  [string] $contextPath, [string] $dbName)
{
 $scriptPath = "C:\Users\Mike McQuillan\source\repos\usql_ssc\SSC_UkPostcodes\"

 Perform-AdlLogin $contextPath
 Drop-Database $accountName $dbName

 Write-Output "Creating objects..."

 Execute-Script $accountName $scriptPath "010 Create UkPostcodes Database.usql" $dbName
 Execute-Script $accountName $scriptPath "020 Create Postcodes Schema.usql" $dbName
 Execute-Script $accountName $scriptPath "030 Create Counties Table.usql" $dbName
 Execute-Script $accountName $scriptPath "040 Create Districts Table.usql" $dbName
 Execute-Script $accountName $scriptPath "050 Create PostcodeEstimates Table.usql" $dbName
 Execute-Script $accountName $scriptPath "060 Create Postcodes Table.usql" $dbName

 Write-Output "Database creation complete."
}
This function takes three parameters – the Analytics account name, the path to the context file, and the name of the database to create/recreate. The first line of the function specifies a hard-coded path to the script files (you’ll need to change this to match wherever you’ve downloaded the GitHub code to):
$scriptPath = "C:\Users\Mike McQuillan\source\repos\usql_ssc\SSC_UkPostcodes\"
In a production-ready script we’d specify this as a parameter of the Create-Database function. Extra code would then be needed to test the path existed before proceeding on to script execution – I’ll leave this as an exercise for the reader, all the code you need is in other parts of the script.
Now it’s time for two of the functions we wrote earlier to be called:
Perform-AdlLogin $contextPath
Drop-Database $accountName $dbName
And then we can put Execute-Script to good use, using U-SQL scripts we’ve created in previous articles to create the database.
Execute-Script $accountName $scriptPath "010 Create UkPostcodes Database.usql" $dbName
Execute-Script $accountName $scriptPath "020 Create Postcodes Schema.usql" $dbName
Execute-Script $accountName $scriptPath "030 Create Counties Table.usql" $dbName
Execute-Script $accountName $scriptPath "040 Create Districts Table.usql" $dbName
Execute-Script $accountName $scriptPath "050 Create PostcodeEstimates Table.usql" $dbName
Execute-Script $accountName $scriptPath "060 Create Postcodes Table.usql" $dbName
These calls create the database, the schema, and four tables. Here’s how everything looks in PowerShell ISE.

Executing the Script
Executing the script as it is doesn’t actually do anything – it just displays the content of the script in the command window. We need to make a call to the Create-Database function to execute the script. Add this line to the very bottom of the script, underneath the Create-Database function:
Create-Database "sqlservercentral" "c:\temp\azurecontext.json" "UkPostcodes"
Make sure you change “sqlservercentral” to the name of your Data Lake Analytics account, and the second parameter to the path where you saved your Azure context file. The last parameter is, of course, the database name. Click the Run Script button on the toolbar (or hit F5) to execute the script.
The script will take a while to execute (we are waiting for each submitted job to complete, remember), but regular status messages should be displayed.
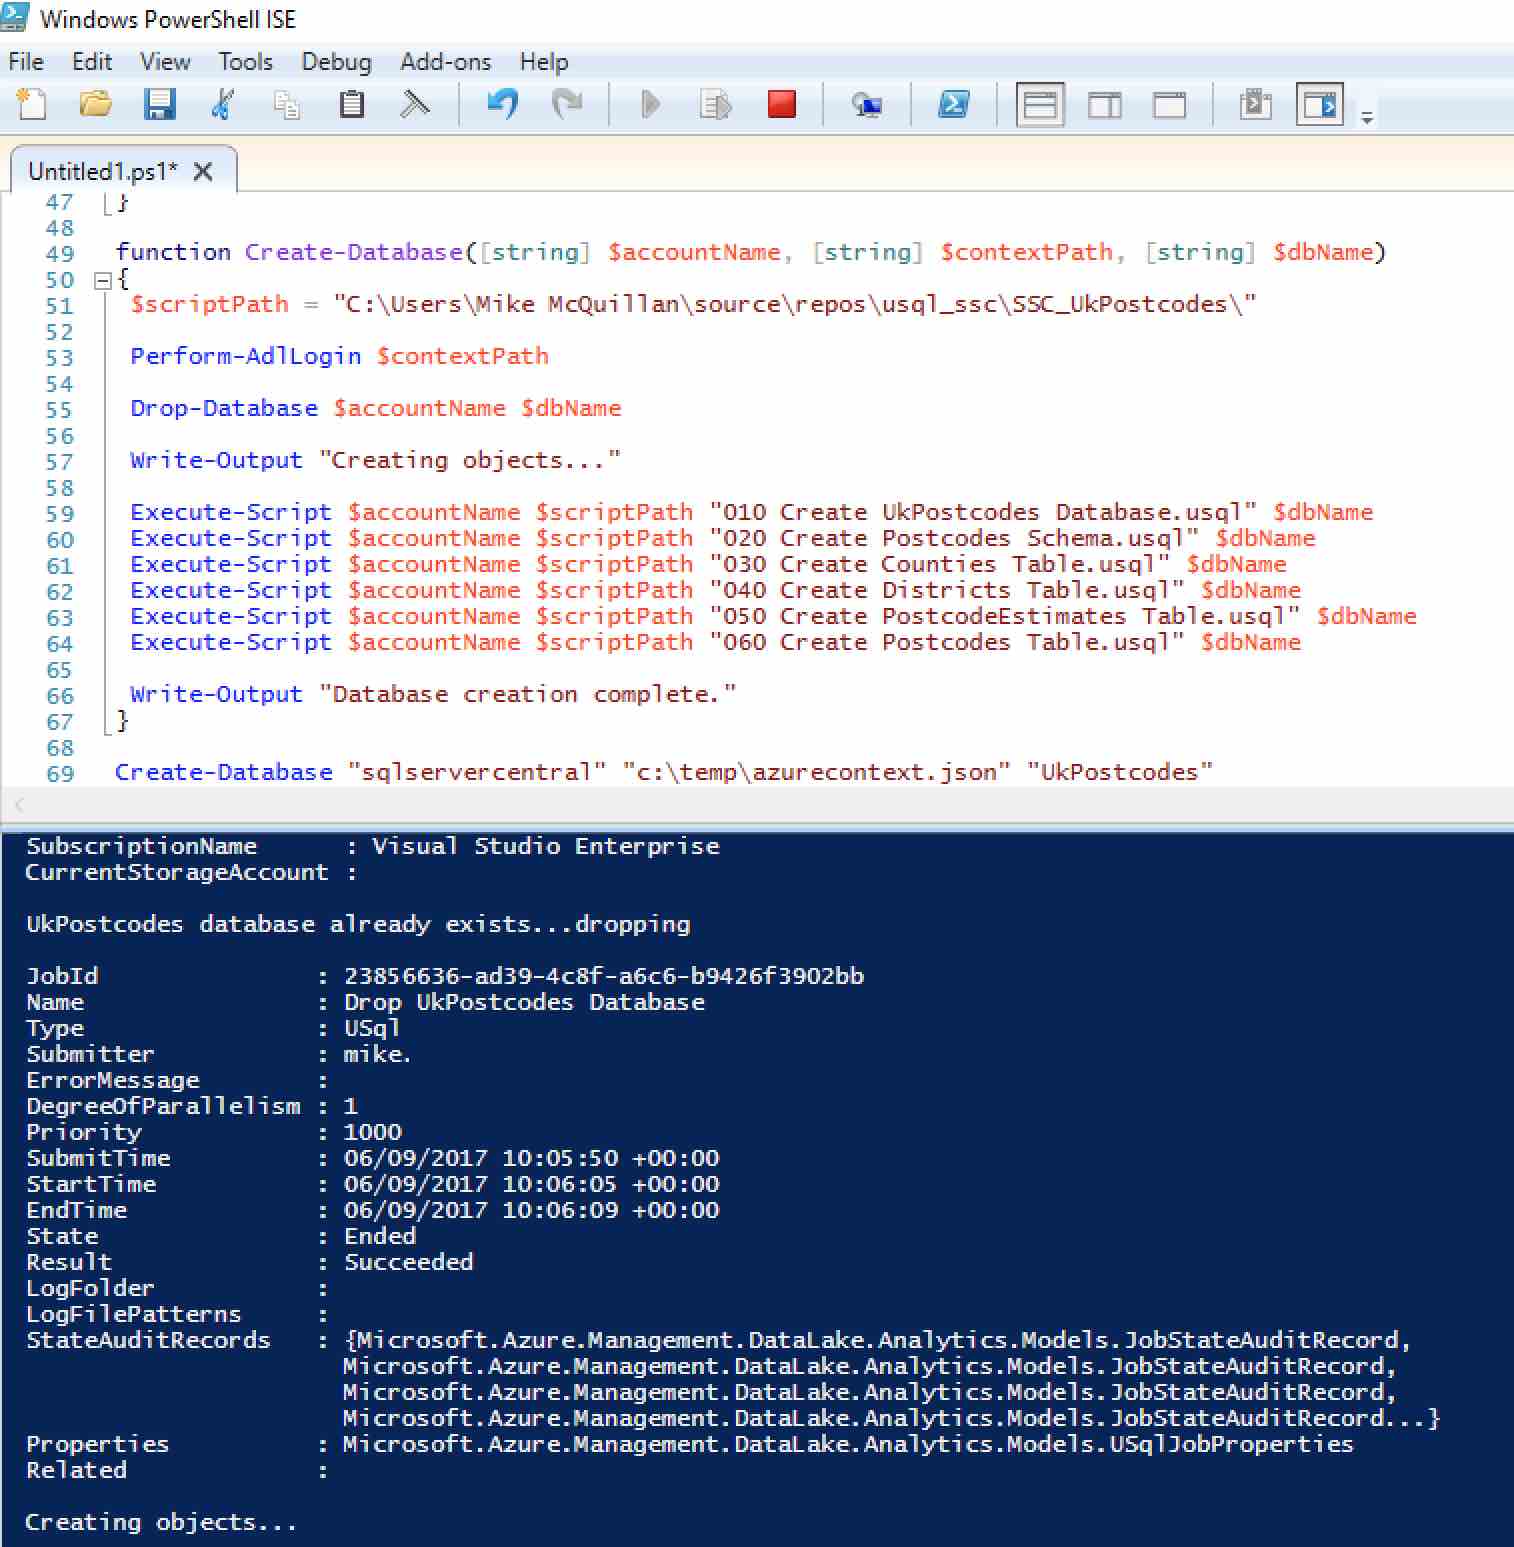
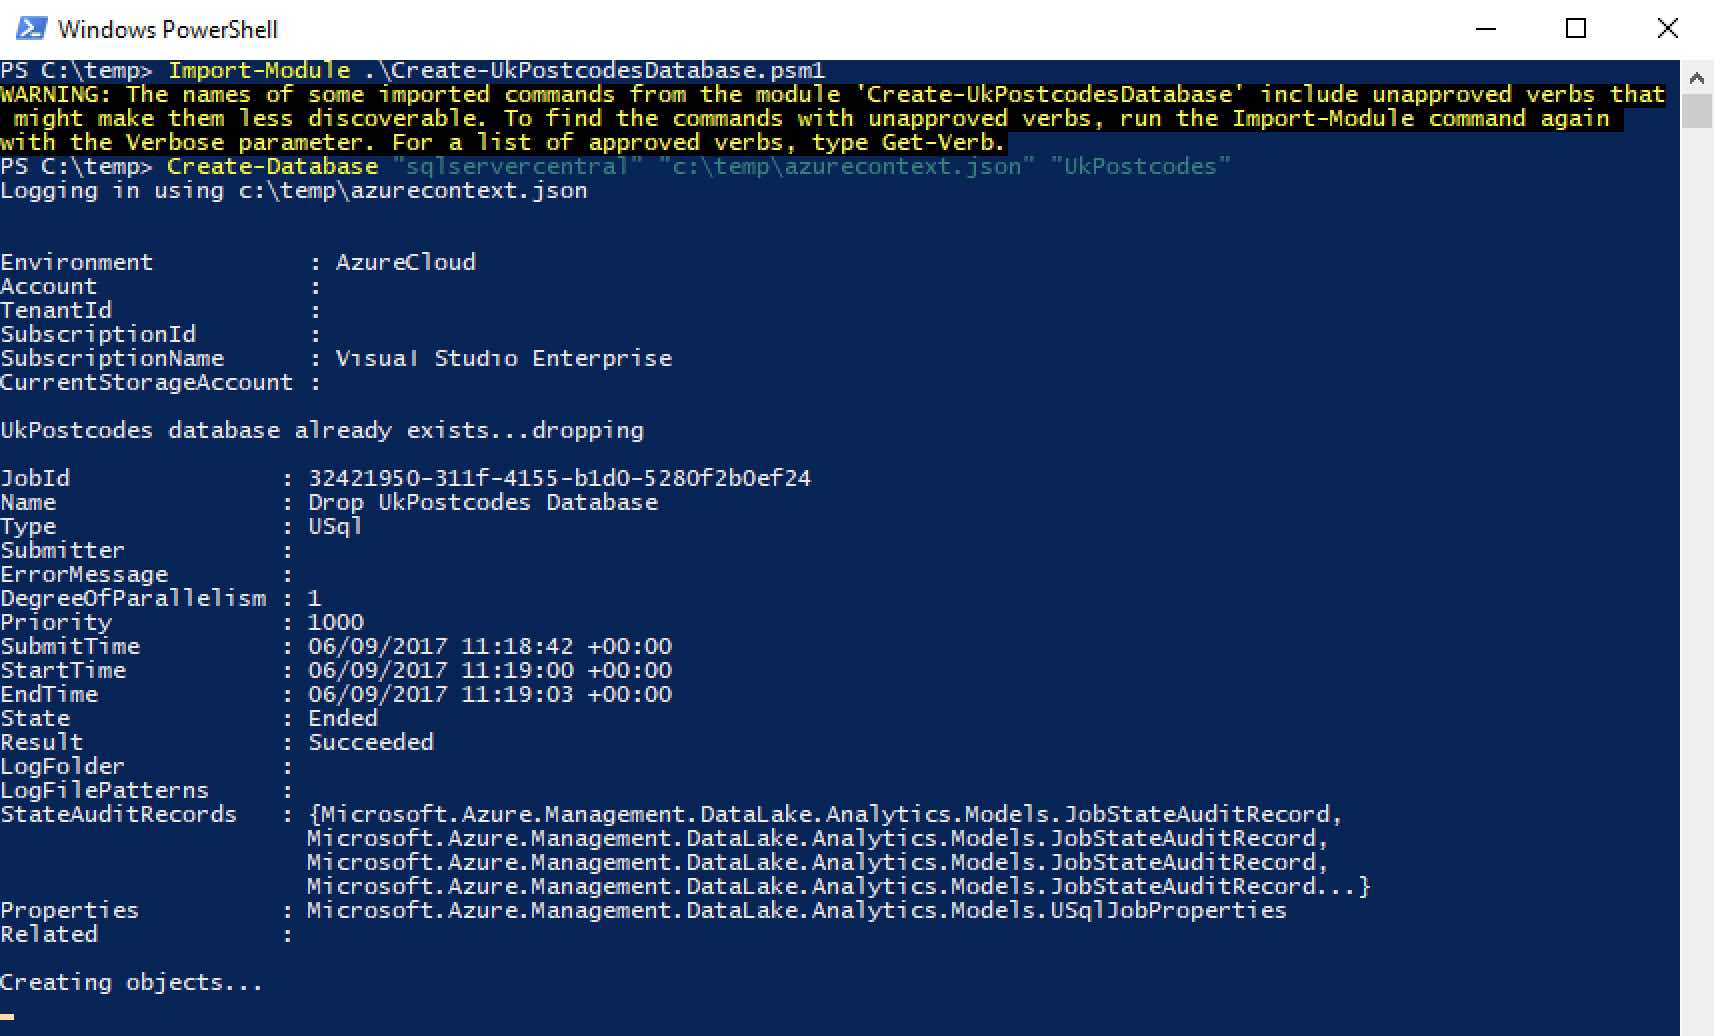
In this example, you can see the result of the drop database U-SQL job. The status message at the bottom tells us the database objects are now being created.
After a few minutes, the script will finish.

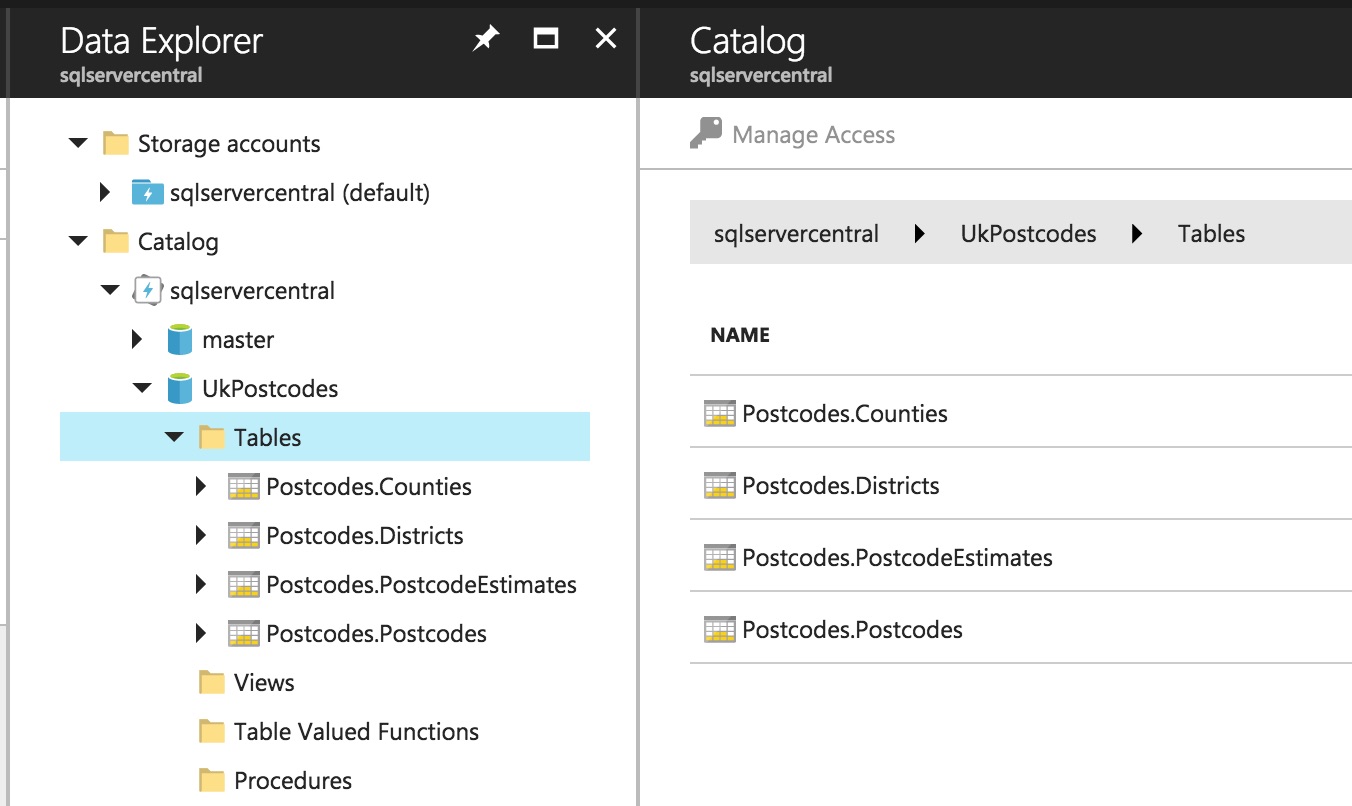
You now have an empty UkPostcodes database!
Executing the Script Outside of PowerShell ISE
We don’t want to keep using PowerShell ISE to execute the script. Save the script to an appropriate location (I’ve added it to the Visual Studio solution in GitHub), calling it Create-UkPostcodesDatabase.psm1. Before you save it, make sure you have removed the final line:
Create-Database "sqlservercentral" "c:\temp\azurecontext.json" "UkPostcodes"
If you leave this line in, it will cause the script to execute with the specified parameters – which won’t be what you require!
Close PowerShell ISE and open up a normal PowerShell command prompt. Navigate to the path where you saved the file, e.g. c:\temp in my case. Then execute the command:
Import-Module .\Create-UkPostcodesDatabase.psm1
A warning will appear, but don’t worry about that. This command will make the functions inside the PowerShell script we’ve created (we’ve actually created a PowerShell module) available for use within PowerShell. You can now execute the Create-Database command directly:
There’s a lot more we could do – make parameters mandatory on functions, make some functions private – but I’ll leave that as an exercise for the reader to undertake.
Summary
We’ve made a good start with PowerShell here. Apart from picking up some PowerShell basics, we covered how to check if certain objects exist in the Data Lake Catalog (specifically, the UkPostcodes database) and how to execute U-SQL jobs in Azure.
We’ve successfully created our database using PowerShell, next time out we’ll see how we can manage files in the Data Lake Storage Account with PowerShell.