

Introduction
The Azure Internet of Things (IoT) is a collection of Microsoft-managed cloud services that connect, monitor, and control billions of IoT assets. Azure IoT technologies and services are used to create a wide variety of IoT solutions. An IoT solution architecture has three major components:
- things: devices that send data
- insight: meaningful information retrieved from the data sent through the devices
- actions: steps taken based on insights to improve or rectify a process or work
There are many options in Azure for building and deploying the IoT solutions. Platform services like Azure IoT Hub and Azure Digital Twins are used to create customized and flexible IoT applications. On the other hand, Azure IoT Central is the managed app platform which helps to create an IoT solution in a simple and easy way.
Azure IoT Central
IoT Central is a fully managed SaaS (software-as-a-service) solution. It abstracts the technical choices. IoT Central is less customizable as compared to the PaaS-based solution. The customizable web UI of IoT Central helps to monitor device conditions, create rules, and manage millions of devices and data throughout their life cycle.
In this article, I will discuss the process of creating Azure IoT Central application and connecting with a device to collect and process the data.
Implementation
I will create an Azure IoT application. Then, I will connect my smartphone with the IoT application. I will collect data from the phone and generate some insights from the data. I will create some rules on the collected data and will export the data to some other Azure service.
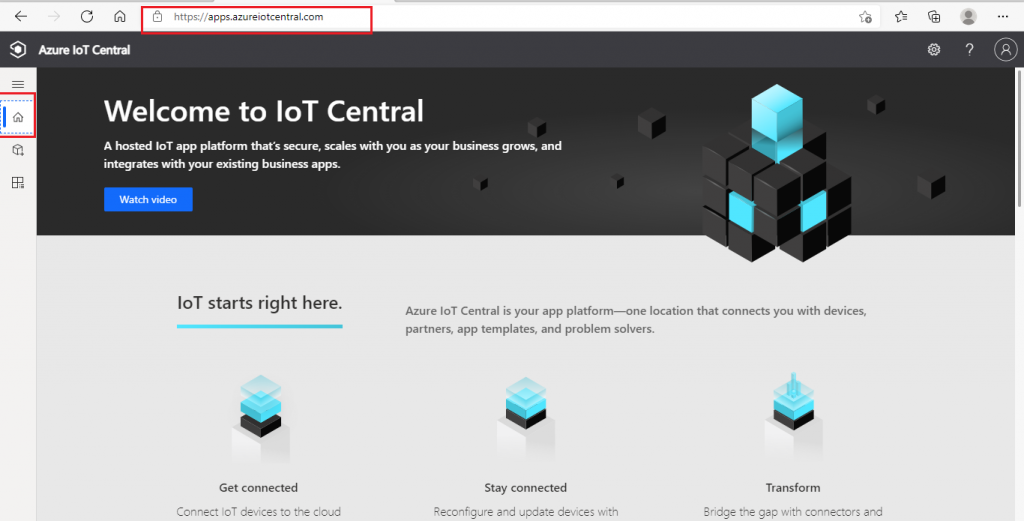
IoT Central Home Page
I go to the home page link: Azure IoT Central Build. I sign-in with my account details in the Azure Subscription and see this page:
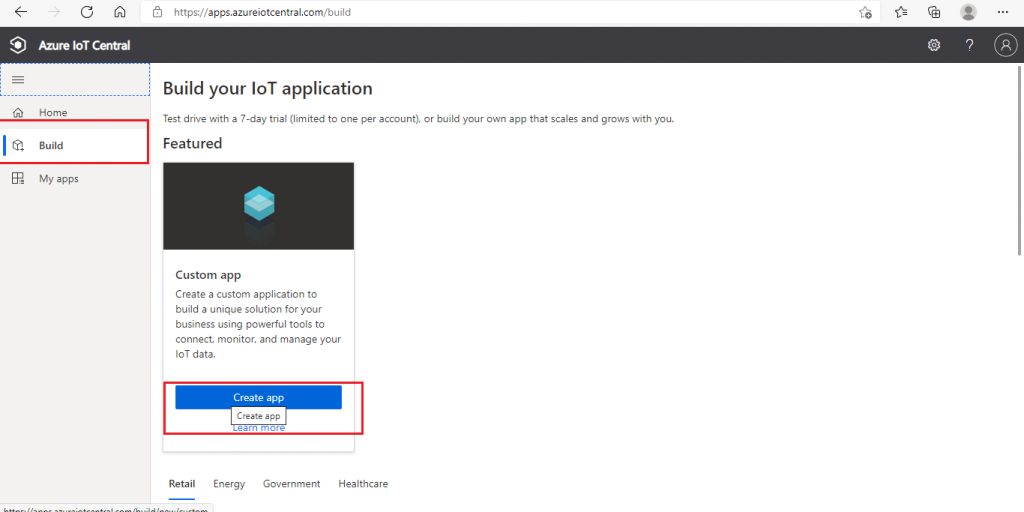
Build page of IoT Application
I navigate to the Build page. This is the button on the left side in the image above. I use the Custom app template to create a new application from scratch. I press on the Create App button.
There are some industry-specific application templates available. These templates are: Retail, Energy, Government and Healthcare. Any one of the templates may be selected to create the application.
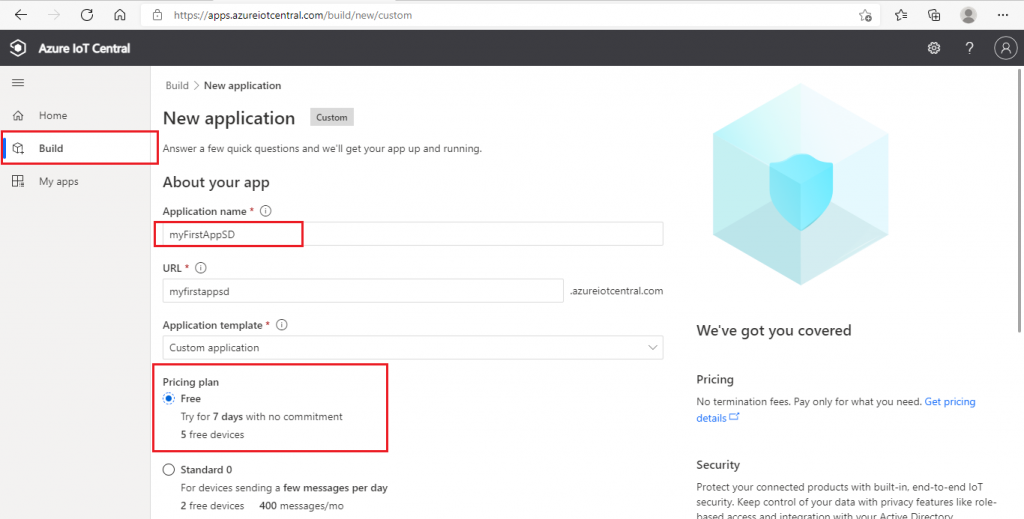
Create a new application
I am in the New application page now. I provide a name for the application. I select the free Pricing plan. I may use the free environment for 7 days. I scroll down the page and press the Create button.
Dashboard page
Once the application is created, the Dashboard page is open, which is shown below.

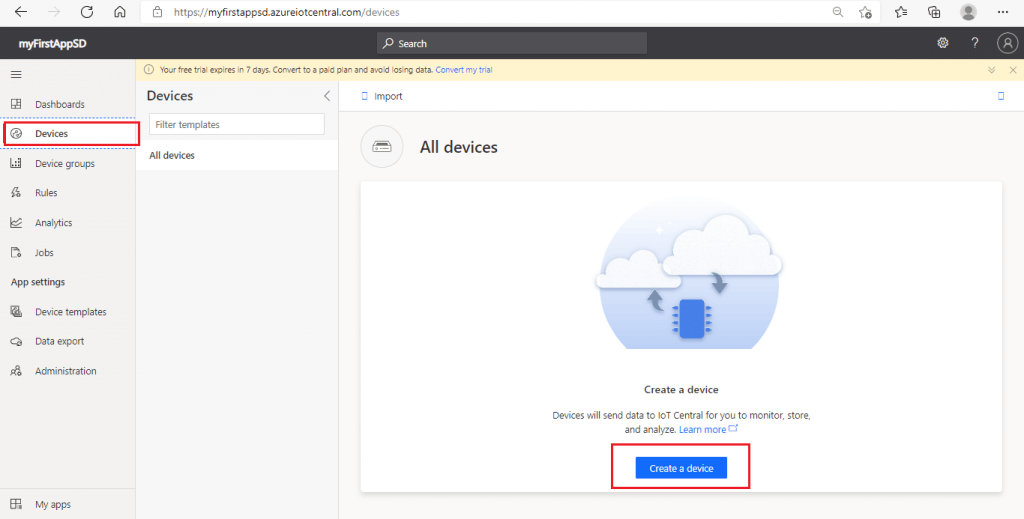
Devices page
I go to the Devices page. No device is associated with the application so far. I press on the 'Create a device' button.
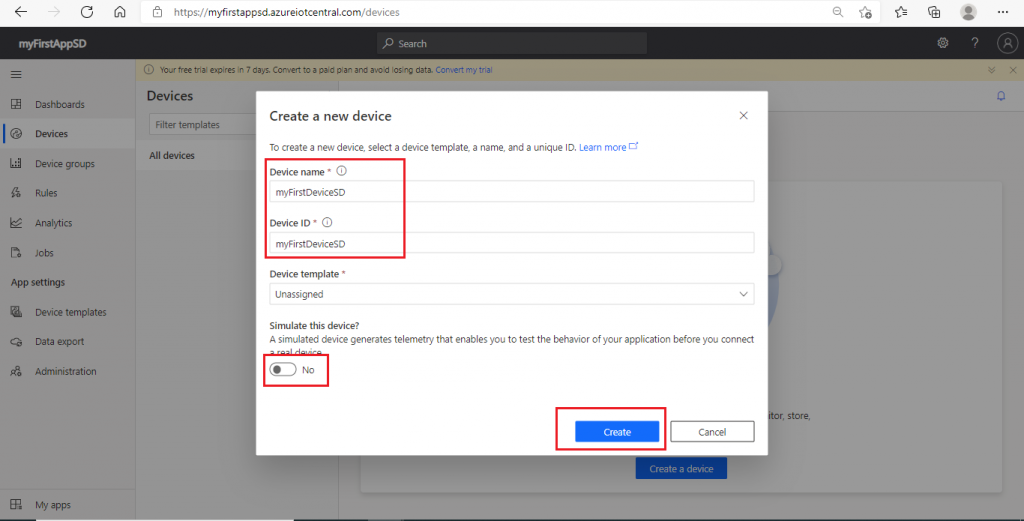
Create a new device
A new pop-up window is open. Here, I need to provide the necessary details for a new device. I give a name for the device. I keep Device template as Unassigned. There is an option to simulate the device. I check on the No option for simulating a device. I will connect an actual device with the IoT Central application. I press the Create button.
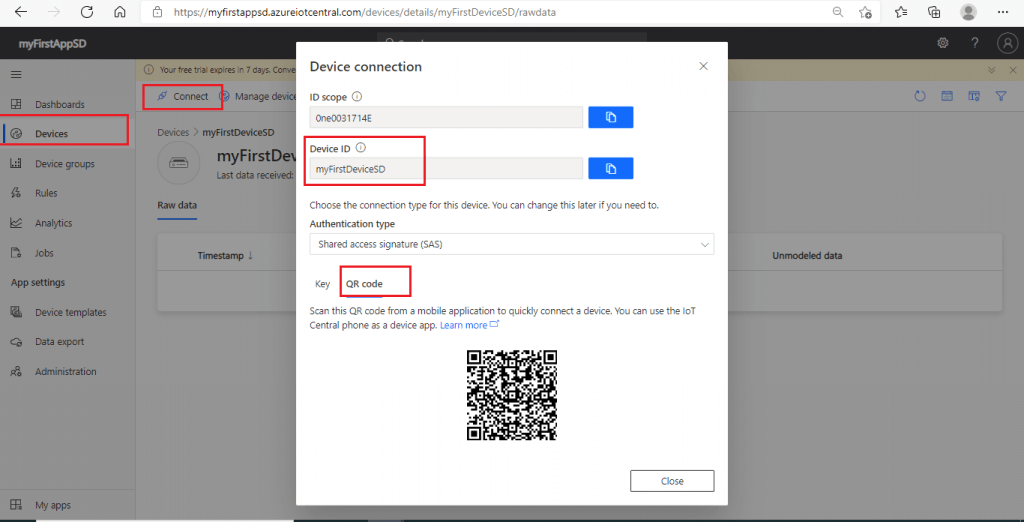
Device connection
The device is created and listed in the Devices page. I select the device and press the Connect button. A pop-up window is open for Device connection. I go to the QR code tab and keep it open.
IoT Plug and Play
I install the 'IoT Plug and Play' app in my smartphone (Android, iOS). The app sends telemetry collected from the phone's sensors, responds to commands invoked from IoT Central, and reports property values to IoT Central.
I open the app in my phone. From the Welcome page of the app, I scan the QR code from the screen, that was mentioned in the last step. The connection is now established between my phone and the Azure IoT Central application.
On the telemetry page of the app, phone data is seen. This data is being sent to IoT Central. On the logs page, device connection and synchronization messages are available.
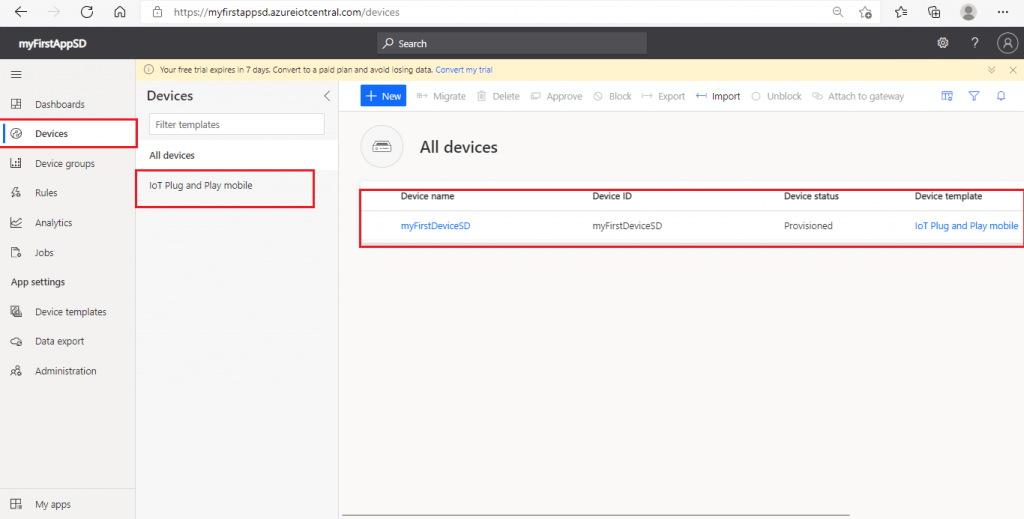
IOT Plug and Play mobile device
I go to Devices page in IoT Central. Now, the device template is shown as IoT Plug and Play mobile. My mobile is now connected with the new device created in the IoT Central application.
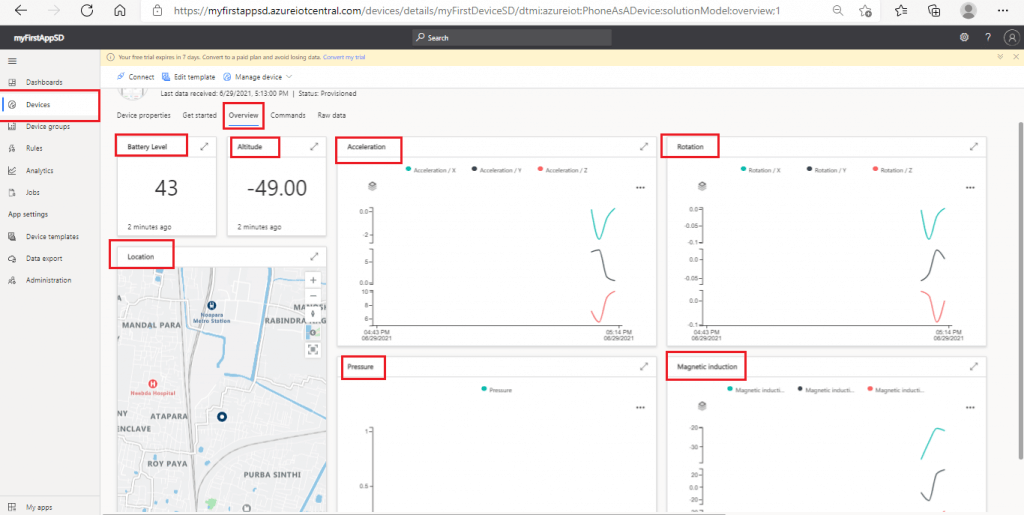
Mobile device overview
I select the device and go to the Overview tab. Here, various details sent by the mobile phone are available. The mobile phone app sends data only when the screen is on. Battery level, altitude, location are some of the the data points as shown on the Overview tab.
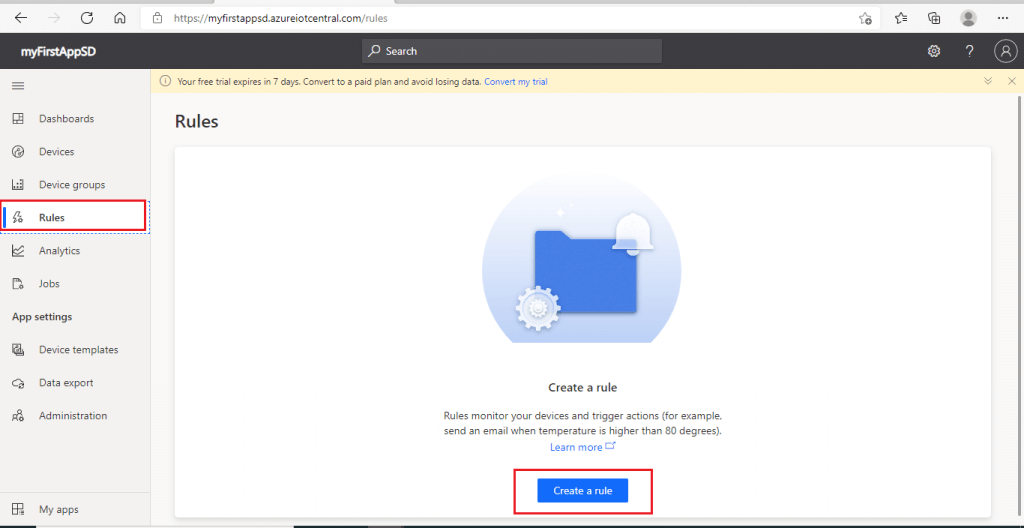
Rules page
I go to the Rules page. I may create a new rule from here to run customizable actions on the device. I press the 'Create a rule' button.
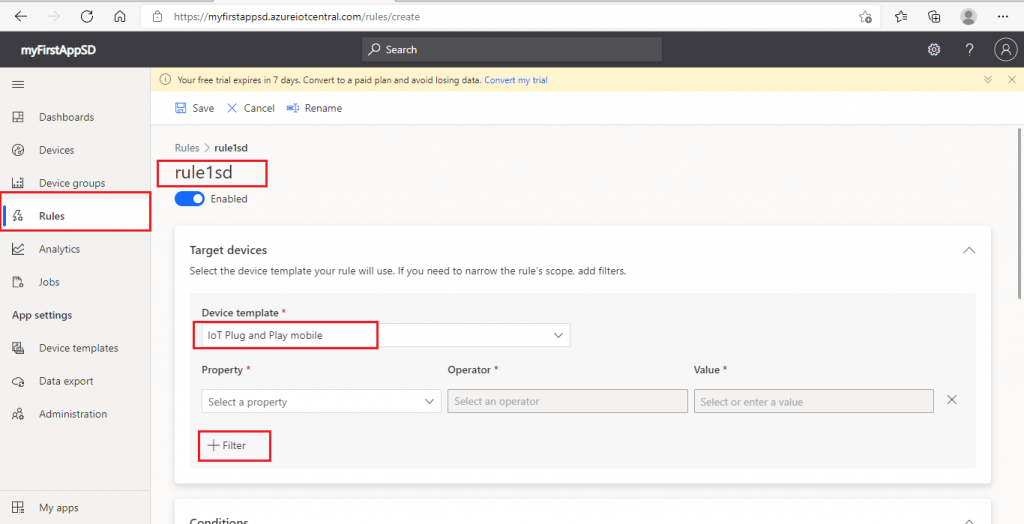
Add a rule
I provide a name for the new rule. Then, I select IoT Plug and Play mobile device template. By default, the rule is applicable for all the devices under the same device template. I may use the filter option to identify the required devices. I have only one device. So, I don't require this filter for now.
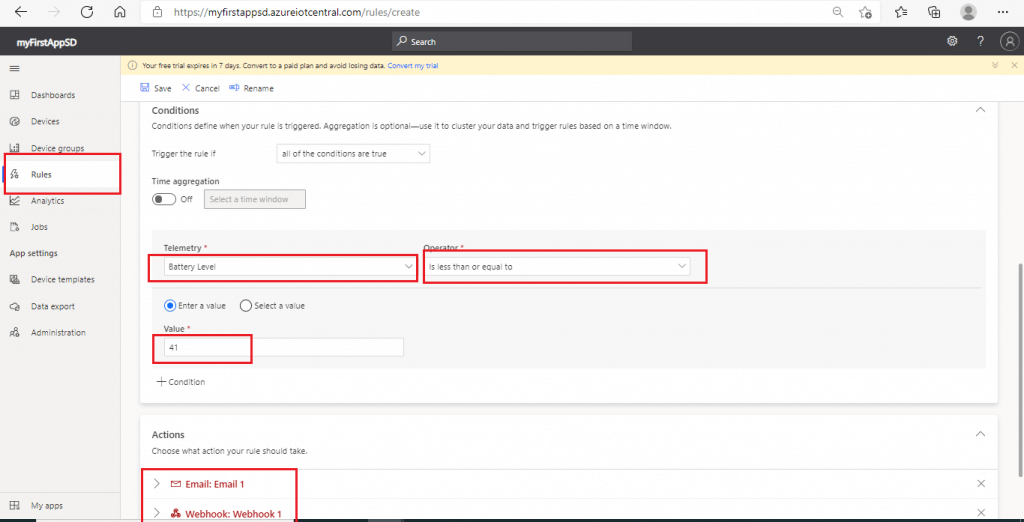
Rule conditions and actions
Next, I select the Conditions. Conditions define the criteria that the rule monitors. I select Battery Level from the telemetry drop-down and and set the operator as less than or equal to the value 41. So, this rule will work when the mobile battery level reaches 41% or less.
Next, I set up the actions to take when the rule fires. I configure the Email action to send a mail to my registered email id whenever the battery level reaches 41% or less in my mobile phone.
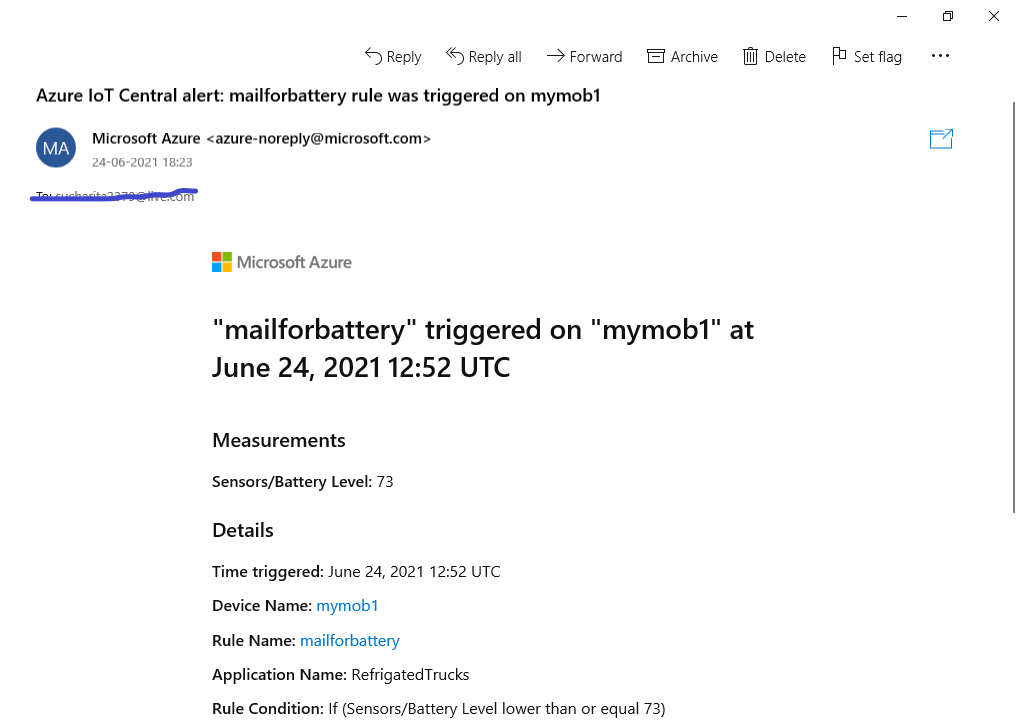
Email Message
A sample mail as received from Azure IoT Central based on the rule condition and action is shown below.
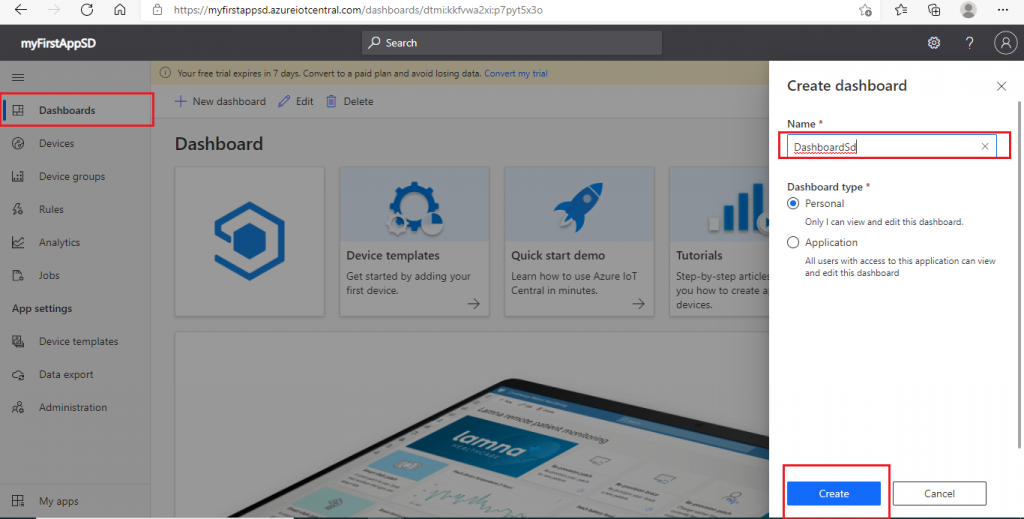
Create a dashboard
I go back to the Dashboards tab and press on the New dashboard button. A Create dashboard pop-up window is open. Here, I need to provide a name for the dashboard and select the type. I select personal dashboard type and press the Create button.
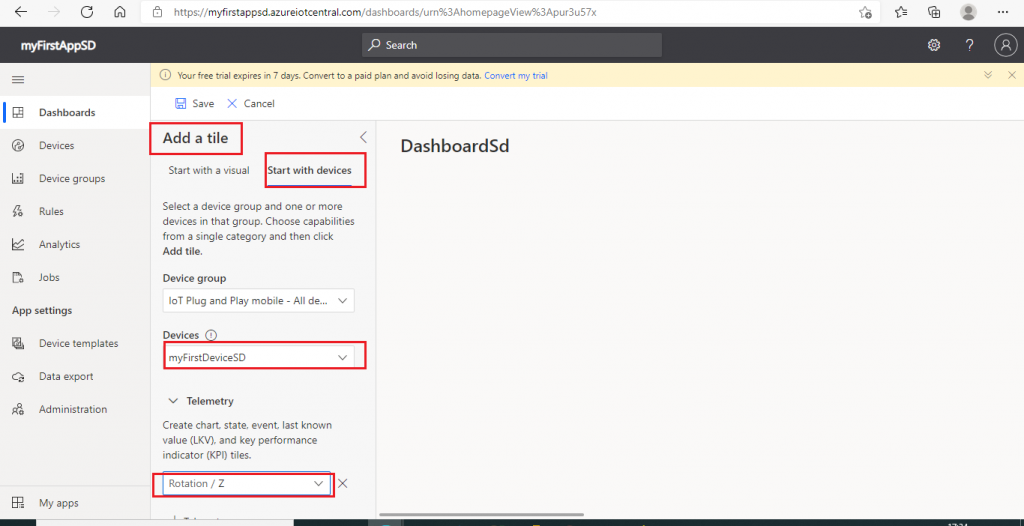
Add a tile
Once the dashboard is created, I try to add a tile to the dashboard. I select the device and a telemetry parameter from the drop-down list and press the Save button.
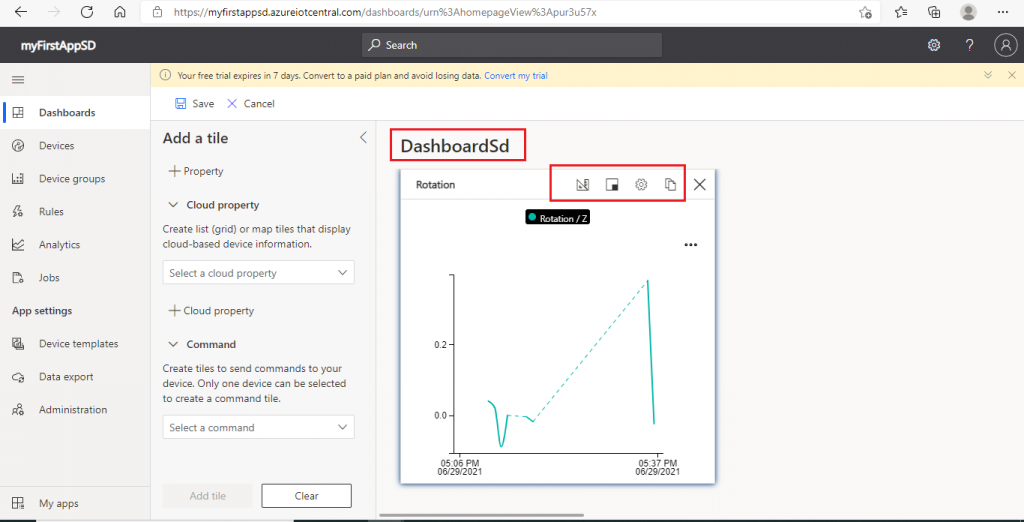
Dashboard tile
The tile is now available on the dashboard. It shows the change in the z-axis value of the Rotation parameter of the mobile phone.
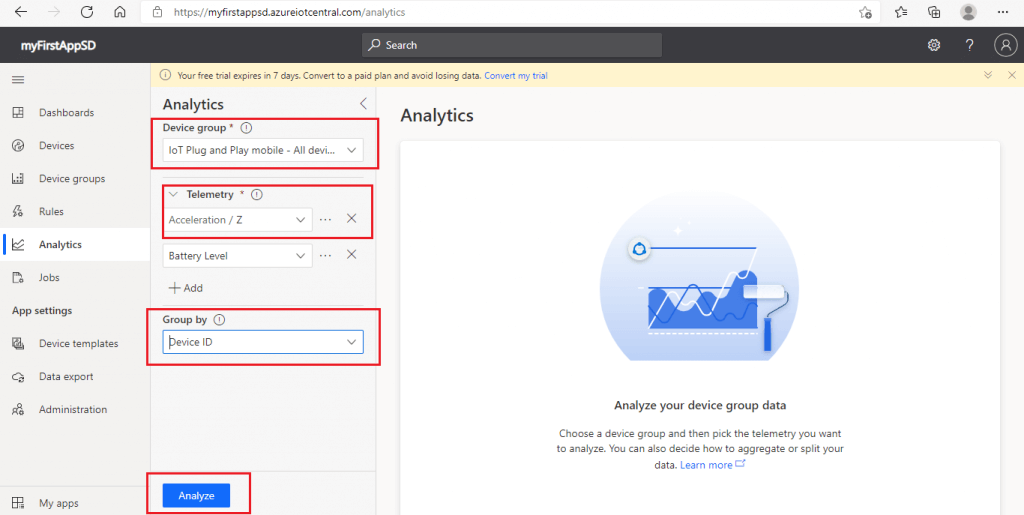
Analytics page
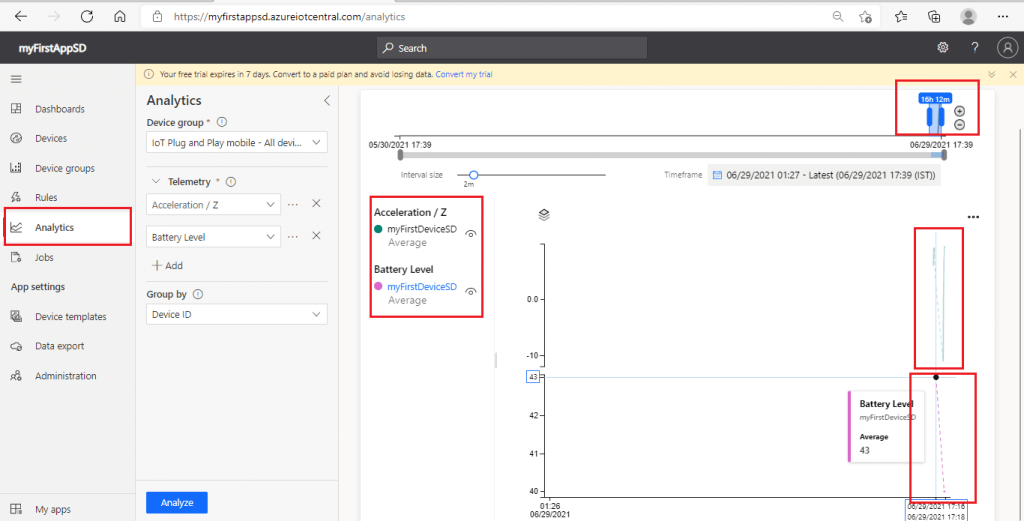
I go to the Analytics page. I select the device group and the telemetry parameter. I may select more than one telemetry parameters. Group by control helps to group the data by using the device properties as dimensions. I may select Device id as the Group by parameter to view data for each device separately. I press the Analyze button.
Analytics data
Analytics data is now shown for Acceleration in z-axis and Batter level telemetry parameters of the mobile device. There is a time slider at the top to change the duration for showing the analytics data. There is an Interval size slider which controls the interval size used to aggregate the data.
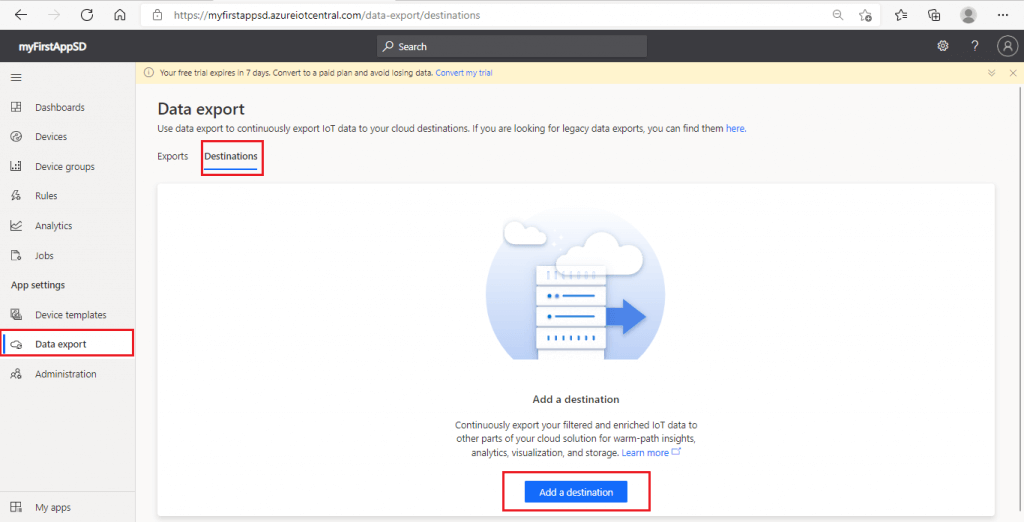
Data export destination
The data export feature is used to continuously export filtered and enriched IoT data from IoT Central application to an Azure destination. The available destination types are:
- Azure Event Hubs
- Azure Service Bus queue
- Azure Service Bus topic
- Azure Blob Storage
- Webhook
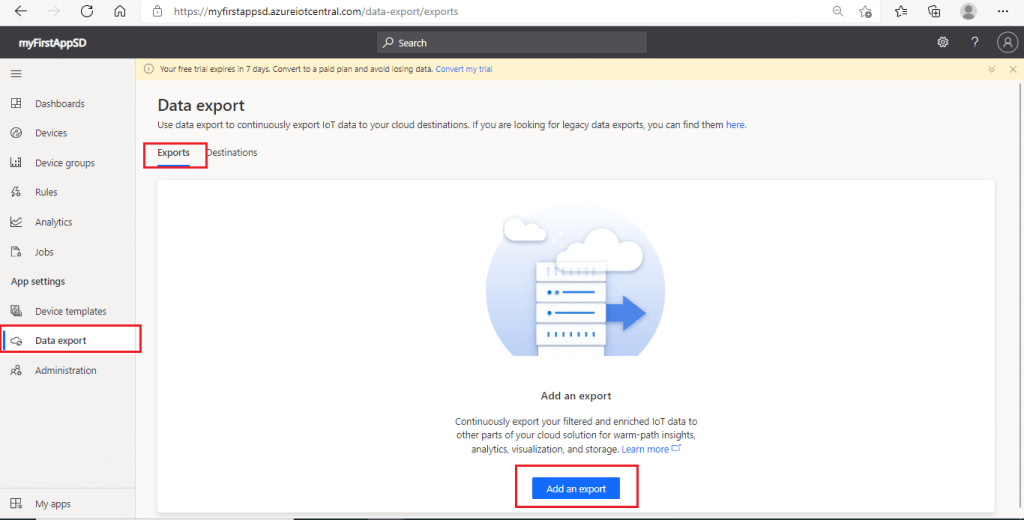
I go to the Data export page and press the 'Add a destination' button in the Destinations tab.
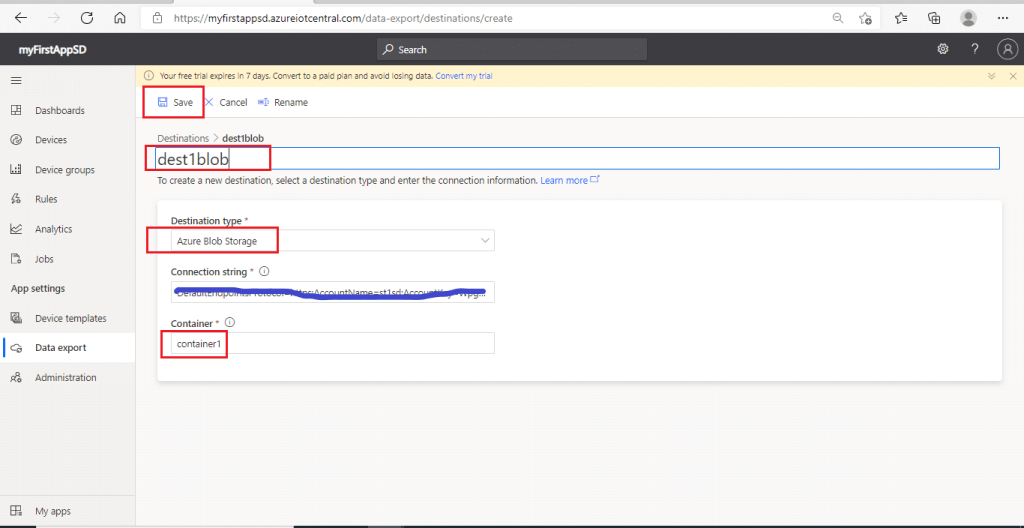
Create a destination
I provide a name for the destination. I select Azure Blob Storage as the destination type. Then, I provide the connection string and the container name of an existing Azure Blob Storage account. I press the Save button to create the destination.
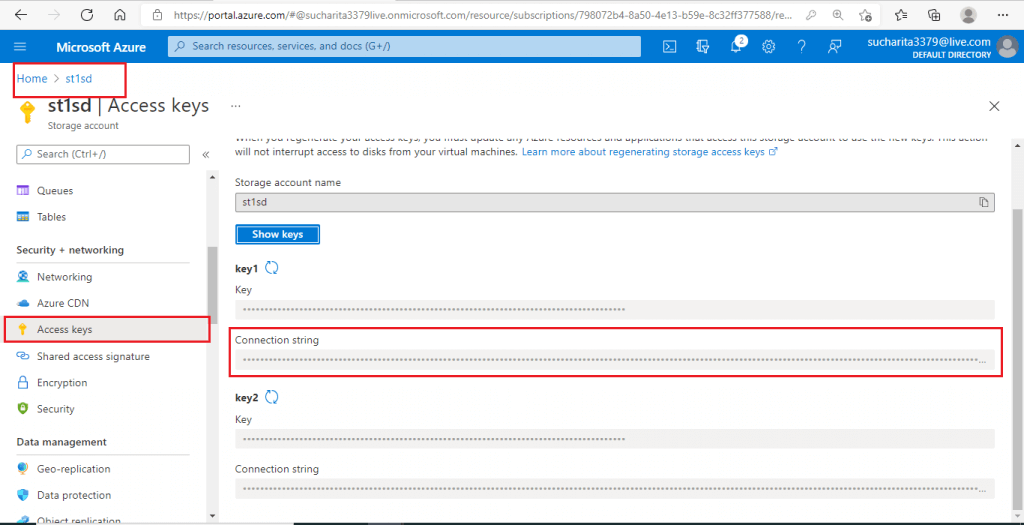
Azure Blob Storage
The article, Azure Storage: Blob and Data Lake Storage Gen2, may be referred for the step-by-step creation of the Azure Blob Storage account. The connection string for key1 in the Access keys page of the storage account is populated as the connection string in the last step.
Add an export
After creating the destination, I go to the Exports tab. I press the 'Add an export' button.
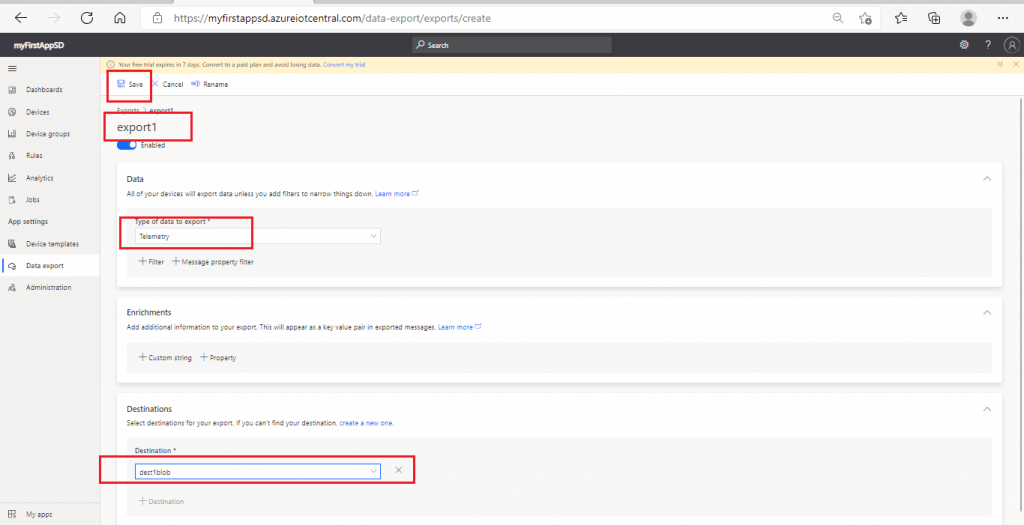
Export Details
I provide a name for the export. Then, I select the type of data as Telemetry. I may add filters to reduce the amount of data exported. I select the destination already created in the earlier steps. I press the Save button.
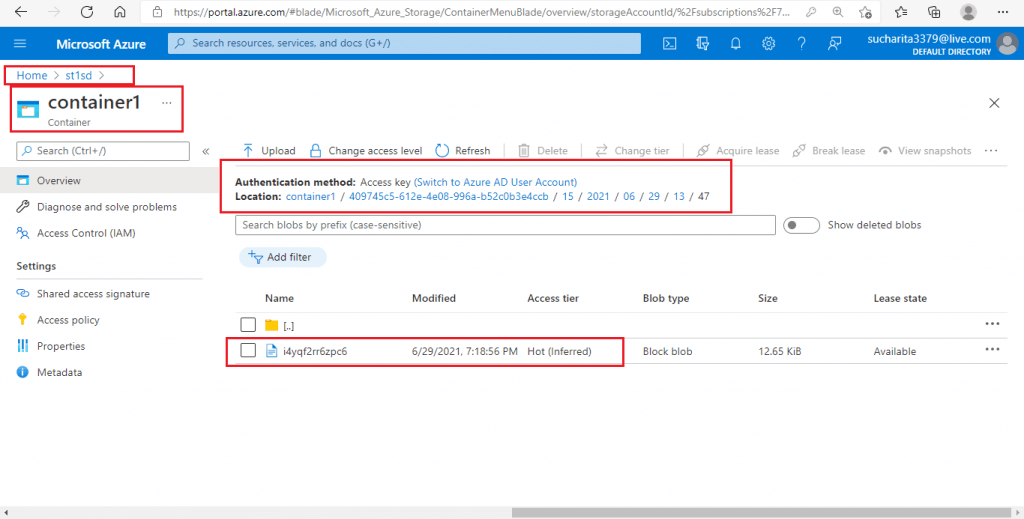
Exported data in Blob storage
I go to the Storage account container. Data files containing the device telemetry are getting created at every minute. Each file contains the batch of changes since the previous export. Exported data is saved in JSON format.
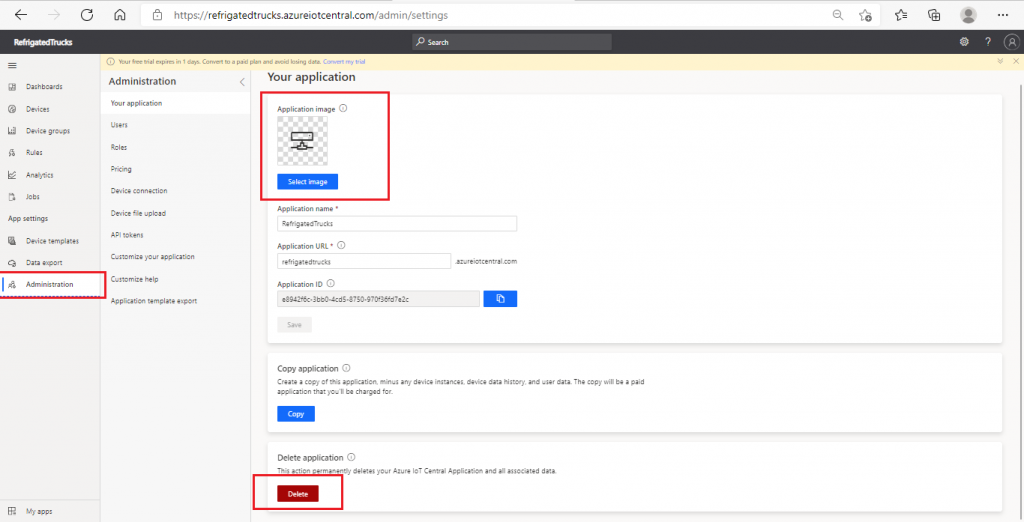
Delete the Application
I go to the Administration tab. Here, I select the application and press the Delete button to remove the application from Azure IoT Central.
Conclusion
Azure IoT Central is a very powerful and easy-to-use service for creating an IoT solution. The web UI makes the design and development of the solution convenient and easy. I discussed the data collection from mobile phone and use of the data in different ways. There are many more features of IoT Central that can be implemented. Also, different device templates may be used for connecting different types of devices. Application templates may be used to create solutions for specific industries. I will discuss other aspects and features of IoT Central in my upcoming articles.