

This article illustrates how to join two queries using ADF (Azure data factory).
Prerequisites
First, prepare your data sources. Make sure you have at least two data sources (such as tables, files, or databases) that you intend to join together. Additionally, ensure that these data sources have been properly registered within your Azure Data Factory. Here are my two datasets with their details.
Dataset #1

Dataset #2
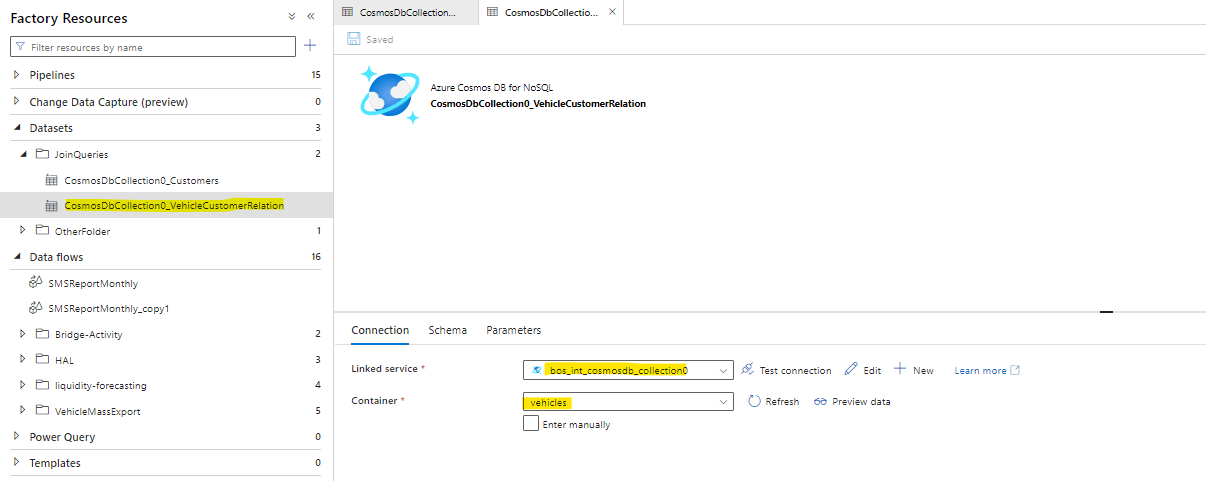
Please note: 'vehicleCustomerRelation' is a data that is available in the 'vehicle' database. Hence the datasetname is 'vehicleCustomerRelation' and the database name is 'vehicle'
Note : Make sure the datasets use the same column(s) for the join requirement.
Steps for the JOIN
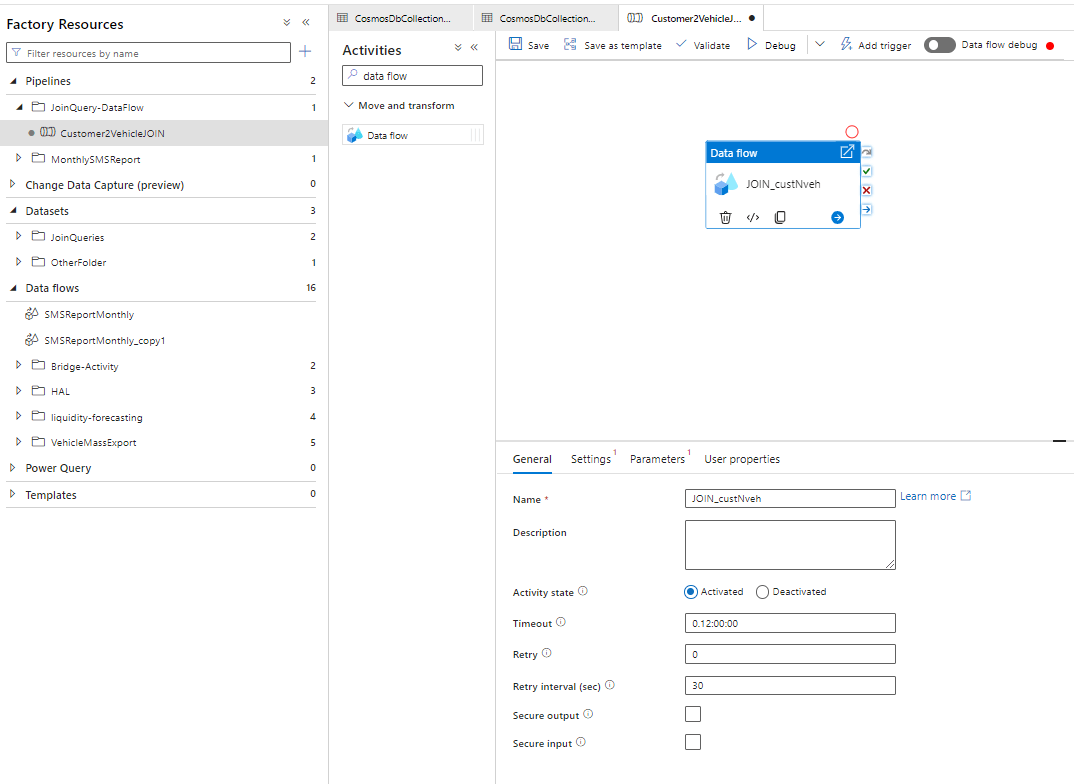
First, create a Data Flow. Within your Azure Data Factory, initiate the creation of a Data Flow activity. Data Flows provide you with the capability to visually design data transformation logic, which includes the process of joining data.
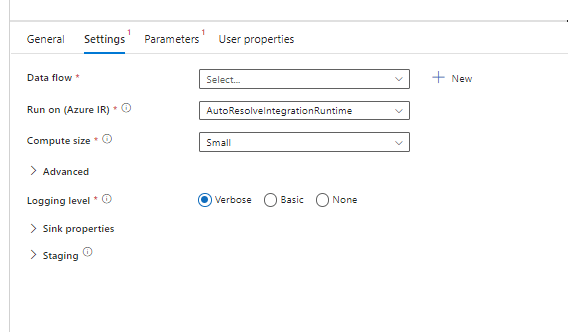
If we click on the settings tab in the bottom pane, we see the following set of options.
Click New at the right of the Data flow drop down. This brings up a new dialog.

Once you are inside your Data Flow, proceed to include source objects that correspond to the specific data sources you intend to combine through the join operation. Depending on the nature of your data sources, you might find it necessary to employ source connectors tailored to various data types, such as Azure SQL Database, Azure Blob Storage, or on-premises SQL Server.
Upon selecting the "Add Source" option, you will typically encounter a user interface or configuration screen that allows you to specify the details and settings for your chosen data source. This is where you'll provide the necessary connection information, credentials, and any other relevant configurations to access and integrate the data from your sources effectively.
Dataset #1 Creation
For the above screen if we click on the source it will redirect to below where we are supposed to give the data set name as 'customers' for the Source dataset #1 creation.
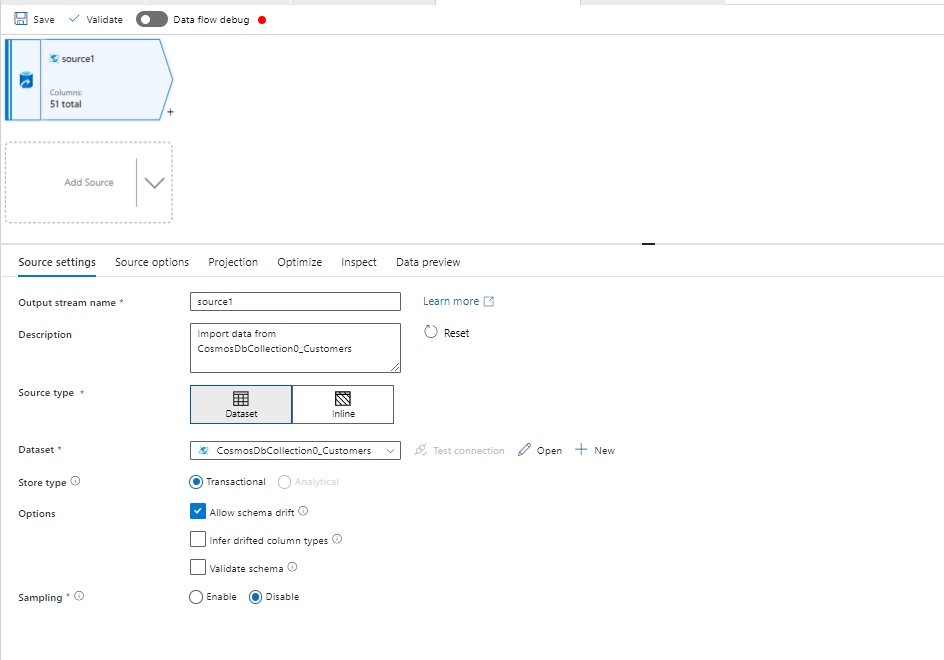
Choose the customers dataset(Dataset #1) .
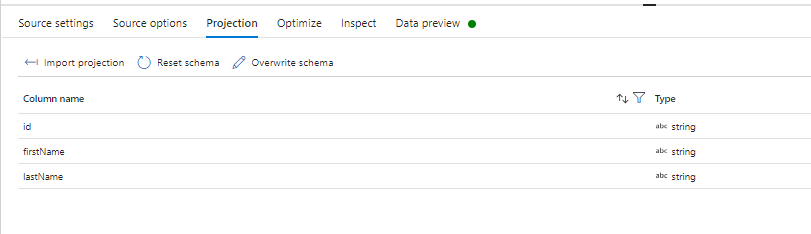
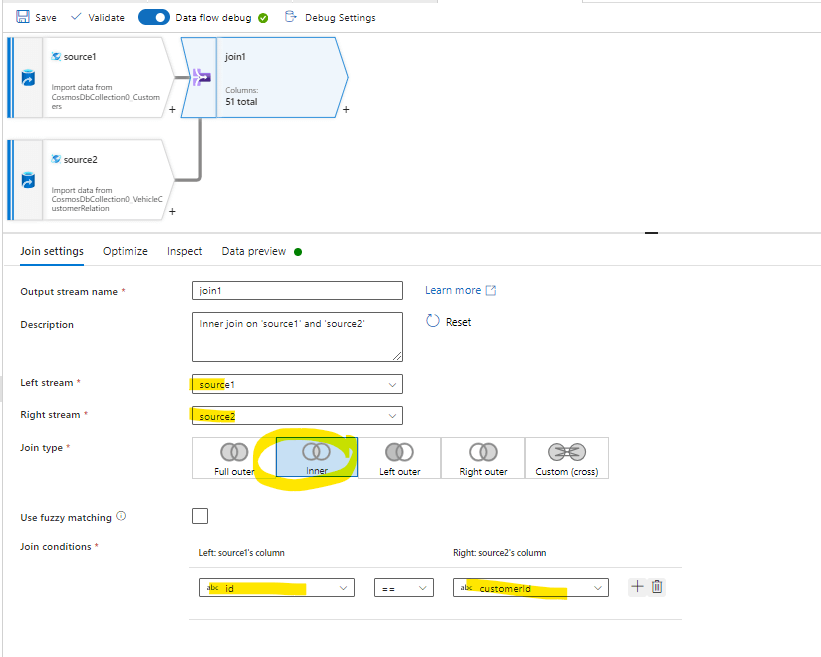
In order to define the first query to JOIN for the data set #1, click on the source options. Click the radio button Query and write the query for customer entity. as above.
select c.id,c.firstName,c.lastName from c where c.type = 'customer'
Now click on the import Projection and see if all the fields are populated
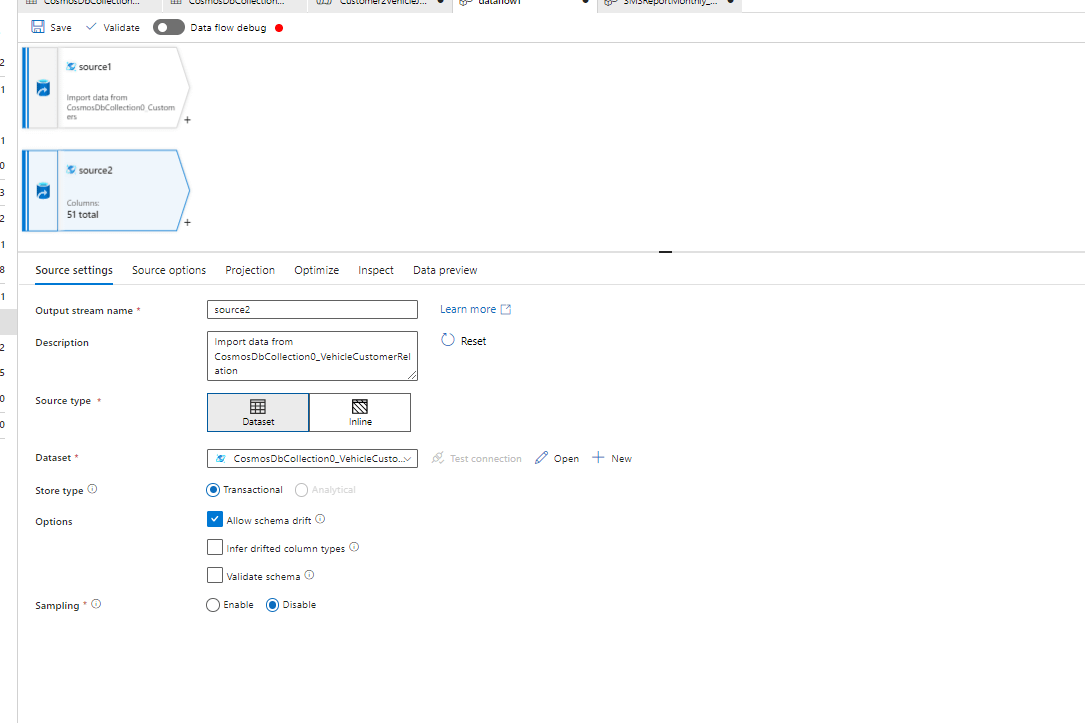
Similarly, and similarly we have to create source2 i.e vehicle dataset (Dataset #2) and select the vehicle entity

When defining the second query to JOIN, click on the source options.
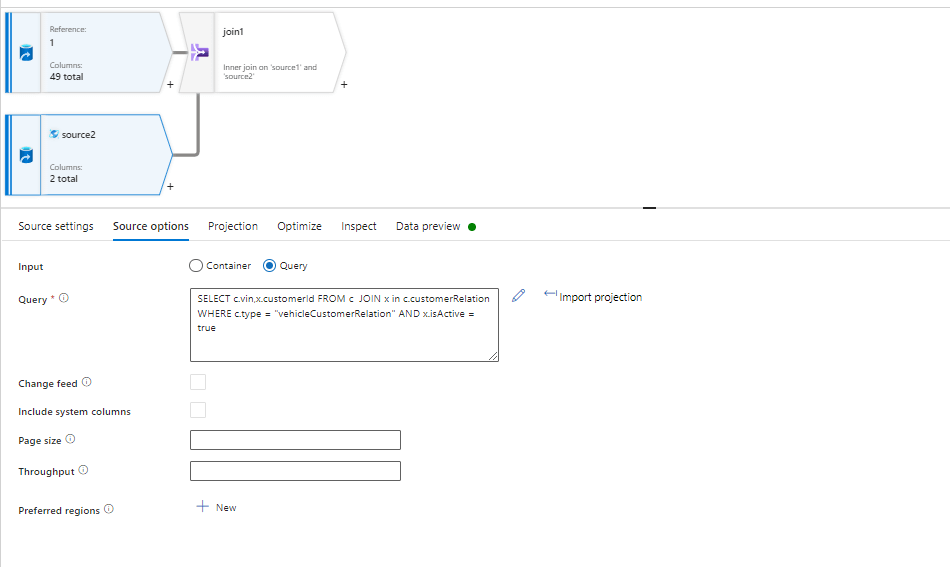
For the query
SELECT c.vin,x.customerId FROM c JOIN x in c.customerRelation WHERE c.type = "vehicleCustomerRelation" AND x.isActive = true
And Import projection

Use a Join Transformation
Within your Data Flow, leverage the "Join" transformation to precisely define how data from various sources should be merged. To accomplish this, follow these steps:
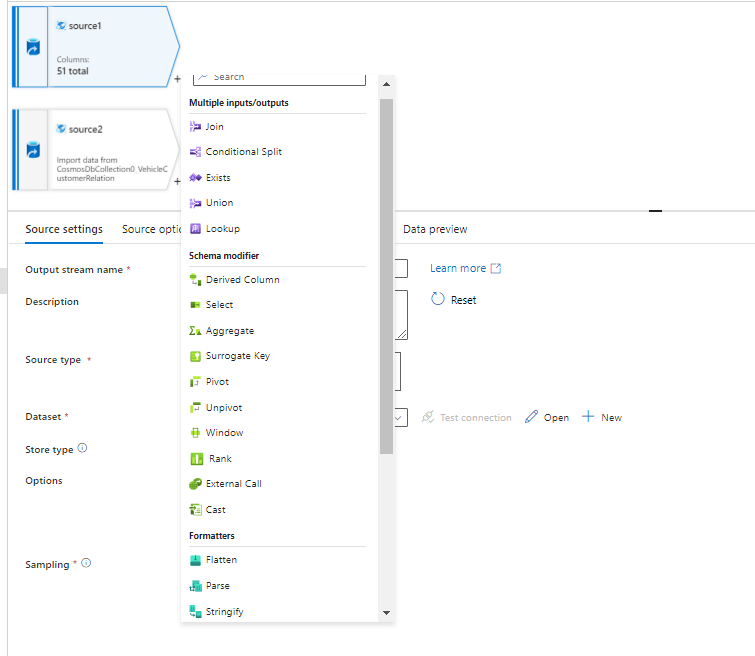
1. Drag the "Join" transformation element onto your data flow canvas, typically by selecting it from the available transformations and placing it within your data flow design.
2. Proceed to configure the join conditions by explicitly specifying which columns should serve as the keys for the data joining process. This involves designating the columns or attributes that match between the data sources, thereby facilitating the merging of data based on these shared keys.
Click the '+' sign next to Source1 to get the below screen and select Join
Explanation for each join types are given below. You can further customize your data join by specifying the type of join operation you want to execute, which could be one of the following common options:
- Inner Join: An inner join returns only the rows that have matching values in both data sources. To configure an inner join, access the properties of the "Join" transformation and specify it as the desired join type.
- Left Outer Join: A left outer join returns all the rows from the left (first) data source and the matching rows from the right (second) data source. If there's no match in the right source, it returns null values. To configure a left outer join, modify the properties of the "Join" transformation accordingly.
- Right Outer Join: A right outer join is similar to a left outer join but returns all the rows from the right (second) data source and the matching rows from the left (first) data source. To set up a right outer join, adjust the properties of the "Join" transformation accordingly.
- Full Outer Join: A full outer join combines all the rows from both data sources. It returns all rows from both sources and matches them where possible, filling in null values for non-matching rows. To perform a full outer join, specify it in the properties of the "Join" transformation.
By selecting the appropriate join type in the properties of the "Join" transformation, you can control how the data from different sources is merged, allowing you to achieve the desired outcome for your data integration process and match the exact columns that has mutual condition for join.
In order to check if the JOIN is working fine. we can do a data preview and click on the Refresh

button shown below.
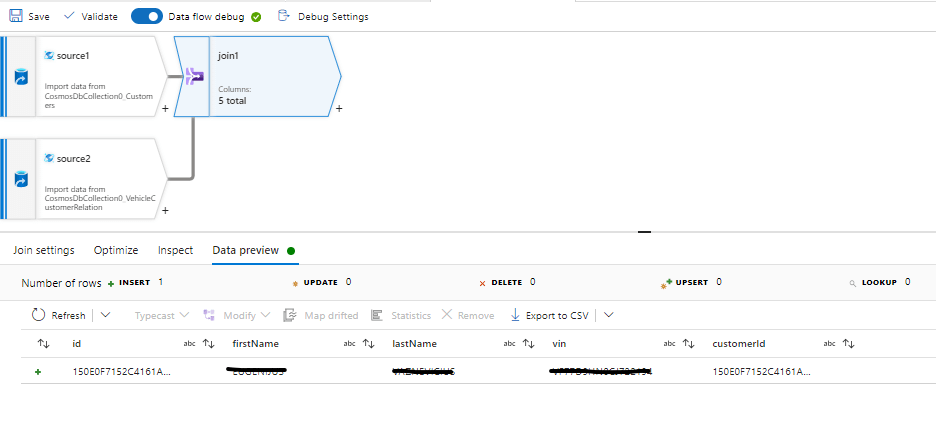
Observation: We observed that the data preview is working fine and now we have to configure the final dataset (Outputdataset #3) using sink operation below.
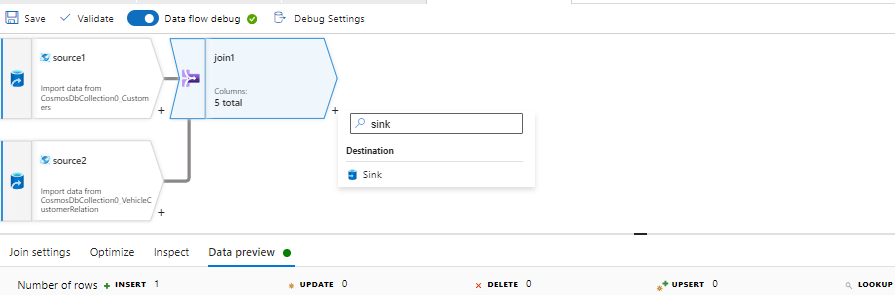
Map Output
Following the join operation, you have the flexibility to map the resulting output to various destinations or proceed with additional transformation steps within your data flow. This step allows you to direct the processed data to its intended location or continue refining it as needed for your data integration workflow.
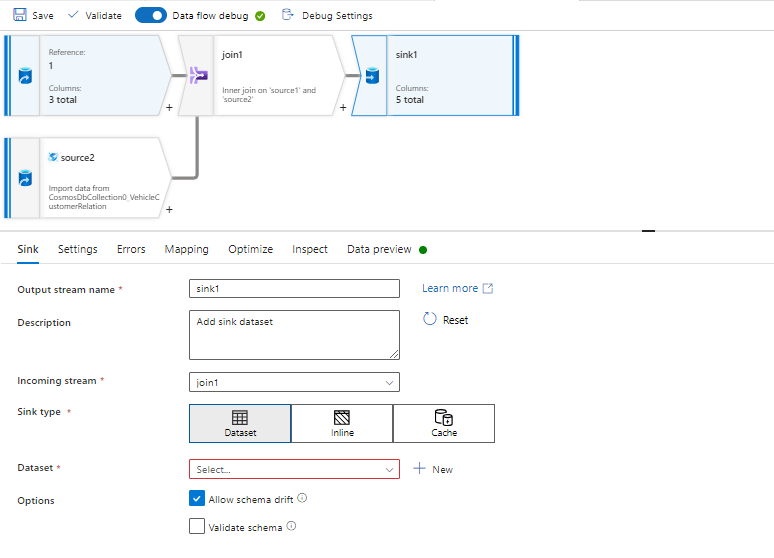
Create another data set where you want to store the data
Debug and Test
You can use the debug mode in Azure Data Factory to test your data flow and ensure that the join operation works as expected.
Publish and Execute
Once you are satisfied with your data flow, publish it to your Azure Data Factory, and then schedule or trigger its execution based on your requirements.