Introduction
Azure Purview is Microsoft’s unified data governance service that helps you discover and get insight into your available data. It replaces Azure Data Catalog and is now based on Apache Atlas, one of the leading open-source data governance and metadata frameworks. Apache Atlas was created by Hortonworks and big names within finance, pharma, etc. such as JP Morgan, Merck and Aetna. Therefore, Apache Atlas and also Azure Purview, has rich features for tagging assets to meet security and compliance requirements.
Azure Purview is currently in public preview and available for free until February 28th 2021.
Key Features
What actually is a "unified data governance service"? That's a good question. Below is a summary of the features that I think are the most important:
- It can automatically scan and register your data sources and their structure. Data sources can be scanned on-premises, in Azure and within multi cloud environments.
- It can (in some cases) detect and register data lineage.
- It can automatically recognize and classify data using built-in classifications such as social security numbers, names, email addresses, etc. or your custom classifications.
- It can assign Microsoft Information Protection (MIP) sensitivity labels on files, database tables and columns using auto labeling rules.
- It can manage your glossary of terms.
Note that Azure Purview is still in Preview and there are certainly things that needs improvement. The error messages can be anything but user-friendly. Last time I created an Azure Purview account, it got stuck and I had to create another account. These are things that hopefully will go away when Azure Purview reaches General Availability. Also I hope Microsoft will lower the price.
Getting Started
To get started with Azure Purview, search for it in the portal and click Create. Make sure you do this from an account with sufficient permissions. I first used an account that was only Contributor on the subscription and then it failed in later steps.

On the configuration page, select the capacity. 4 capacity units are included for free until February 28, 2021.
Caution
Be careful that your Azure subscription type is eligible for free preview of Azure Purview. I did the mistake of not checking and found out a later when my MSDN credits were exhausted. The price list contains info about eligible subscription types.
Dependencies
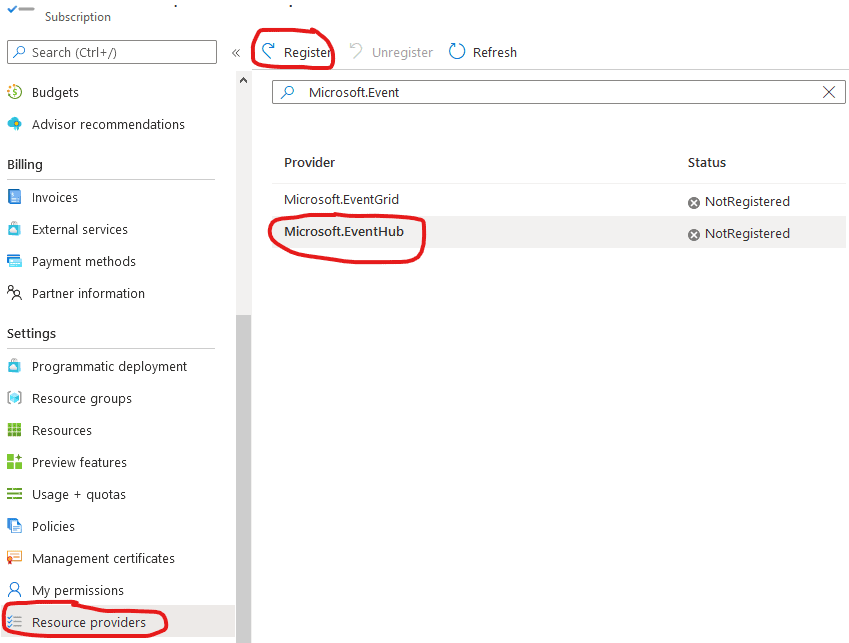
When you click Create, you may run into this error message:

This is because Azure Purview depends on Microsoft.Storage and Microsoft.EventHub. If you get the error, head over to your subscription settings and register these resource providers.
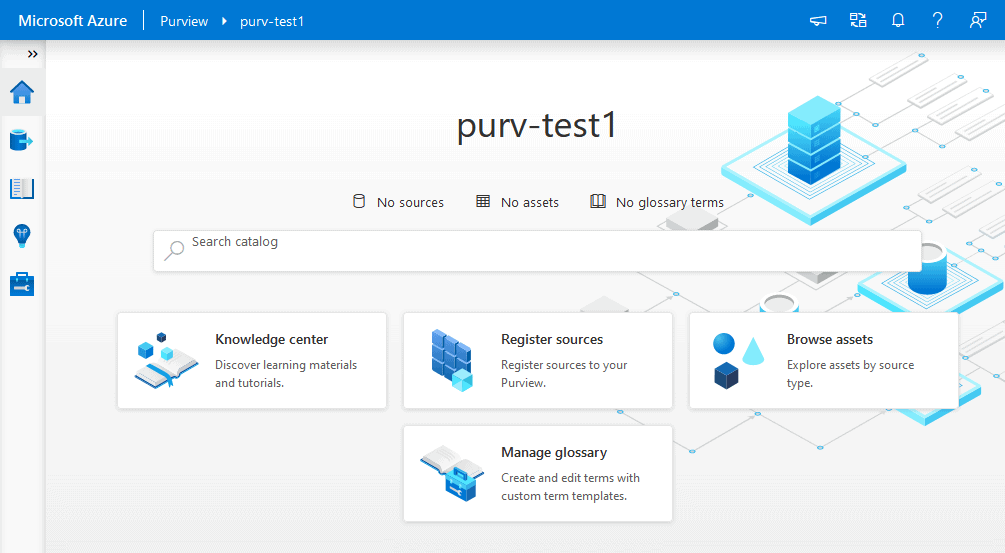
After the deployment of Azure Purview has completed, head over to it and start Azure Purview Studio.
Preparing Test Data
Azure Purview can handle various data sources and file types. A list is available here.
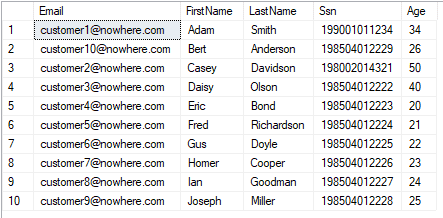
As a starter, let's begin with an on-premise SQL Server and some sample data. I created a Customers table with some sample data in my local SQL Server database called sqldb-demo1. Note that, to get classification to work properly you should have at least 10 rows in the table.
You could also create this test data in an Azure SQL Database. The next steps would then be pretty similar.
Setting up a Data Source
There are several types of data sources available in Azure Purview and they are organized in collections. Start by creating a collection.
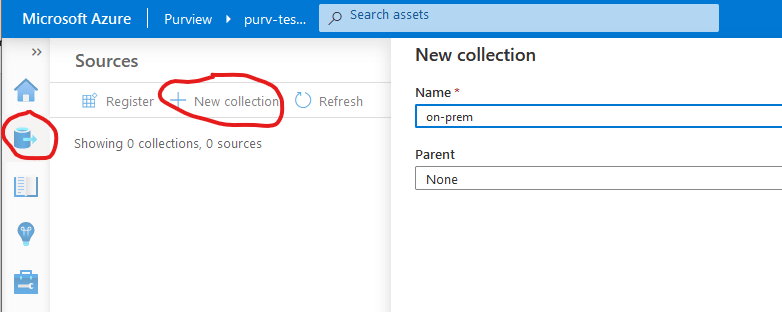
Click the Register button to add a data source to your newly created collection.
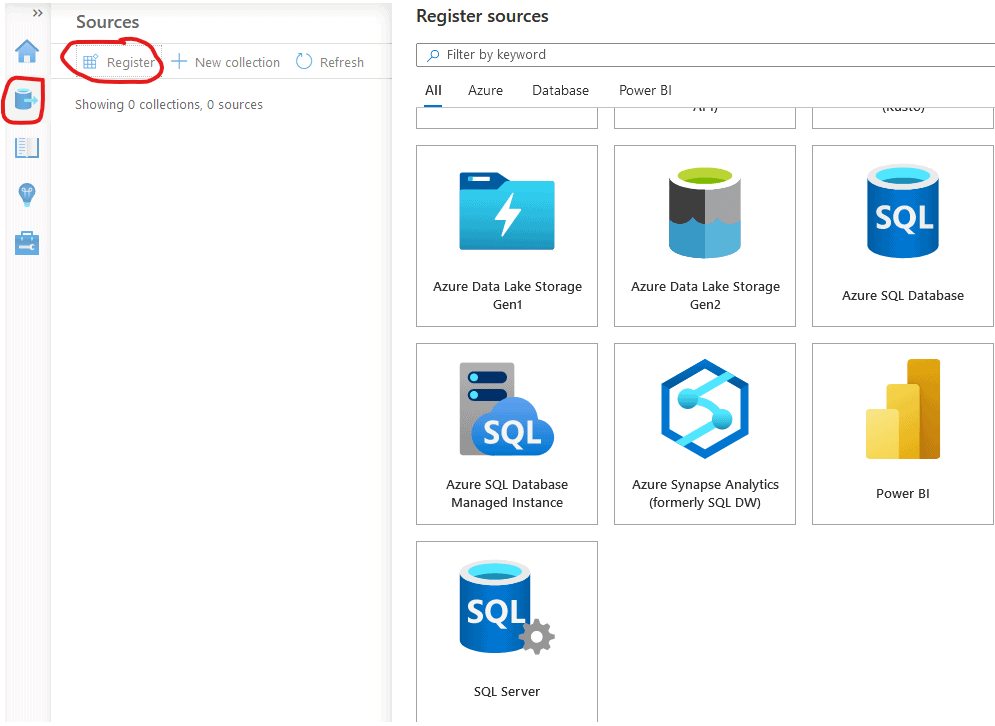
Choose SQL Server and complete with your server info. The Server Endpoint should be the connection info to your server from within your local network.

Integration Runtime
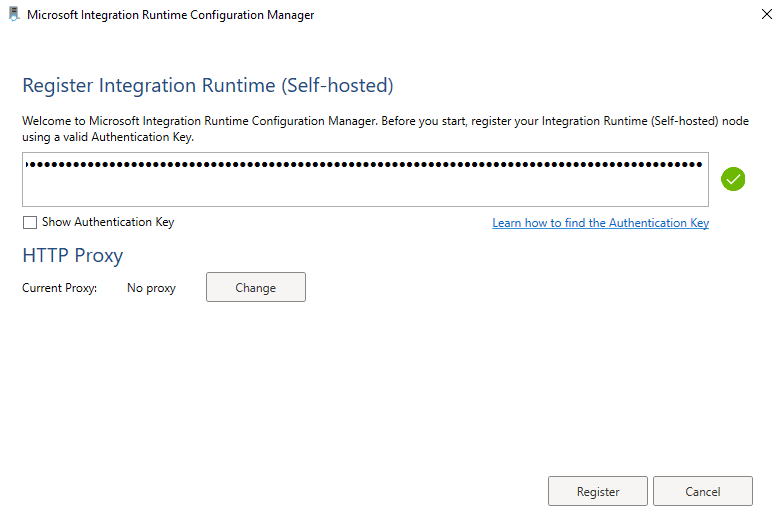
For Azure Purview to be able to access your on-premise SQL Server, you will need to install an Integration Runtime locally. This Integration runtime is the same as being used for Azure Data Factory and Azure Synapse, so you may be familiar with it already. In either case, you need to create an integration runtime in Azure Purview and obtain an authentication key.
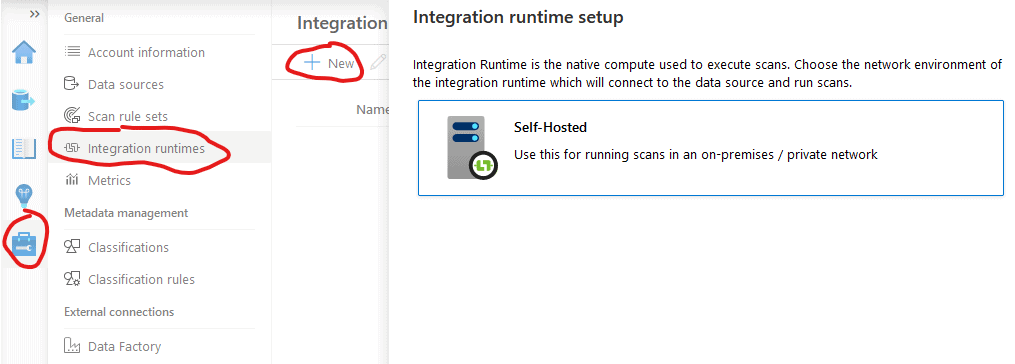
Download and install the integration runtime on a computer on your local network. Then enter the Authentication key you obtained.
Setting up SQL Authentication
For on-premises SQL Servers, the only way for Azure Purview to authenticate is SQL Authentication. In your test database, create a user / login with SQL Authentication, for example:
CREATE LOGIN [testuser] WITH PASSWORD = 'superSecret123';
CREATE USER [testuser] FOR LOGIN [testuser];
EXEC sp_addrolemember 'db_datareader', 'testuser';
Pick a better password than my example above... Also test that you actually can login with the newly created SQL account!
Setting up the Key Vault
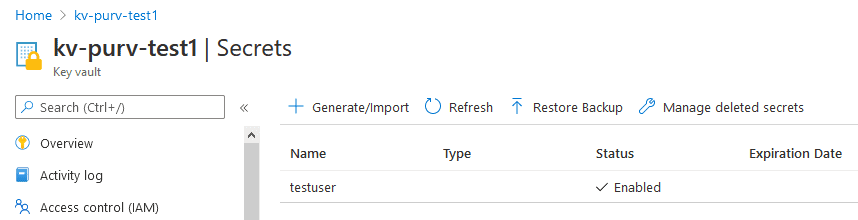
To enable Azure Purview to have access to this SQL account, you will need to store the password in a key vault. This currently seems not to be possible from within Azure Purview, so you need to create a key vault manually. When creating the key vault, give your Azure Purview account access to it.
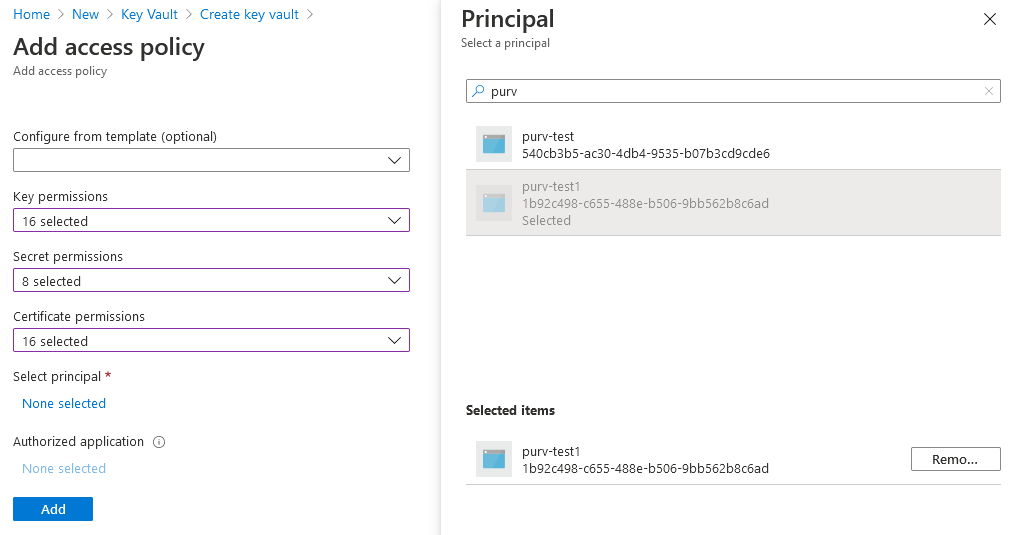
In the key vault, add a secret with the name of your SQL authentication user account. Register the password inside it.
Setting up the Scan
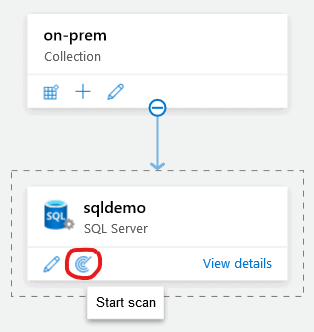
Now you need to create a scan in Azure Purview Studio. Go to your data source and click the scan icon.
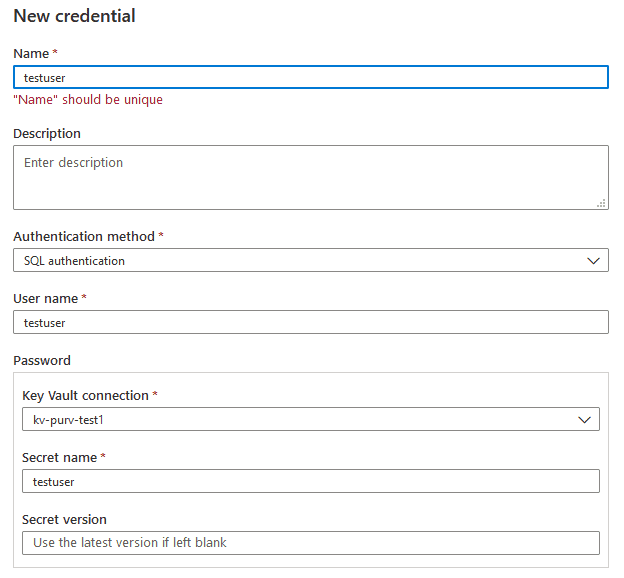
Select your integration runtime and enter the database name. The choose to create a new credential.

For Azure SQL databases you can choose Azure Active Directory authentication. For on-premise SQL Server databases, SQL authentication is the only available method. To register your password, you need to register your key vault in Azure Purview. You can then test connectivity to the key vault and your on-premises SQL Server.
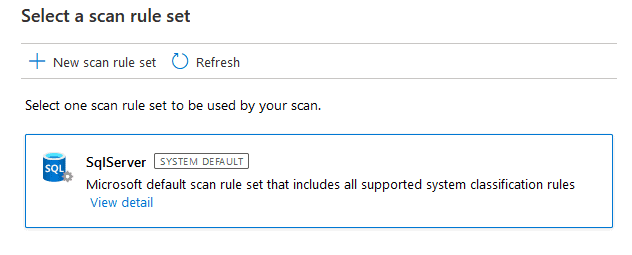
Then go with the default scan rules.
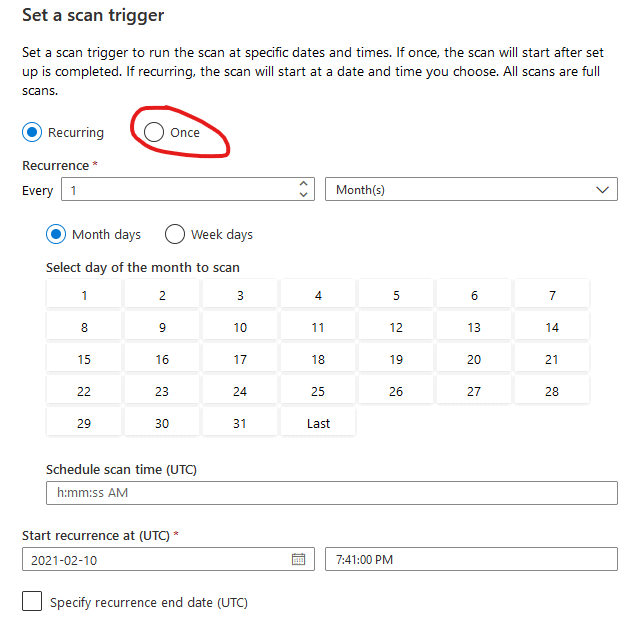
Set up the scan to run only once. You can always rerun scans.
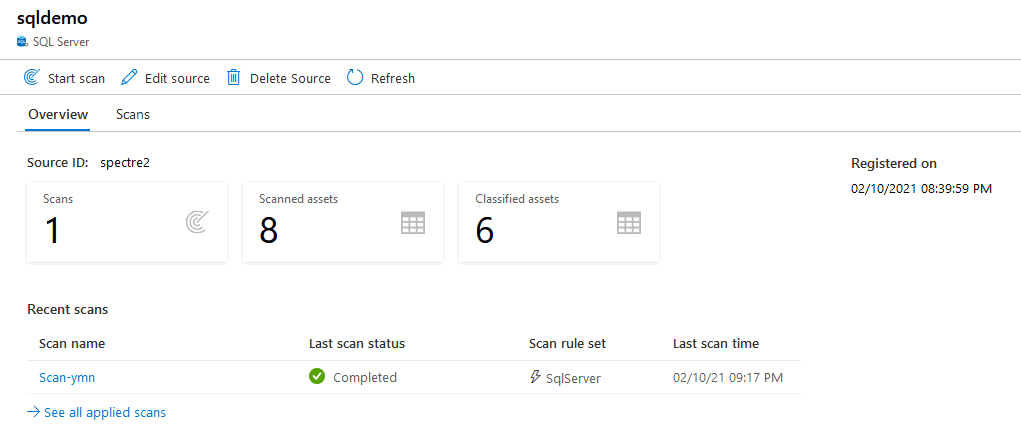
Your first scan should start!
Monitoring the scan
Click View details on your data source to monitor the progress. After a couple of minutes the scan should have completed. If there are errors, you can click on a scan to edit it.
Browsing the results
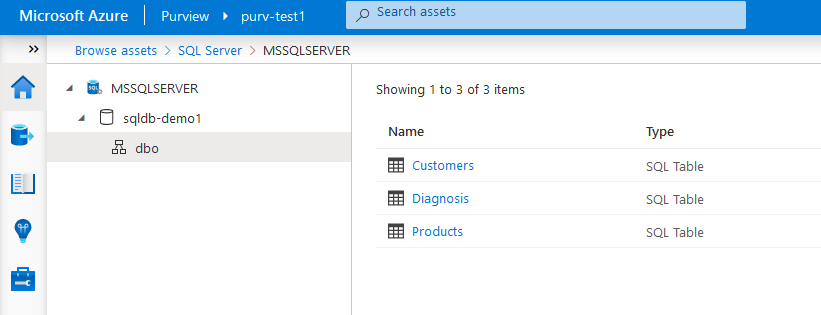
Finally, you can go to the start page of Azure Purview Studio and start browsing the results. You can either click Browse assets or use the fulltext search. I had 3 tables in my demo database and they show up like this.
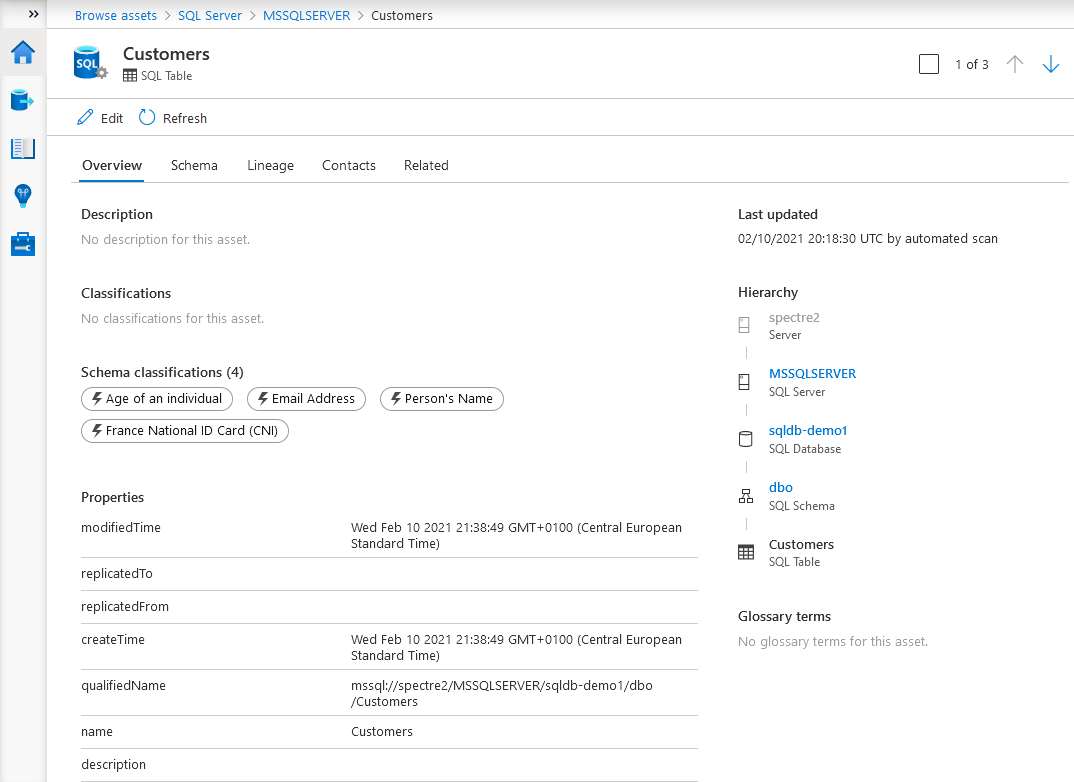
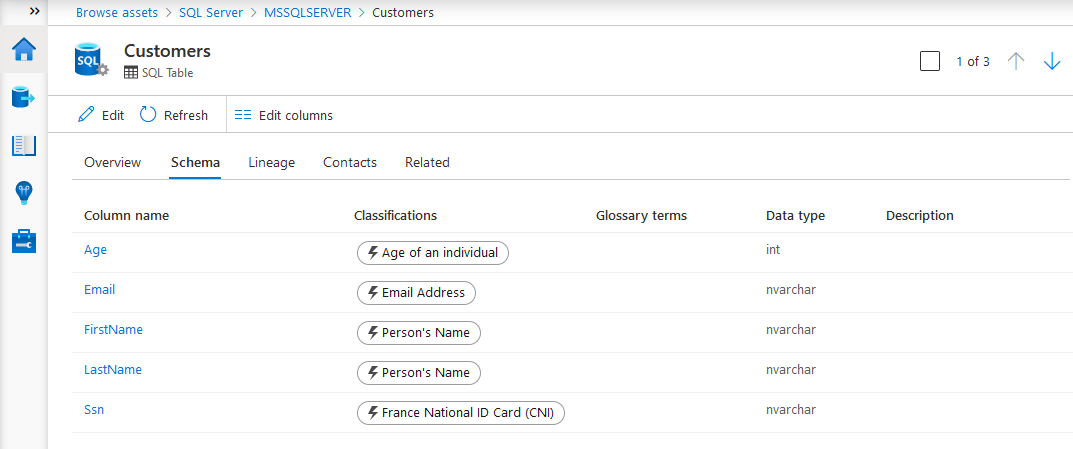
Clicking on a table gives the details, such as classifications. As you can see, it automatically has detected the the table contains ages, email addresses, person's names and national id numbers.
Clicking on Schema gives the details of each column.
Next step
Now that you have added your first data source, you could explore other Azure Purview functions such as glossary terms, lineage and more data sources. There is much more to explore!
Here are some resources that I can recommend:
You are also much welcome to visit my blog www.how2code.info for more samples and scripts.