

Introduction
This article will discuss geo-replication for an Azure SQL database (PaaS) and the steps required for setup via the Azure portal and T-SQL for my database, which is located in West Europe.
Geo-Replication
Before April 29th 2016 we could chose from standard geo-replication or active geo-replication. Standard geo-replication allowed you to create one non readable secondary to a “paired” data centre. (Paired data centres will be explained later on)
There were many more advantages to using active geo-replication such as that you had the ability to create multiple secondary databases with a maximum of four that could be readable and you had the flexibility of choosing whatever data center you desired, but this was only applicable to premium tier databases.
Now Microsoft has expanded their geo-replication features by enabling active geo-replication across ALL database tiers. This means that non readable secondaries will be retired in April 2017 and any non-readable secondary that you have created in the past will automatically be upgraded to a readable secondary.
So for this article I will show the steps required to setup active geo-replication.
Paired Data Centres
The following screen shot shows Azure’s paired regions for its data centres.
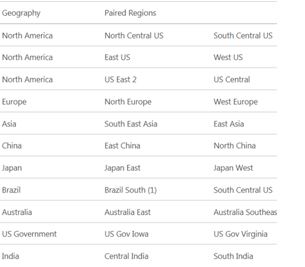
Microsoft’s aim is to provide (where possible) at least 300 miles of separation between data centres in a paired region. For example the distance between the North European data centre and the West European data centre. This means there is less likelihood of your database being affected by a natural disaster or a physical outage affecting both data centres at the same time.
On the flip side excessive distance can be troublesome too, especially when it comes to latency and bandwidth for when replicating data between the sites, this is something to be aware of especially if you decide to use active geo-replication’s capability of selecting a region of your choice.
Pre-Reqs
To successfully setup active geo-replication you will need:
- An Azure subscription.
- An Azure SQL database that you want to replicate.
- Latest version of SQL Server Management Studio (SSMS) if you want to setup and monitor geo-replication via TSQL.
Portal-Setup
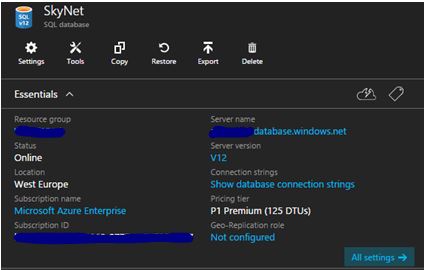
Within your Azure SQL database click on the Not Configured option under the geo-replication role.
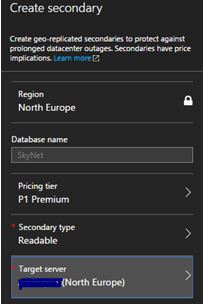
This will then take you to the main geo-replication dashboard. Here you will need to select the Data center that you would like to replicate to – for this article it will be replication to North Europe.
Once you have decided on the data center of your choice you will need to create the database on a server that is located in that region.
Once this section has been completed, initialisation takes place.
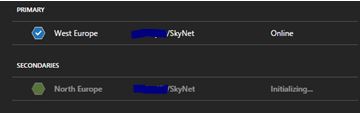
The next stage is that the secondary database will then be populated with the data copied from the primary database. This process is known as seeding.
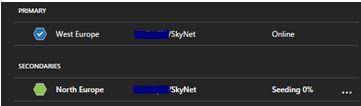
When seeding completes then replication is complete. These secondary databases that you create will operate under Read Committed Snapshot Isolation (RCSI) mode.
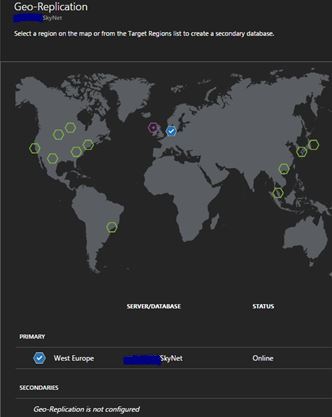
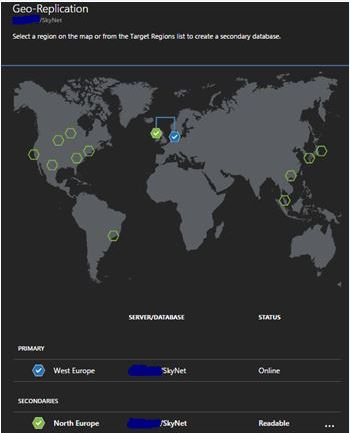
The below image shows the geo-replication map when you have successfully created one readable secondary.
Portal - Failing over
Geo-replication in Azure uses asynchronous replication, so when you click the failover button (as circled below) the following takes place.
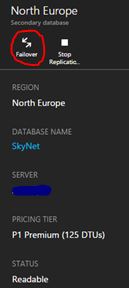
Firstly, replication temporarily switches to synchronous mode. This will cause all outstanding transactions to be flushed to the secondary, then once this has completed the primary and secondary roles of the two databases in the geo-replication relationship switch positions.
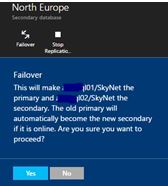
Books on line (BOL) does state that there will be a short period during which both databases are unavailable (approximately 0 to 25 seconds) while the roles are switched.
Portal - Removing Replication
If you want to stop replication you would need to go to the secondary database and click stop replication as circled below.
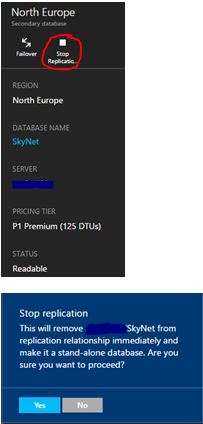
This removes the secondary database from the replication relationship and it becomes a standalone database that operates in read/write mode.
The next section will give you a high level look at using T-SQL to help setup active geo-replication – as opposed to using the portal.
T-SQL Setup
If you want to use T-SQL to setup a secondary, then you can. It is recommended that you use the latest version of SQL Server Management Studio (SSMS), this being the June 2016 release, found at the following link: https://msdn.microsoft.com/library/mt238290.aspx
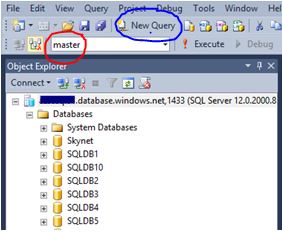
Once installed and you have connected to your primary server you should then navigate to the master database as shown by the red circle (the USE command is NOT supported) and click the new query button as shown by the blue circle and issue the following the command.
ALTER DATABASE SkyNet
 ADD SECONDARY ON SERVER abcsql02 WITH (ALLOW_CONNECTIONS = ALL);
For the above T-SQL to work, it assumes that the secondary SQL Server has already been created. Also you should be aware that if the database already exists on the secondary server the command will fail.
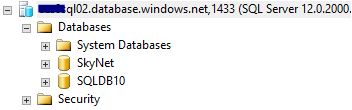
On the secondary server you will now see the replicated database.
To confirm setup you would use the following T-SQL when connected to the master database:
SELECT
 start_date,
 link_guid,
 partner_server,
 partner_database,
 replication_state_desc,
 role_desc
 FROM sys.geo_replication_links
WHERE database_id = 12

There are three states that the replication partnership can be in, these are:
- 0 = Pending – Creation of the secondary database has not yet completed.
- 1 = Seeding – The databases in the replication partnership have not yet synchronised.
- 2 = Catch-up (Which is shown above) – The secondary database is in a transactionally consistent state.
T-SQL - Failover
The below statement should be executed on the master database on the Azure SQL server on which the geo-replicated secondary database resides on.
ALTER DATABASE SkyNet FAILOVER;
All SSMS will give you is a Command(s) completed successfully message. You could then check the portal to confirm that the role switch had occurred or query sys.geo_replication_links to confirm the new role status.
If you try to run this code on the PRIMARY you will get the following message:
Msg 40683, Level 16, State 1, Line 1
The operation cannot be performed since the database 'xxxx' is not a replication target.
T-SQL - Removing Replication
To remove a replicated database you need to issue the following command – this should be executed on the master database on which the primary database server is located.
ALTER DATABASE SkyNet
 REMOVE SECONDARY ON SERVER abcsql02;
T-SQL - Monitoring
I prefer using T-SQL for monitoring, more specifically the following queries. The first query should be executed on the master database on the primary server where it will show the last replication time and capture replication lag in seconds.
SELECT
  link_guid,
  partner_server,
  last_replication,
  replication_lag_sec
 FROM sys.dm_geo_replication_link_status

If you terminate the replication relationship by removing the secondary database (as shown in the previous section) the row for the database in the sys.dm_geo_replication_link_status query disappears.
The next query (again you will need to issue it from the master database) will get all activity against your replicated database. There is some great information stored here, such as success and failure operation messages.
For example, from the below screen shot the last row operation has the text ‘Terminate continuous database copy’ this failure occurred due to a security privilege issue, I knew this because the errors get written to a column called error_desc.
SELECT *
 FROM sys.dm_operation_status
 WHERE major_resource_id = 'Skynet'
 ORDER BY start_time DESC

Summary
Hopefully this article has given you a better understanding on how to setup and monitor active geo-replication for your Azure SQL database.
Sources
https://azure.microsoft.com/en-gb/documentation/articles/sql-database-geo-replication-portal/

