

Problem
Developing OLAP cubes have always been fascinating to me. Right after completing the development of a data warehouse, my next line of action often becomes setting up Analysis Services for the warehouse. Although, there are multiple client tools readily available in the market to perform some analysis on this SSAS Server, sometimes it is really difficult to provide good solutions to the customers on how are they going to use this Analysis Server.
One such incident happened when I was working for a client who had their production data center setup and their front-end SAAS application directly connected to the databases that were hosted on a private data center. Since they were already a cloud application provider, they did not allow any inbound traffic to be connected to the databases directly. The SSAS database was also embedded in their application on which some pre-built reports were already provided. However, when a client wanted additional reports, they had to turn up to the IT team each time there were any such ad-hoc requirements. Also, those of reports were static and there was no means of refreshing the data in the reports once it reached the customer.
We thought of exploring other ways by which the customers can directly do their analysis on the OLAP cubes by themselves without any intervention by IT. This also meant we had to expose our OLAP services over the Internet as we could not allow direct TCP/IP connections to the databases. It turns out there is already a utility provided by Microsoft in order to achieve this. The name of this utility is MSMDPUMP, and it is shipped with the Microsoft Analysis Services.
This article will discuss how to expose SSAS OLAP cubes over the internet using HTTP.
PS: For the sake of this tutorial, I'm using a Windows PC rather than a Server. The steps are almost similar in both the operating systems.
Solution (Connect to SSAS over HTTP)
In order to set up HTTP access to the OLAP server, it is essential that we have a web server running which will act as the host a web application for accessing the OLAP server.
Prerequisites
In order to enable HTTP access to the OLAP server, we need to ensure that IIS is properly configured.
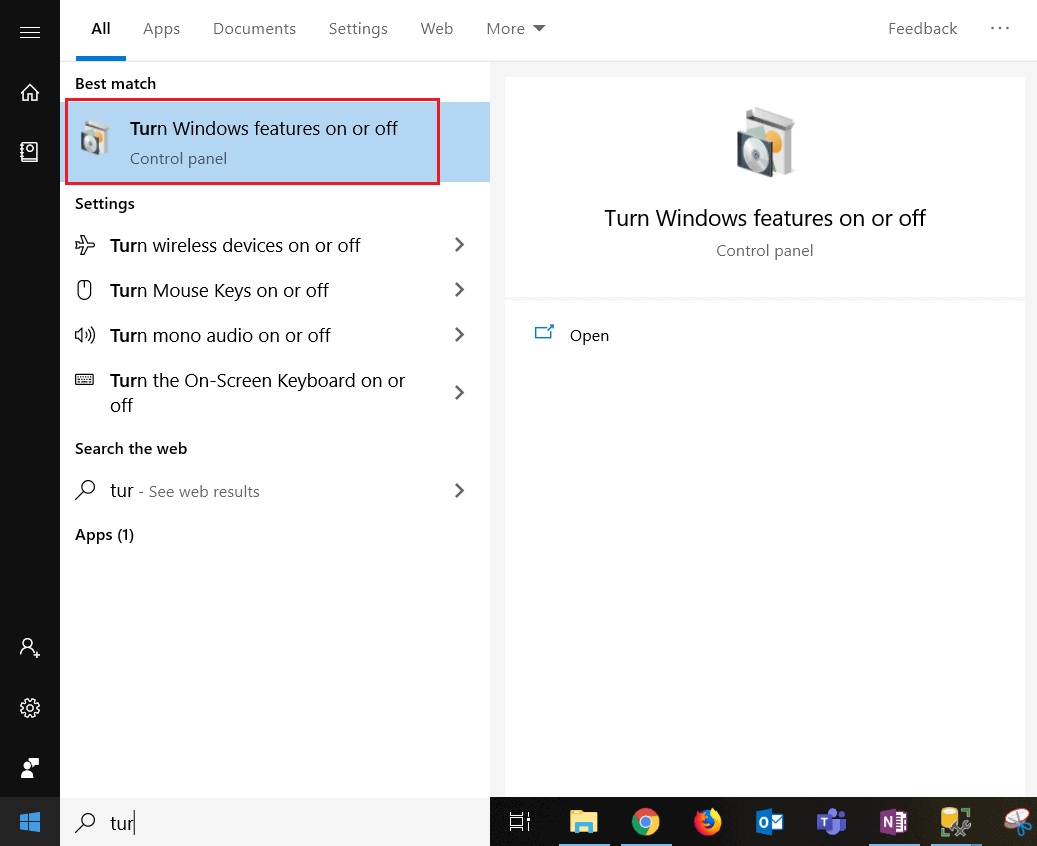
- Click Start, and select "Turn Windows Features on or off".

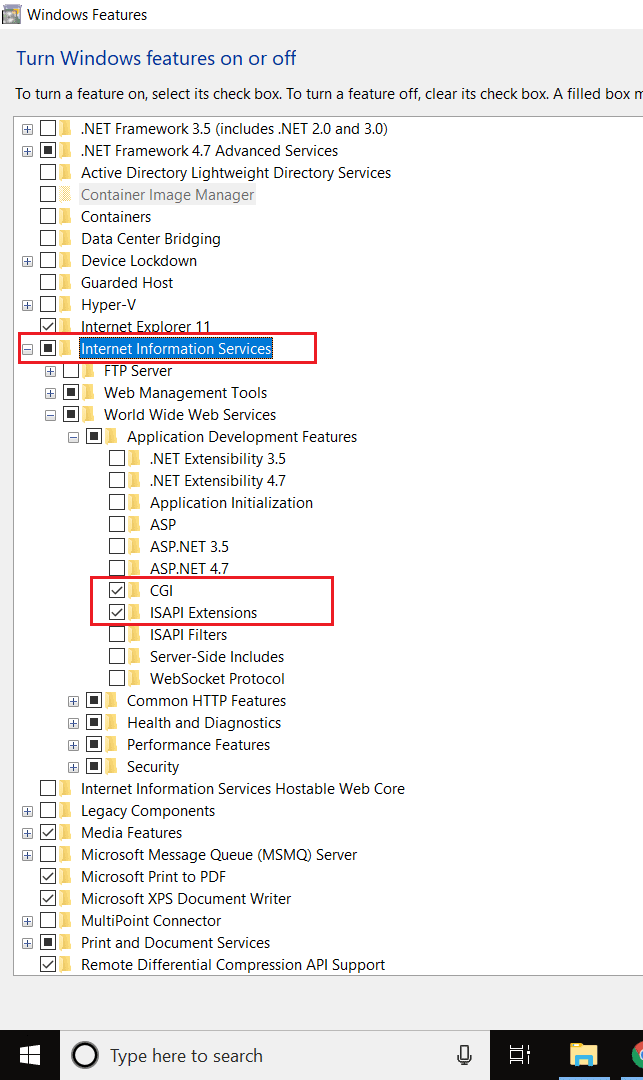
- Navigate to Internet Information Services, and expand it.
- Expand World Wide Web Services and then Application Development Features.
- Check the boxes against CGI and ISAPI Extensions.
- Next, expand Security and check the boxes against Basic Authentication and Windows Authentication.
- All the necessary pre-requisites has now been set up.

Preparing the IIS Server
Now that the IIS is up and running, there are a number of steps to configure IIS to support the transfer of data between the end-user and the OLAP database. The following steps will discuss, in general terms, the configuration of IIS to use the MSMDPUMP.DLL provided with SQL Server to facilitate the transfer of OLAP data over IIS.
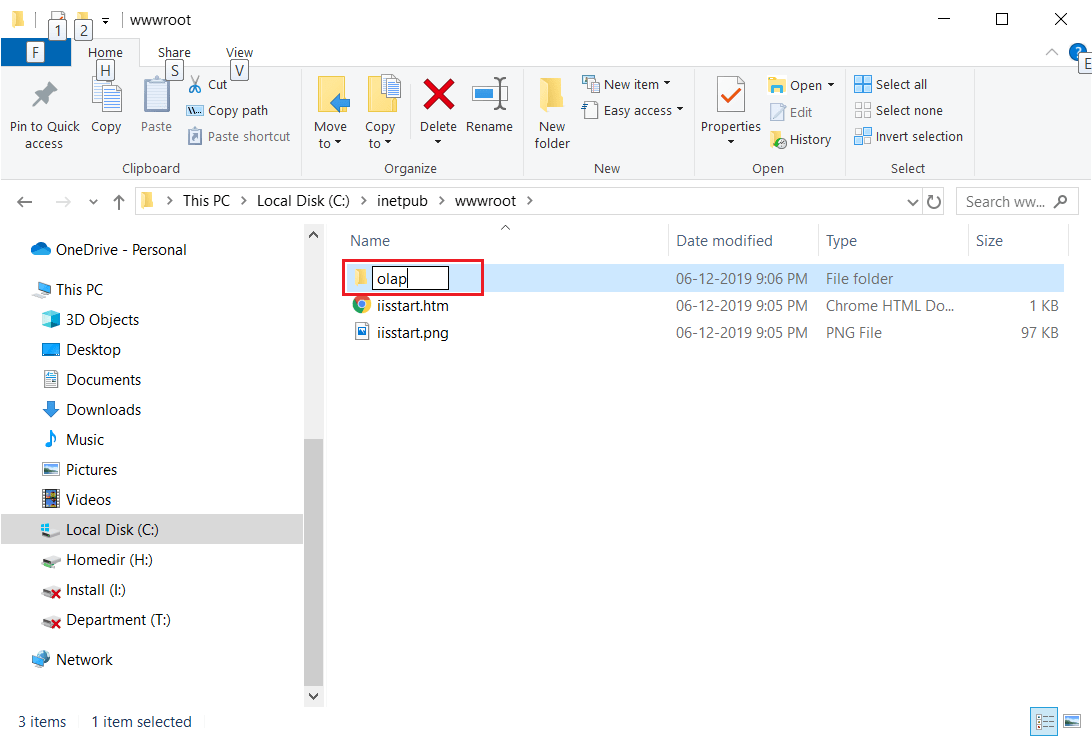
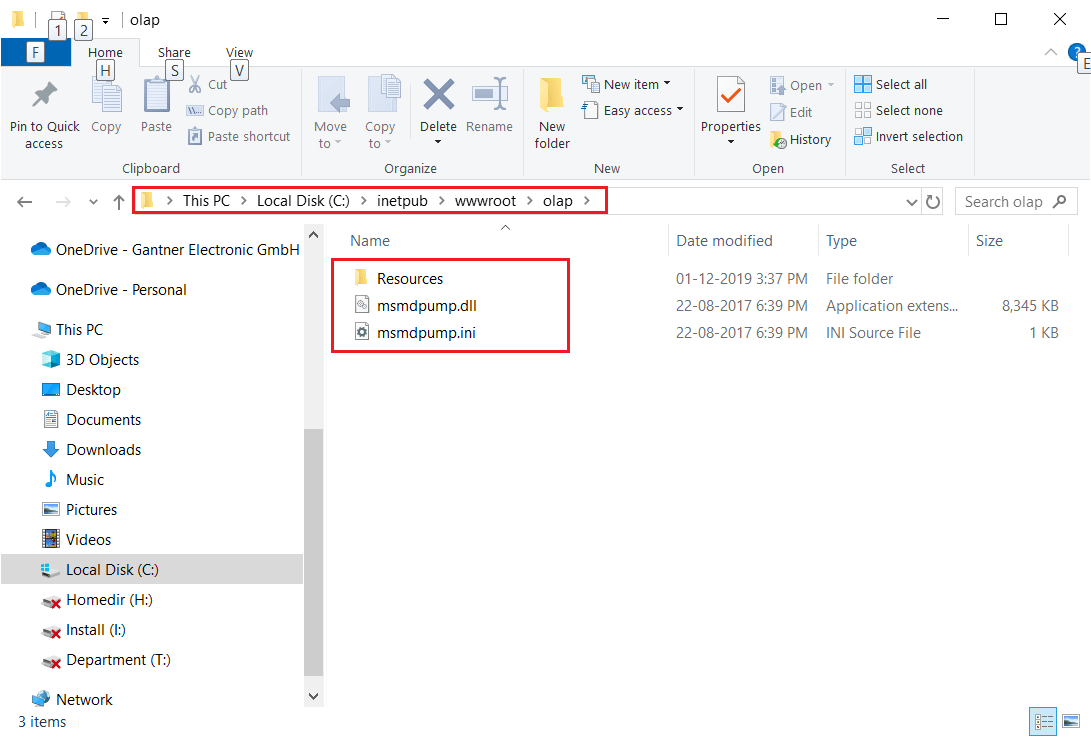
- Navigate to the IIS root folder. In my machine, the path is "C:\inetpub\wwwroot\".
- Create a New Folder with the name "olap" under "wwwroot".
- The next step is to copy the necessary libraries provided by Microsoft into this new directory that we have just created.
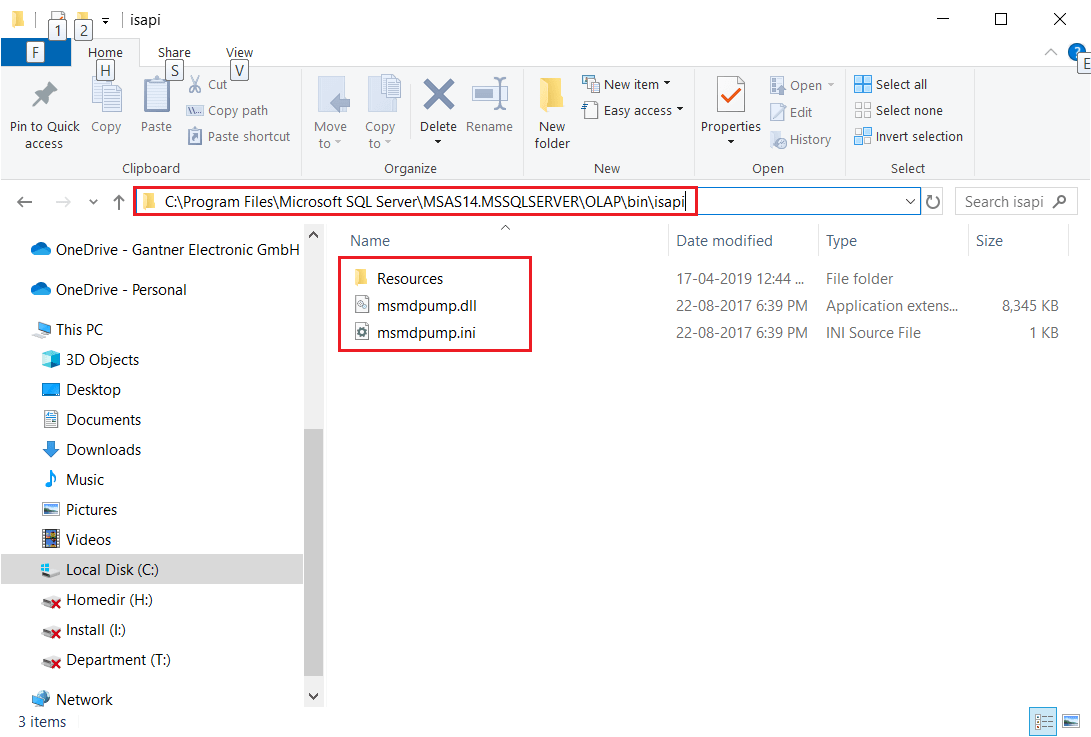
- The files that are required to copy can be found inside the default SQL Server Analysis Services installation directory - OLAP>bin>isapi.
- In my machine, the path is found under "C:\Program Files\Microsoft SQL Server\MSAS14.MSSQLSERVER\OLAP\bin\isapi".
- Copy all the three items and paste them in the "olap" directory.
- Now, the IIS directory has been set up.
Creating the Application Pool and Virtual Directory in IIS
The next step is to create an Application Pool for the web application that will expose the SSAS OLAP Server over the internet. Application Pools are nothing but the logical groupings of web applications that will be executed in a common process, thus allowing deeper granularity of which programs are grouped together in a single process.
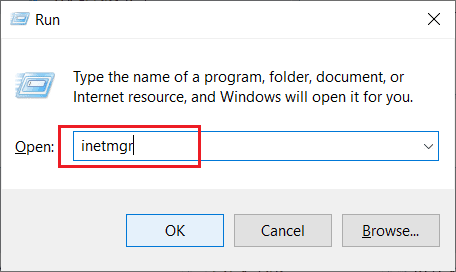
- Start Run, and open inetmgr.
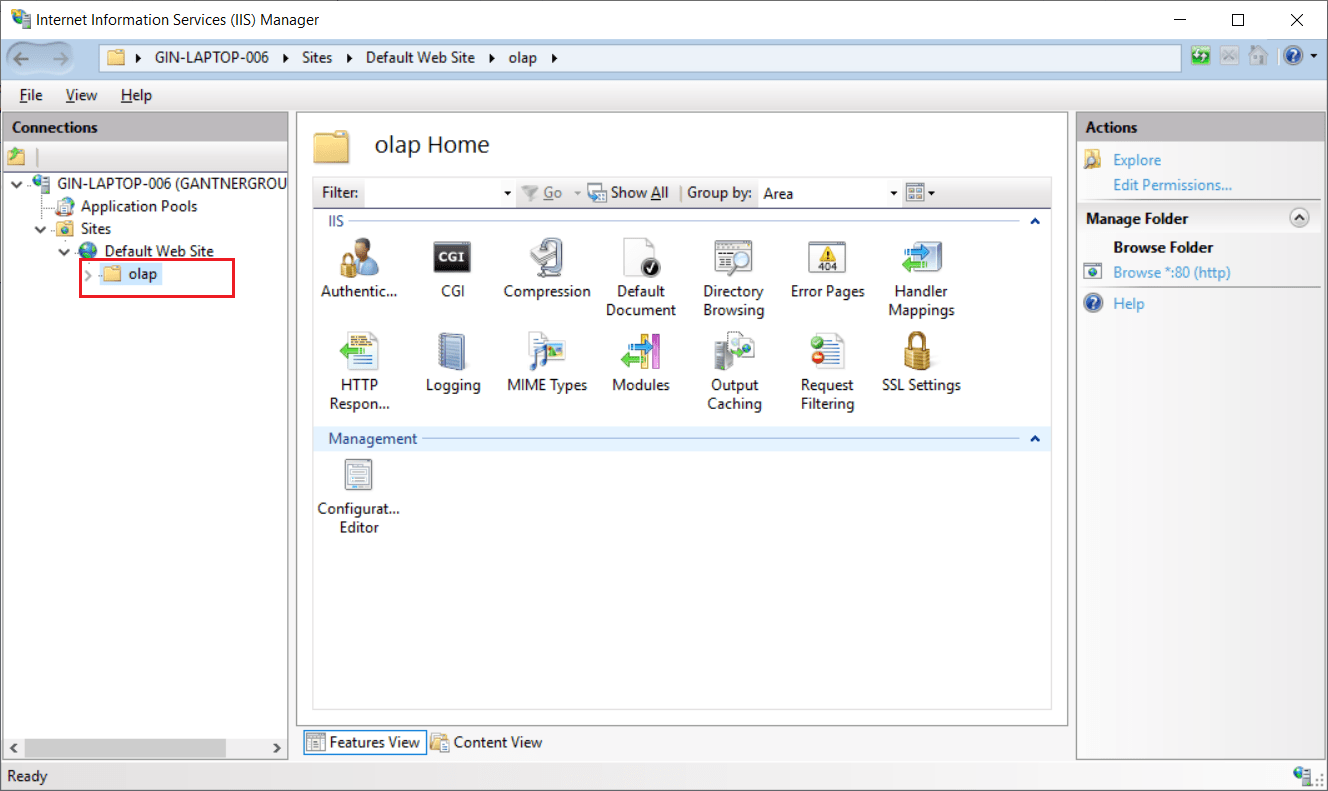
- Expand Sites, and then Default Web Site. We should be able to see the "olap" directory that we had created earlier here. Also, notice that the icon for this directory, which indicates it is a folder.
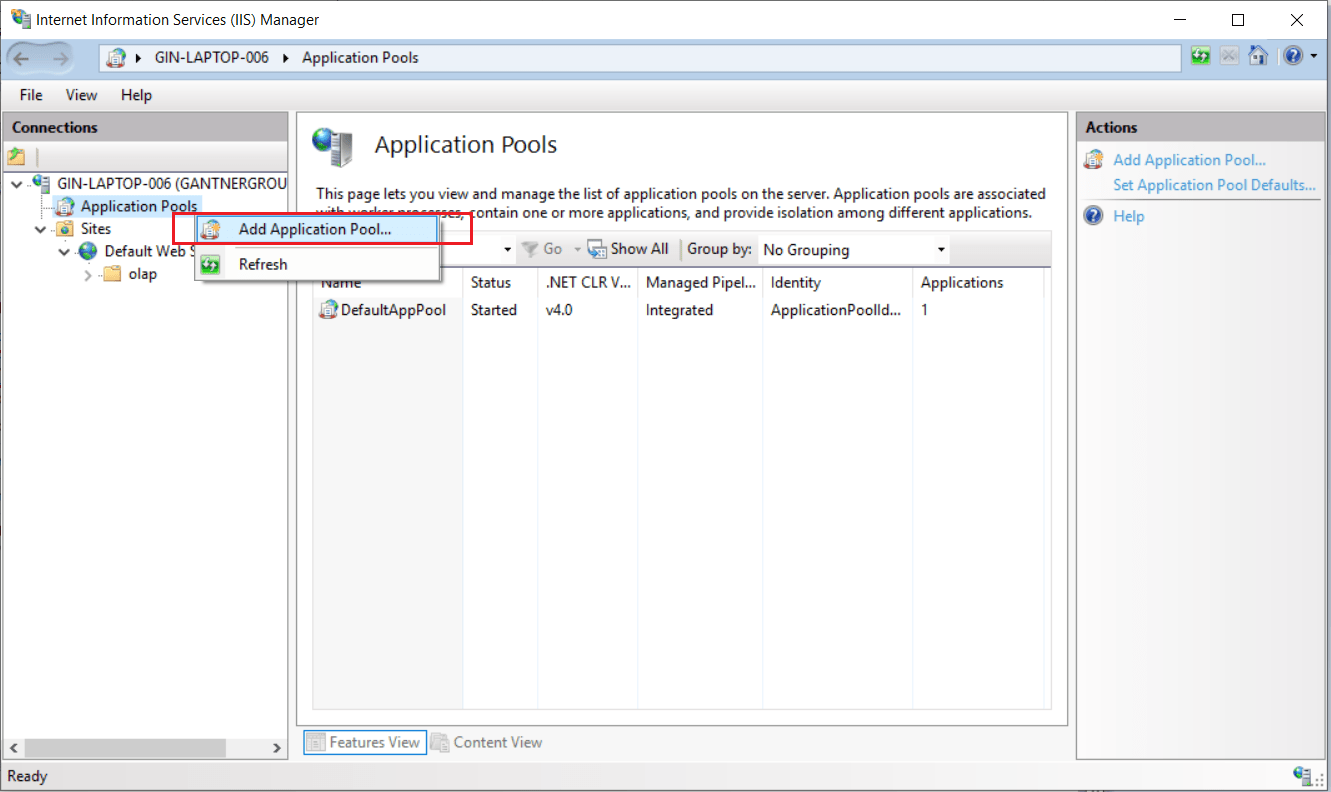
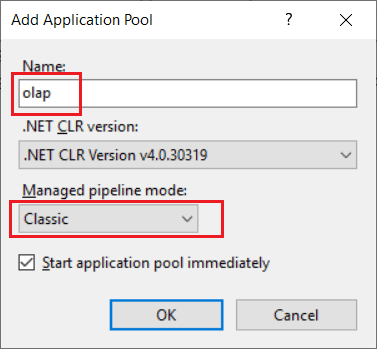
- Right-click on Application Pools, and select Add Application Pool...
- In the new dialog box "Add Application Pool", enter "olap" as Name and select Classic as the Managed pipeline mode. Click OK once completed.
- Now, when you select Application Pools on the left panel, the newly created pool "olap" is visible. Also, note that there aren't any applications in this pool. So, we would need to create one.
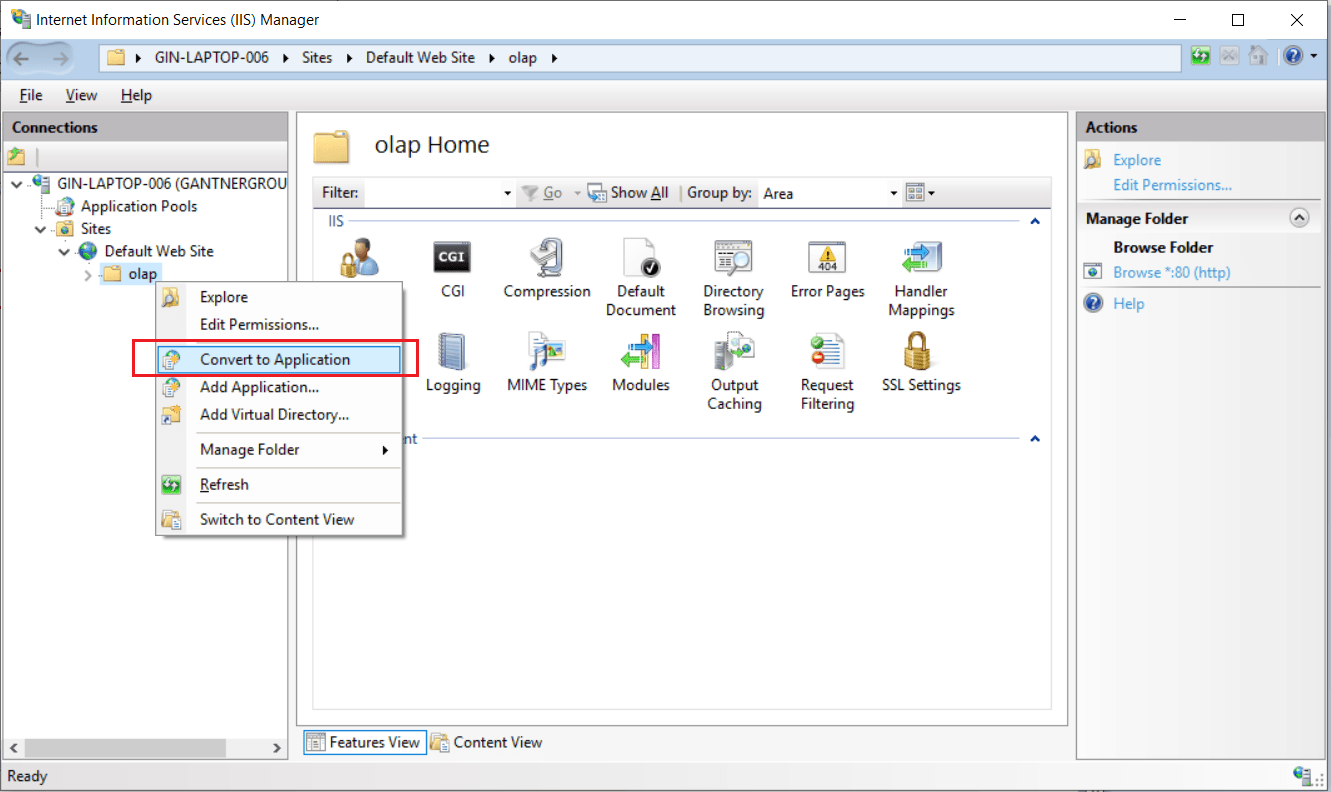
- Now that the Application Pool is ready, we should create the application. Right-click on the "olap" directory, and select "Convert to Application".
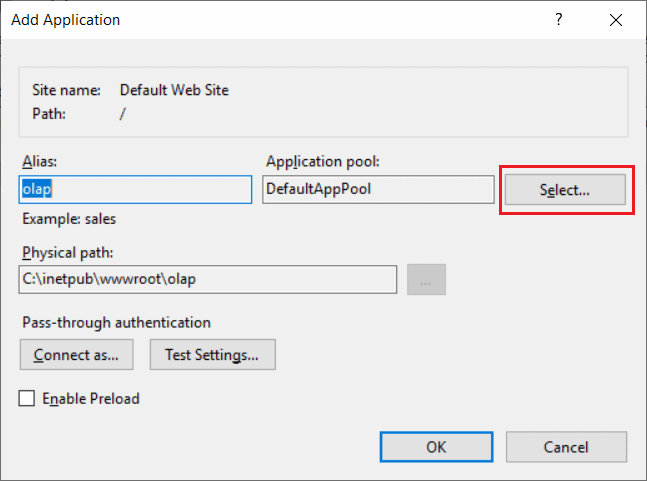
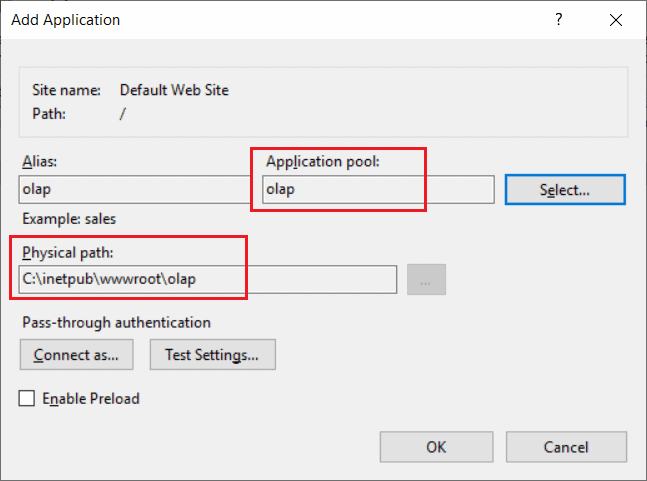
- A new dialog box appears "Add Application".By default, the alias will be the name of the folder on which the application is being created. In this case, it is "olap".The next step is to run this application under the new Application Pool that we have created in the previous step. Click "Select".
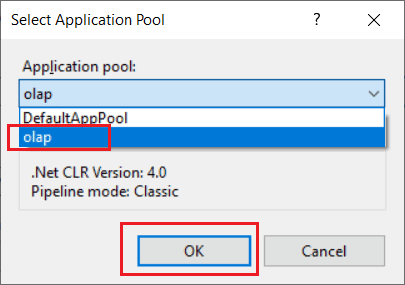
- Select "olap" from the drop-down and click OK.
- Verify the Application Pool and the Physical Path. The path should be the directory on which we have pasted the files in the first steps which configuring the IIS Server.
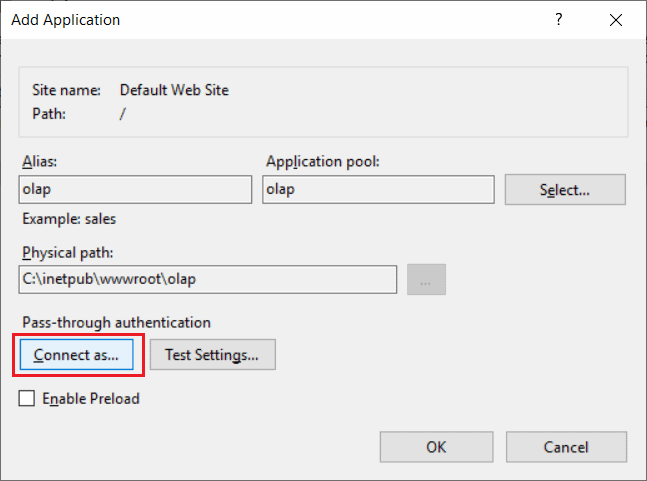
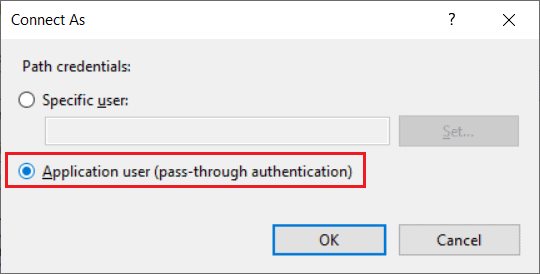
- Click Connect As..., and select "Application User (pass-through authentication)"
- Click OK.
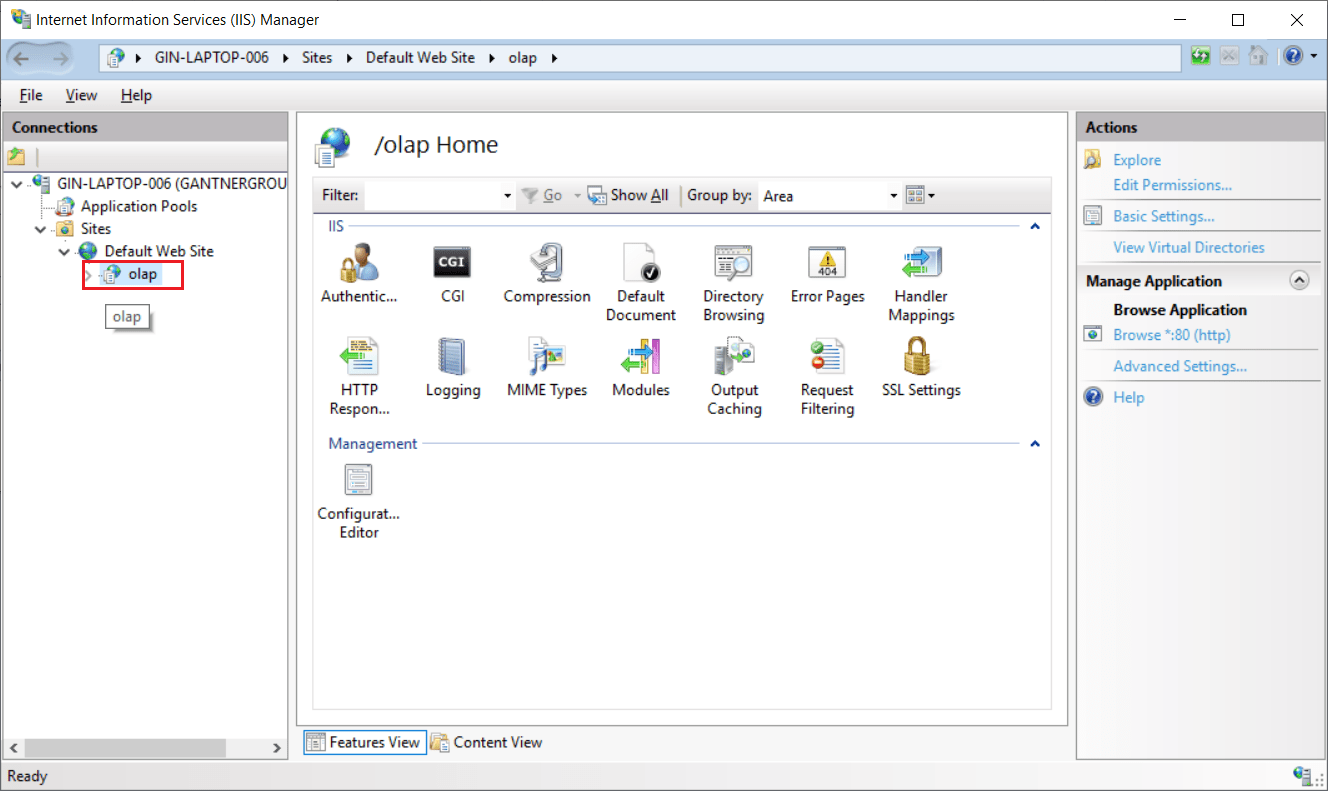
- Since the application is now created, the icon for the "olap" should now change.


Configure Authentication in IIS
Once the application has been configured, the next step is to configure authentication for the application that we just configured in the previous step.
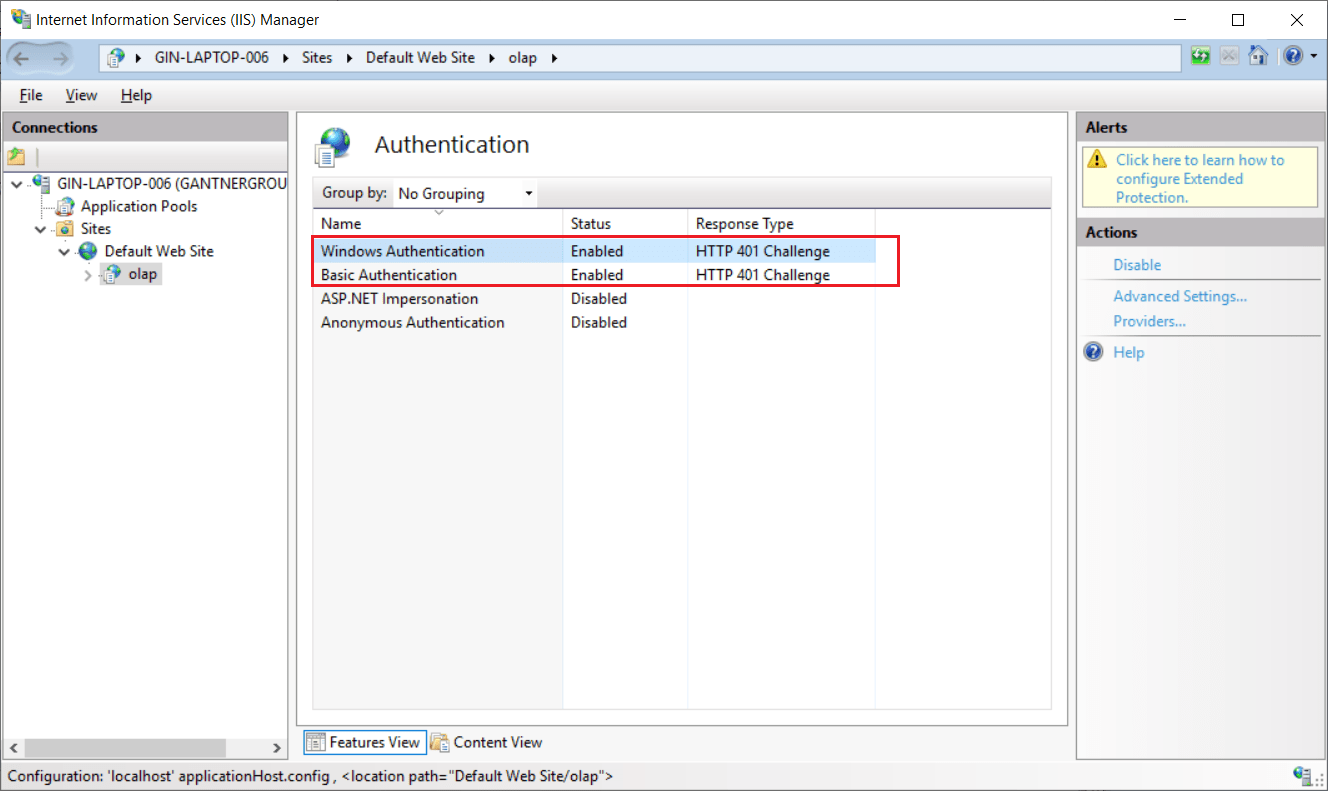
- Select the application "olap" on the left-hand panel and double-click Authentication.
- Right-click on Windows Authentication and select "Enable". Repeat the same for Basic Authentication as well.
- Disable Anonymous Authentication.

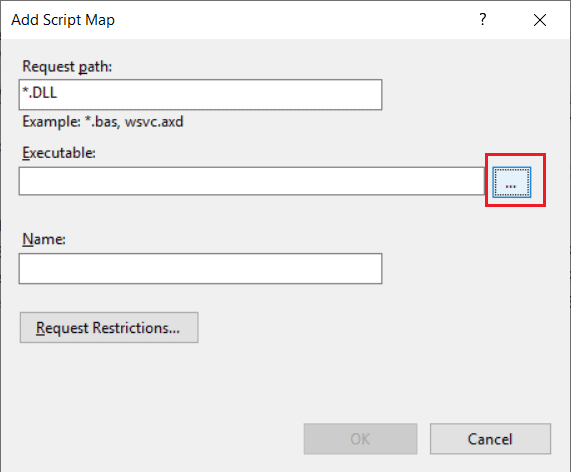
Adding a Script Map for the Pump DLL
As the application is now authenticated, we need to map the application to use the MSMDPUMP.dll file.
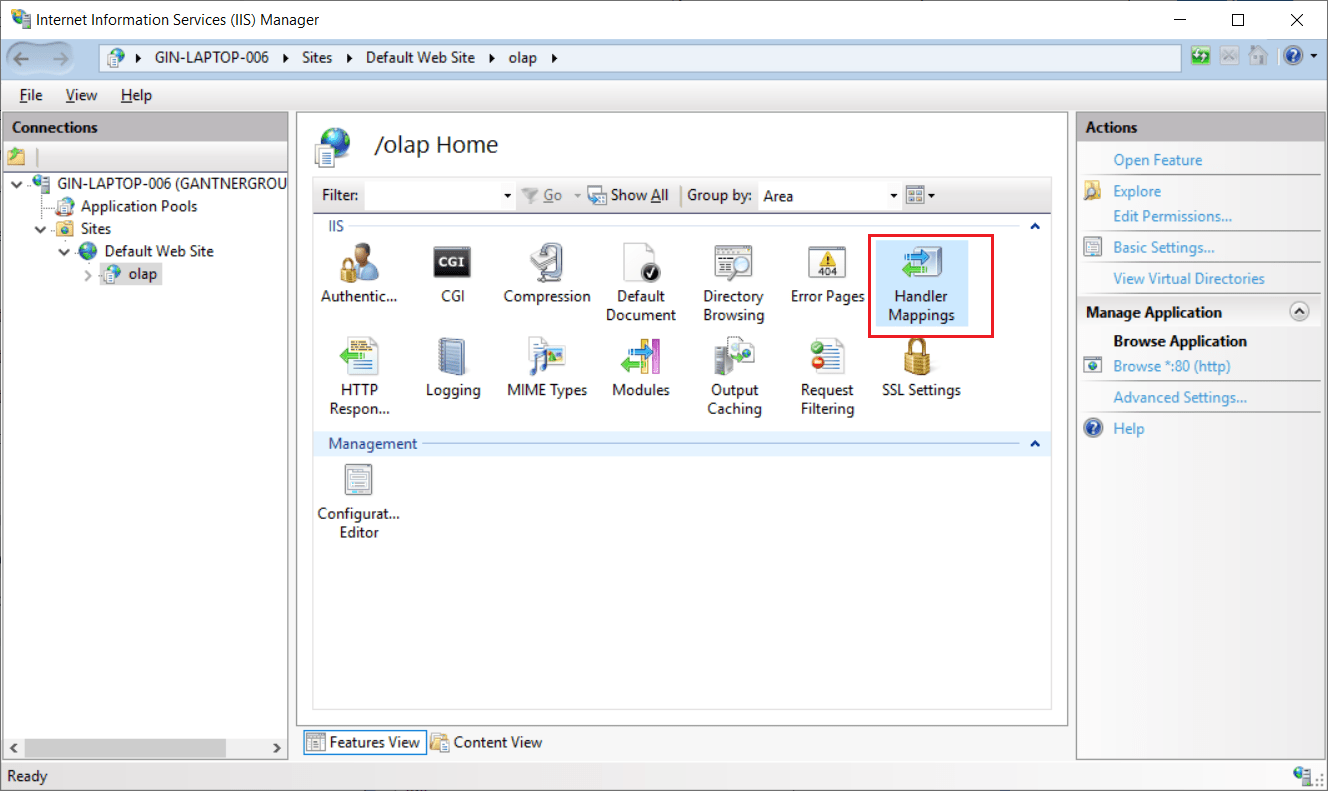
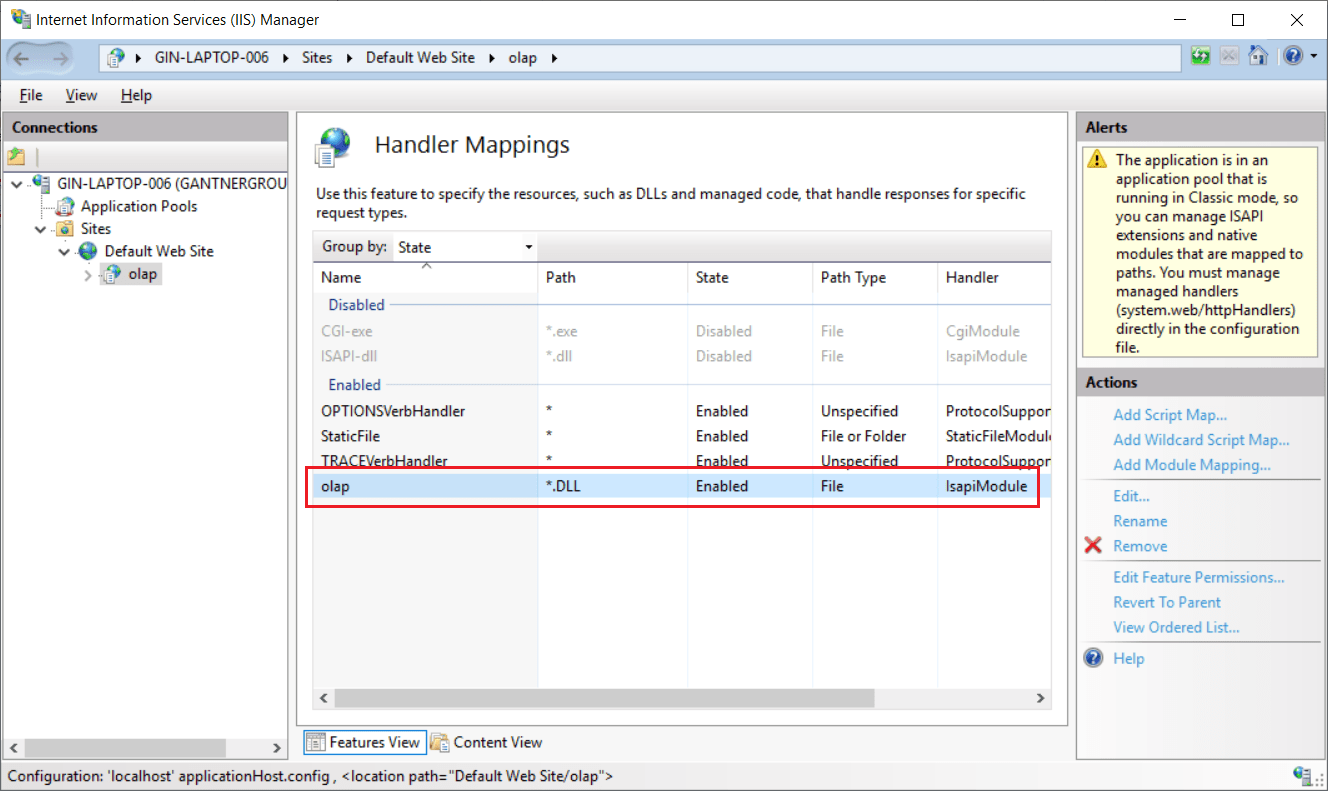
- Select the application "olap" on the left-hand panel and double-click Handler Mappings.
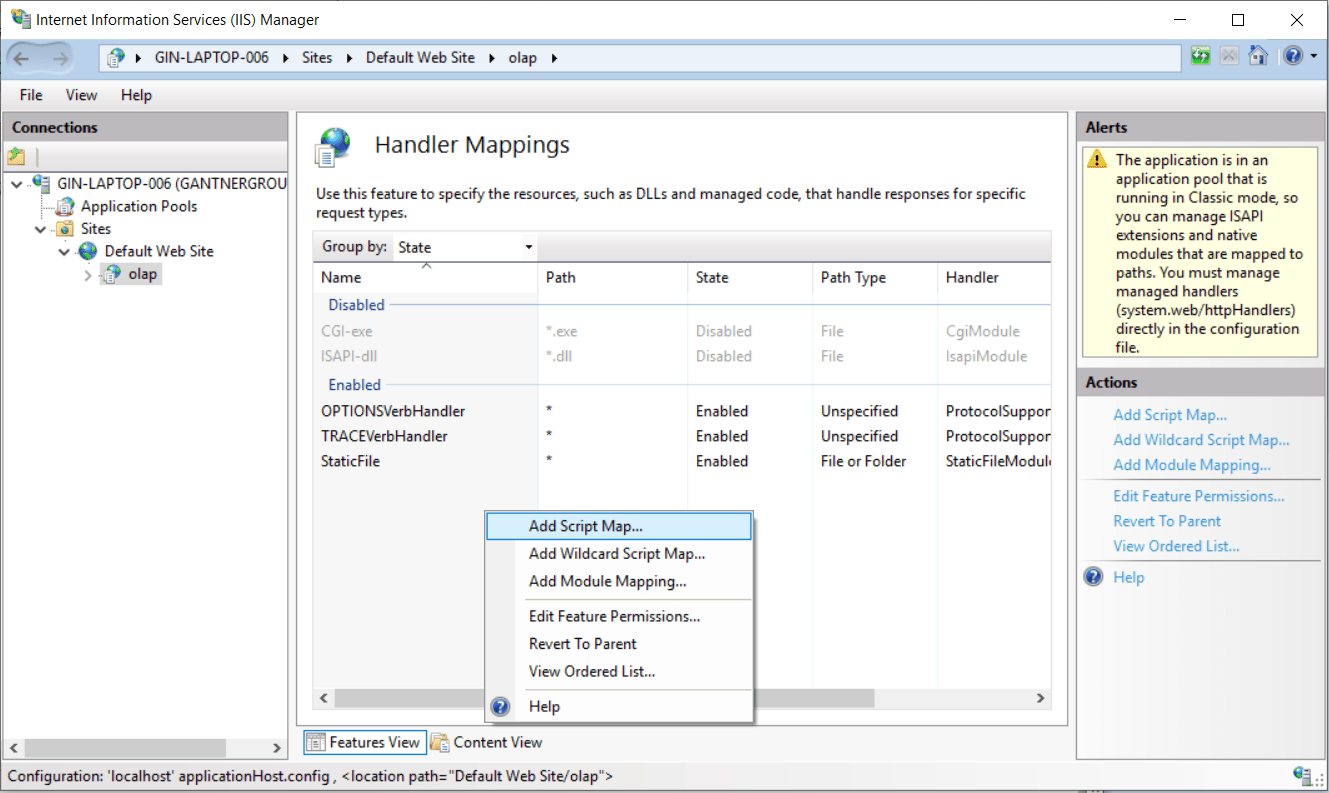
- Right-click inside the panel and select "Add Script Map..."
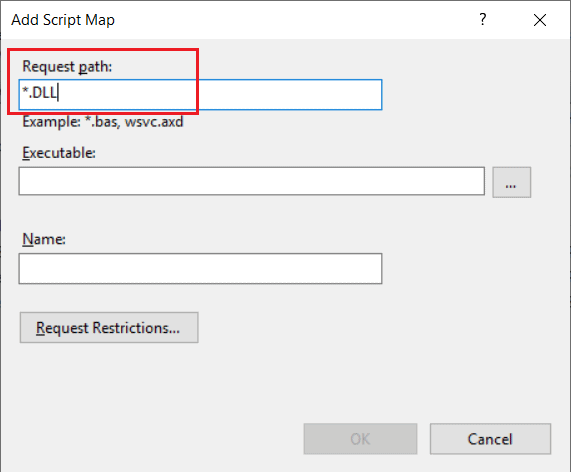
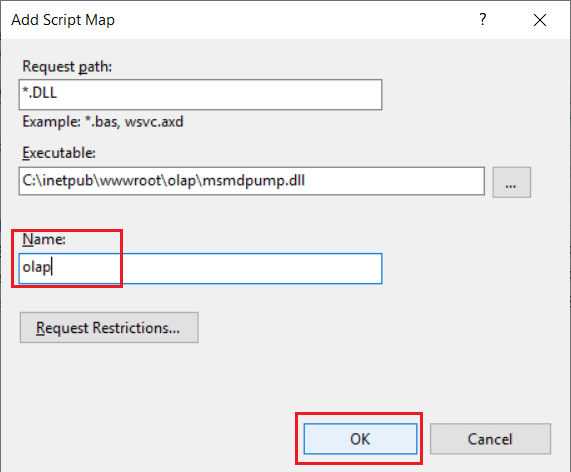
- In the Add Script Map dialog box, enter "*.dll" as the Request Path.
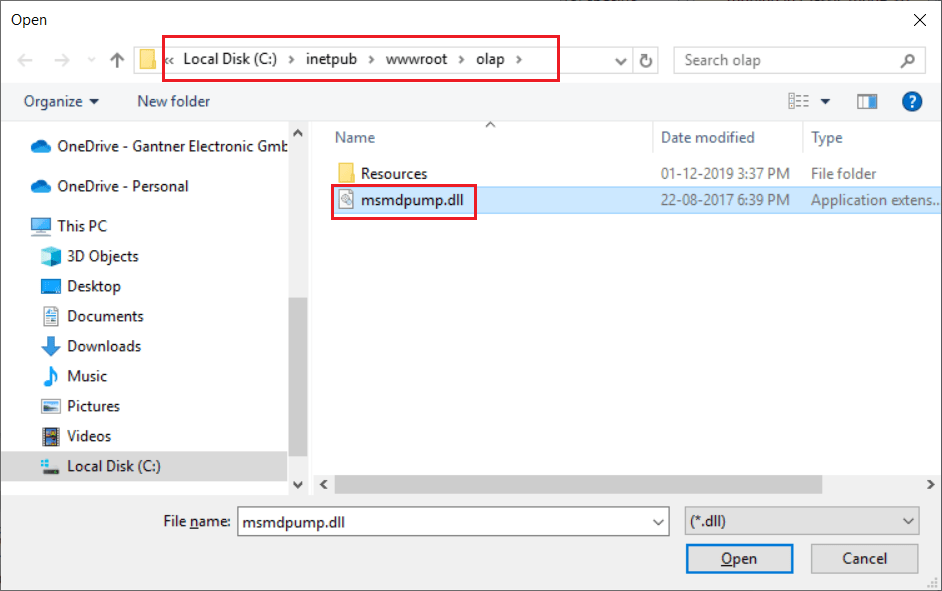
- Browse the executable MSMDPUMP.dll for the Executable property.
- Finally, provide the Name of the map as "olap".
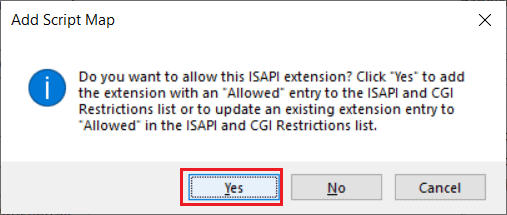
- Click "Yes" to allow the ISAPI extension.
- The script map should now be visible in the Handler Mappings list.
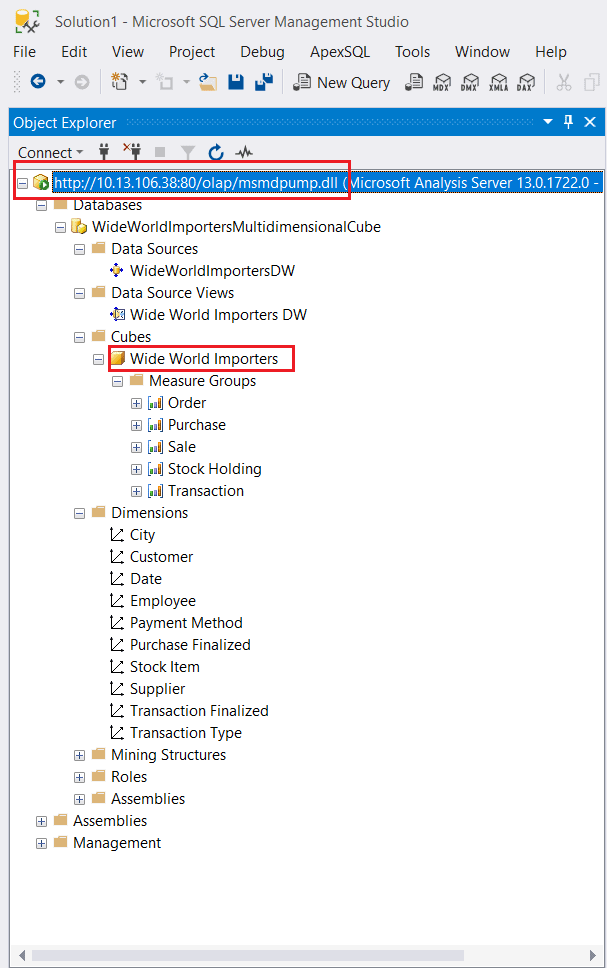
Connect to the SSAS Instance using HTTP (using SSMS)
Once all the above configuration is completed, we are now all set to connect to this instance of Analysis Services using HTTP.
- Start SQL Server Management Studio, and enter the Server Name as "http://<<LOCALHOST IP ADDRESS:80>>/olap/msmdpump.dll".
- Now, you should be able to connect to the instance and browse all the databases and cubes.

Takeaway
Overall, this article describes how to configure IIS to allow HTTP connections to a local instance of SSAS Multidimensional. The steps are almost similar if the instance is a Tabular one.
For more information, please refer to the official documentation from Microsoft.
