

This is the second article in a series on the basics of using Git. The other articles in the series are:
- Basic Git for DBAs: Getting Started with Git
- Basic Git for DBAs: Sharing Files Through GitHub
- Basic Git for DBAs: the Basics of Branches
- Basic Git for DBAs: Making Changes in GitHub
- Basic Git for DBAs: Merging Code Between Branches
- Basic Git for DBAs: What's a Pull Request?
- Basic Git for DBAs: Managing PowerShell Scripts
- Basic Git for DBAs: Ignoring Files and Customizing Your Environment
In the first article, we covered the basics. In this one, we will look at how to share our files with others. We will learn how to copy our files to GitHub and download them from another machine.
Prerequisites
The first thing that you need to do in order to follow along with this article is create a GitHub account. You can sign up for free, and even choose private repositories for free. Private repositories are not visible by those to whom you haven't given access. Public repositories are viewable by anyone.
I would also encourage you to get a friend to sign up and work with you to exchange repositories. I will use two separate machines in this article, with two separate GitHub accounts to simulate the sharing of files.
Note: I would highly suggest that you enable two factor authentication (2FA) on GitHub. Your code is important, and it's your intellectual property. It also becomes a part of your career, so secure access to your account.
What's a Remote?
In GitHub Desktop, we see this in the upper right corner of the GUI.

The Remote item has an exclamation point. Something is wrong here, isn't it?
A remote is the a copy of your repository on another machine. It's "remote" from your copy, which is "local". While you can use git locally, it is designed for collaboration with others, and hence there is the facility for linking repositories around.
This is a distributed system, and you can link with others, but many of us try to keep a repository somewhere that everyone links to. Typically this is one spot, though there could be multiple copies. Before you make too many copies, keep in mind there is overhead to coping all these files around and syncing the changes, as well as resolving potential conflicts.
Typically each repository will have one remote that it is linked with. In this series, we'll link with a repository at GitHub, but the idea is the same whether you link with Azure DevOps, BitBucket, or any other Git service. You can even link with repositories on other machines in your organization. The main concerns are the protocol and security. Git supports http and ssh for remotes. We'll look at http with GitHub here.
Linking to GitHub
When I click the Remote menu item, I see what the warning is.
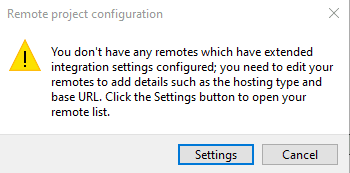
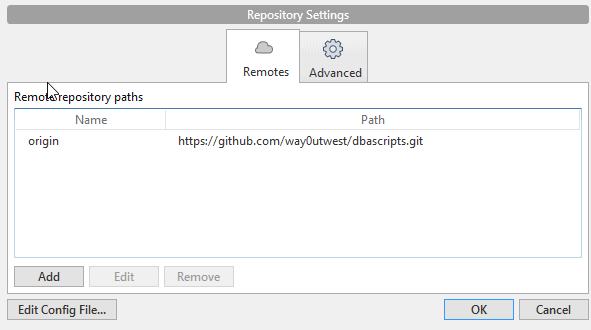
I haven't configured remotes, so I'll click Settings. This brings up a list of remotes, but I don't have any configured.
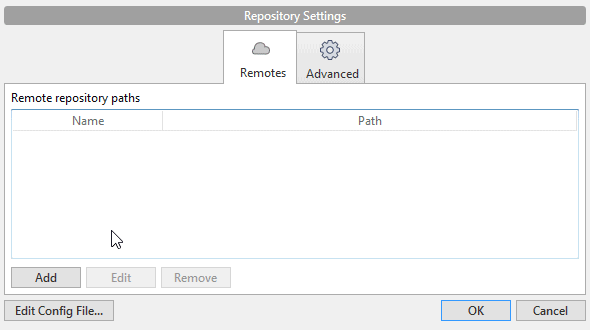
No problem, let's click Add. When we do that, we get a form with a number of fields.
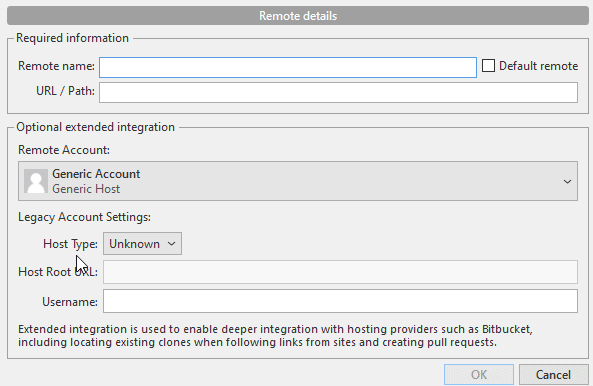
What do I put in here? I don't have a remote at GitHub, so I likely need to start there. Let's log onto GitHub and create a repository there. After all, I need some way to get a URL. In your organization, you likely need to get someone to set up a repo there first, which you can then exchange files with.
When I log onto GitHub, I see all my repositories. If you haven't signed up, you need to do so. Once you do, you'll have your won space. Don't worry if you might need to move your code to a repository in your organization, it's easy to do so. You can always add another remote to a different spot later.
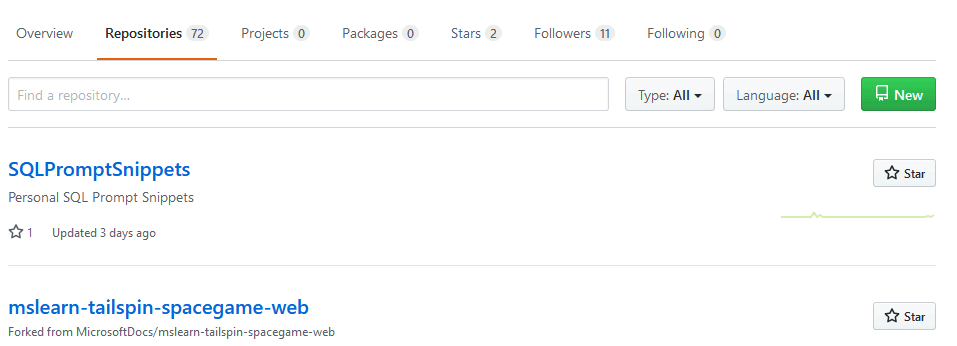
The important thing in the image above is the "New" button in the upper right. Clicking this lets me create a new repository. Once I do that, I get a form to fill in. In general, I try to name my repository something that makes sense. Here, I'l use the name of the folder I picked. This does need to be unique in your workspace, so use something that makes sense.
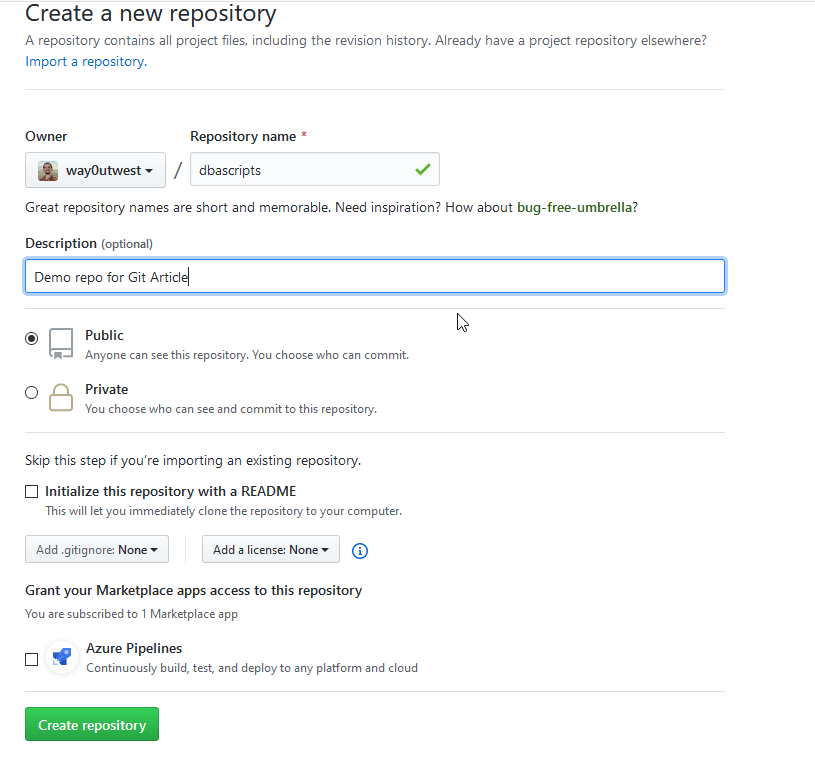
I added a description and left this as public. You can choose what matters to you, and many people have chosen public because that was free. However, now you can have private repos for free, so pick what you want. I am not going to initialize this repository, because I have code already on my local file system I want to send up here. This also isn't something I want to build and test for now, so I'll leave that unchecked.
When I click "Create repository", I get taken to my repo, with some instructions that explain how to get code here. I usually use the "push existing repository from the command line" section when I work in a command prompt, but we'll do this in SourceTree. The URL we need is at the top.
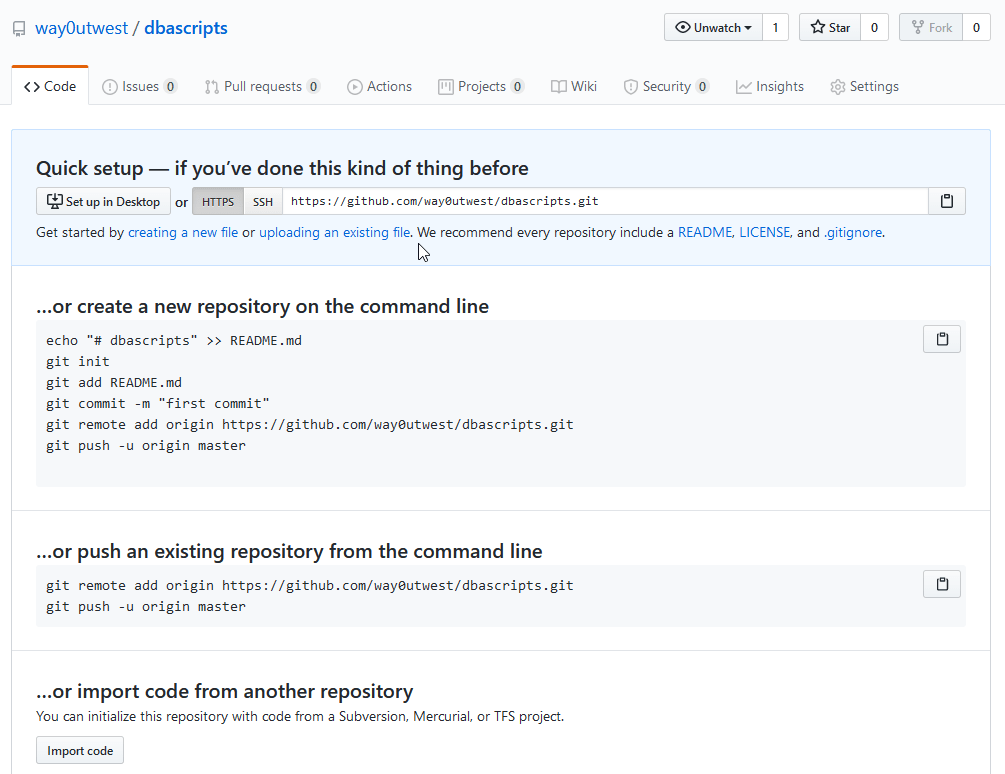
Convention is that the main remote name is "origin", so I'll use that, but you can call this something else. This isn't the branch, but rather a designation that tells you where the remote is. You could call this GitHub if you want. I enter the URL, and the form detects this is GitHub. At the bottom, I enter my username.
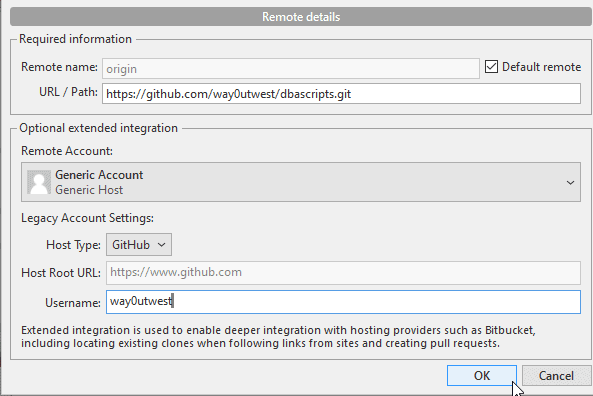
When I click OK, I see my remote. I select it and click OK.
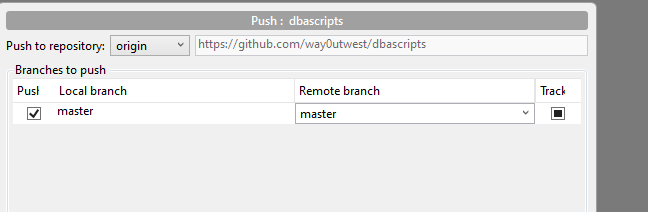
Now the test. Can I send code there? I'll click "Push" in the menu bar.
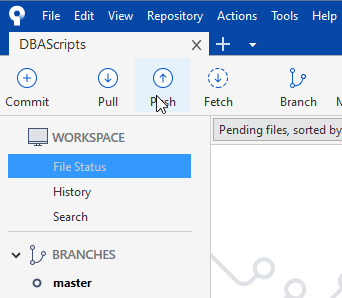
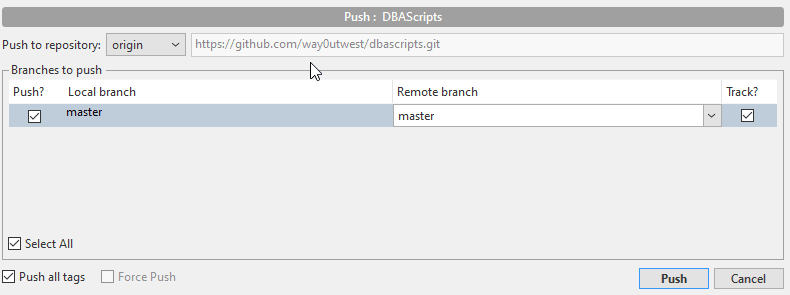
This is the first time I've done this, so I see some configuration items. I clicked the "Push" checkbox next to the master branch, which automatically tracked this with the master branch on the remote. We'll cover branches in a alter article, but for now, we want these to match. The "Track?" checkbox is selected, and you want to leave this. The setting here will link the local copy with the remote copy (on this branch), so that changes flow back and forth. This also ensures you can use git push and pull without arguments.
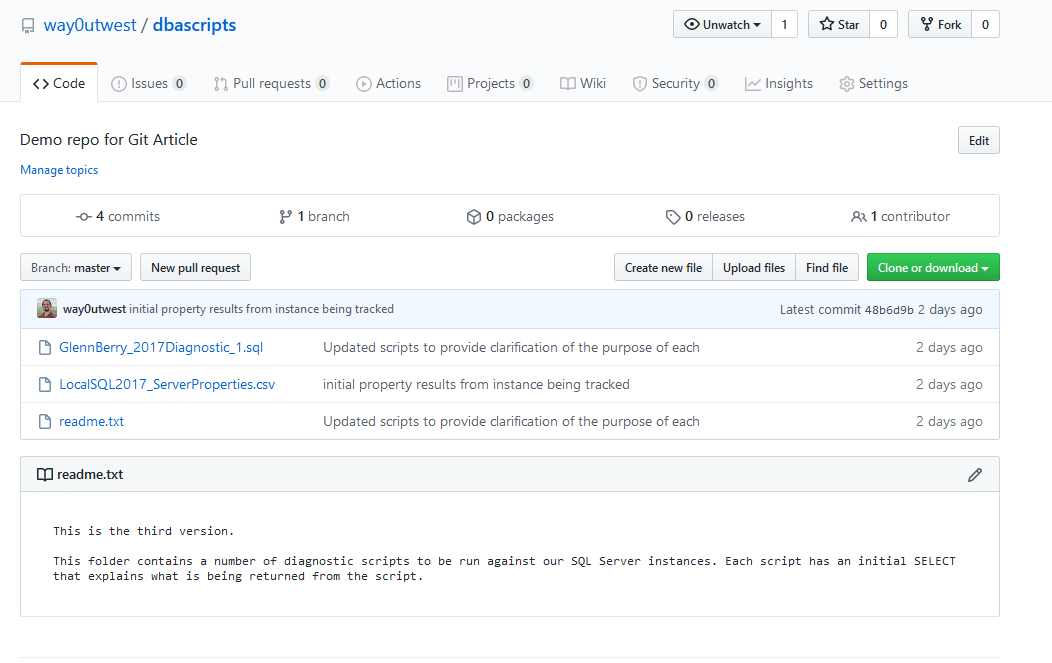
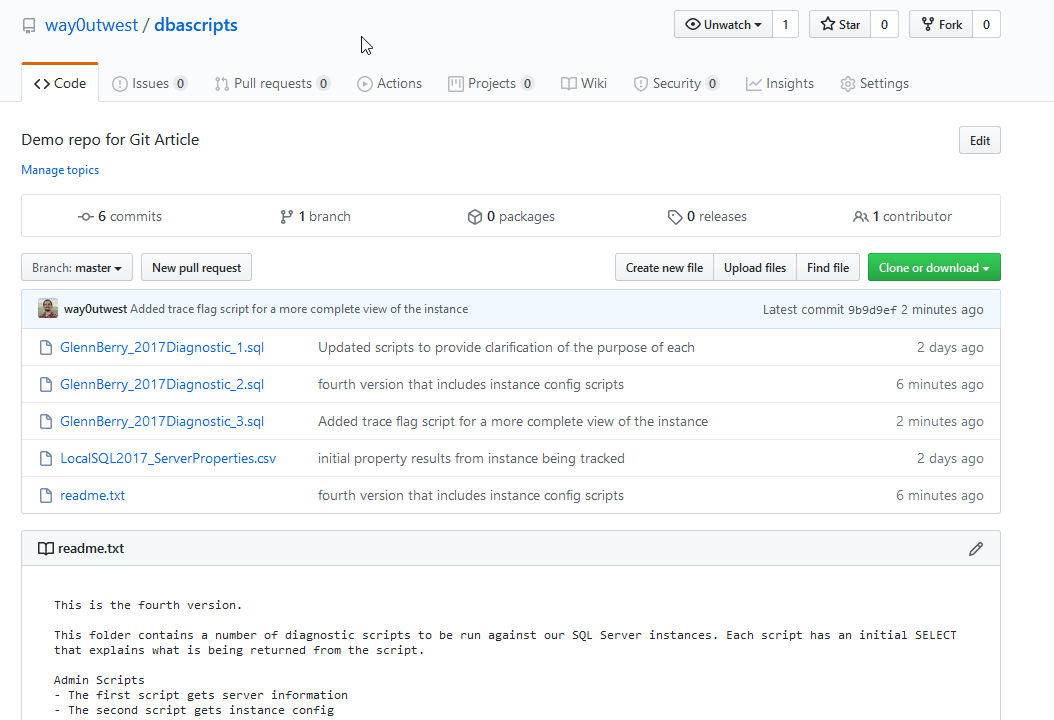
Once I've done this, I click "Push" and the code moves. If I refresh the page on GitHub, I see all my code. The readme.txt at the bottom shows a preview of the readme.txt file. Readme files are expected, so this is shown.
That's the basics of getting this code set up. Now I can exchange my code with the remote repository. This gives me a backup, but more importantly, this also allows other users to get my code. Let's start by making some changes and moving them up to GitHub and then share these files with another user.
Making Changes
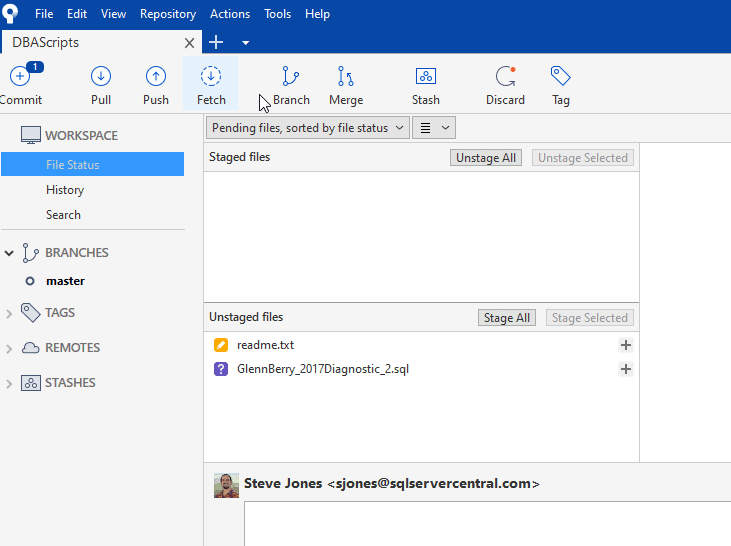
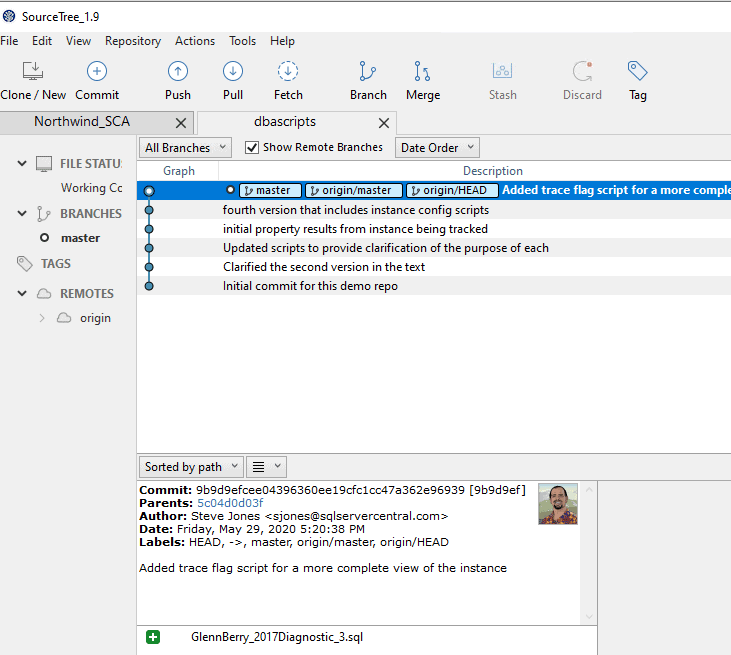
In the first article, we saw that we can make changes and commit them. Let's repeat that process. I'm going to edit the readme.txt file and then add another file. In this case, I'll add another script from Glenn. Once I do this, I see this in SourceTree.
I'll stage and commit these files. At this point, my local repo has these 4 files
- readme.txt
- GlennBerry_2017Diagnostic_1.sql
- GlennBerry_2017Diagnostic_2.sql
- LocalSQL2017_ServerProperties.csv
After I do that, SourceTree annotates a couple items to let me know that my system has commits that aren't in the remote. In this case, I have one commit that hasn't been "push"ed to my remote (GitHub). You want top pay attention to these as your changes that haven't been shared mean other users might not have the latest code.
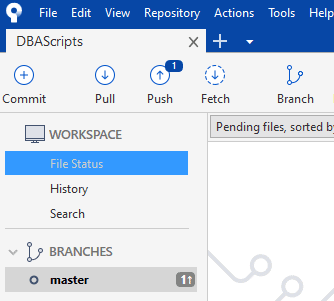
Before I push these, I'm going to make one more change, so we can see that multiple commits stack up. These are changesets, sets of code that have been changed. You may not want to push on every commit, or you may want to, but just be aware that you should be looking periodically to see if there are changes.
Once I add a new file and commit it (now 5 files local), I see this.
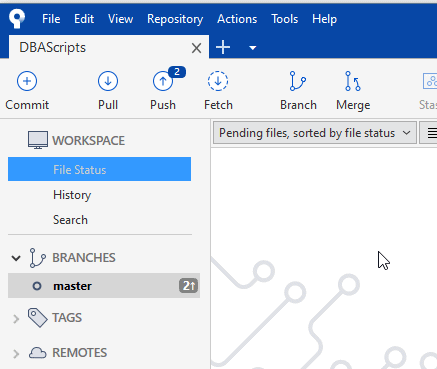
Note that both the "Push" button and the branch (master) show that 2 commits have been saved locally. Let's now click "Push". I confirm the push and let if complete. Now if I go to GitHub and refresh the repository, I see all my changes.
Downloading a Repo
One of the things we want to do is share this code. I often share code with myself in this manner, with things like SQL Prompt snippets. However, I want to show someone else getting this code here, so I've signed up in GitHub as another user. I don't need to do this to download code, but I will need this to share changes. I suggest you experiment with a friend or colleague and have them sign up as well.
I have a second machine, and I'll browse to the repo. I can search for it, copy it from an email, or type it in. In my case, the repo is under my way0utwest account. I'll browse to it (it's a public repo) from my SteveJonesdkr account (with a poor profile icon in the upper right).
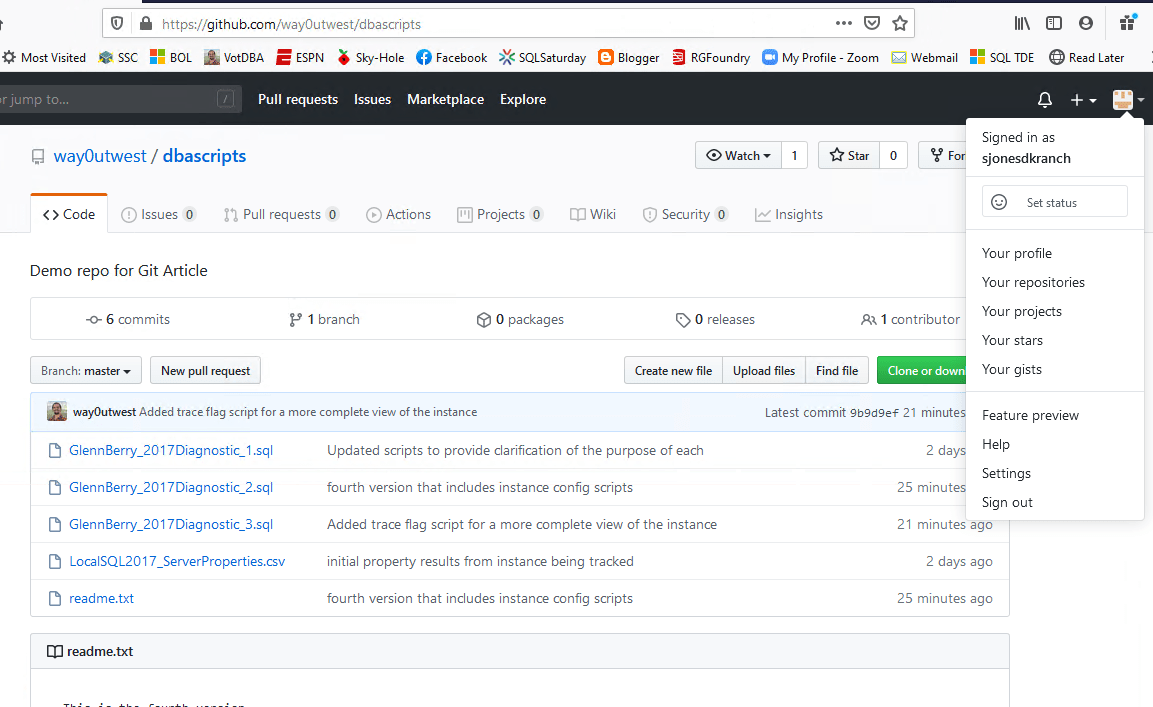
This looks the same, but this is a different account. I can't edit any of these files. If you look in the image above, you can see that there is no pencil icon near the bottom of the screen, to the right side of the "readme.txt" file name. If you look a few images back, you will see one.
To download this repo, what I want to do is "clone" it. The git command would be "git clone <url>". If I click the green "Clone or download" button on the right, I see the URL I need. I can copy this, and then use a tool to download this. I have the older "SourceTree" on this machine, so I can use that.

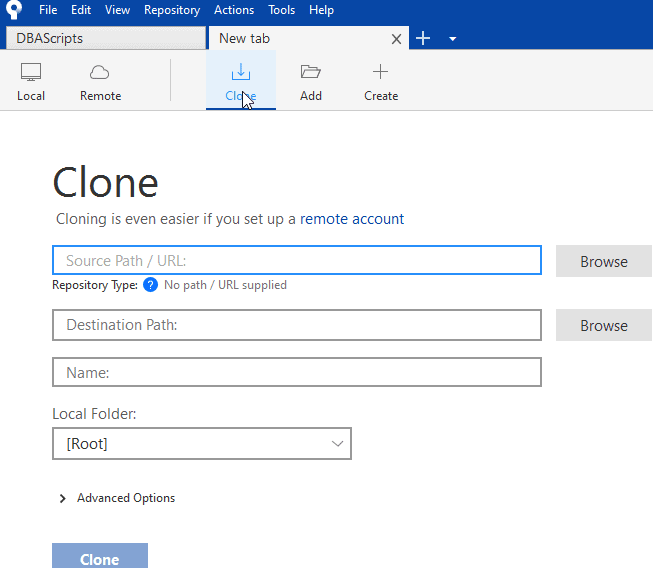
In the older SourceTree, there is a "Clone/New" button in the toolbar. In the newer one, I can click the plus (+) sign in the tab bar and get a place where I can clone a repo. I see this dialog in the newer SourceTree.
In the older one, this is what I have. Note I've pasted in the URL, and I have edited the location. By default this goes in My Documents on Windows, but I have a GitHub folder on the old machine.
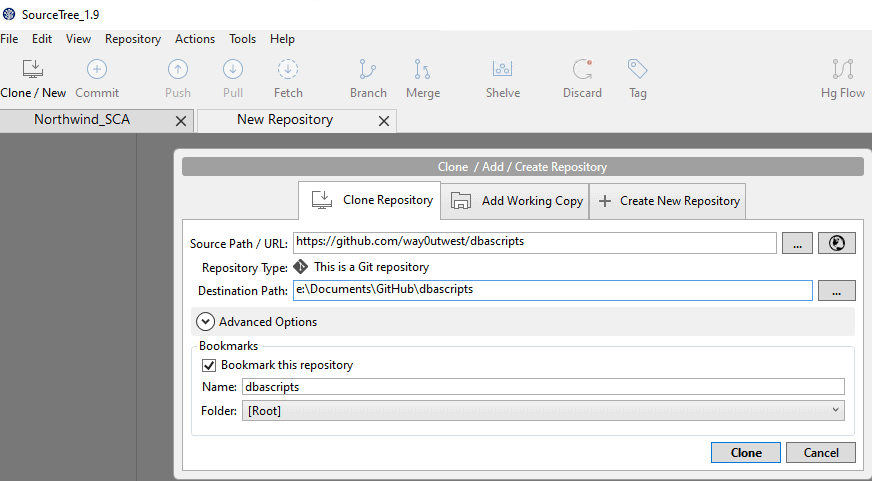
The "name" is for SourceTree. Use something that makes sense, but leaving this as the repository name is the best idea. When I click Clone, I'll get a new folder here. Note there is no dbascripts folder.
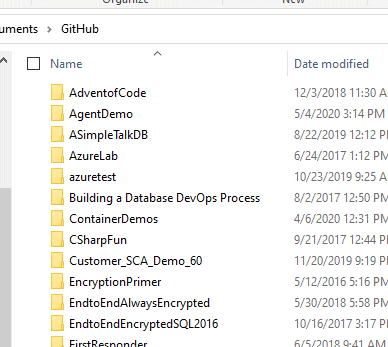
I click Clone and git makes a copy of the repository. I see a new folder:
And I see the repo in SourceTree.
I've now exchanged these files with another user. If I make changes (as way0utwest) and push them to GitHub, my other user (sjonesdkranch) can download them by clicking the "Pull" button. I'll leave that as an exercise, but I encourage you to do this with a friend.
For now, this is a read only set of files for your friend, but we will fix that next.
Granting Access in GitHub
By default, anyone can read your public repo, but they can't contribute back. That might not be the default if you use a repo set up in your organization, but you should check. This section will configure things for GitHub, but the idea is the same for other git services. The actual steps might vary, but I'm sure you will get the idea of how this works.
When I am in my repo, I can click "Settings" on the right side and get a list of things that apply to this repo. This is similar to looking at the settings for any type of application.
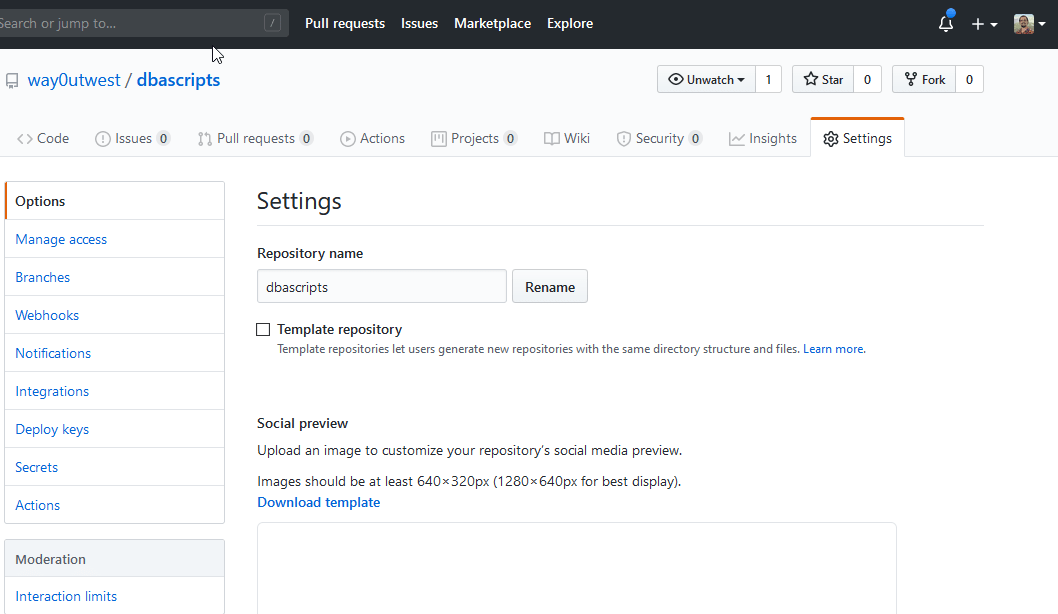
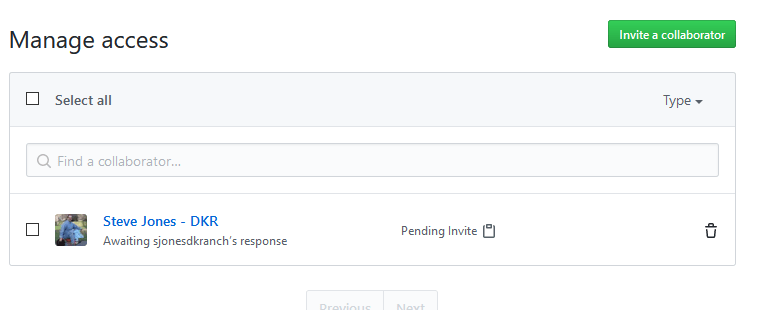
The second item on the left is "Manage Access". Let's click that and we will see our access controls.
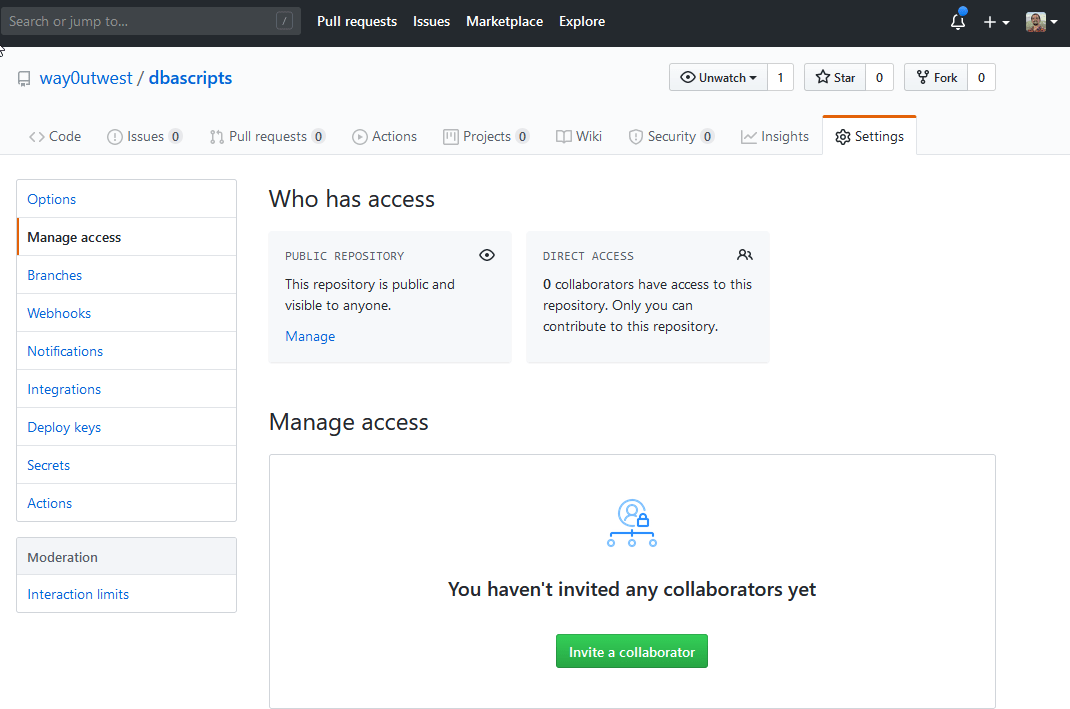
I see this is a public repo, which means anyone can read it. This is what allowed my other account to download the repo. However, someone needs to be a collaborator to send back changes. I'll click the green button and then search for the other user in the dialog.
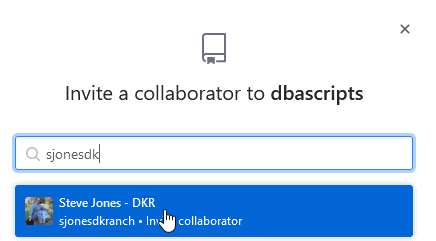
I'll select the user, and then I see them in the access panel. Note the invitation is pending, and the other user needs to accept it.
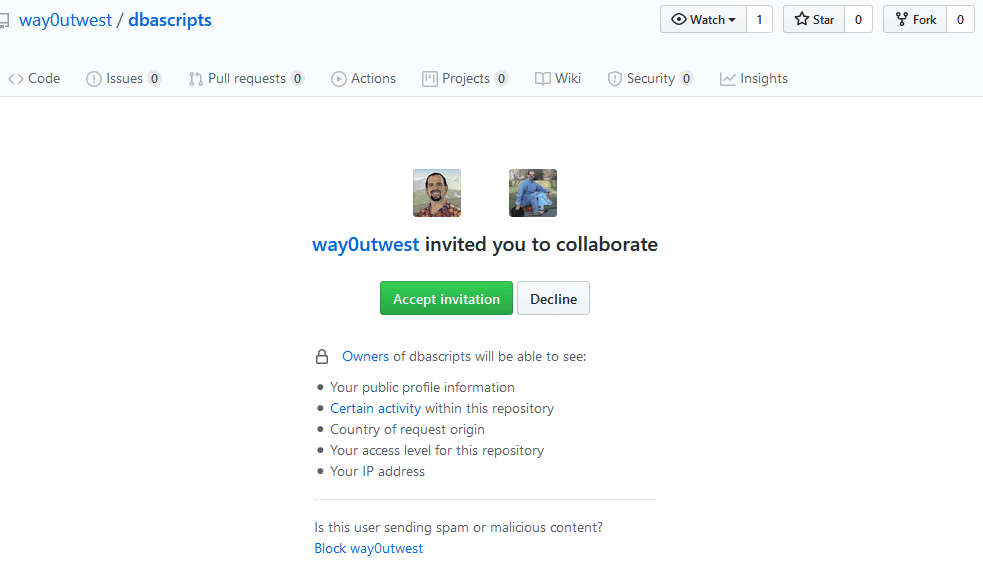
If my friend (my other account) goes to email, they'll see the invitation. Once you click it, you get the invitation notice. Click "Accept" to get access. Note that this invitation only is valid for a period of time, so when you do this, make sure you let your friends know they need to accept this.
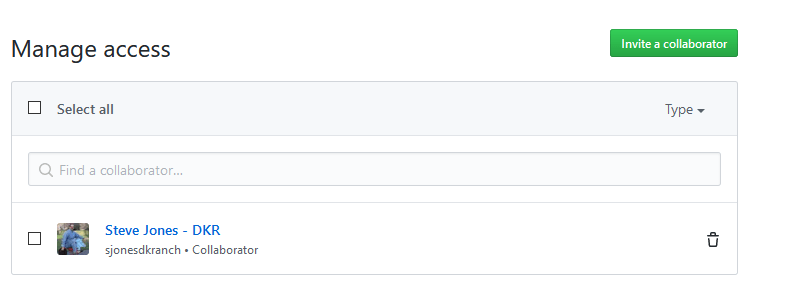
Once I do this, the repo just looks normal. On the owner account, they will see the friend as a collaborator.
Now, let's test this. I'll edit the readme.txt file as the other user. This is on the second machine I have (or your friend's machine). I will add a note about the third script and then commit this locally. When I do this, I get the notification of a unsynced change and I'll press "Push". When I do this, I see the confirm for pushing.
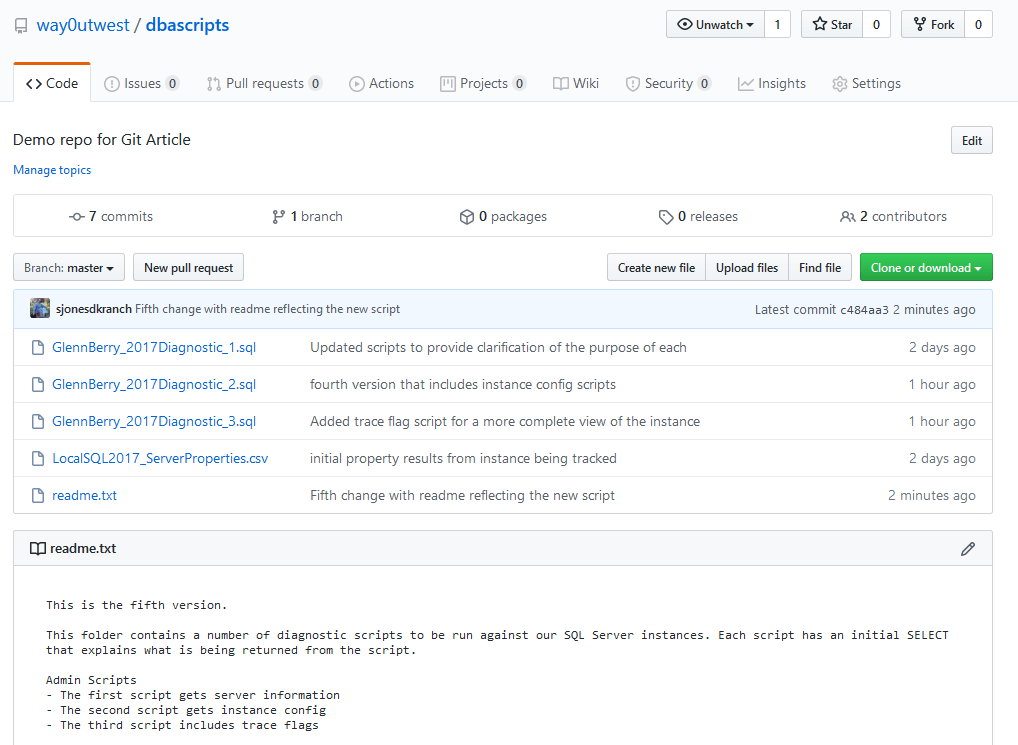
Now my friend has made a change. If I go back to the repo as myself (way0utwest), on the code tab, I'll see the image below. A couple things to note. First, the readme.txt was updated just now (2 minutes ag0) and below this I see the new text. In the middle of the screen, there's a light blue background bar, which notes that "sjonesdkranch" had the last commit. I see the commit message and the hash on the far right.
At this point we have a way to exchange code back and forth. As long as only one of us makes changes and the other syncs those changes before making our own change, this works well. This isn't how things work in the real world, so we'll start to explore how we can avoid collisions in our work in the next article.
Exercises
A few things that you might want to try here and then explore in the history.
- Make another change and push it. Have your friend pull the change.
- Have your friend add new files/folders, commit and push them. You pull them down.
- Each of you add a different folder (different names). Each add a file and push and pull. What are the results?
Summary
We learned how to connect our repository to GitHub and copy our files up to the site. We then learned how another user can download those same files and we can share changes easily among ourselves. This process is the same with any remote git repository, such as BitBucket, Fog Creek Kiln, Azure DevOps, or even a server in your organization.
While this might seem very similar to using a file sharing service, such as Dropbox, there are advantages to using Git. Many file sharing services have versioning, but you have no control over which versions are saved (all are). You lose the metadata of knowing who changed what inside of a file, and many of these services don't handle conflicts well. We'll look at conflicts and merges in another article.
While DropBox or other file sharing services do work well, they aren't necessarily the best choice for code code. I would encourage you to experiment with Git and try using it to exchange files with your colleague and get comfortable with non-colliding changes. In the next article, we'll discuss a better workflow and start to see the advantage that git has over file sharing.