

Azure Elastic jobs provide similar functionality in Azure as MS SQL Server Agent for MS SQL Server databases on premises. The only big problem I have noticed so far is a lack of graphic tools to manage Azure Elastic jobs. So, the most of operations with these jobs has to be performed using T-SQL, or power shell.
In order to deploy an Elastic jobs agent you will need an empty database at least tier S0. That database will contain all the jobs metadata. Also at the moment of writing this feature is in the preview mode so you will need to accept the preview terms.
Azure Elastic jobs Overview
There are 4 important elements which are required in order to use this feature: jobs, steps, target groups and credentials. The main entity is a job. A job may consist of a one or many job steps. The attributes of a job are: job name, description, state (enabled or disabled), scheduler time attributes.
Another important term is target. A target is a collection of Azure database servers or elastic pools. Particular databases can be excluded from a target if that is required.
A credential basically is a stored in the Elastic jobs agent database account and password which will be used to connect to a target.
A job step is actually the code which executes against a target. It glues all 3 entities together: a target, a credential, and a job. Basically it defines the code which will be run on a target using a specified credential accordingly with a scheduler defined by job. A job steps has ability to record results of execution of that step in a database table.
Create a Credential
It is the easiest part of the deploying Azure Elastic jobs. A credential is a stored in the jobs database account which will be used to connect to the target server or database. A credential can be created like this:
CREATE DATABASE SCOPED CREDENTIAL elastic_jobs WITH IDENTITY = 'AdminAccount',
SECRET = 'MySuperSecretAdminPassword';
In order to create a credential you will need to provide a credential name, a remote account name (login name on the remote side) and its password. The credential will be safely stored in the Azure Elastic jobs database and jobs will be able to execute some code remotely.
Create a Target
A target could be an elastic pool, a SQL Server, or an Azure database. Jobs operate with a target group not an individual target. That is why you will need to create a target group first. An example of target group is below:
EXEC jobs.sp_add_target_group 'MyTargetGroup';
When a target group is created you can add group members like this:
EXEC jobs.sp_add_target_group_member
'MyTargetGroup',
@target_type = 'SqlElasticPool',
@refresh_credential_name='elastic_jobs',
@server_name='MyServer.database.windows.net',
@elastic_pool_name='MyElasticPool';
In this example the target is a SQL Elastic Pool. You can also add a database server as a target, for example:
EXEC jobs.sp_add_target_group_member
'MyTargetGroup',
@target_type = 'SqlServer',
@refresh_credential_name='elastic_jobs',
@server_name='MyServerName.database.windows.net';
Or you can add an individual database in a target group like this:
EXEC [jobs].sp_add_target_group_member
@target_group_name = N'MyTargetGroup',
@target_type = N'SqlDatabase',
@server_name = N'MyServerName.database.windows.net',
@database_name =N'MyDatabaseName';
It is possible to combine different targets in one group. You even can create a target server but exclude some databases from that server like this:
EXEC [jobs].sp_add_target_group_member
@target_group_name = N'MyTargetGroup',
@membership_type = N'Exclude',
@target_type = N'SqlDatabase',
@server_name = N'MyServerName.database.windows.net',
@database_name =N'master';
In order to see all the existing target groups and their members you can use the following script:
select g.target_group_name, gm.membership_type, gm.target_type, gm.server_name, gm.database_name, gm.elastic_pool_name
from [jobs].target_groups g
left outer join [jobs].target_group_members gm
on g.target_group_id = gm.target_group_id;
Create a job
For example the code below will create a job which will run once a day:
DECLARE @JobName NVARCHAR(128) = N'My daily job';
DECLARE @JobDescription NVARCHAR(512) = N'This job will run daily starting at 3AM';
DECLARE @Enabled BIT = 1;
DECLARE @ScheduleIntercalType NVARCHAR(50) = N'Days';
DECLARE @ScheduleIntervalCount INT = 1;
DECLARE @ScheduleStart DATETIME2 = N'20190101 3:00';


EXEC jobs.sp_add_job @job_name = @JobName,
@description = @JobDescription,
@enabled = @Enabled,
@schedule_interval_type = @ScheduleIntercalType,
@schedule_interval_count = @ScheduleIntervalCount,
@schedule_start_time = @ScheduleStart;
Also we would need to create a job step or several job steps per each job. A job step will contain a code which will be executed against a target group. For example this job step will run sp_updatestats against databases in MyTargetGroup when the job 'My daily job' executes:
DECLARE @JobName NVARCHAR(128) = N'My daily job';
DECLARE @JobStepName NVARCHAR(128) = N'Update statistics';
DECLARE @Command NVARCHAR(MAX) = N'exec sp_updatestats;';
DECLARE @CredentialName NVARCHAR(128) = N'elastic_jobs';
DECLARE @TargetGroupName NVARCHAR(128) = N'MyTargetGroup';
DECLARE @retryAttempts INT = 0;


EXEC jobs.sp_add_jobstep @job_name = @JobName,
@step_name = @JobStepName,
@command = @Command,
@credential_name = @CredentialName,
@target_group_name = @TargetGroupName,
@retry_attempts = @retryAttempts;
The step will use the 'elastic_jobs' credential in order to connect to the target databases, and it will not retry the sp_updatestats if the first execution failed. The detailed up to date documentation of all parameters for Elastic Jobs is published in the official Microsoft web site. Also you can use Power Shell to work with Elastic Jobs.
You can change jobs and job steps using the stored procedures jobs.sp_update_jobstep and [jobs].sp_update_job. For example this code will change scheduler for the 'My daily job':
exec [jobs].sp_update_job @job_name = N'My daily job', @schedule_start_time = '20190401 19:00';
Scheduling a Job and Monitoring It
You can start a job manually like this:
EXEC jobs.sp_start_job @job_name = N'My daily job';
In order to stop a job you will need to have a job_execution_id which you can get using the following query:
SELECT job_execution_id, job_name, step_name, lifecycle, start_time, target_server_name, target_database_name
FROM jobs.job_executions
WHERE is_active = 1
ORDER BY start_time DESC;
The same query you can use to monitor all the currently running jobs. In order to stop the job uses the following script:
EXEC jobs.sp_stop_job '0BBDE512-263B-4EC0-B6B3-83C5A169FA96';
Note. Replace the '0BBDE512-263B-4EC0-B6B3-83C5A169FA96' with your job_execution_id
In order to monitor job failures you can use this T-SQL code:
SELECT job_execution_id, job_name, step_name, last_message, start_time, end_time, target_server_name, target_database_name
FROM jobs.job_executions
where lifecycle = 'Failed'
ORDER BY start_time DESC;
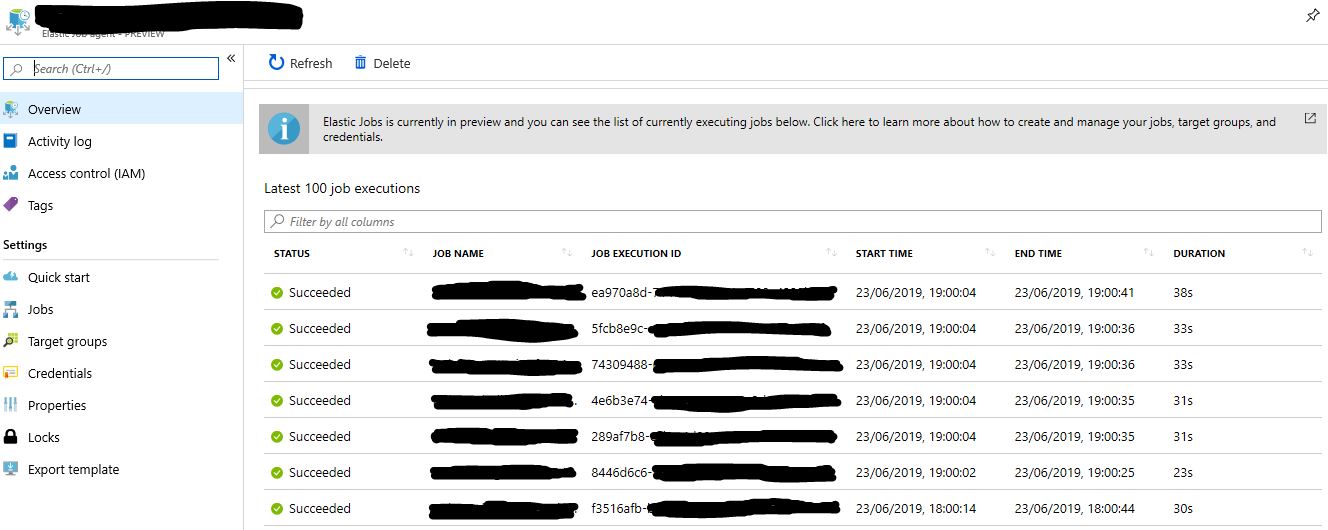
Also Azure portal has some basic Elastic jobs monitoring functionality:
Removing Jobs and Target Groups
In order to remove a job with all it's steps you can use the stored procedure [jobs].sp_delete_job, for example:
EXEC [jobs].sp_delete_job @job_name = 'My Daily job';
In order to remove an existing target group with all it's members the stored procedure [jobs].sp_delete_target_group @target_group_name can be used:
EXEC [jobs].sp_delete_target_group @target_group_name = 'MyTargetGroup';
Job History Cleanup
You can manually delete history for a particular job using the stored procedure [jobs].sp_purge_jobhistory. But that is not really required because Azure Elastic jobs are automatically purge all the history logs older than 45 days.
Conclusion
Azure Elastic jobs in Azure is a replacement for MS SQL Server Agent on premises but it is still lack of GUI tools to manage these jobs. Hopefully that will be solved in the future. At the moment you will need to use T-SQL or Power Shell to use this feature.

