

One of the more important things that I think we should be doing as software developers is maintaining our changes in some sort of version control system (VCS). This is important to protect code, allow us to undo problem changes by finding old code, and ensuring that all changes made by a team are captured in a central place.
This post continues my look at Azure Data Studio (ADS) with an examination of the version control features built into the product.
A Dedicated Pane
ADS is built on Visual Studio Code, which is a tool I use often for non-SQL work. Git support was built into VS Code, and it wasn't disabled in ADS. This is unlike SSMS, which is based on Visual Studio, but doesn't have a lot of the VS capabilities, including version control features. If we look at the ADS sidebar, there is a VCS icon, which looks like a git branch graph, two connected curved lines with circles at the ends. You can see it in the image below, the second from the bottom icon with the pointer hovering over it.
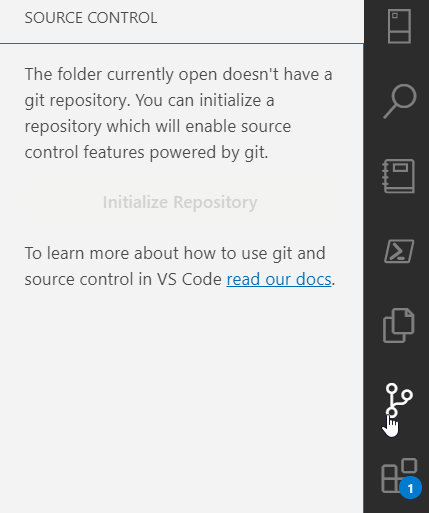
This is where I can work with any of the changes I've made to code and commit them to my git repository. This seems like an extra step to many DBAs, but it really isn't. Git provides capabilities to help you track and audit script changes over time. I've written a getting started article you can read to understand a bit more about Git.
Opening a Repository
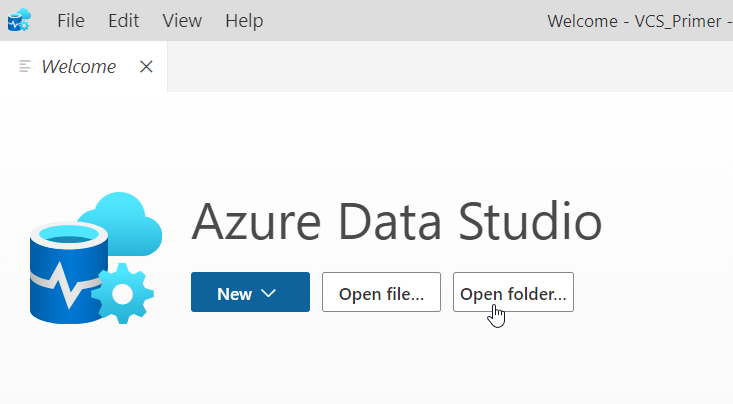
The way to open a repository to work with it is to use the File | Open Folder link or use the button on the main screen that appears when you start ADS. This is shown below:
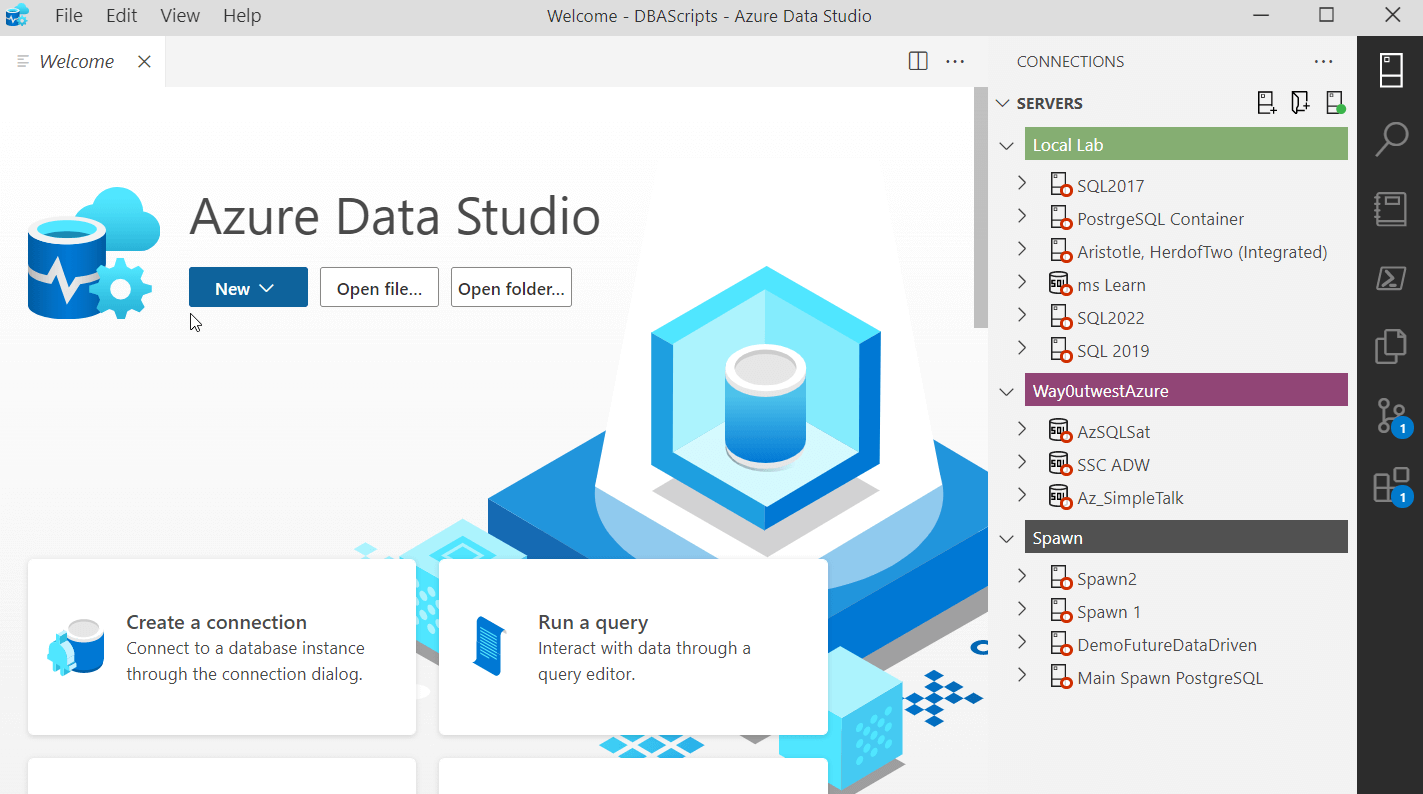
I'll click the button and then select a folder that contains a Git repository with a number of scripts. When I click Open, the shell reloads this folder and the server connections blade opens. I still see the main screen, but as the screen show below shows, I have an uncommitted change in my Git repository.
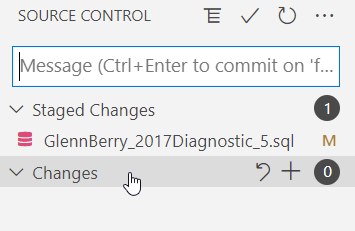
If I click the source control icon in the right menu, I'll get that blade open and I can see the change that's uncommitted. In this case, I see that the file, GlennBerry_2017Diagnostic_5.sql, is in the staged status.
I can click the file name and I get a diff view in the main code space that shows me the changes. As you can see below,. I added and ORDER BY to this script (using pseudo code).
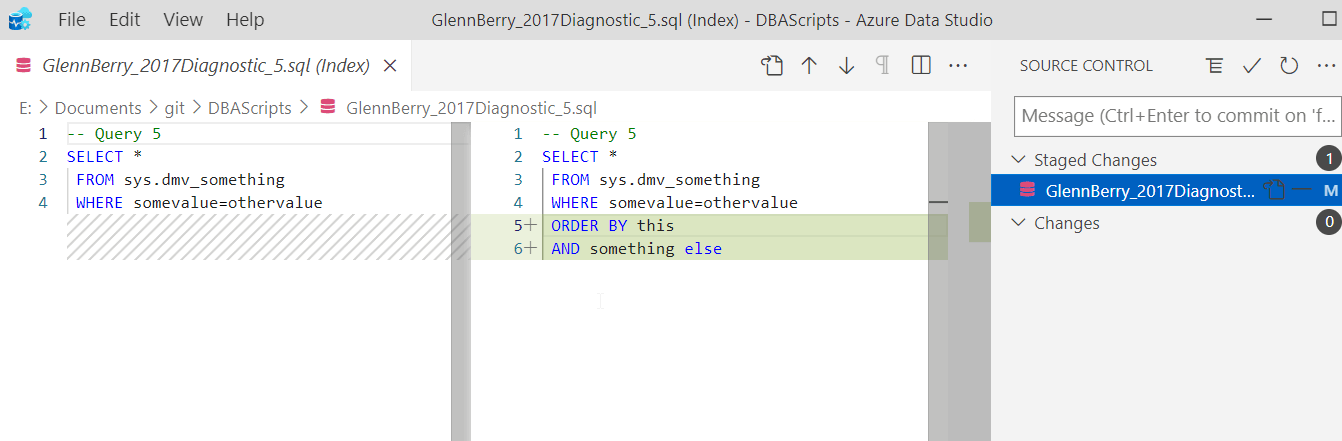
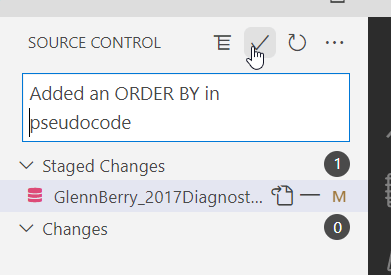
I'll enter a commit message in the upper right edit box and click the check mark above this to commit the change.
I haven't explained much, but this is the flow of changing code and then including those change in your repository. In this case, when I started this article, I was in the middle of explaining some changes to another person and needed to save those changes.
Note: This isn't a good flow, as the code isn't really ready to go. However, I find code committed all the time that a developer hasn't tested well, so this mimics what you'll find in the real world. It's entirely possible that you also open a repo (repository) and realize you hadn't committed a change made in the past.
The Version Control Flow
The idea is that we edit code, test it (hopefully), fix our bug(s), and then save a version that others in our team can retrieve and use. ADS helps us do this easily in a way that SSMS does not. We get an integrated Git client to work with along with a SQL editor.
Our in ADS is to:
- Open a Git repository in ADS
- Edit code
- Connect to a SQL Server and execute/test this code
- Save the file on the local file system
- Commit the local file to Git
- Push our code to a remote repo
That's what we will do in the rest of this article. I'll show how do navigate ADS and save versions of code.
The Git Client in ADS
Git is built into ADS, which means that we can stage, unstage, commit, push, pull, branch, and fetch code with Git. Likely there's more, but those are the big things. We'll get started with a little orientation. So far we've seen that there is a Source Control blade in the menu (left, right, wherever you've placed it). This is where you can see the changes that you've made to files.
There are a few other important places to look for other information, so here are a few areas that you should examine.
Branches
Branching is important for distributed work and most of the time a user will create a new branch for each piece of work. You can find the branch name in the lower left corner of ADS in the status bar. In this case, I've named the branch "feature\demotest".
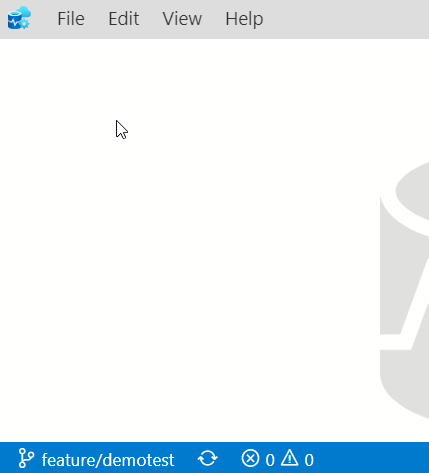
This is the same information I'd see if I ran a git status at the CLI.

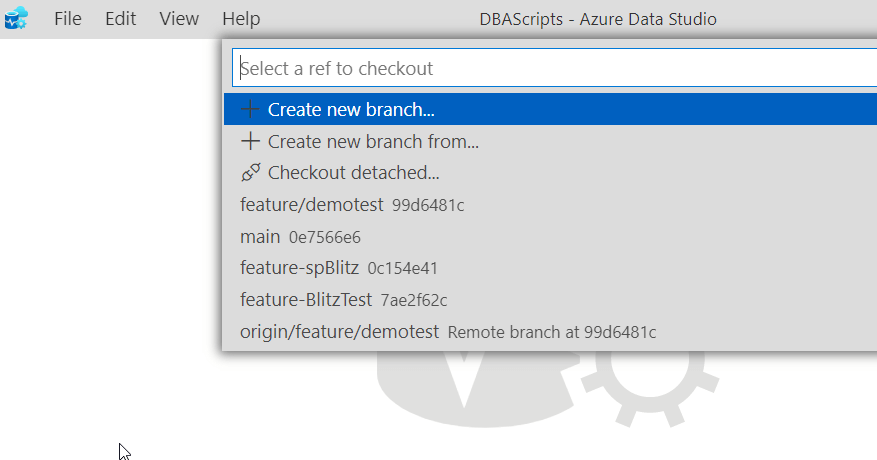
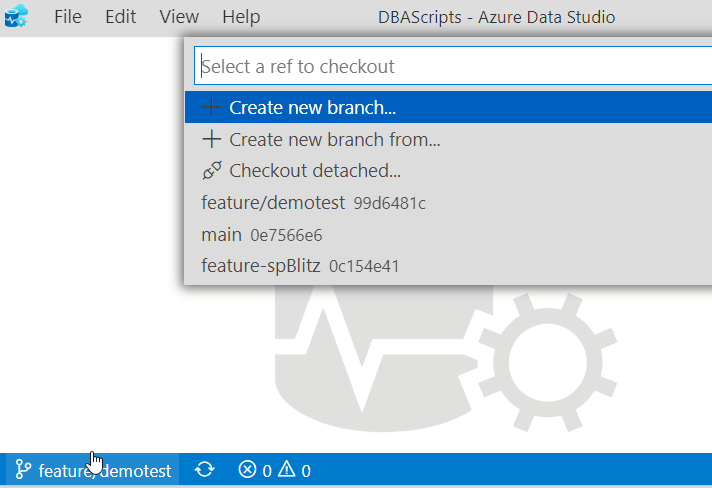
If I click the branch name in ADS, I get a list of branches in the command palette. Here you can see I have 4 local branches and one on the remote (the origin\feature/demotest).
Note: If I have a smaller ADS window, I see fewer branches.
If I have a larger one I see more.
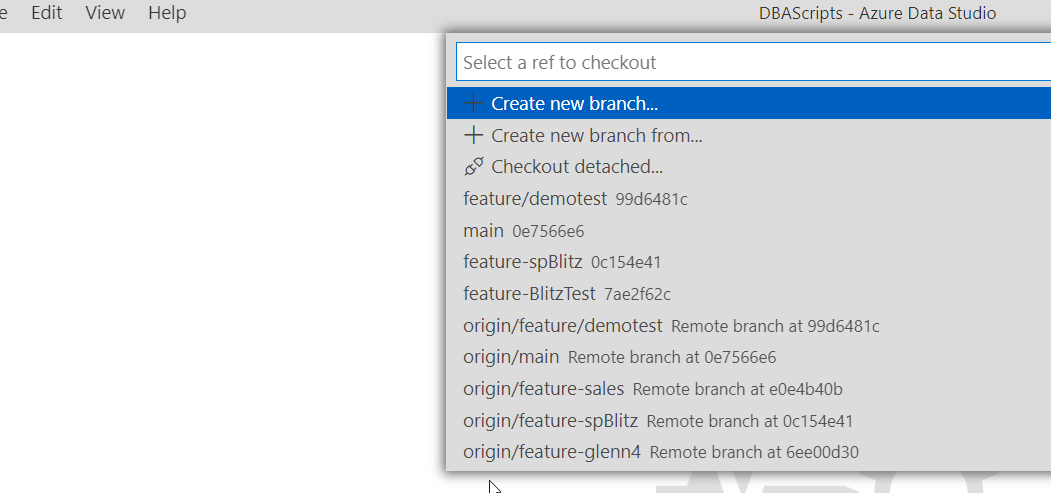
This is something to be aware of. You can always scroll up or down to see all the branches, but note that the size of your ADS window (and resolution) will limit what the pop up shows.
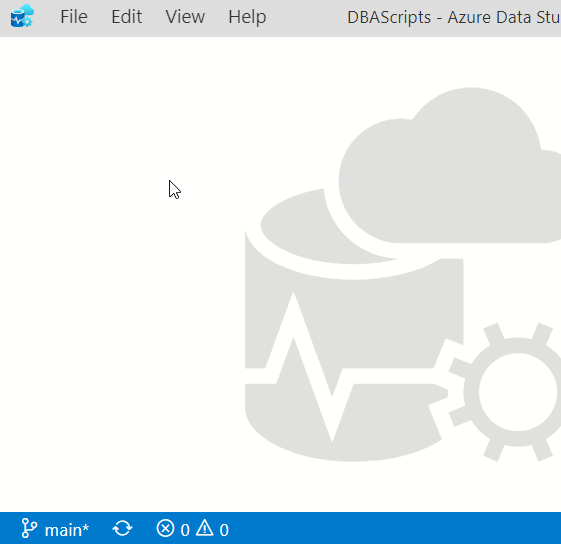
To change to a new branch, just click it. If I click the "main" branch, I see this in ADS.
I also have the ability to create a new branch (first selection above in the pop up) from the current branch committed state, or from another branch. Handy when you might need to check something from mother branches.
Pushing and Pulling Code
The main advantage of a VCS is that we can more easily share code with others. We do this by pushing and pulling from a remote repo. We typically link a local branch to a remote branch, and ADS make it easy to exchange code. I'll make a remote change and then look at ADS. When I do this, ADS will refresh (after a moment) and I see there is a remote change in the status bar. An up arrow and a down arrow appear when the repos are out of sync. There is a number next to each arrow that represents the number of commits that are different either on the remote or the local branch.
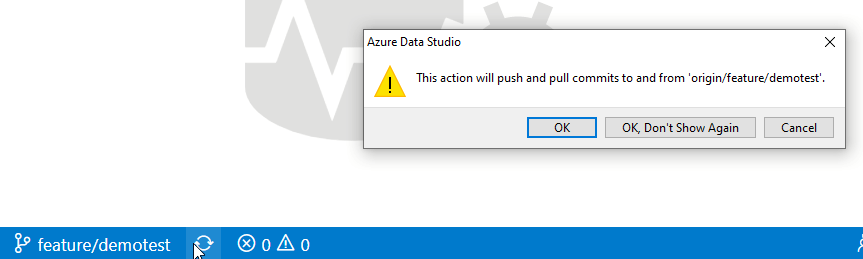
In this case, there is 1 change on a remote branch (down arrow), which means I need to "pull" that change. There are 0 changes on my local branch, so I have nothing to "push". The circle made up of two arrows is the sync button. If I click that, I will see a note (by default) that tells me what will happen. In this case, I see that I will push and pull.
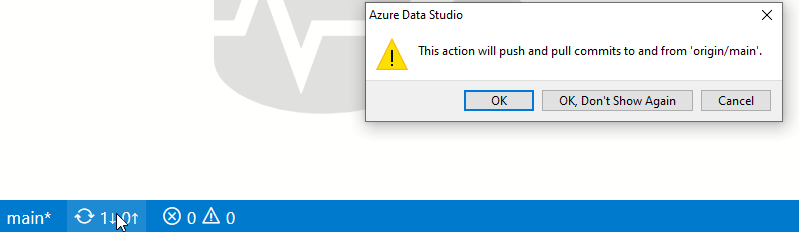
I can click OK, or the "OK, Don't Show Again" buttons, to get the changes moved. I can also cancel this operation.
If I switch branches, I'll see that the message changes slightly. Note that in the image below, I am pushing and pulling changes from the feature/demotest branch. There also are no arrows, as this branch is in sync.
I might still click this if I suspect someone else made changes to a branch without me being aware of it (or ADS hasn't refreshed).
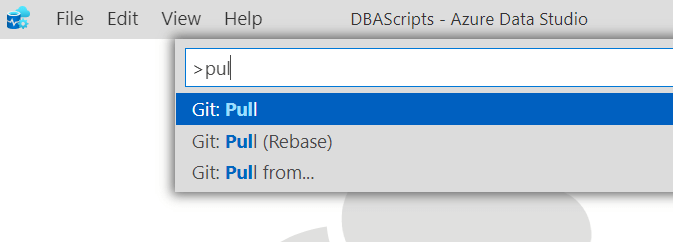
If I want to push or pull separately, I need to use the command palette, which I can open with a CTRL+Shift+P. This is a list of all commands in ADS, and if I start typing, the list will filter to my commands. In this case, I can type "pul" and I see the Git Pull commands.
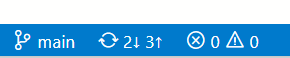
When I select this, the circle arrows in the status bar spin while a "git pull" is executed. Then if everything is in sync, the status bar resets to show just the branch and circular arrows. If there were commits to send to the remote, then I would still see those. Let's see that. I'll make local and remote changes, so that I see different numbers. In this case, I see 2 commits at the origin and 3 commits locally that need to move.
Now I want to pull the changes, so I will use the command palette and select "Git Pull" again. When I do that, the circle will spin and then I see the image below.

I could do the reverse as well, push and then pull, but the recommended flow is get changes from the remote, resolve conflicts, and then push.
Staging Changes
Often we may edit multiple scripts and need to save them, but we may not want all the changes in the same commit. For example, I might make a couple changes, then get interrupted and asked to fix something else and change that. I will end up with many scripts saved to disk and uncommitted. Git gives us the ability to stage some changes and not others, and then only commit the staged changes.
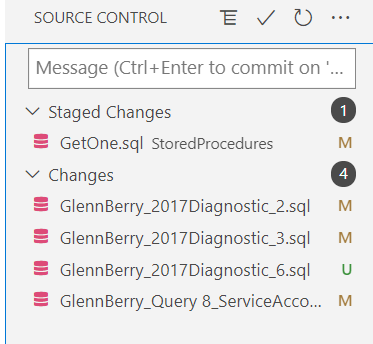
Here is an example of how I do this in ADS. I've made 5 changes, which we can see in the source control blade.
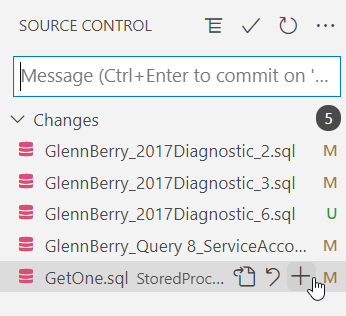
I put my cursor over one file, and there are three icons that appear. The + is for staging changes. If I pick this, my change moves into a separate area:
If I were to press commit, only the GetOne.sql file would be committed. The others would not. I'll add one more file and then enter a commit message.
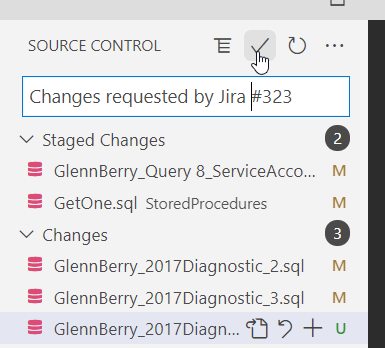
The checkbox under my cursor in the image above is how I commit these files to Git. If I click this, those files disappear from the blade as they are not captured by Git. The three other changes are still unstaged, and those appear as items to be committed.
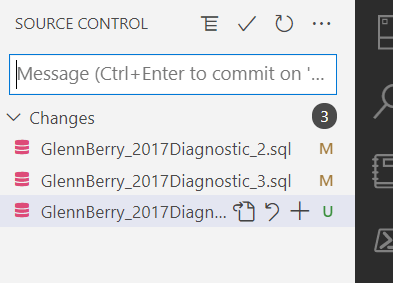
Note that in the image above, the top two files have been modified, as designated by the "M" to the right of the file name. The bottom file is untracked, meaning Git is unaware of this file. I need to stage and commit this for Git to track changes to this file.
Other Commands
There are plenty of other Git commands available that I haven't discussed. This isn't a complete tutorial on Git. For that, check the Git documentation or a tutorial on the software. However, I do want to show you how to get to some other commands.
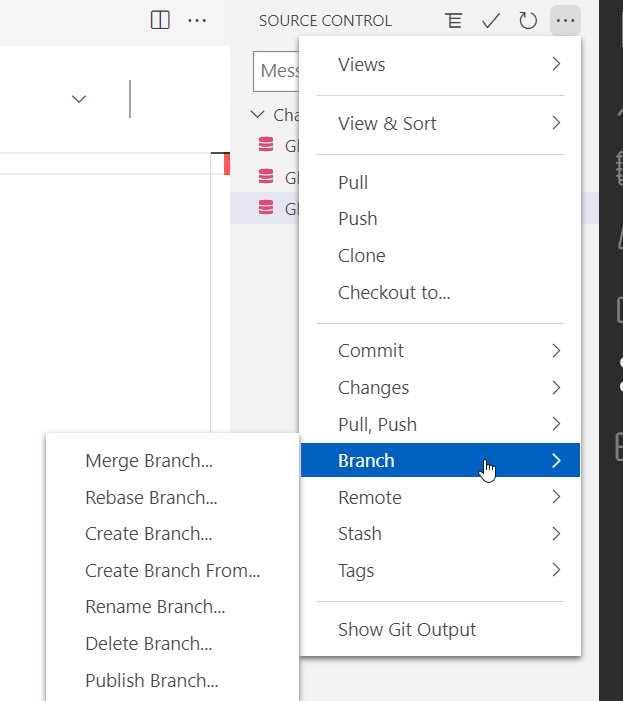
First, there is a menu of other Git commands from the Source Control blade. If you click the three dots at the top, you will see a menu appear. This menu includes a number of sections, such a push, pull, branch, remote, and more.
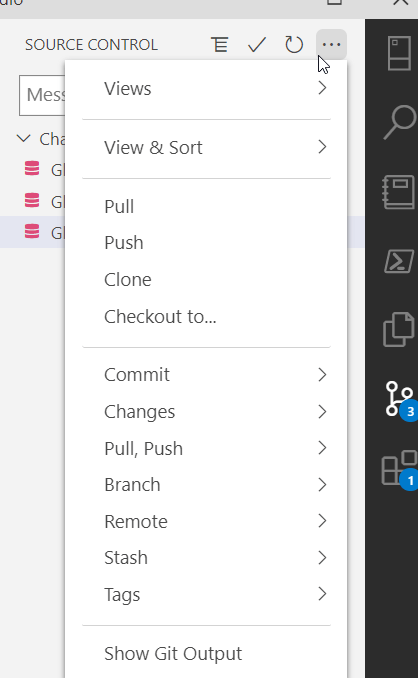
You can select any of these to run the command, or see a sub menu. For example, here is the branch submenu. From here, you can merge, rebase, etc. as needed.
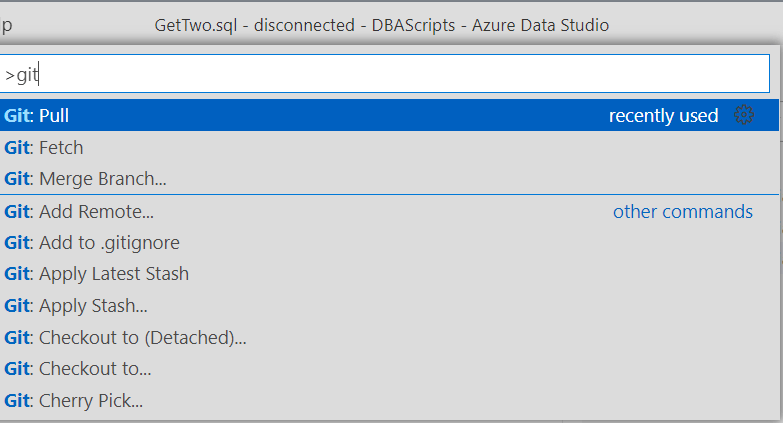
There also are many Git commands in the command palette. If you click CTRL+Shift+P, you will see the command box. Typing "git" brings up a number of commands. You can scroll down to see them all.
Finally, you can see all the commands VSCode is running in the Git Output. This is part of the terminal, and if you click the last item in the Git menu above, you will see this. Here is the latest Git output from ADS.
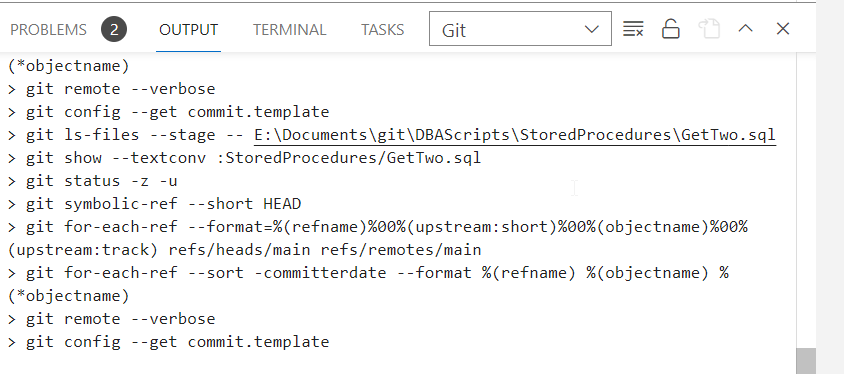
If you are wondering what happens with various commands in VS Code, you can select them in the menu and then see the output here. If you are curious, you can also run some of these in a command prompt or the terminal from your git repository and experiment with the commands.
Summary
For most of us, we will use ADS with Git to save changes to code and push/pull those changes to/from a central respository where others can see them. The main commands for us are branching to work separately from others, committing code, and then syncing (push/pull) those changes. I recommend you practice those actions in your own repository and get comfortable with them. Then you will be ready when others want you to save code in Git.
There are plenty of other command that you might find useful, and I recommend you slowly experiment with the terminal and learn how various git options affect your code. Using Git is an important skill for modern software developers, which includes DBAs and sysadmins.