

This is the third article in a series on the basics of using Git. The other articles in the series are:
- Basic Git for DBAs: Getting Started with Git
- Basic Git for DBAs: Sharing Files Through GitHub
- Basic Git for DBAs: the Basics of Branches
- Basic Git for DBAs: Making Changes in GitHub
- Basic Git for DBAs: Merging Code Between Branches
- Basic Git for DBAs: What's a Pull Request?
- Basic Git for DBAs: Managing PowerShell Scripts
- Basic Git for DBAs: Ignoring Files and Customizing Your Environment
In the first few articles, we set up a repository and shared files through GitHub. In this article, we will explain what a branch is, how to create one, and how to get a new one from GitHub.
What is a Branch?
Branch comes from the idea of splitting from the main section. A main tree trunk splits into branches. A stream might branch off a river. The idea is that we start from some known thing and make a copy of some sort. That's what a branch is: a copy. Each time we create a branch, we are making a copy of the existing code as it is at that point in time. Each branch is independent, and we can modify each one separately.
In version control, we typically show some flow of code into a copy as a branch. The starting point for the branch has a line and arrow from it that indicates the point in time when the branch occurs. Here's an image of multiple branches related together, from https://lucamezzalira.com/2014/03/10/git-flow-vs-github-flow/
In this image we have a master branch at the top. The "hotfixes" branch was created from the first point of the master branch. The "develop" branch was also created here.
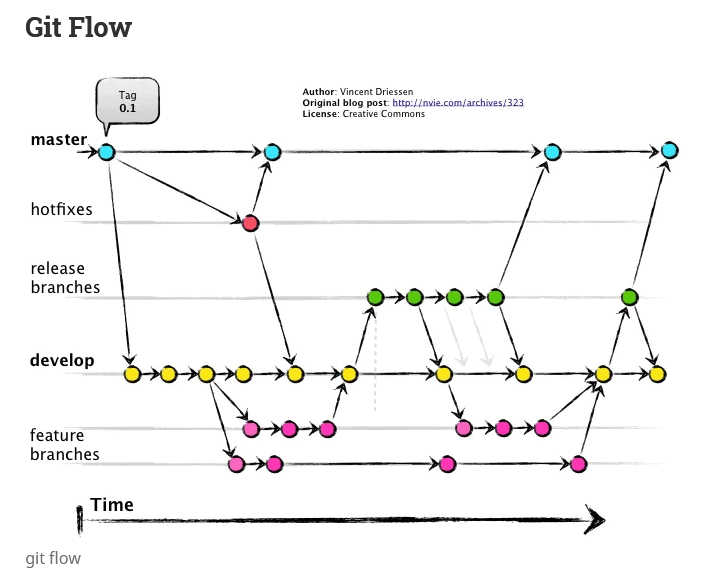
This is a complex set of branches and relationships among them. We won't worry about duplicating this. Instead, in the examples below, we will create three additional branches and show how each is a completely separate copy of the code.
One last note. There always is a branch. When we created the repo, we start with the master branch. We can add more, but there is always at least one branch in a repository.
Creating a Branch
The "git branch" command is used to make a copy of our code. We can use this in a few ways. First, with the repo we created in the existing, we can see our branches by typing just this command, as shown here:
Steve@ARISTOTLE E:\Documents\git\DBAScripts
$ git branch
* main
A couple notes here. First, I've changed from the default "master" to "main" as described in this blog. Second, I'm going to show the text from the command line here as a starting point, rather than an image. I'll also include how this looks in SourceTree.
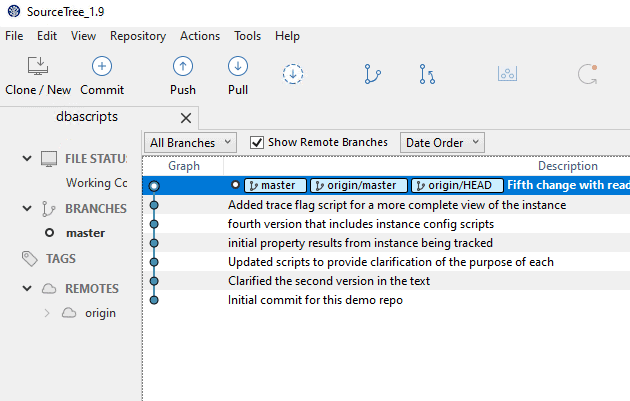
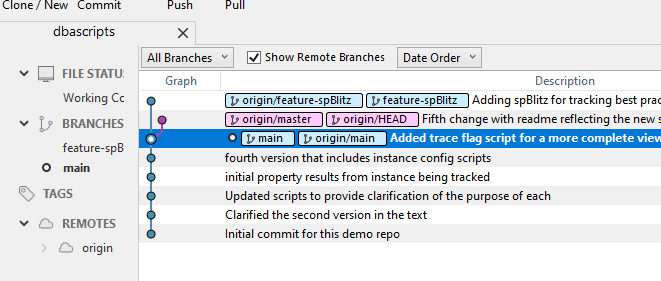
If I look at SourceTree, I see this:
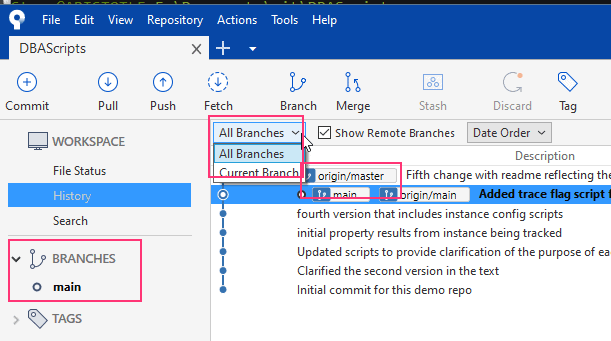
Branching is an integral and a very common practice when working with Git, hence the 3 places you see in the image above. I've outlined each in red and will discuss them.
The left side is the tab area, and I will see all my branches here. I can click one of them to select the branch. The drop down would also change the view to just one branch or all of them, and the box just about my commits shows me the remote branch on GitHub. Remember from the second article that my remote is set to the place I move code to and from. I see origin/master, which is the remote branch. My local copy is main, though I suspect that my name change hasn't propagated somehow through SourceTree. I also see the latest commit was on main and synced (pushed) to origin/main.
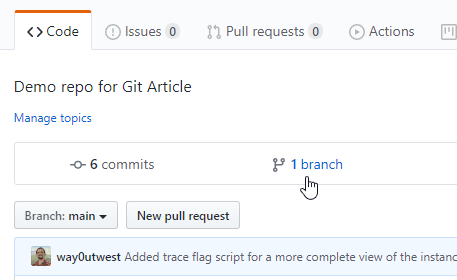
If I look at GitHub, in the Code tab, there is a "branches" item above my code listing. If I click this, I'll see the main branch.
I can click the "Branch" button in the toolbar or click the Respository -> Branch menu item. In either case, I get a dialog that lets me create a new branch. We usually name branches for some purpose. The idea is often that we don't keep these around for a long time, so we try to explain the purpose of the branch. In this case, I'm going to add some sp_Blitz code, so I'll name it for that.
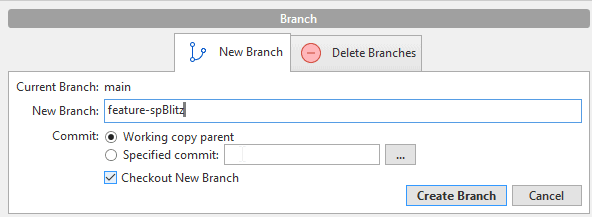
Notice that I have the radio button set to the working copy parent. This means I'm copying the current state of the main branch. I could pick any of the commits in this branch as a basis, starting off from a previous place in history. Why would I do that? Well, if I know there's a bug in the current main that wasn't there in the previous commit (fourth version), maybe I want to start there and fix code from that point. Typically, however, we do start with the current state of some other branch when we create a new branch.
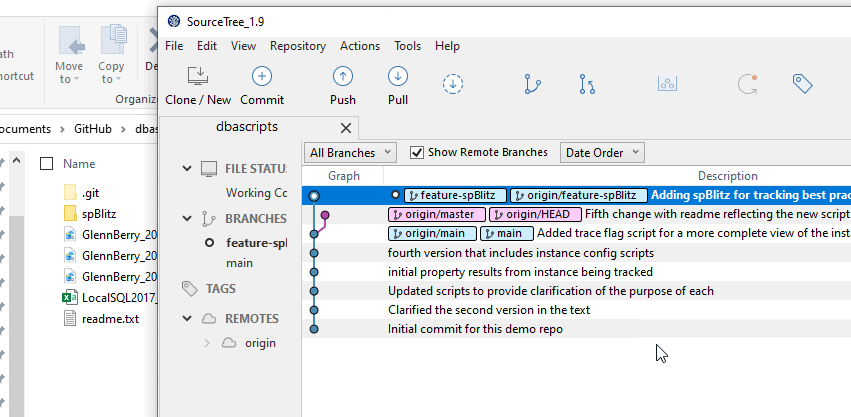
I also checked "Checkout New Branch", which switches me to this copy. Now I see this in SourceTree, with the feature-spBlitz code as the active copy.
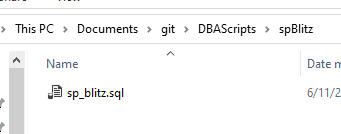
Before I move on, I'm going to add some files and then create another branch, just to let you see how this works. I'll create a new folder and add the spBlitz.sql script file. When I do that, I'm doing normal SQL code development. Create a folder, download the script file and save it in the folder. I have this structure:
These are new files, and they'll be changes I've made to my VCS structure, so when I check SourceTree, I see this. I want to stage and commit these. I think this is what I want, so I'll save it, but I'm saving this in my feature-spBlitz branch, not in main. We'll see how that works in a bit.
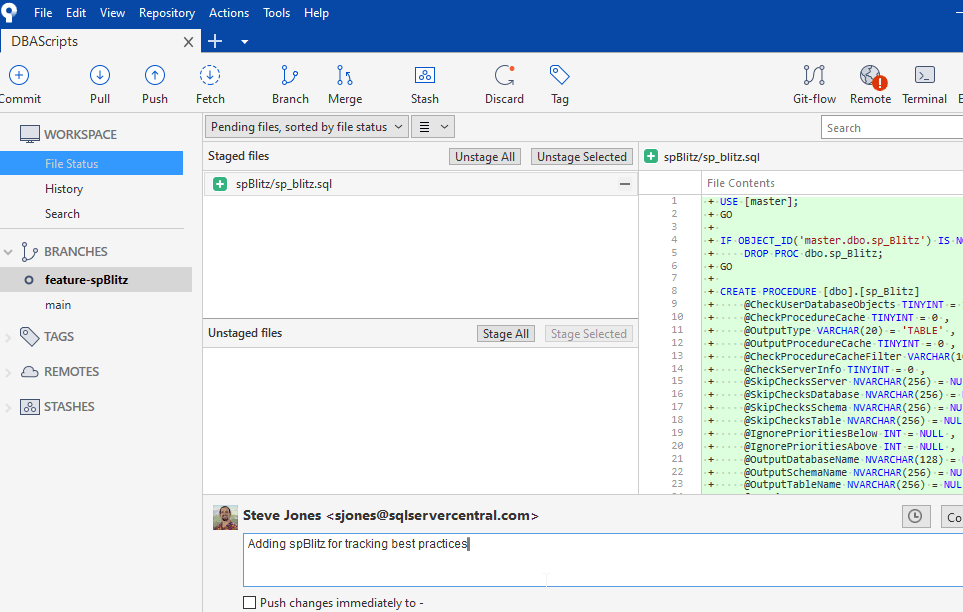
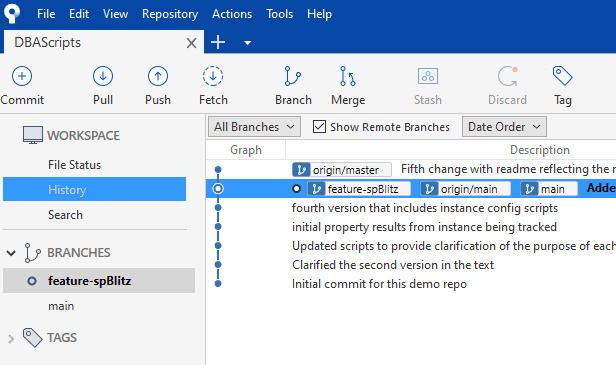
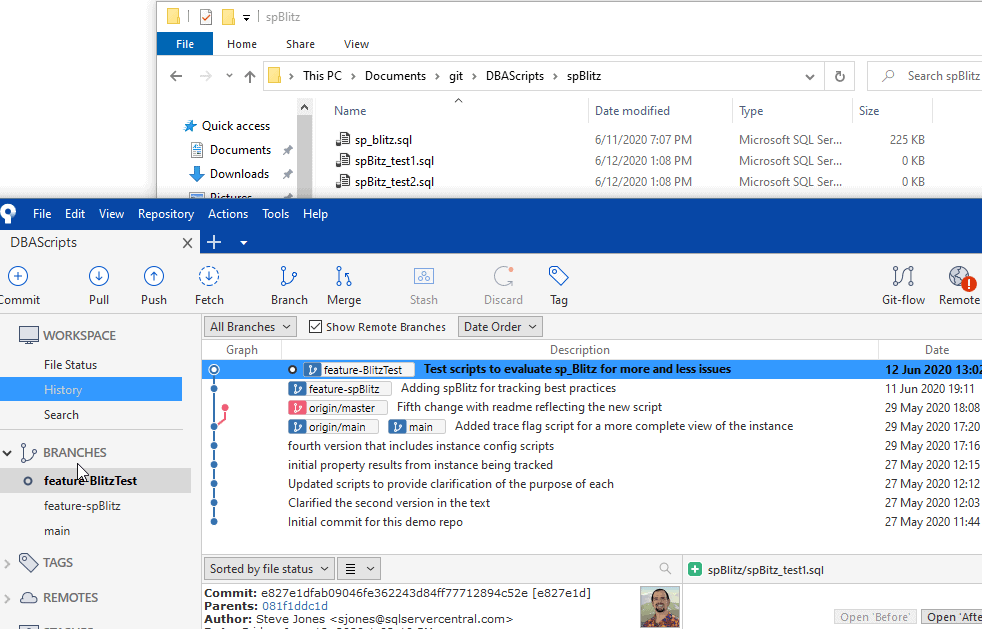
I'll commit this, but not push this (the checkbox is unchecked). Now I go back to the branch by clicking it in the left menu. When I do this, I see this display.
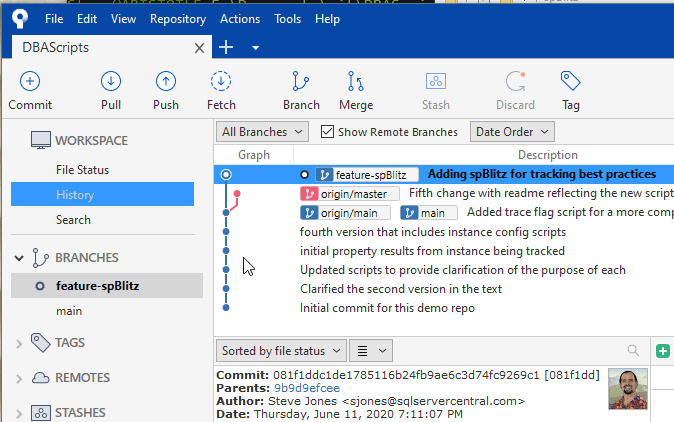
My commit is at the top, but notice the red "branch" in the graph to the left of the commits. This is shows the origin/main and main branches are separate from where I'm working, which is the vertical line on the left. My latest change is only on the feature-spBlitz branch, which is represented on the top line with the top dot.
Let's now branch again from this point, just to show a branch from a branch. I'll do this from the command line as an alternative to the GUI dialog. From a cmd line, I run git branch to see my branches, with the active one marked by an asterisk. I'll create a new branch with the git branch command by giving it a name.
Steve@ARISTOTLE E:\Documents\git\DBAScripts
$ git branch
* main

Steve@ARISTOTLE E:\Documents\git\DBAScripts
$ git branch
* feature-spBlitz
  main

Steve@ARISTOTLE E:\Documents\git\DBAScripts
$ git branch feature-BlitzTest

Steve@ARISTOTLE E:\Documents\git\DBAScripts
$ git branch
  feature-BlitzTest
* feature-spBlitz
  main
Note that the active branch is still feature-spBlitz. I just created a new branch, but haven't switched to it. That happens in the next section.
One last thing, git is sync'd across any clients and any CLIs I use. If I go back to SourceTree, I'll see the branch, but again, it's not active.

That's fine, we'll now move into the ways that we switch branches and show how each is separate.
Switching Branches
When I created the first feature branch in SourceTree, I had the checkbox set to move me to this branch automatically. I could do this from the CLI, but I didn't. So how do I get to this new copy of the code under the feature-BlitzTest branch?
The way this works is by checking out the branch. If I right click a branch in SourceTree, I see the option to check things out. The equivalent command from git is "git checkout <branch>".

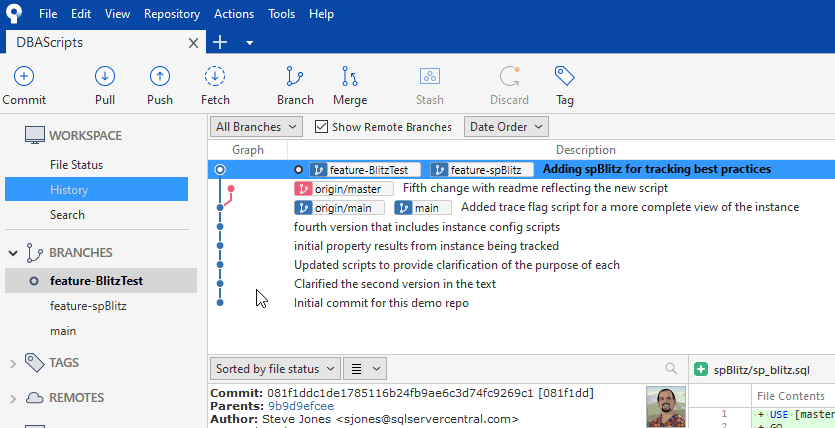
If I click this, then there will be a flash on the screen and the new branch is checked out. If I double click the branch name, the same thing happens. When this completes, I see this display. The circle on the left has moved to the feature-BlitzTest branch. I see this listed at the top of the graph, showing both feature branches at this state. Notice main is still behind this branch.
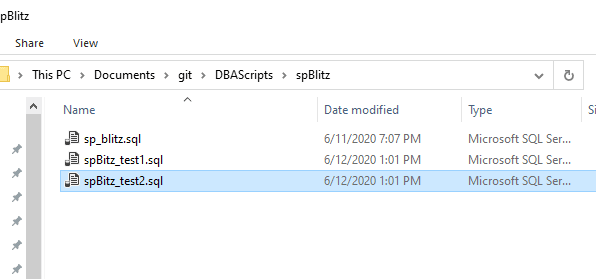
What does that mean in practice? Let's show how branch switching matters. Let me go to my repo, to the spBlitz folder, and I'll add two new script files. One of the things that a VCS helps with is keeping code together. In this case, I've added some test scripts for spBlitz.
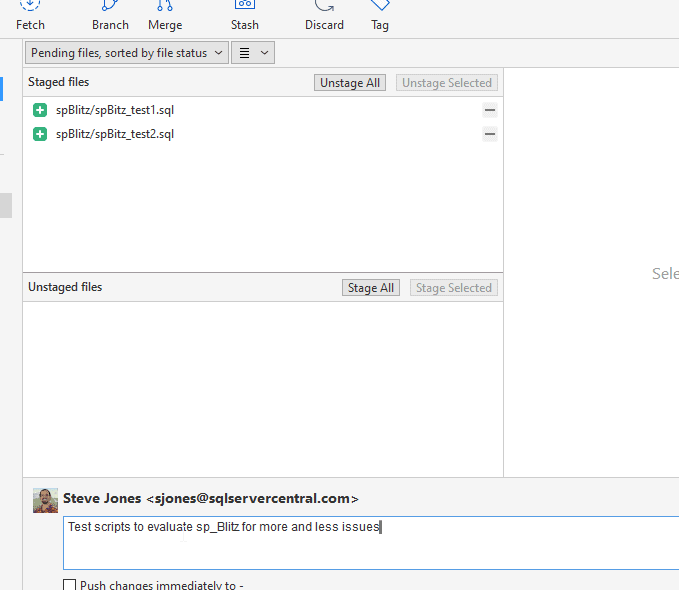
I need to commit these, so let's do that.
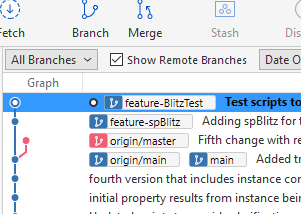
Once I do this, I see this next view for my graph and branch status. The latest commit is on the feature-BlitzTest branch. This is one commit (the two test scripts) ahead of the feature-spBlitz branch, and two commits ahead of origin/main and main.
Practically, this means that I have 3 files in the feature-BlitzTest branch, as I see below. My files in Explorer are above SourceTree in this image.
Now, if I checkout the feature-spBlitz branch (double click or right click), I see this:
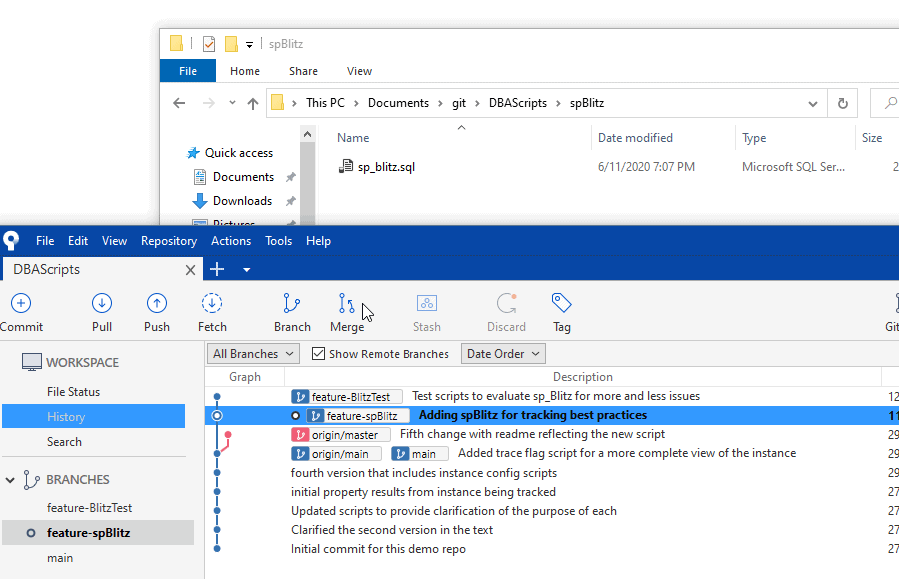
Only one file exists in the Explorer window because that's the state of this branch. Just one file. In SourceTree, the current state of this branch is highlighted in the graph, which shows this as behind the changes I made to feature-BlitzTest.
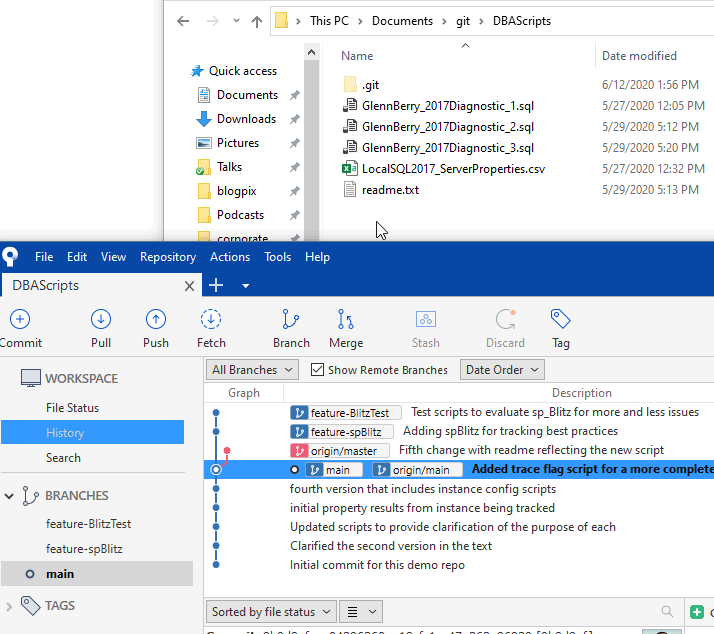
I can switch back and forth. In fact, if I switch to the main branch, I don't even have an spBlitz folder. That didn't exist in this branch.
This is how I work with code in files and folders, with their existence and contents matching the state of my branch in version control. In this way, other developers that are using the main branch won't see my experimental code until I merge that code back into the main branch, or I share the branch with them. Let's see how to do that.
Sharing a Branch
Typically I share a branch with a user through my central remote server. In this case, that's GitHub. Remember above, we have one branch on GitHub, but I have 3 locally. How do I share these? I can push branches, just like I push code. This is much simpler in SourceTree (or another GUI) than the command line, so let's see how this works.
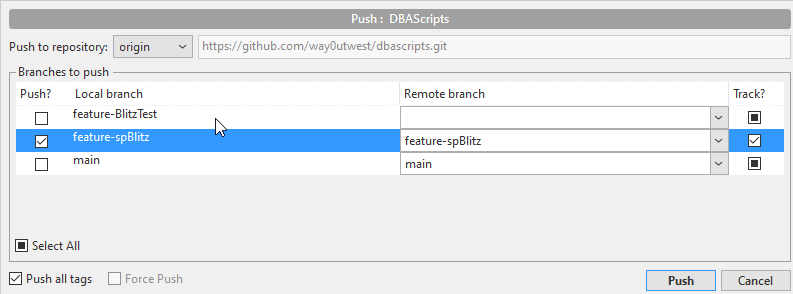
When I click the "Push" button, I see a dialog. I have the option to push any or all branches. I can also track these, meaning that my push/pull in the future will map the correct local branch to the remote one and exchange code. I've checked just one branch here, as I want to see the effect of this action.
When I push this, my branch changes will go to GitHub. On GitHub, I now see "2 branches" in the top bar, and I have a drop down to change branches as well.
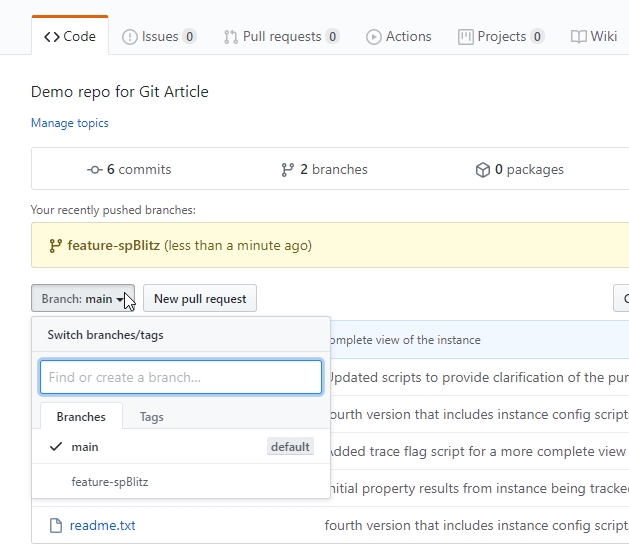
You can't see below the drop down, but there are only files listed here, each with the commit message that matches the work from the first two articles. If I click the feature-spBlitz item below main, I now see this view.
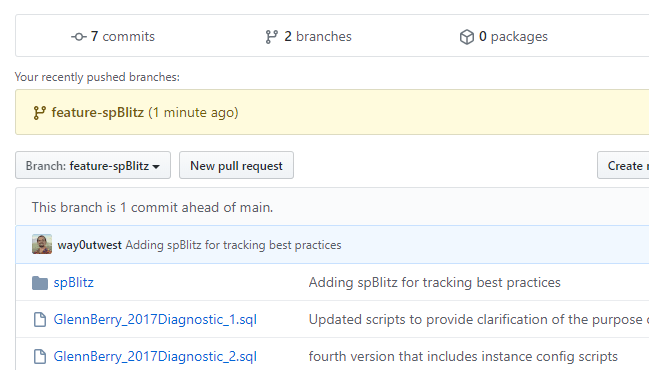
I'm on this branch, so I have the spBlitz folder visible. Exactly the same effect on my local file system when I switch branches. Now, any other user can checkout this branch and pull it down to their local file system.
Pulling a New Branch
Let's see this work on my other machine. I have the older version of SourceTree here, but that's fine. Git is git, and any client can help me. Here is what I initially see.
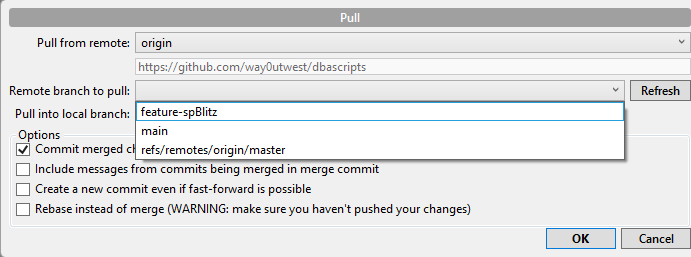
If I click Pull, I get a dialog. I need to click the Refresh button, but then I can see the branches from the remote. I can select my feature-spBlitz branch here. I'll do that and click "OK".
I download the branch, but I need to check it out still, or switch to it.
If I double click on the feature-spBlitz branch, it gets checked out, my graph moves, and in the file system, the spBlitz folder appears.
I can repeat this from machine 1 with the feature-BlitzTest branch, sharing this with my other user, but the process is the same. In modern development, we often use separate branches for each developer, and there isn't a need to necessarily share these. Usually we will merge code from one branch to another (often to main/master) and then other users can merge that code into their branches and merge their changes into the master/main branch. That's for another article.
For now, a few things for you to try:
- Commit a change to a branch and then push this to GitHub, what do I see?
- Pull changes from a branch down to a colleague's machine and have them switch branches to see the changes come and go from the file system.
- Have a colleague add a new branch based on master, make a change, commit it, and then push that to GitHub. Can you download it?
Summary
In this article we covered the basics of branching and how to work with them. Branches are a great way to separate known, working, and approved code from code that we need to test and evaluate. There are a lot of ways to work with branches, and numerous "flows" or processes that teams implement. This is the basic beginning of branching, and gives you a basic way of working with branches, but doesn't explain how to move code from one branch to another.
That will be the focus of the next article, where we look at merging code.