
In this second level we’ll install SQL Server on our newly created Ubuntu Server. We will cover the installation of the command line tools and verify our instance is running.
If you don’t have an Ubuntu instance, be sure to read Level 1 on how to get started.
Prerequisites
Before installing SQL Server 2017 on Linux, we need to be sure to meet a few prerequisites, as documented by Microsoft:
| Memory | 2 GB |
| File System | XFS or EXT4 (other file systems, such as BTRFS, are unsupported) |
| Disk space | 6 GB |
| Processor speed | 2 GHz |
| Processor cores | 2 cores |
| Processor type | x64-compatible only |
Please note, that if you use Network File System (NFS) remote shares in production, there are a few additional requirements:
- Use NFS version 4.2 or higher. Older versions of NFS do not support required features, such as fallocate and sparse file creation, common to modern file systems.
- Locate only the /var/opt/mssql directories on the NFS mount. Other files, such as the SQL Server system binaries, are not supported if moved to the NFS share.
Ensure that NFS clients use the 'nolock' option when mounting the remote share.
SQL Server Installation
The overall installation process is straightforward: once the server is checked and meets the prerequisites for the installation, we add a few configuration items for the apt installer and then use this to install SQL Server. You might note this is different than getting media from Microsoft for an installation on Windows.
We start by importing the GPG key. We do this by retrieving the key with the wget utility from the Microsoft location. We pass this to the apt-get command. This must be run as a superuser, so we include the sudo option. The command is:
wget -q https://packages.microsoft.com/keys/microsoft.asc | sudo apt-key add -
The parameter –q0 (quiet) means that we want no output from the wget command, while the add option of the apt-key command will add the key contained in the file passed as the argument (in this case with the minus character) to the keys repository.
You can see the results below, with an OK to verify this completed sucessfully:

Next, let’s add the Microsoft SQL Server Ubuntu repository to the packages source list using the command add-apt-repository. This command simply appends the specified repository into the /etc/apt/sources.list file.
sudo add-apt-repository “$(wget –q https://packages.microsoft.com/config/ubuntu/16.04/mssql-server-2017.list)”
Please note that this is the link to the Cumulative Updates (CU) repository, that installs the latest SQL Server version available. You can also select the GDR repository (mssql-server-2017-gdr), which install critical updates, if you already have a SQL Server installation and want to apply hotfixes.
We update the local repository by running the command apt-get update. Now, are you ready? Let’s start with the installation. We do this by running
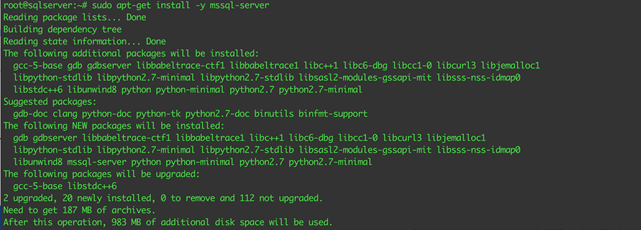
sudo apt-get install –y mssql-server
This command will download the packages from the Microsoft repository (together with all the required dependencies) and unpack them in the /opt/mssql directory. The download is about 187MB in size and could take some time, depending on your internet connection.
After the SQL Server binaries and libraries have been copied to the server, you should end up with this message:
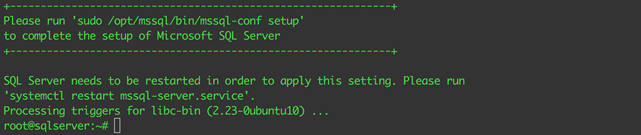
To complete the installation, we must configure SQL Server before its first run. The mssql-conf is a Python script that you can use for the configuration of SQL Server instead of the Windows program, SQL Server Configuration Manager. This is also used to perform post-installation instance-level configurations like changing the maximum memory or parallelism settings.
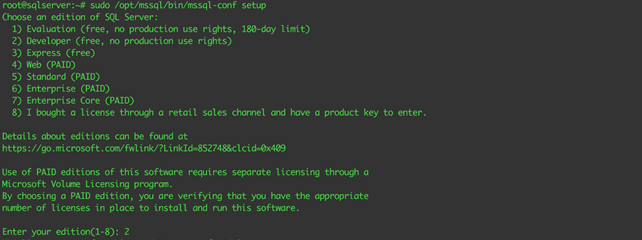
Now, as suggested, let’s run the mssql-conf script to configure SQL Server. The first question you are required to answer is which version of SQL Server you want to run. You can choose one of the three free editions (Evaluation, Developer, Express) or, if you have purchased a regular license, one of the paid editions (Web, Standard, Enterprise, Enteprise Core), according with your license.
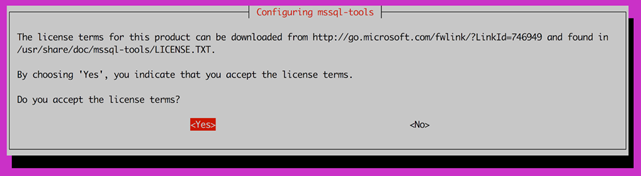
Next, you must accept the license terms to continue.

And finally, you are required to provide a secure password for the sa user.

That’s all!
Install the SQL Server Command-line Tools
Once you have completed the SQL Server engine installation, if you want to create a database or run a query you need to connect with a tool that is capable of running Transact-SQL commands. You could use SQL Server Management Studio on Windows, SQL Server Operations Studio on Windows/Linux/Mac or command line tools like sqlcmd or bcp (both Windows and Linux). We will set up the command line tools here.
First, import the GPG keys from public repository with the command:
curl https://packages.microsoft.com/keys/microsoft.asc | sudo apt-key add -
The curl command is very similar to the wget command and can be used to download a file using internet protocols like FTP, HTTP or HTTPS. This is the output of the command:

Next, register the Microsoft Ubuntu repository with curl:
curl https://packages.microsoft.com/config/ubuntu/16.04/prod.list | sudo tee /etc/apt/sources.list.d/msprod.list
The tee command reads from standard input and writes to standard output and to files. In this case we are reading the content from the prod.list file and redirecting it via pipe to the msprod.list file.
Now, update the sources list and run the package installation command. Note that, together with the tools, you are installing also the unixODBC developer package, that contains the libraries needed for the connection to the database.
Run the command:
sudo apt-get update
to refresh the packages list. Then launch the command to download and unpack the latest version of the tools and libs.
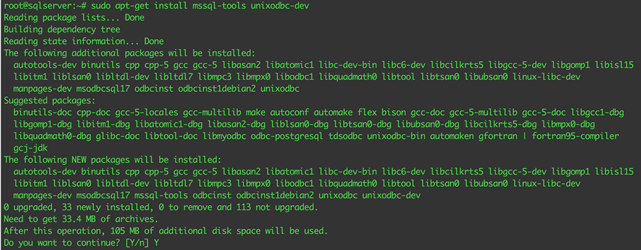
sudo apt-get install mssql-tools unixodbc-dev
This command will copy the packages from Microsoft repository to disk and unpack it. This is a small package, about 34MB in size.
During the installation, the program will ask you a couple of times if you accept the terms (one for the tools and one for the ODBC development package):
As the final step, add the path, /opt/mssql-tools/bin, to the PATH environment variable. This lets you run the tools from a logged in session or from a script.
If you need to run sqlcmd/bcp from the bash shell, add the path to the PATH variable in the ~/.bash_profile file:

If you need to run these commands also from a non-interactive/non-login session, you must modify the PATH in the ~/.bashrc file:

Connect to SQL Server
We’re almost done. Let’s check if SQL Server service is running regularly and try to connect using sqlcmd, exactly in the same way we are used to connect in a Windows environment.
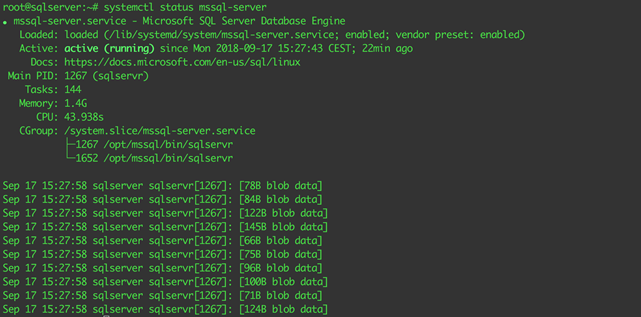
To check if the service is running you can run the following command:
systemctl status mssql-server
Systemctl is a Linux command to check on a process/service. The output of this command includes a few information about the running instance of SQL Server, like the number of tasks that are running, the memory used by SQL Server and the percentage of CPU in use.
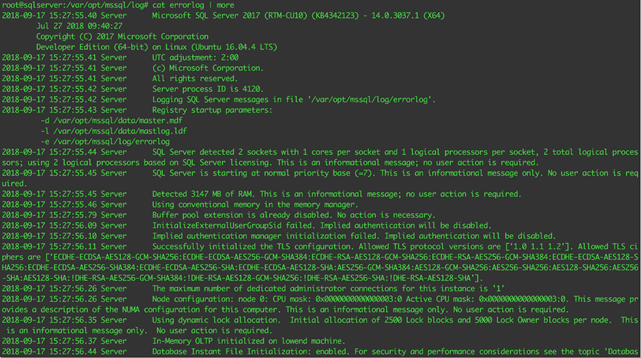
If you have to troubleshoot your SQL Server installation and don’t have the tools installed, you can read the SQL Server errorlog directly from the command line using the command:
cat /var/opt/mssql/log/errorlog
OK, the service is up and running. Let’s try to connect using sqlcmd and run a simple query:
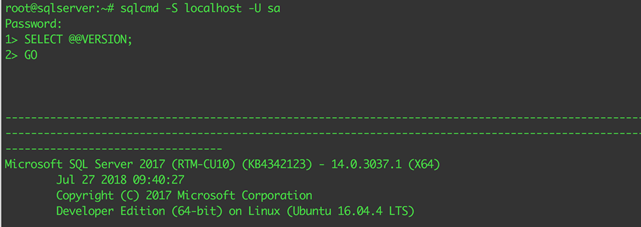
I chose to run the command without passing the parameter –P to provide the password in clear manner. You can obviously to that, for example to run this command from a script, but is very unsecure and should be avoided.
Congratulations! We have our SQL Server on Linux up and running!
In the next level, we’ll discover how to add further disks and separate data, transaction logs and tempdb data files among them, following one of the well-known best practices and obtain better performances.
Enjoy!