

Executive Summary
Microsoft Azure has several capabilities, including support for Machine Learning (ML) and Artificial Intelligence (AI). One of the AI and ML offerings that enable developers to build cognitive intelligence into applications is referred to as Azure Cognitive Services. This offering does not require direct Data Science or AI/ML skills and is low code/no code. There are four categories of Azure Cognitive Services:
- Language
- Vision
- Speech
- Decision
This article will provide an overview of Azure Cognitive Services' Text Translation API, which is part of the Language category, and will elaborate on how to create a working Text Translation application. Using this, one can perform Text Translation with more than 100 different languages and dialects.
Overview of the Text Translator service
The Text Translator service provides near real-time text translation through Rest-based API calls. You can create a working application using text translator services by following the three steps below:
- Create a Text Translator service
- Document the access keys and API endpoints
- Create a sample application to try the Service
Create a Text Translator service
This step assumes that you already have an active Azure account. If you don't have one, Microsoft allows you to create a free account using the Create Your Azure Free Account Today | Microsoft Azure link.
You can access the Text Translator service using two types of resources.
- Single service
- Multi service
As the name suggests, a Single service allows access to only one cognitive service. On the other hand, the Multi service can allow multiple cognitive services. Both resource types are accessed using a single access key and an API endpoint. For this article, we will focus on the Single service resource type.
To get started, click on the Create Translator - Microsoft Azure link. Once logged in, you will be presented with a page similar to the one shown below.
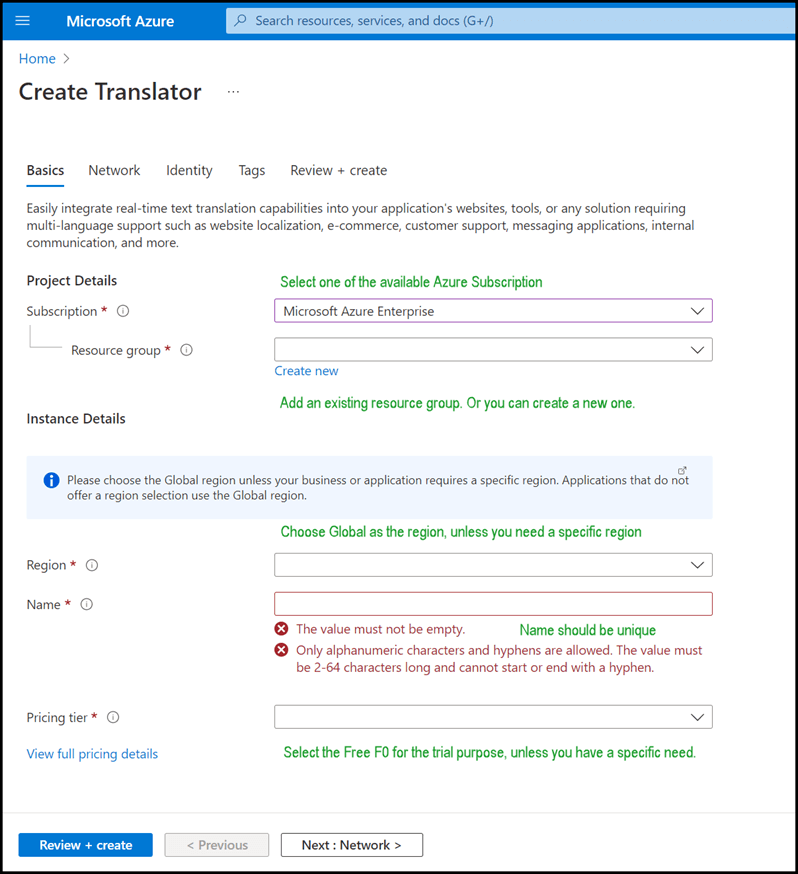
In green font, I have provided some guidance for each field next to it. For the pricing tier, if you want additional functionality such as Document translation, you can review the Pricing - Translator | Microsoft Azure link to understand it better. For this article, let's select "Free F0".
Once all the fields have been filled with pertinent details, you will click on the "Review + create" button. The next page will present the service terms, similar to the one shown below.
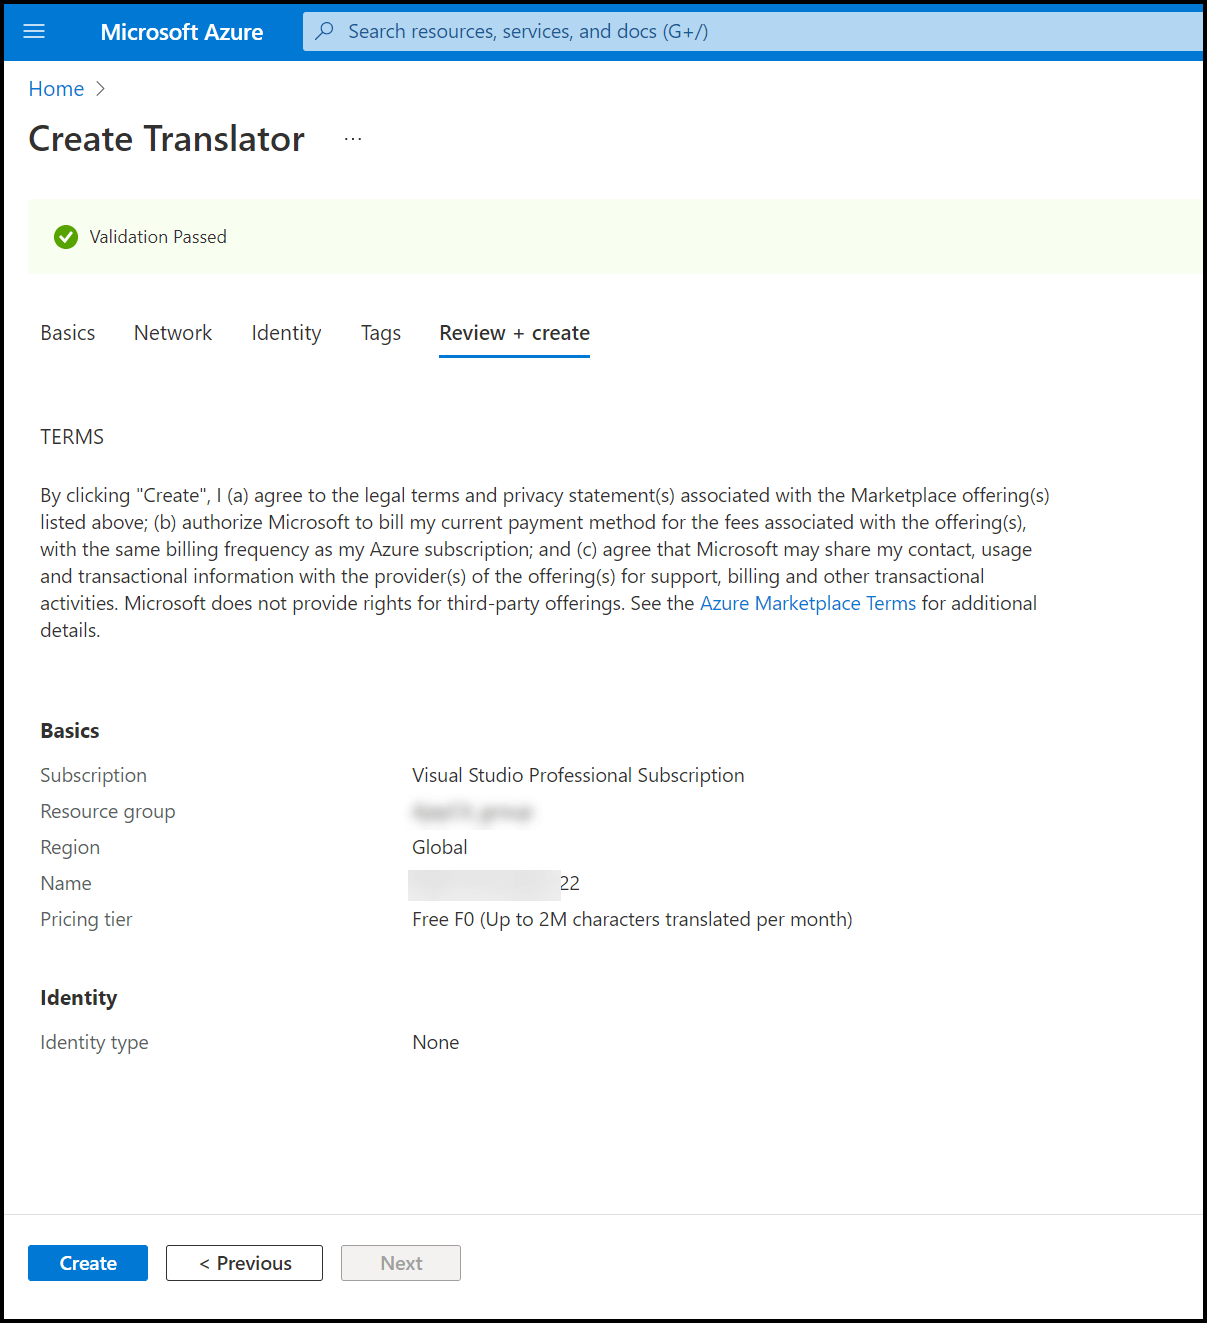
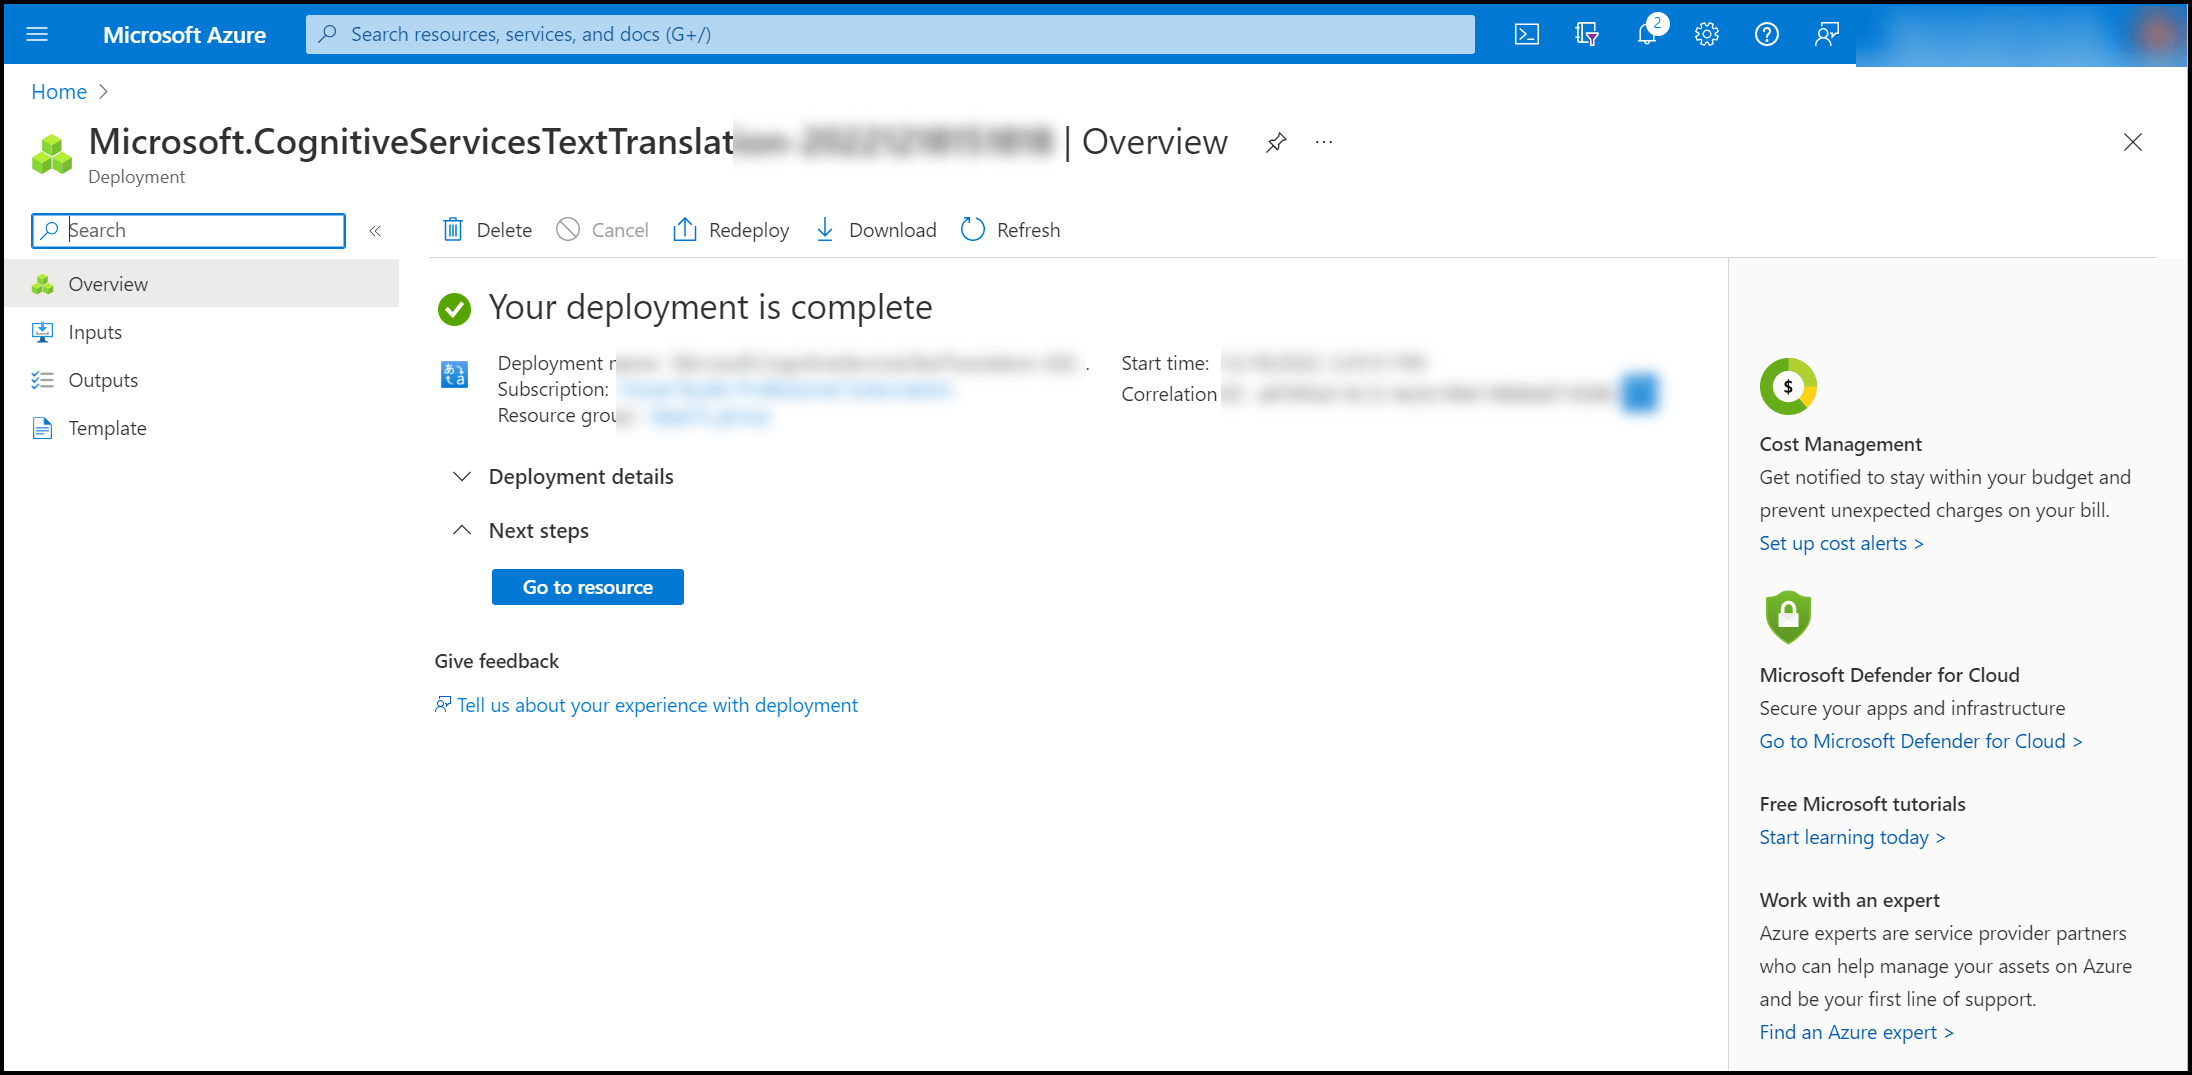
Review the terms and select "Create" to deploy the resource. You will be presented with a page similar to the one shown below.
Document the access keys and API endpoints
End-user applications that use the Cognitive API require both the access keys and the API endpoint. The access key is a unique string that needs to be passed for all API calls by specifying it in the HTTP request header.
The API endpoint is a global endpoint in the API request, and for the Text translation, it is always
api.cognitive.microsofttranslator.com
Once the deployment is complete, click on the "Go to resource" button. On the left side menu, under "Resource Management," click on "Keys and Endpoints." This will display the access keys and API endpoint. Click the blue "Copy to clipboard" button to copy the keys and keep them somewhere for the third step. The key is important and should not be kept private.
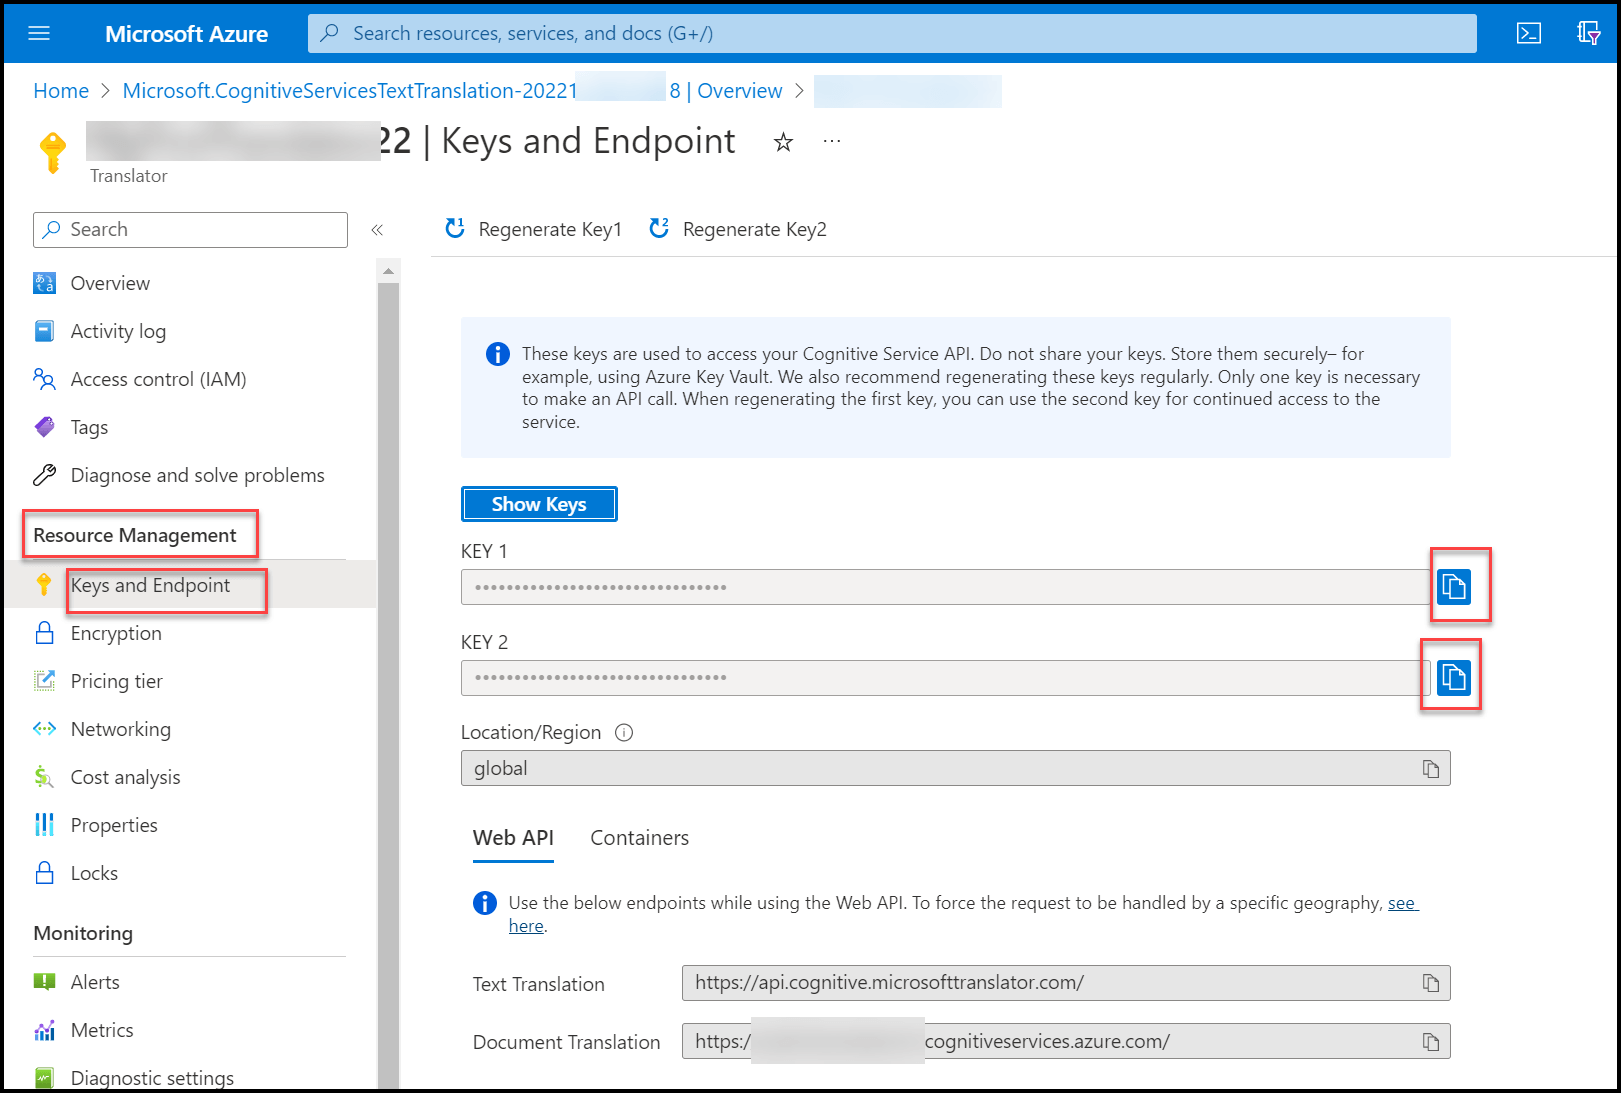
Please note that only one key is required to make the Rest-based API call. The second key is used for backup or while regenerating the first key.
Create a sample application to try the Service
The third and last step is the creation of a sample application. For this article, we will build the application in Python. This article assumes that you already have Python installed. If not, you can download and install Python using the Download Python | Python.org link.
You need to "pip install" requests and the uuid package using the code below on a terminal window.
pip install requests uuid
The next step is to write the Python code. Here is a sample Python code that you can reuse. Remember to change "YourKey" with the key you noted in step 2.
import requests, uuid, json
# Add your key and endpoint
myKey = "YourKey"
api_url = "https://api.cognitive.microsofttranslator.com/translate"
myParams = {
'api-version': '3.0',
'from': 'en',
'to': ['es', 'af', 'fr']
}
myHeaders = {
'Ocp-Apim-Subscription-Key': myKey,
'Content-type': 'application/json',
'X-ClientTraceId': str(uuid.uuid4())
}
#The text in English that will be translated. Here, you can pass more objects in the fromText
fromText = [{
'text': 'My new year resolution is to run 25 miles every week'
}]
APIRequest = requests.post(api_url, params=myParams, headers=myHeaders, json=fromText)
APIResponse = APIRequest.json()
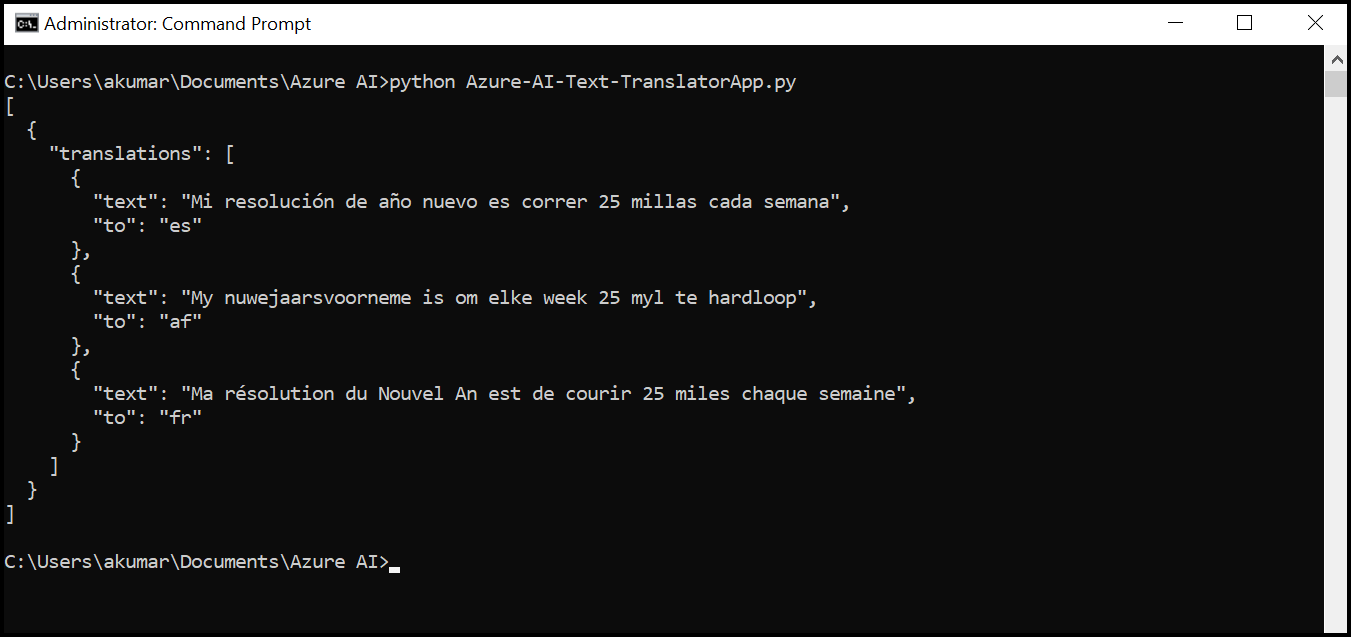
print(json.dumps(APIResponse, ensure_ascii=False, indent=2))In this Python program, we input the text "My new year resolution is to run 25 miles every week" in English and will convert it into three languages:
- Spanish (es)
- Afrikaans (af) and
- French (fr)
You can refer to the Language support - Translator - Azure Cognitive Services | Microsoft Learn link for a list of supported language codes. Once you run this program, you will get an output similar to the one shown below.
Conclusion
This article taught us about the Text Translation feature of Azure Cognitive Service. We created a Text translation service and noted the access keys and API endpoint. We also created a sample Python application to invoke the Rest-based Text Translator API using the access key to translate a text from English to Spanish, Afrikaans, and French. You can build the sample application in any language that can communicate with a Rest-based API.

