Introduction
This article will introduce you to the SQL Server Dacpac in Azure Data Studio. We will also learn about the Bacpac. In the Azure Data Studio, we have an extension named SQL Server Dacpac which allows us to deploy, extract Dacpacs, create a database from a Bacpac and export a schema and data to a Bacpac.
In this article you will the following:
- First of all, we will learn how to install the SQL Server Dacpac in Azure Data Studio
- Secondly, we will learn what is a Dacpac.
- Thirdly, we will learn how to extract a database to a Dacpac.
- Also, we will learn how to deploy a Dacpac.
- In addition, we will learn what is a bacpac.
- Moreover, we will learn what is a bacpac.
- Furthermore, we will learn how to export the database schema and data to a bacpac file.
- Finally, we will learn how to create a database using a bacpac.
Install the SQL Server Dacpac in Azure Data Studio
The SQL Server Dacpac is included in the Admin Pack for SQL Server. In order to install it, you only need to press the Install button.
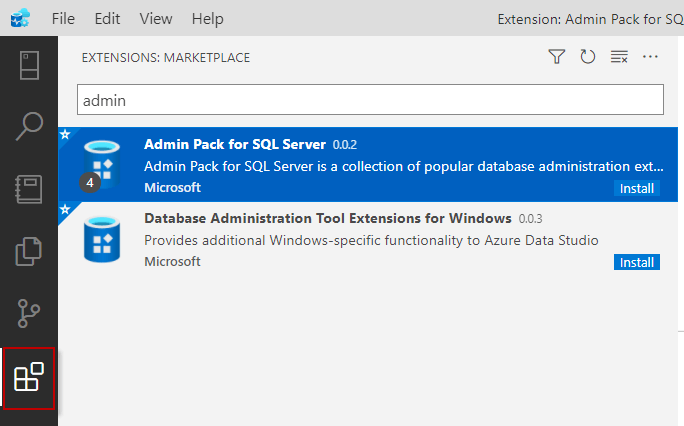 Admin Pack
However, you can install only the SQL Server bacpac individually without other features:
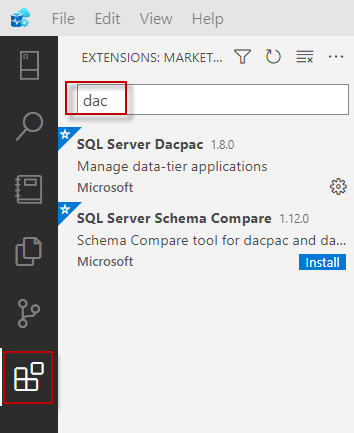 Dacpac plugin
What is a Dacpac?
Dacpac means Data-tier Applicacion Package. It is basically a compressed package with dacpac extension. A Dacpac is a compressed XML file that contains the database objects and the data. This file is used to handle the deployment of data-tier elements in an easy way to have control over versioning in the life cycle.
How to Extract a Database to a Dacpac
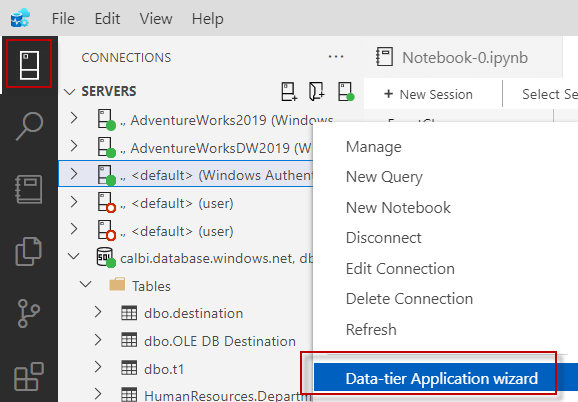
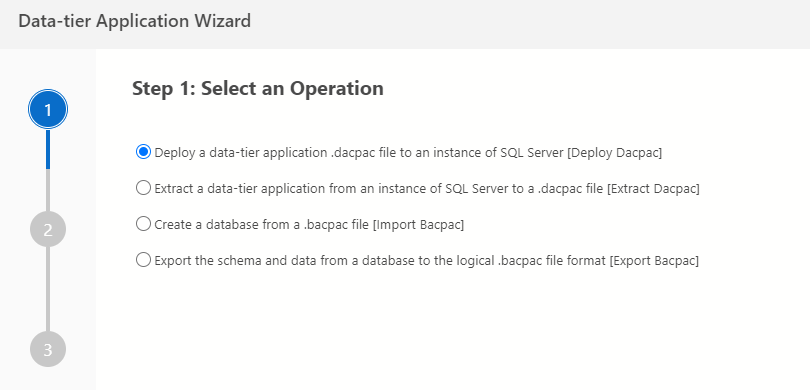
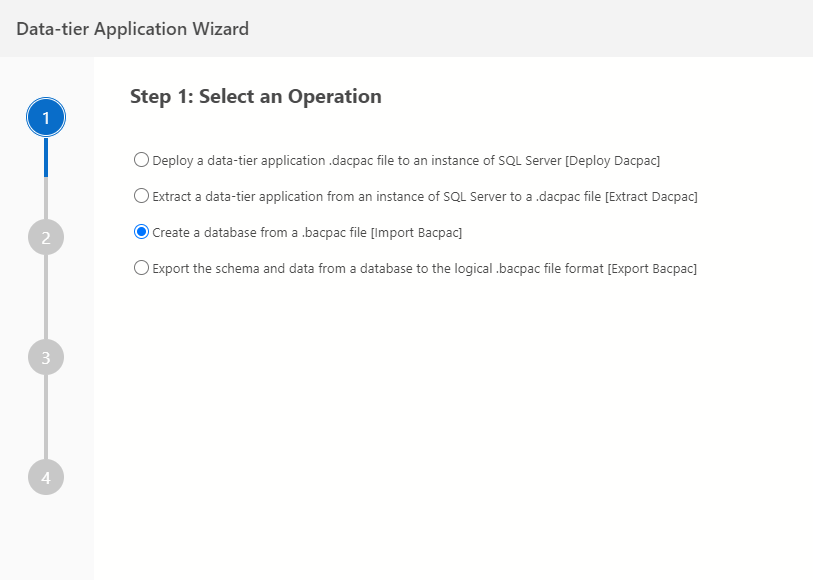
Once installed the extension, go to Servers and right-click the database connection, and select the Data-tier Application wizard.
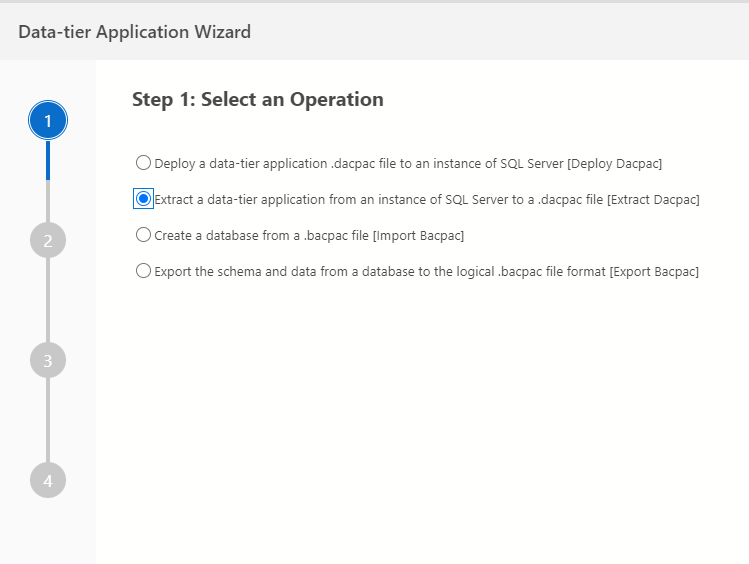
We will explain the four options in this article later. At the moment, we will select the option to extract a data-tier application from an instance of SQL Server to a .dacpac file. Basically, we will create a Dacpac file to deploy the package somewhere else.
The wizard will then ask for the SQL Server name, source database, a versioning number. For versioning, you can refer to this link: Software versioning. You also supply the file location where the file will be created.
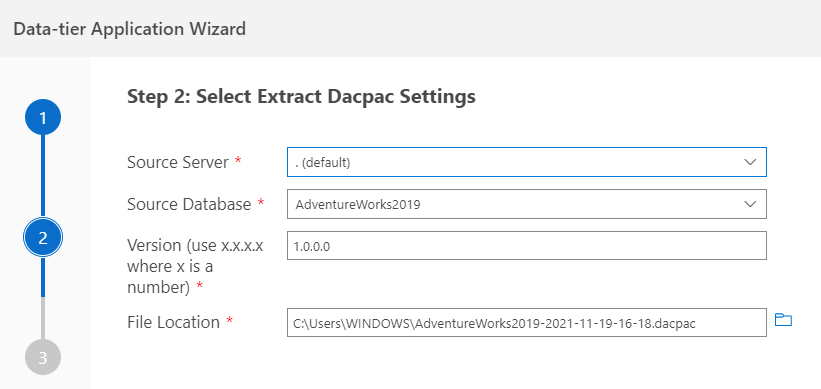
The summary provides the last step to check the configuration. Once accepted, the Dacpac will be created.

How to deploy a Dacpac
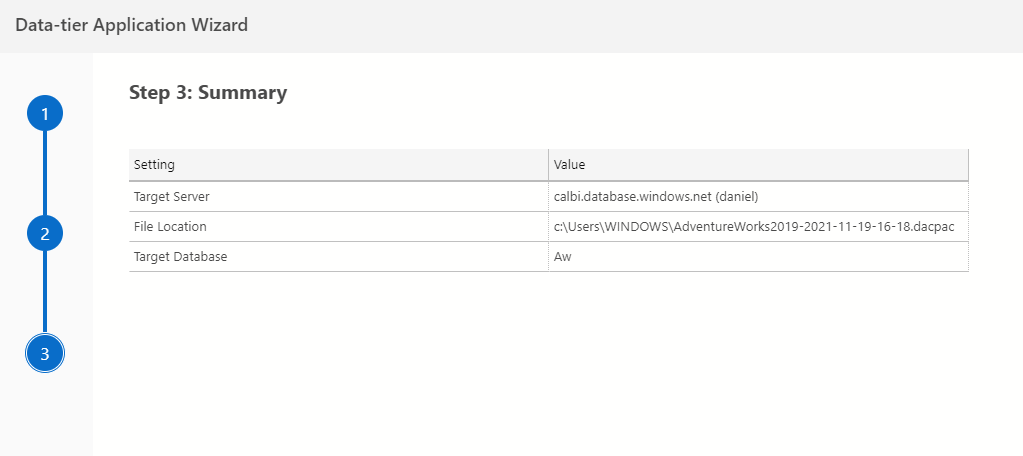
In the previous section, we created a Dacpac based on a database. Now, we need to have a destination database. What I like about a Dacpac is that you can have an Azure Database as source or destination, as well as a local database. In this example, we will right-click on the destination database connection and select the Data-tier Application Wizard as we did in the previous section. Then on the wizard, select the Deploy a data-tier application .Dacpac file to an Instance of SQL Server.
Select the Dacpac created in the previous section. Note that the Target Server is an Azure instance. In this example, we are creating a new database on destination based on the Dacpac.

In the summary, you have another chance to check the configuration to make sure everything is fine. You have the last chance later because there is a cancel option during deployment.
What is a Bacpac?
Previously in this chapter, we learned about the Dacpac and now, we will talk about a bacpac. A Bacpac is similar to a Dacpac. In both cases, the schema is in XML, but in a Bacpac, the data is in JSON format. A Bacpac is also a compressed file. According to the documentation, the maximum size is 200 GB.
The main difference is the usage. A Dacpac is used to deploy different versions of the database in a life cycle of a database. On the other hand, the Bacpac is used just to import and export data.
How to Export to a Bacpac File
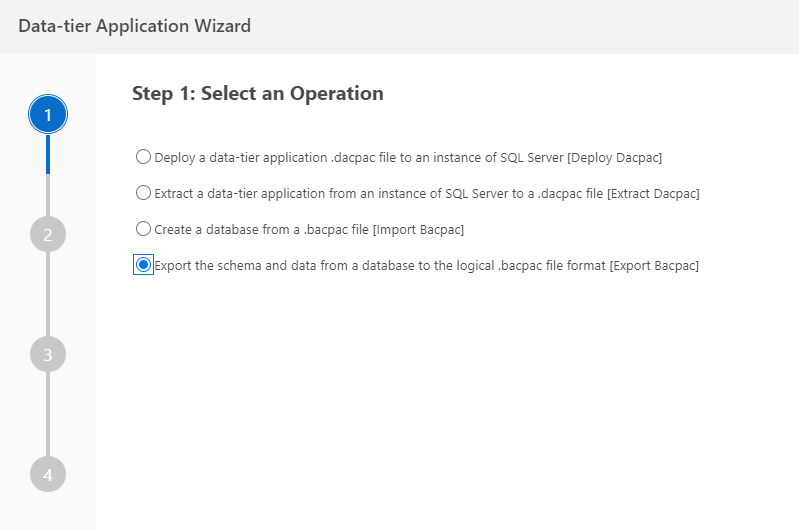
The same wizard has an option to export the schema and data from a database to a logical .bacpac file. To do this in Azure Data Studio, right-click on your connection and select the Data-tier application wizard option and then select the Export the schema and data from a database to the logical .bacpac file format option.
The wizard will detect the connection server name and the source database. However, you can manually change it if required. You can also modify the File Location for the bacpac that will be created.
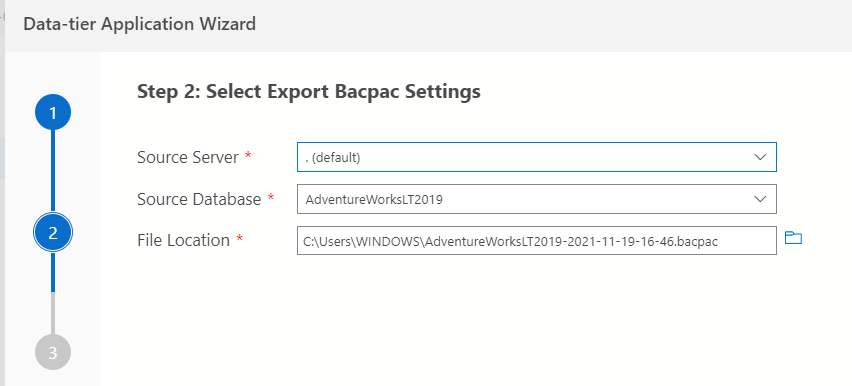
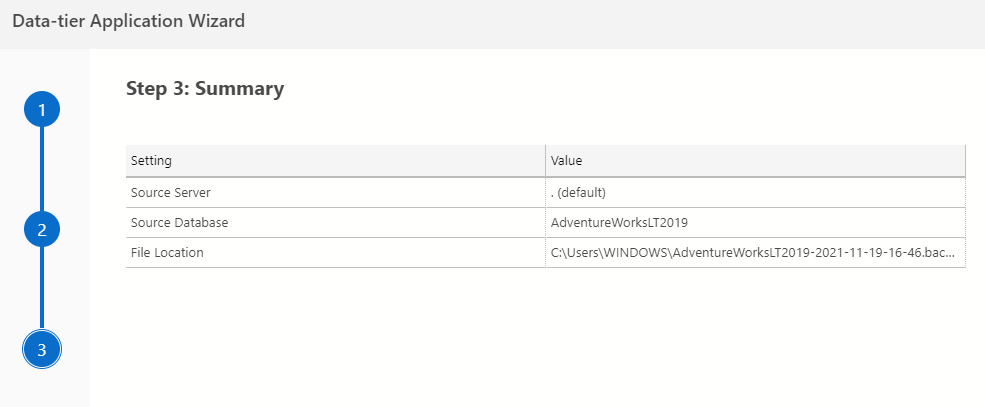
If everything is fine, you will have the summary and after accepting the settings, a bacpac file will be generated. We will use that file in the next section to import the data from the bacpac file created.
How to Create a Database Using a Bacpac
Previously in this article, we created a Bacpac file from a source database. Now, in a destination connection, we will create a database based on the Bacpac file. We will connect in Azure Data Studio in the database to import and then use the data-tier wizard used before to import the database.
In the Data-tier Application Wizard, select the Create a database from a .bacpac file option.
If the Target Server and database are not the correct ones, write the required Target Server and Target database. Select the File Location for the bacpac created previously.

The summary will show the values for the configurations entered.
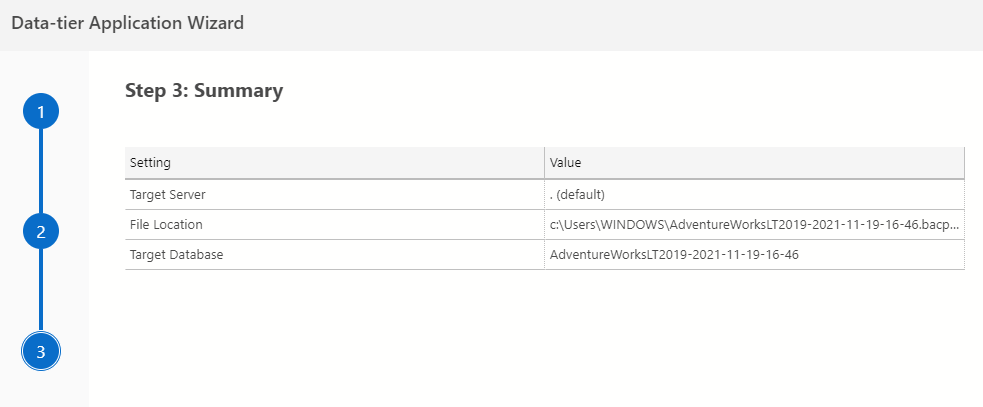
If everything is fine, you will have a new database created on the destination.
Conclusion about Dacpac in Azure Data Studio
To conclude, in this article we learn what is a Dacpac and a bacpac. We learn the differences. Basically, a Dacpac is used for deployment and a bacpac is used to import and export data. We learned how to install this extension in Azure Data Studio and we learn the options to generate these files and how to deploy or import them.