

Introduction
While working with Azure Storage, data might be accidentally or erroneously deleted. We can prevent the total loss of data by enabling soft delete features in Azure Storage. The system will store soft-deleted containers and its item for a specified period of time. During the retention period, we can restore the container and its content at the previous state when the container was deleted. Once the retention period is over, the container and its contents are permanently deleted.
Enable soft delete
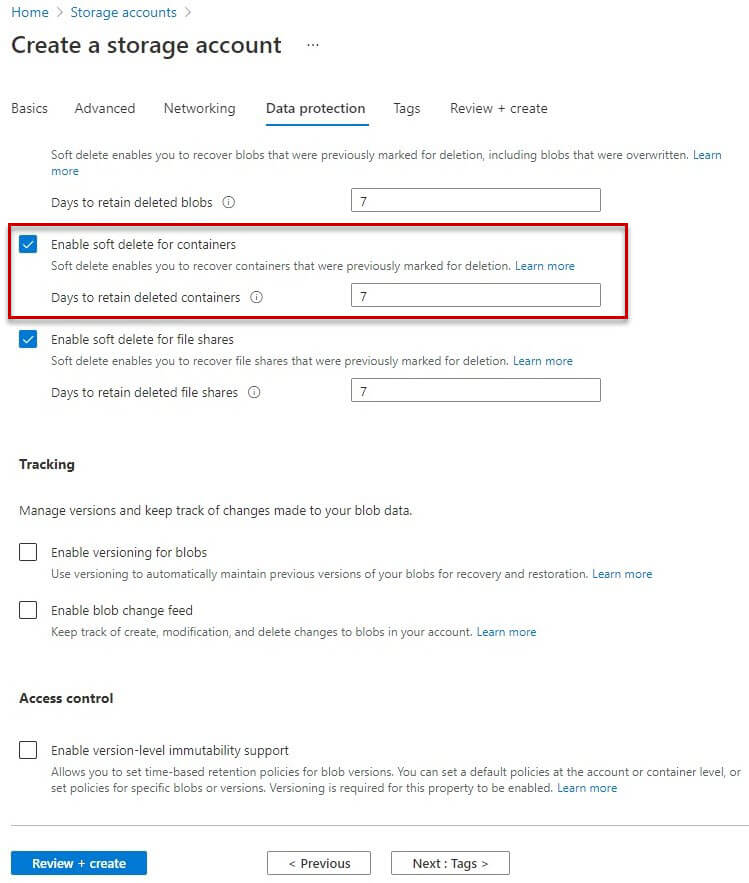
While creating a new storage account, you will find the enable soft delete for container option in the data protection tab. The default retention days value is 7, and you can change this value as required. The maximum allowed value is 365.
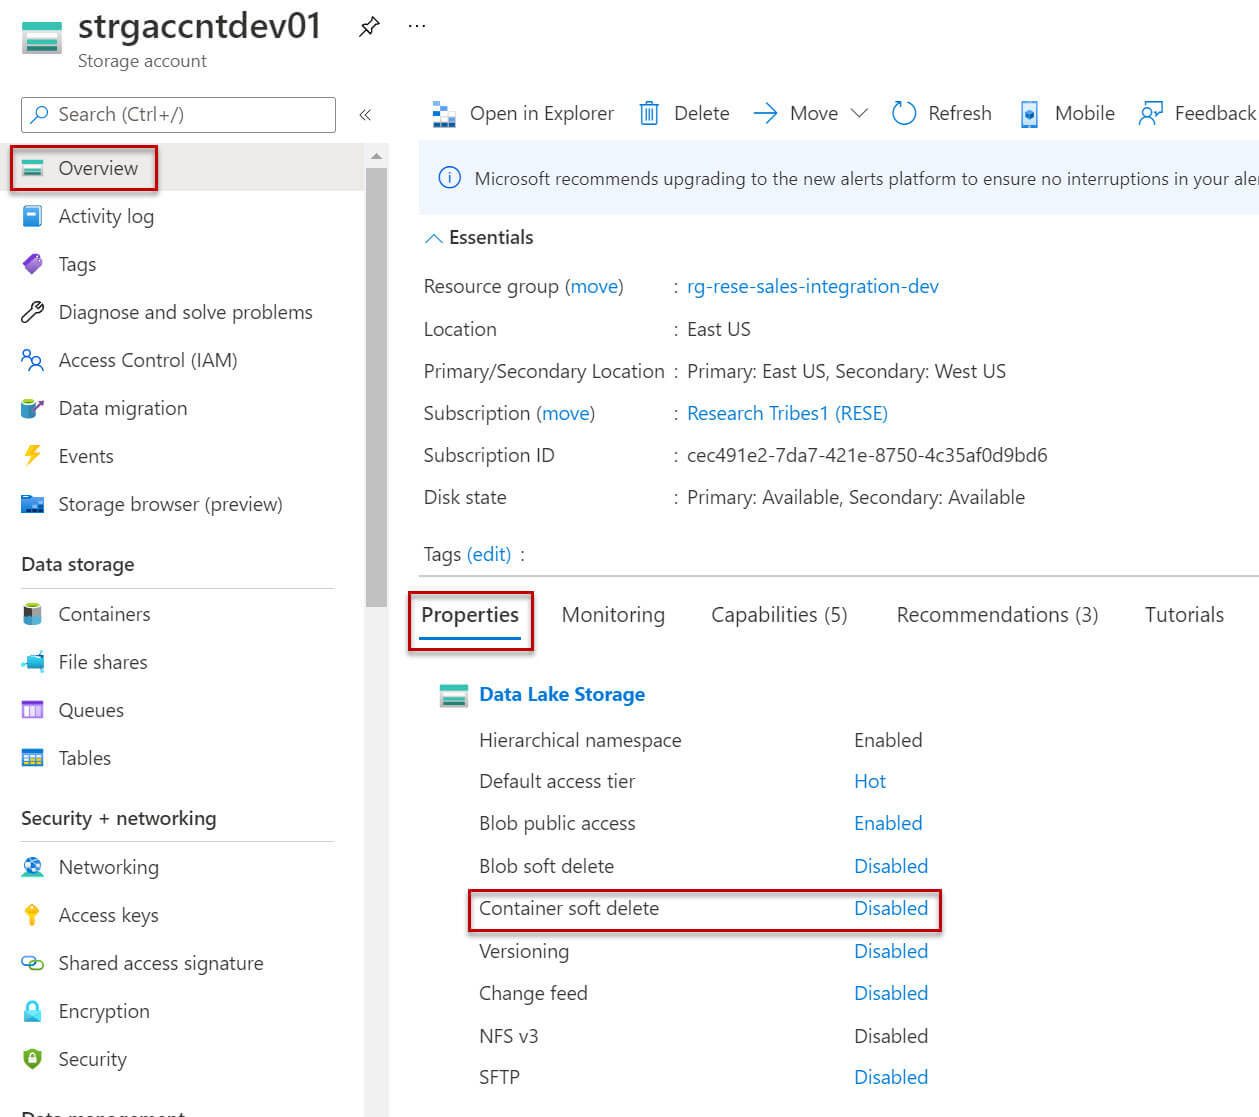
If you already have an existing storage account then you can view the container soft delete properties settings in the Overview blade. If the option value is disabled, you can enable it by clicking on the Disabled link.
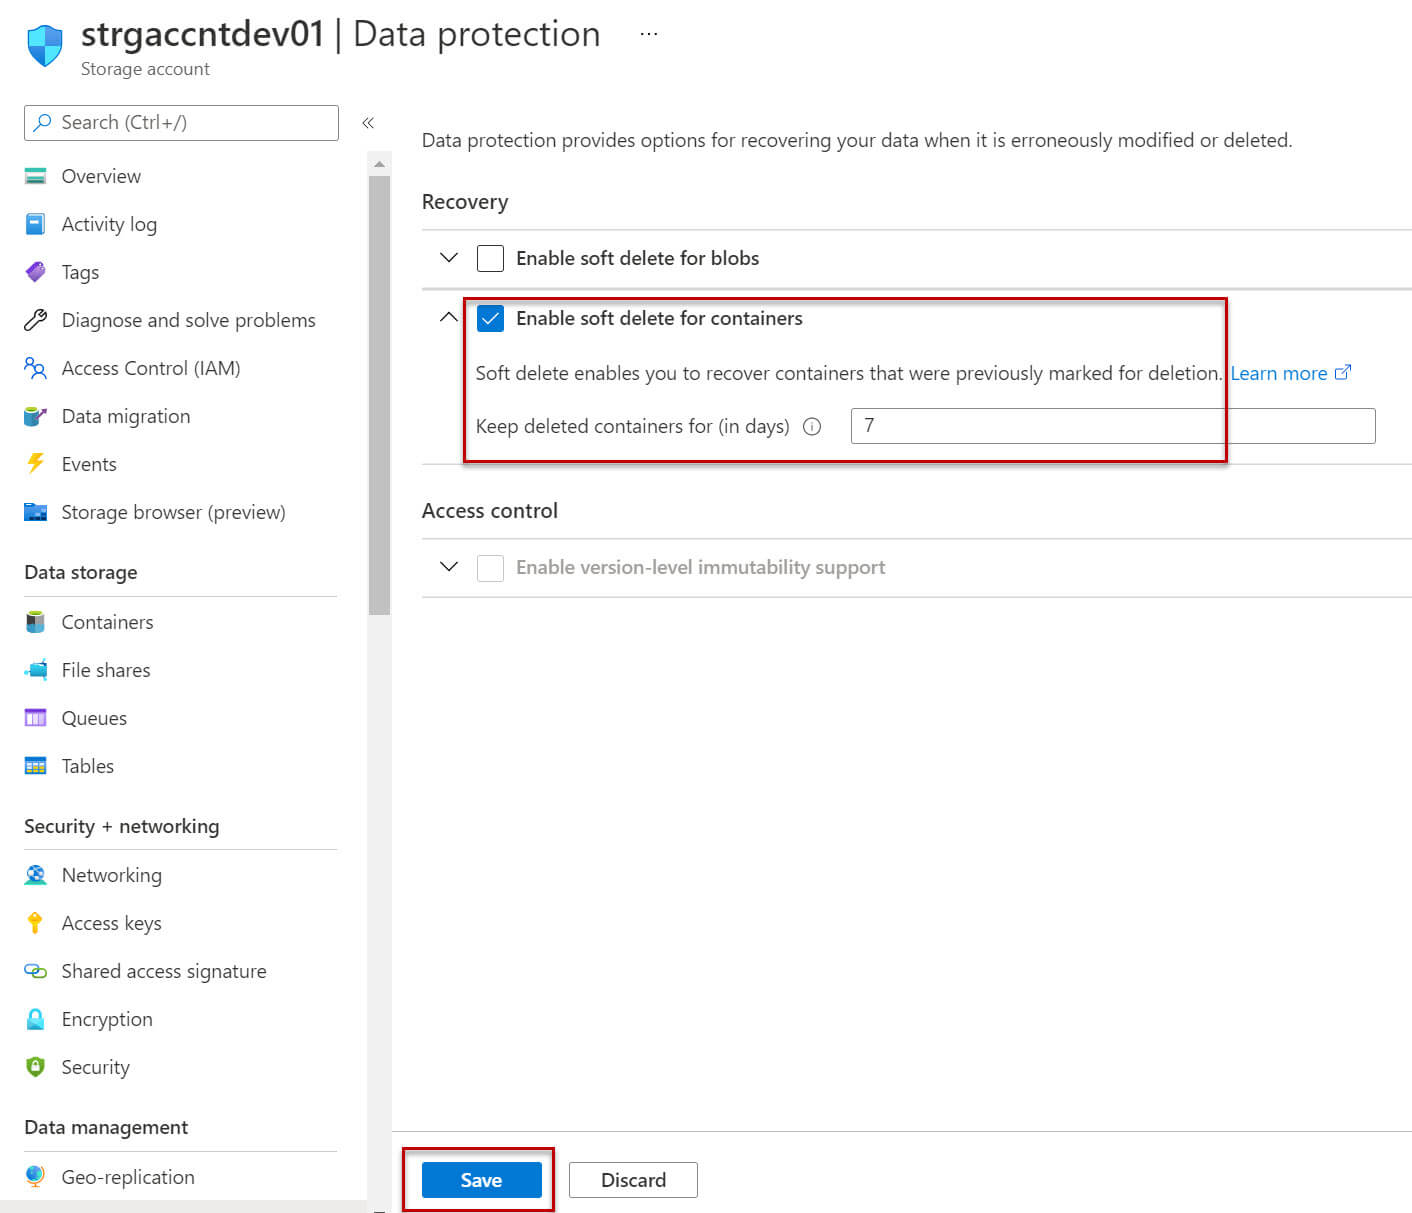
Once we do this, in the next screen, we check the enable soft delete for containers option. Note the default value to keep deleted container is 7 days, but we can change it if required. Then click on the Save button:
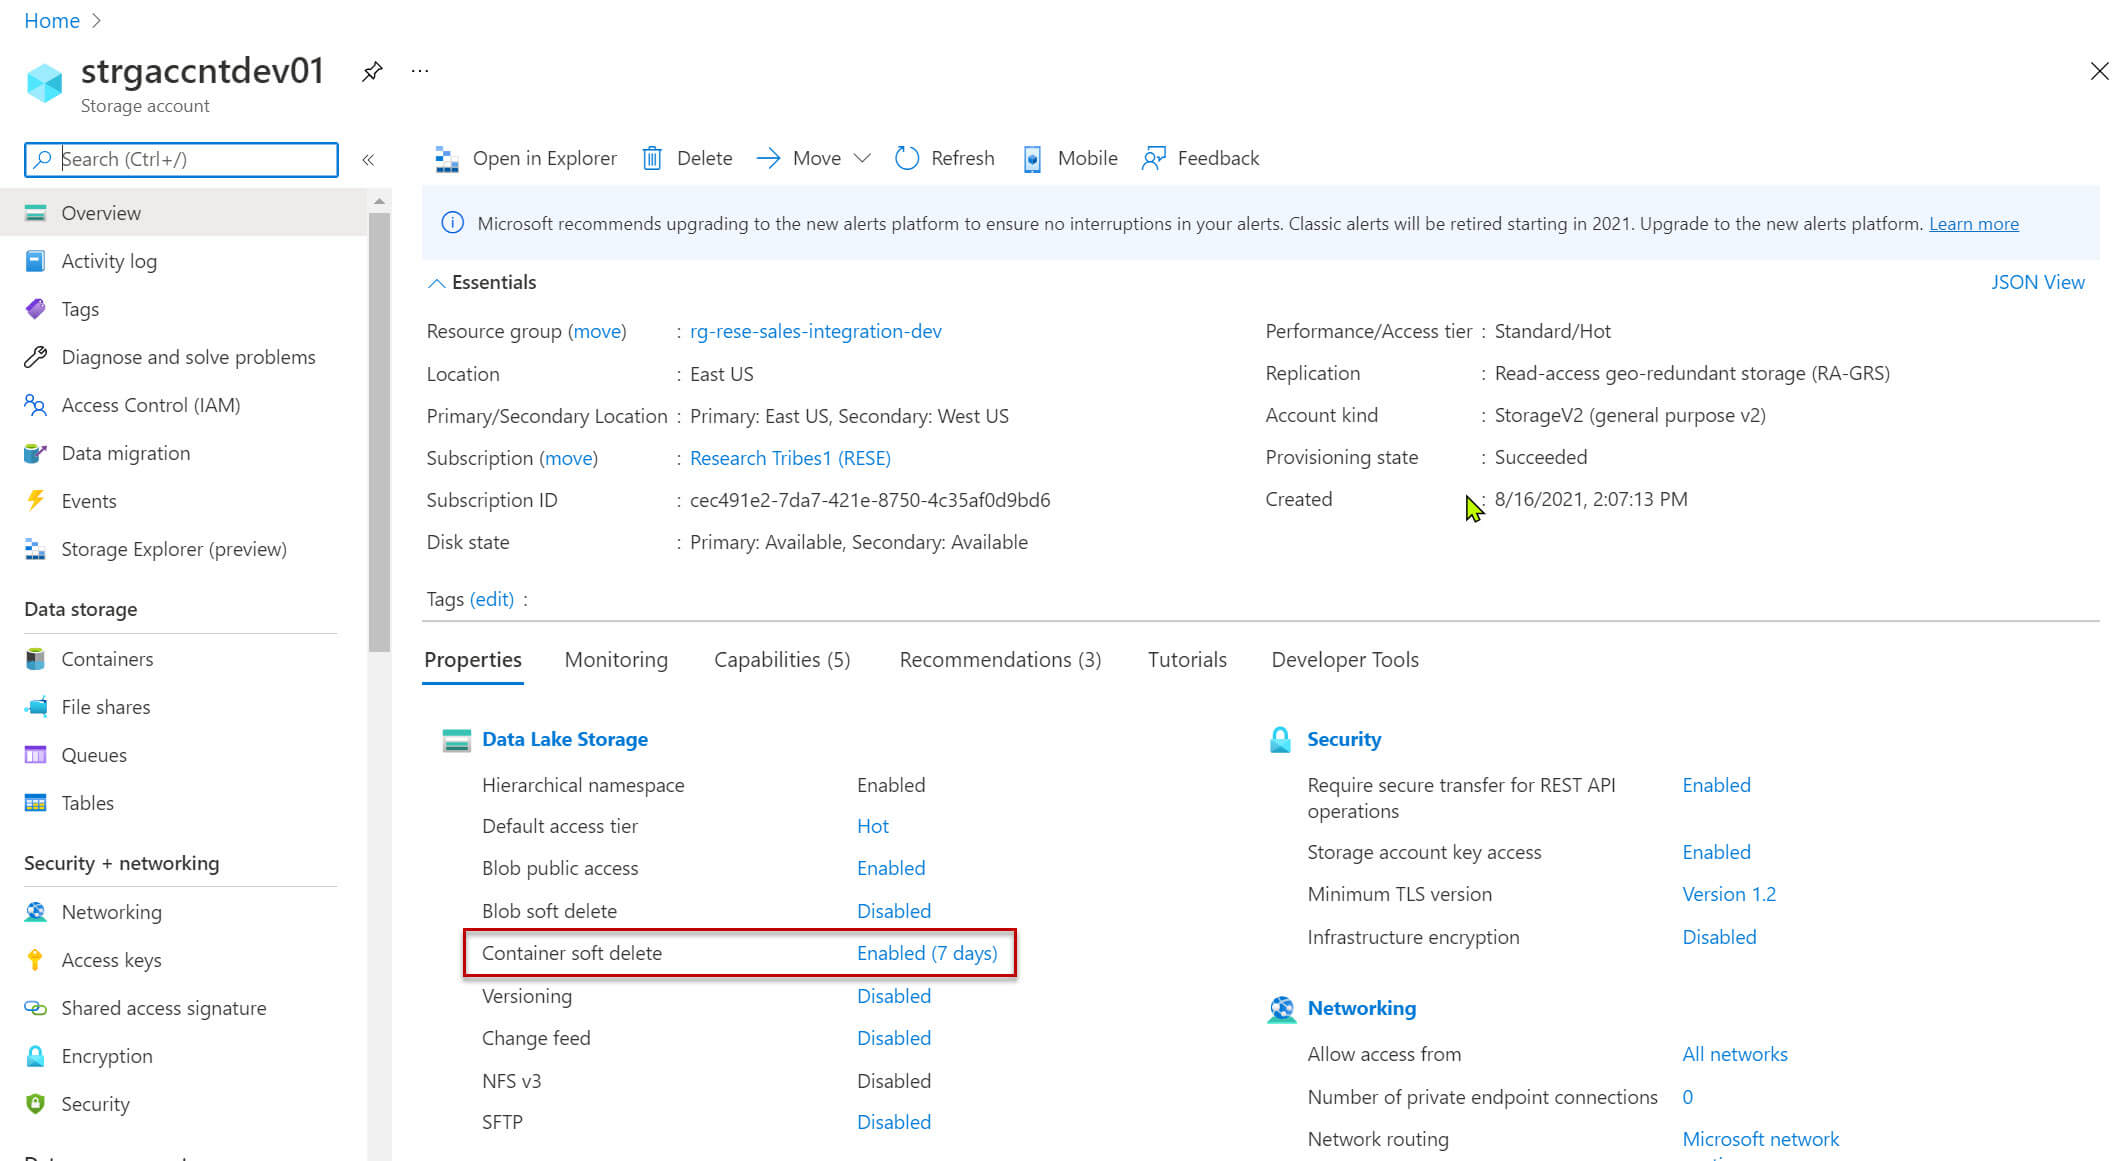
Now you can see the property of the container soft delete is Enabled and the retention period is 7 days:
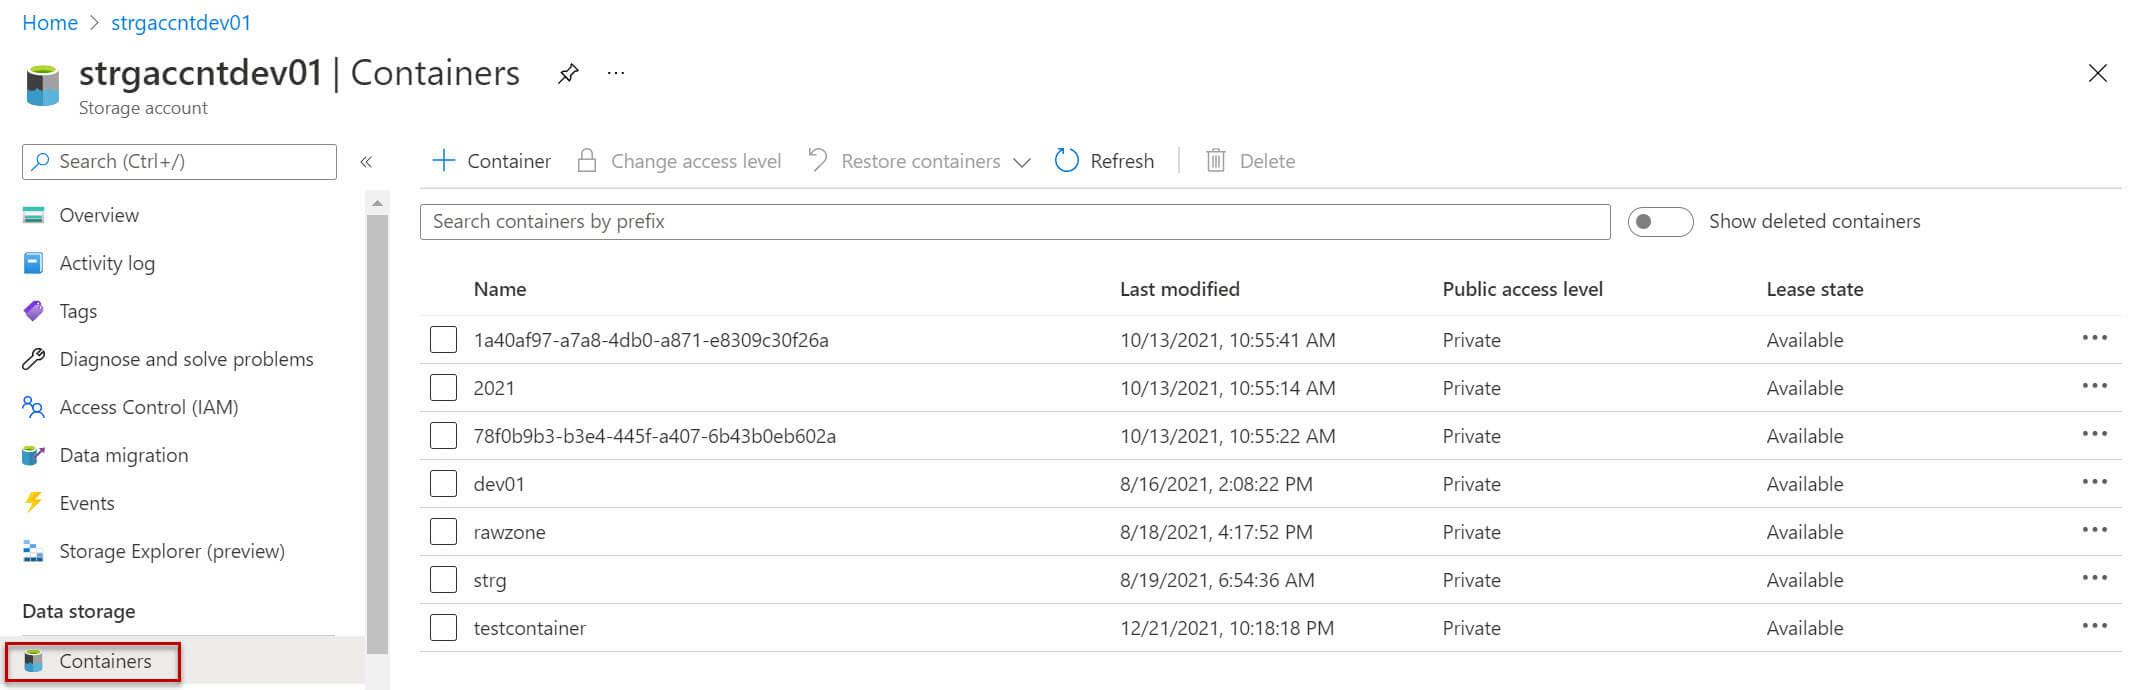
Now let's open an example storage account. I have the below containers in the storage account:
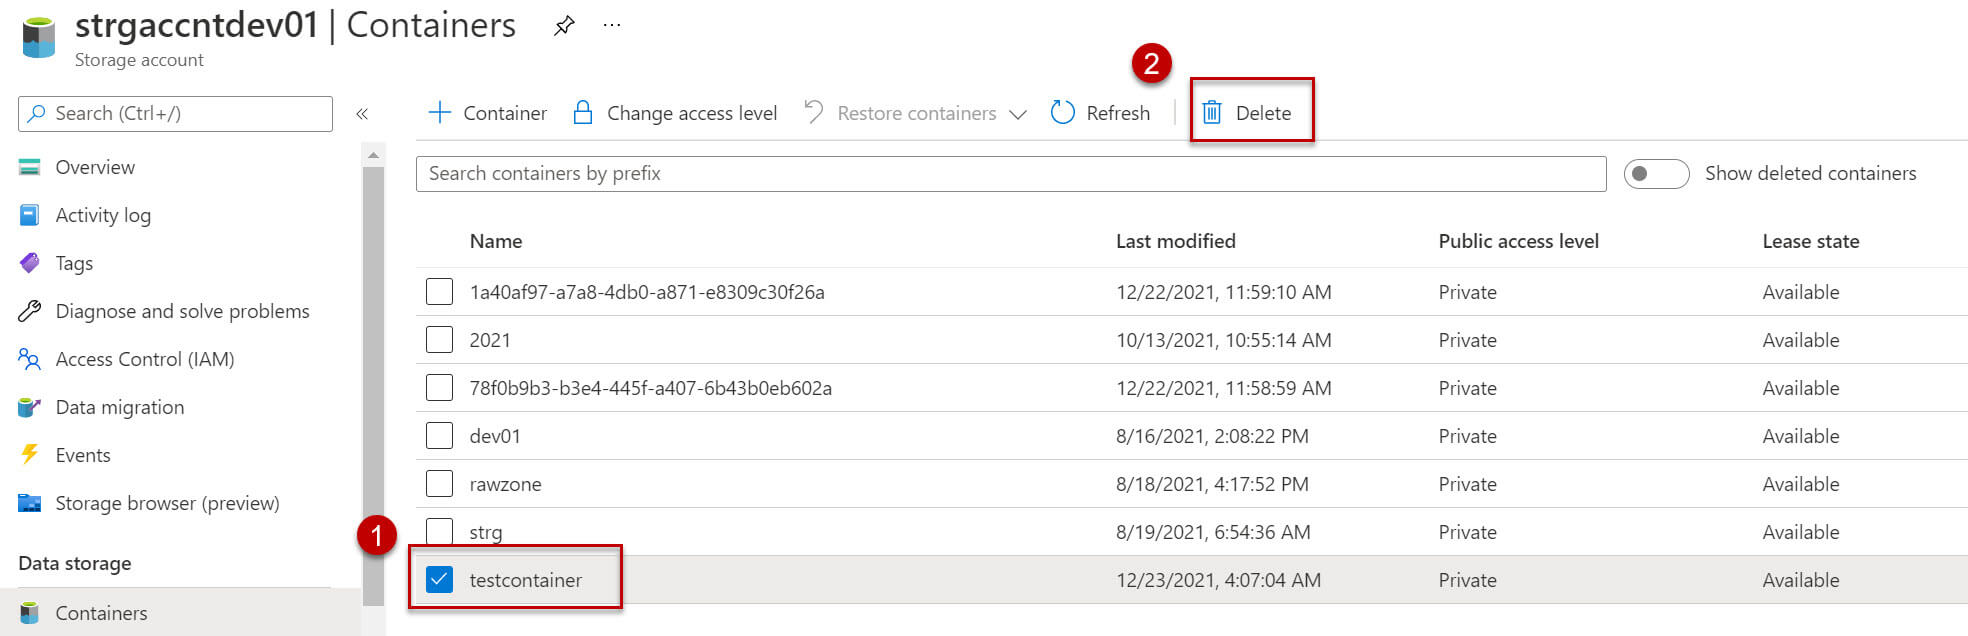
Now I will delete the testcontainer from the storage account:

To delete the container I will follow below steps:
- Select the checkbox before the container name.
- Click on the delete button.
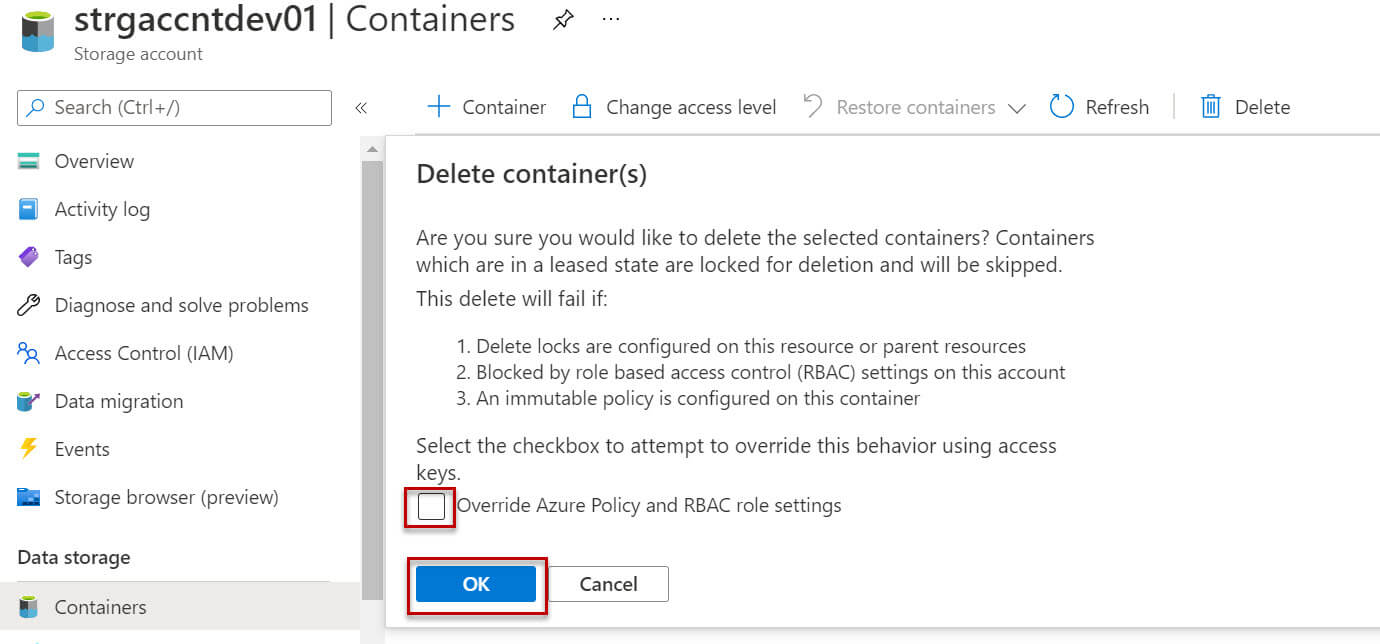
In the next screen, we need to confirm the delete operation, note that delete will fail in the below scenarios:
- If delete locks are configured on this container or parent resource.
- Blocked by role-based access control (RBAC) for this account.
- An immutable policy is applied to this container.
However, we can override this behavior by using the override Azure Policy and RBAC role settings checkbox. Click OK to proceed:
After successful deletion of the container, we can view the notification confirmation by clicking the bell icon:

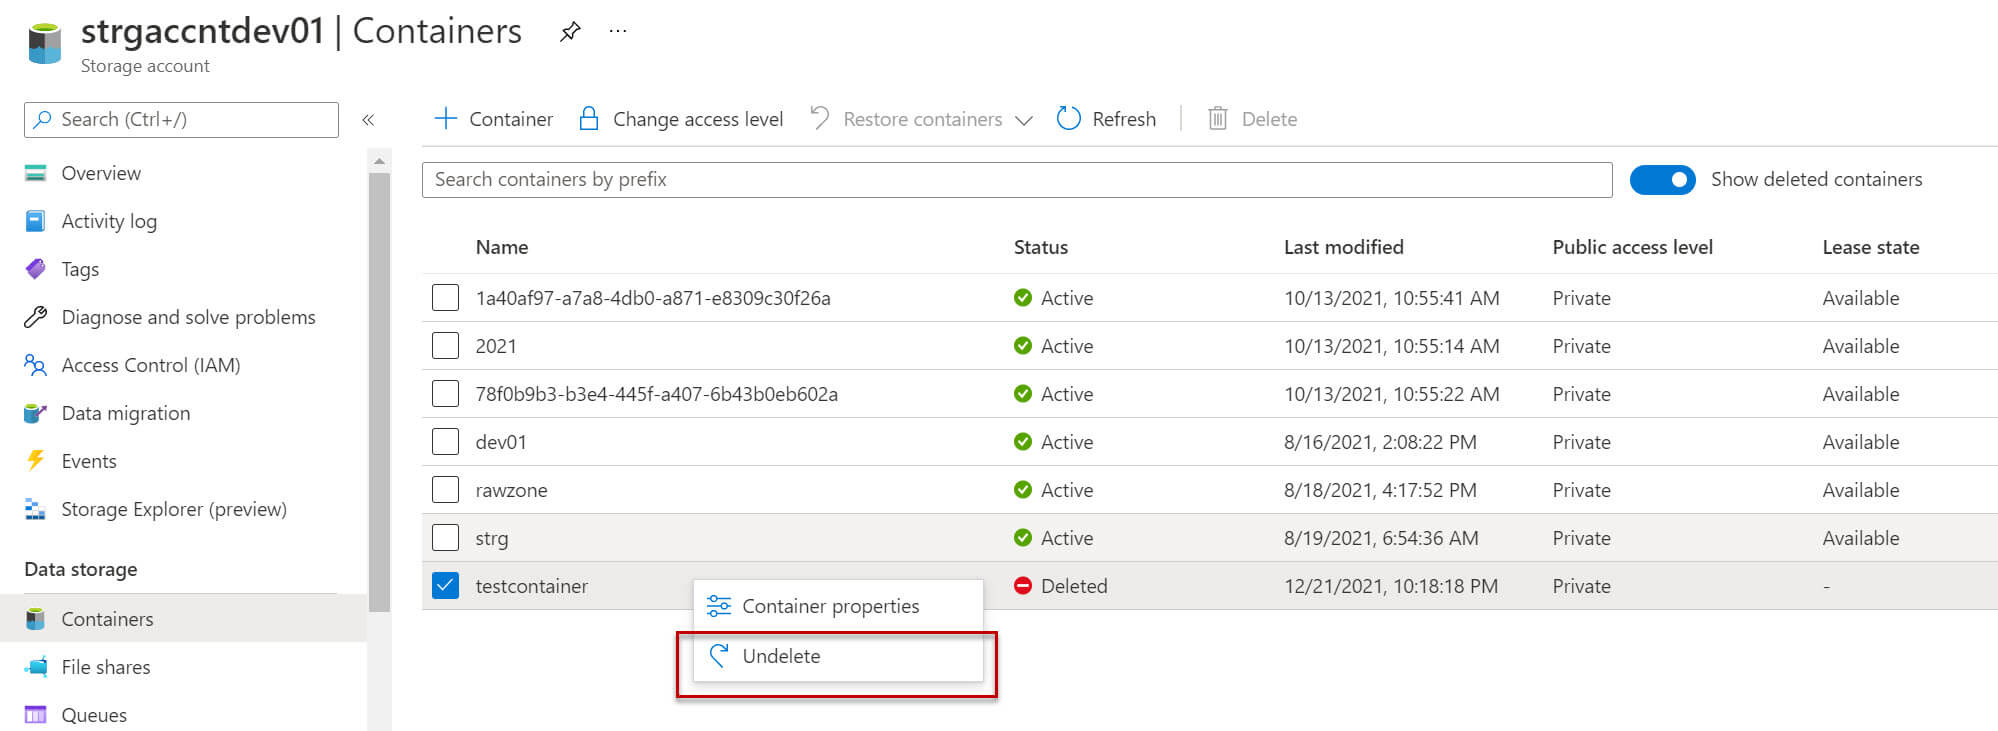
Now, we want to view the deleted container, to do that we need to click on the show deleted containers slide button. The status of the testcontainer changed from Active to Deleted.

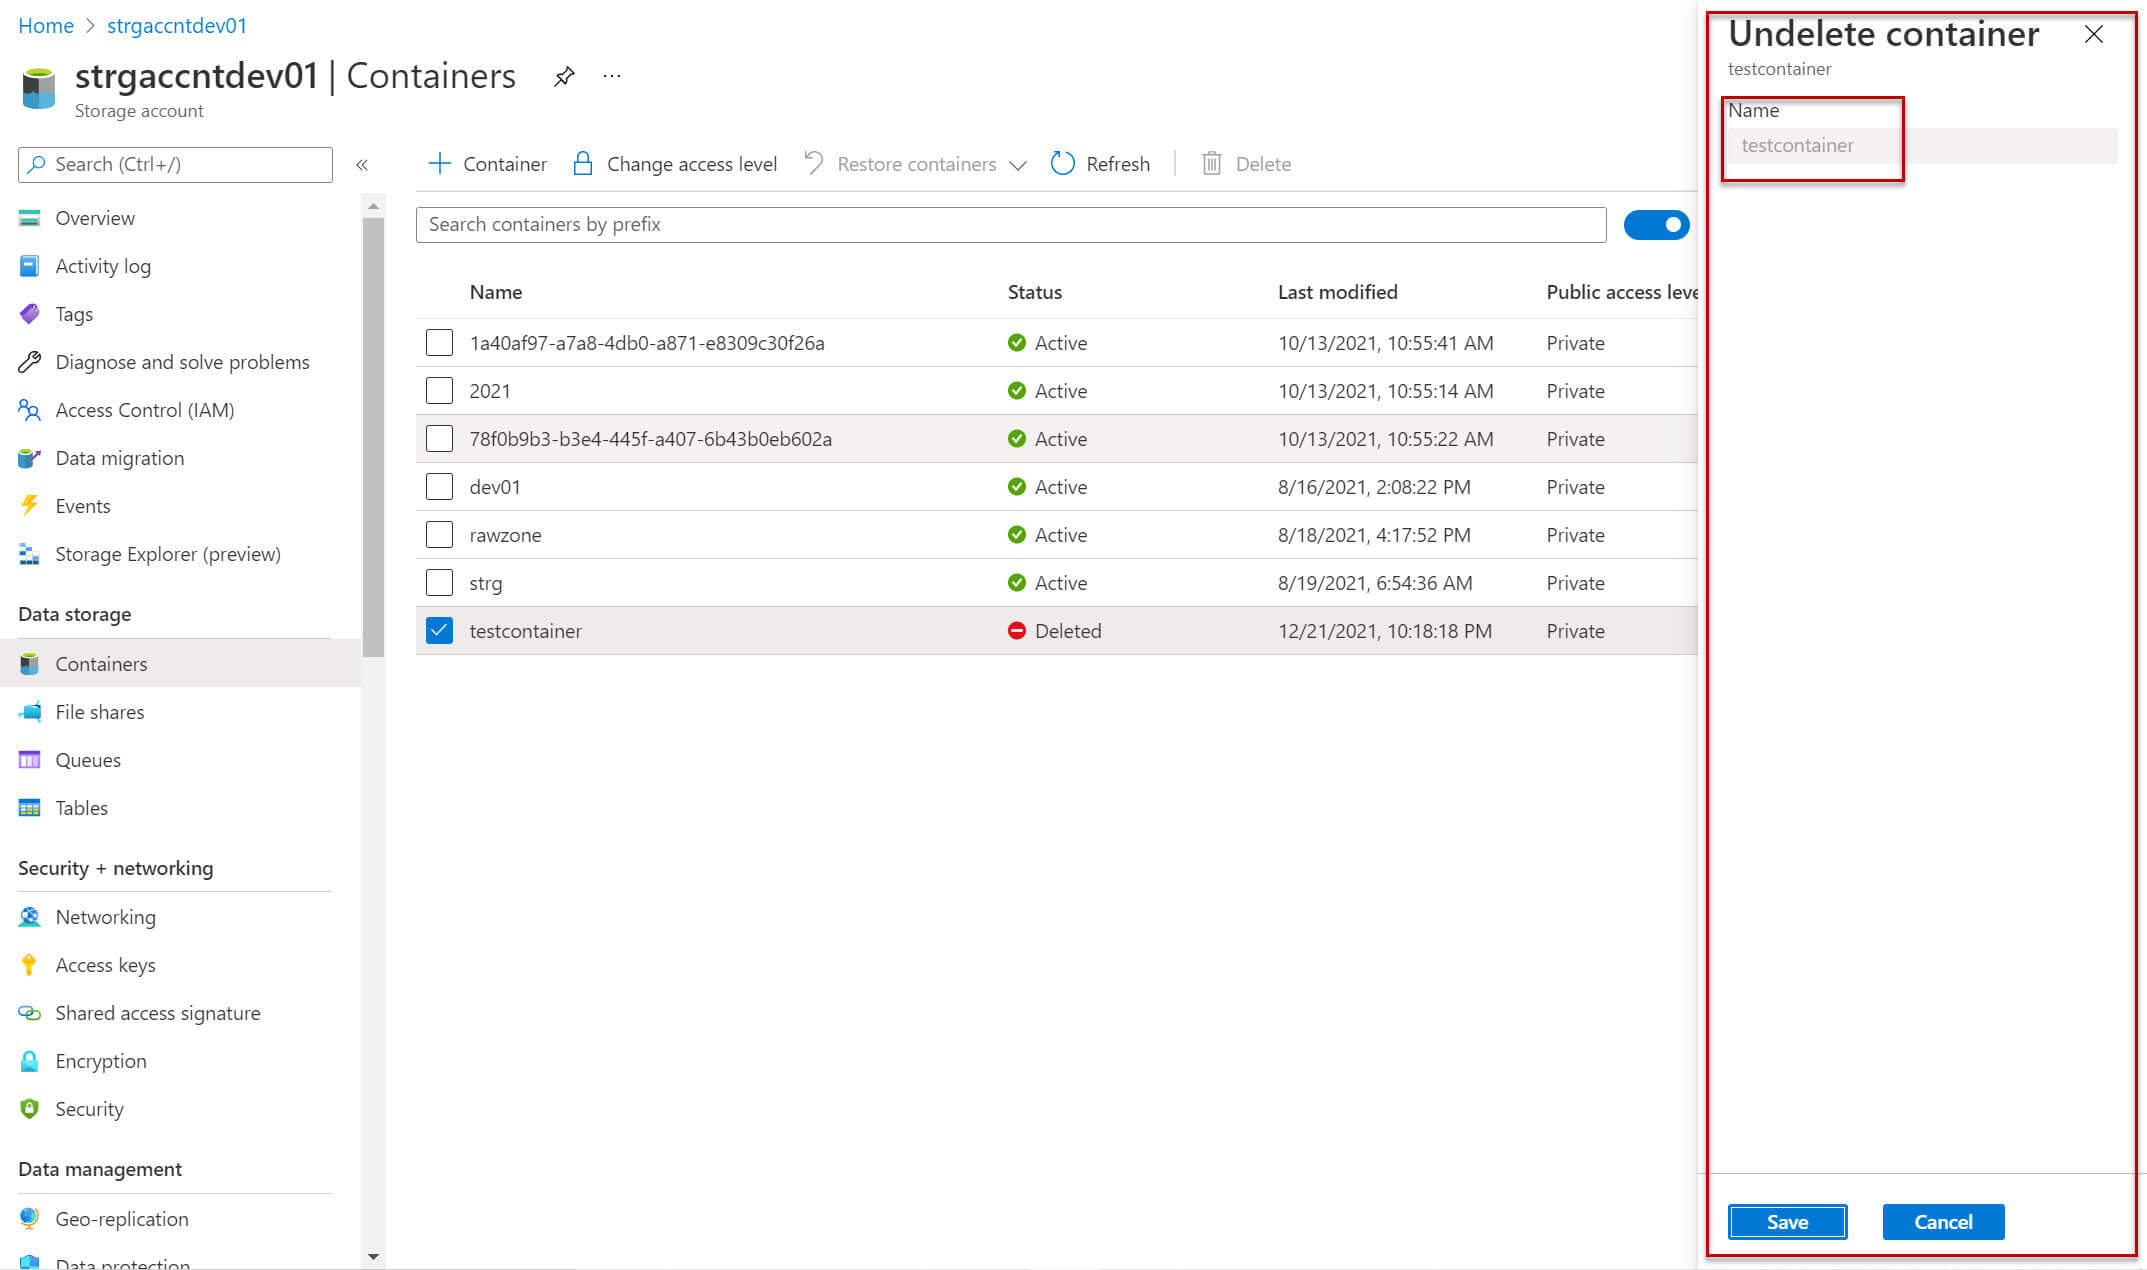
We will restore the container. Right-click on the container name and then choose the undelete option.
In the next step, an Undelete container blade is opened. Note that the container name cannot be changed and it is read-only. So, we must restore the container with its original name. If the name is already used by another container then we will not be able to restore the deleted container.
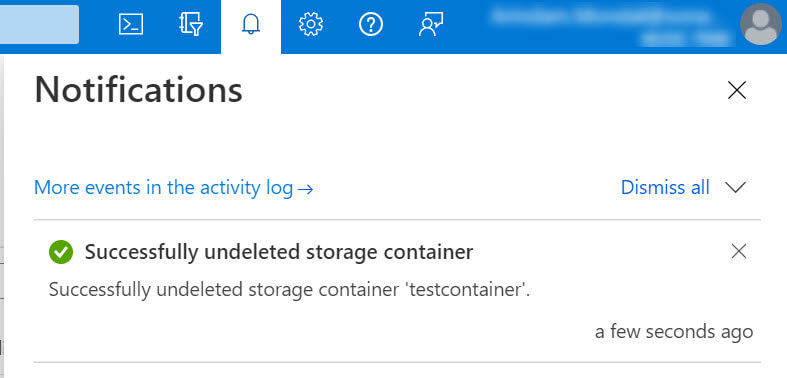
After successful undelete, we will get the notification in the bell icon:
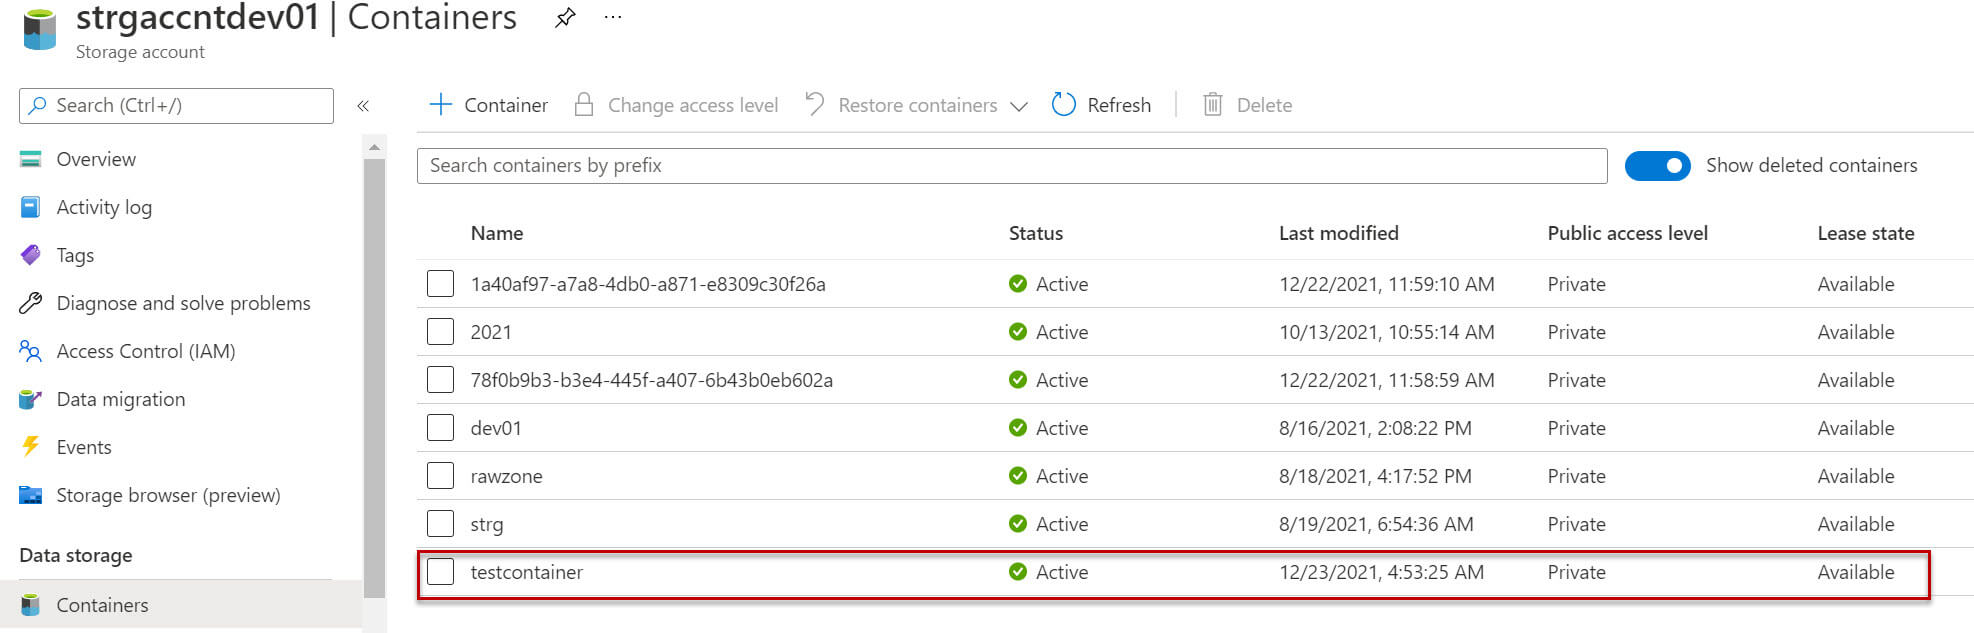
Now the deleted container is available and the status changed from deleted to active:
Conclusion
In this article, we discussed enabling soft delete in an Azure storage container to prevent accidental data deletion. Microsoft does not charge extra for enabling soft delete, data in soft delete container billed at the same rate as the active data.