

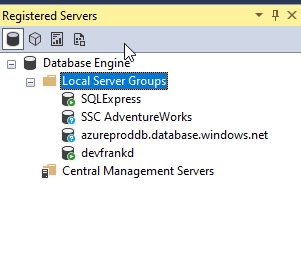
Many SQL Server Management Studio (SSMS) users connect to the same SQL Server instances over and over. In some organizations, the number of instances can be large, which makes flipping through a long list of instances in the Connect to SQL Server dialog cumbersome. I don't have a huge list, but I do have a few, as you can see in the image below.
Many users will create a custom list of registered servers that they have handy in the SSMS window on the side. These are custom to each installation, but teams may want to share their lists with each other. This article covers the export and import of your Registered Servers list.
Note: If you've never used Registered Servers, you can open this pan from the View Menu where there is a Registered Servers item. Or press CTRL+ALT+G.
Exporting Registered Servers
The export of your registered servers is very easy, but we'll walk through how this works. In the Registered Servers pane, right click the Local Server Groups item. In here, you will see a number of items, including how to add new subgroups or servers. The Tasks menu expands, and in here we see the Export item. Select that.

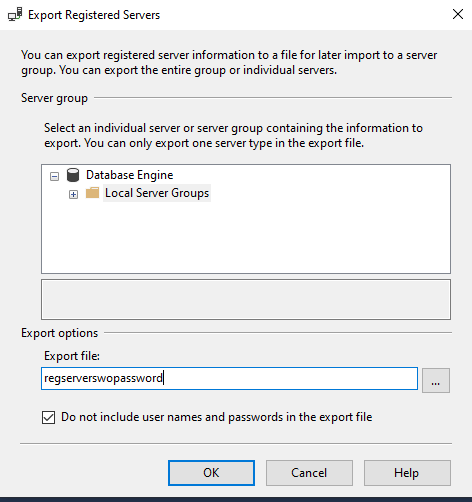
This brings up a short dialog, which is very simple. We pick which server or group we want to export. I'll just choose everything to start and enter a file name.
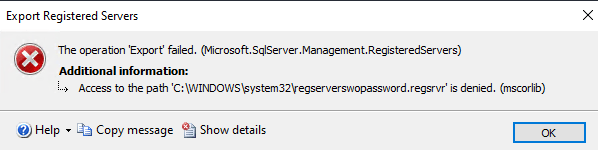
If I click OK at this point, I get an error. The default path for this isn't accessible.
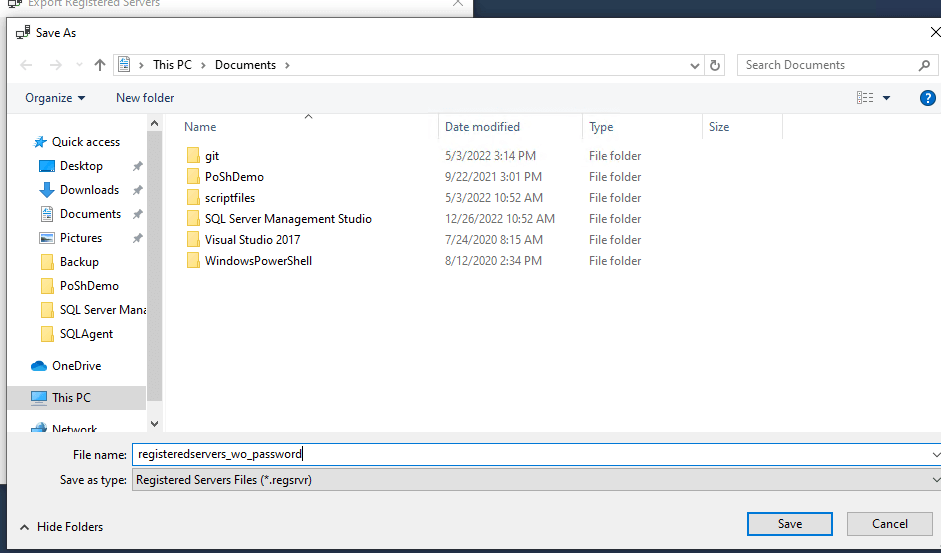
If I go back through the process and select the ellipsis button to search for a path, it defaults to my Documents folder. I am not sure why this isn't the default path anyway, but it isn't. Note that I also see a file extension, .regsrvr.
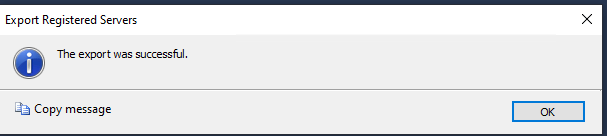
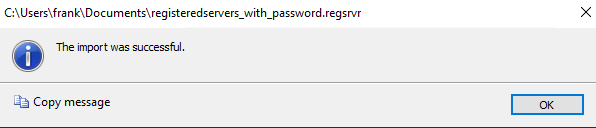
I click Save here and OK and I get a message things are exported.
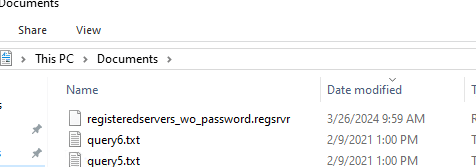
If I go to my Explorer, I see the file created.
Examining the Export File
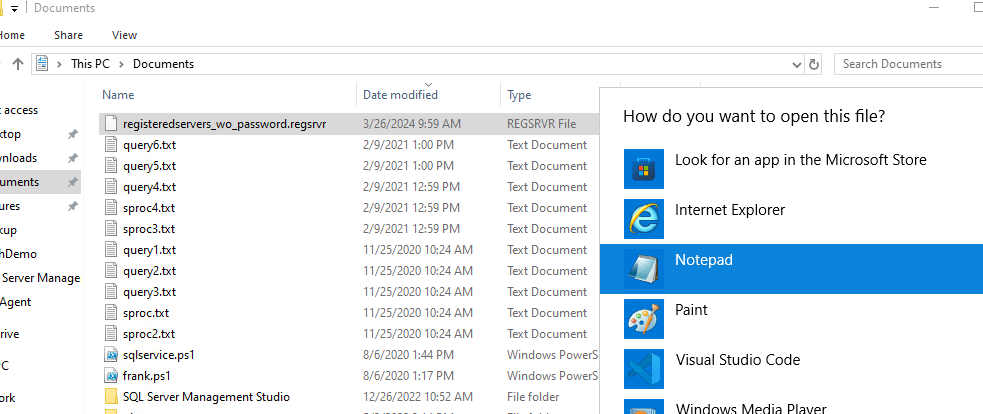
I can open this in Notepad, or any text editor. This way I can see what is being exported.
When I do that, I see this is just an XML document, despite the new extension. I am glad they choose a new extension since this helps me to know what this file contains.
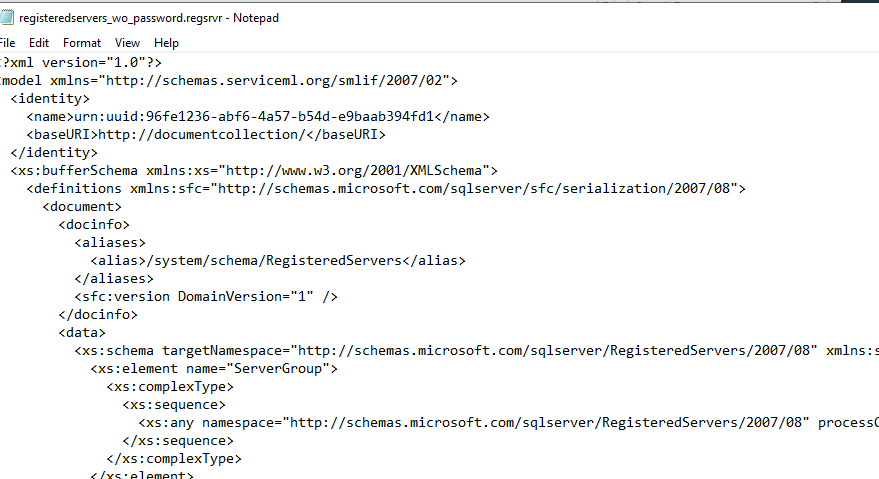
If I scroll down a bit, I will find a RegisteredServers:ServerGroup element. In here, I see my four servers as sub elements. Note these are the display names of the instances.
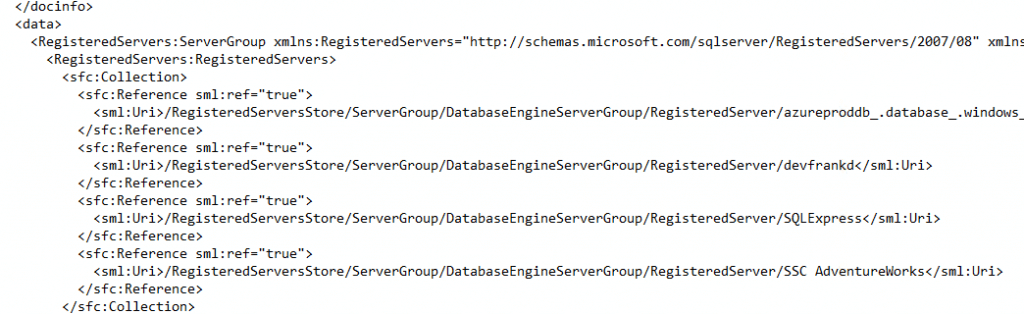
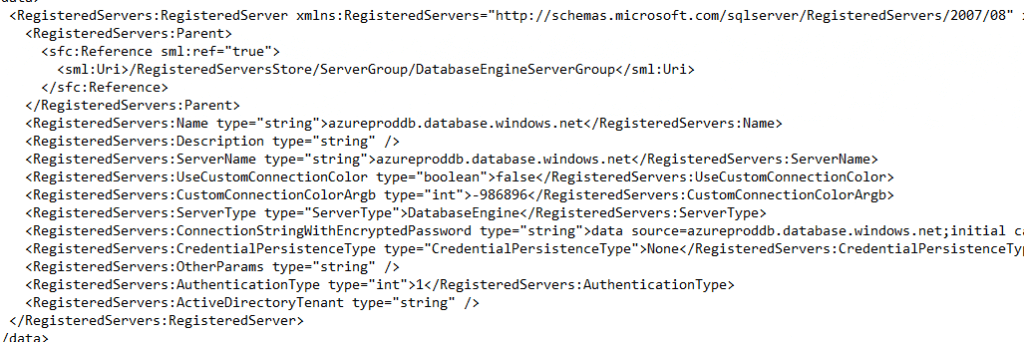
If I scroll further, I see there is a RegisteredServers:RegisteredServer element. In here, the details for my database (this is an Azure SQL Database) are contained.
Exporting Credentials
I left the box checked on my export to not include credentials in the export. Let's redo the export, but uncheck the box. I am curious what this will produce for the XML. Here's my export setting.

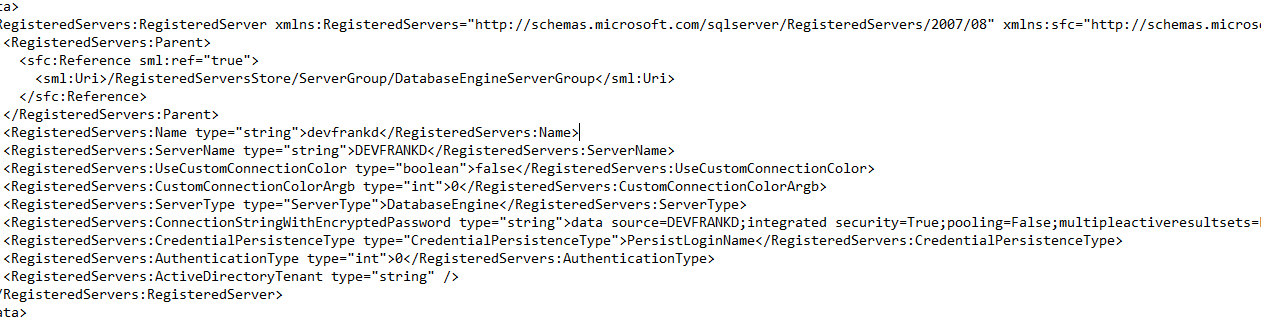
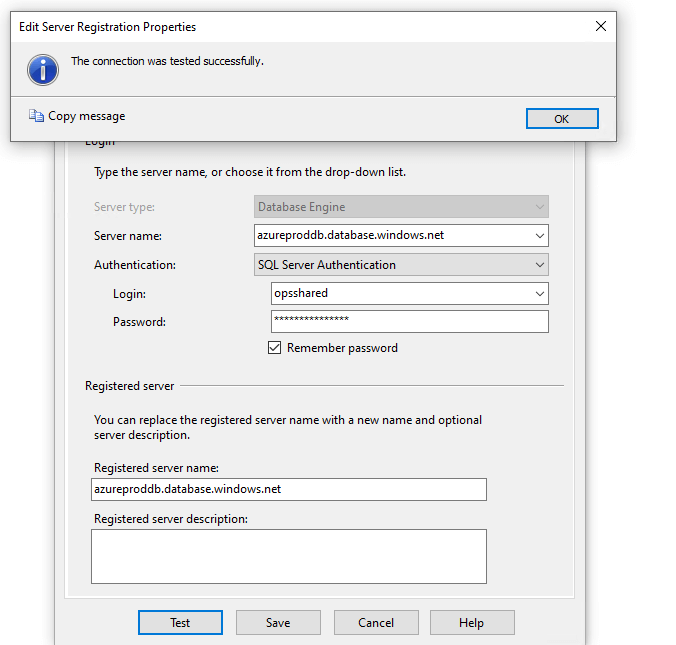
When this completes, I'll open the file. I see the same list of registered servers, but when I scroll down to a particular server, I see something different. For one of my Azure SQL Databases, I connect with a name and password. You can see that below. We see the element for RegisteredServers:ConnectionStringWithEncryptedPassword has a connection string that includes the server, the user id (opsshared) and a password. The password, however, is not the one I use. I assume this is encrypted, but I doubt this is highly secure.

Be careful with this file if sharing with others and delete it as soon as you can (and empty the recycle bin).
If I scroll to another entry, one that uses Windows Auth, I see this is noted in the connection string.
That's about it for exports. Now, let's import these.
Importing Registered Servers
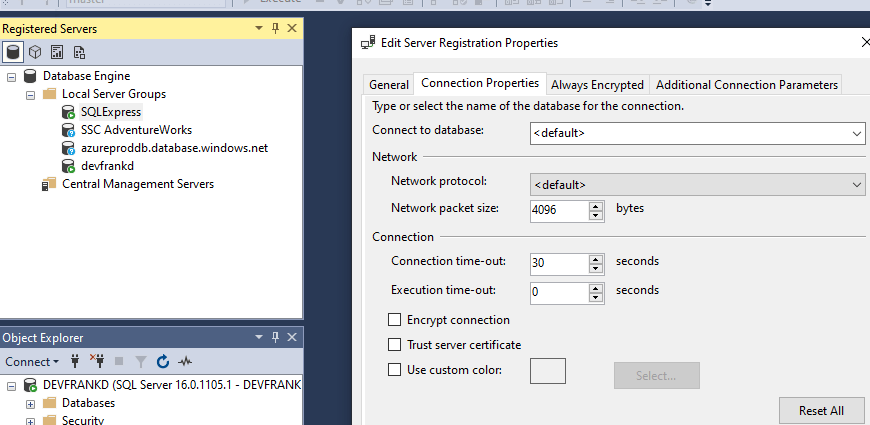
As you might guess, the import takes this file and adds it to the Registered Servers. As a first experiment, I'm going to leave my Registered Servers in SSMS, but I'll change one thing. For the SQLExpress entry, I'm changing the custom color.

Now I right click the group, select Tasks, and Import.
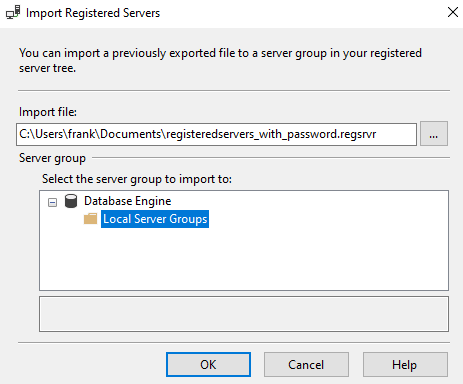
When I click OK, I see this message. I like this. It asks me to overwrite existing items. This is useful if I am sharing with a colleague, and want to update their settings.

I select Yes to All and let the import run. In a couple seconds, it completes.
If I check my SQLExpress instance, then I see the color is wiped out.
That's it. If I were to delete an instance, the import would add it back. I deleted the azureproddb instance and then re-ran the import from the file with credentials. The instance appears again, and when I check the properties of the server, I see they are correct. The Test works as well.
Now to go delete those regsrvr files.
Summary
This short article shows how easy it is to shared registered servers from SSMS. If you are not using Registered Servers in your install and you work in a team, you might consider having one person create these and then share a file with others. It's also a good way to onboard new developers.
If you use any names and passwords, however, then you should not keep these regsrvr files around, nor should you email them (copies are stored on servers). Instead, directly copy the file for another user and then be sure all copies are deleted after the imports are complete.
References
A few references that might help you understand this article.

