In this article, we will discuss creating a new Microsoft Azure SQL Database and use SQL Server Management Studio and Powershell to connect and work with it. You will need to sign up for the Free Trial with a Microsoft Account. Go to http://azure.microsoft.com and sign up for a free 30-day trial. Once you sign up, go to the Azure Portal (http://portal.azure.com) and sign in.
Overview
Microsoft Azure SQL Database is a cloud DAAS (Database As A Service) that can be used to build SQL Server databases easier and on-demand. Developers can leverage the cloud offering to focus on development of their new applications without having to wait days for a DBA to create a database. Database Administrators can use it for high availability scenarios, use the service to backup databases to the cloud, or scale databases quickly based on demand.
Microsoft Azure SQL Database uses the codebase from the newest SQL Server 2016 Product Suite for the database engine, however, there are some T-SQL differences on what you can do in Microsoft Azure SQL. The table below highlights a few of those differences. You can view more differences and limitations in the Azure Documentation.
- Global Tempoary Tables
- SQL Server Agent Functions/Procedures
- SQL Server Logins (Database Scope Credentials are supported)
- sp_addmessage
- SQL Server Auditing (Database Auditing Supported)
- SQL Server Trace
- Login Triggers or Server-scope Triggers
- USE statement
Use Cases
There are a number of use cases that can be adopted.
- Scale a production application based on increase demand
- Provision development and test environments that will speed up development and QA/Test
- Ability to out-source database management and TCO
- Backup and Recovery
Features
Instead of writing out the features that are available in Microsoft Azure SQL I will provide a link to the Microsoft Docs with that information. The feature set is changing daily and it a good idea to check with the docs on a daily or weekly basis.
Microsoft Docs - Azure SQL Database Features
Create an SQL Database in Azure
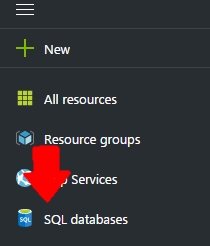
You will need to create a Azure account and Microsoft is offering a Free Trial as of the date of this article. Once you have the account and are in the Azure Portal, to create a database, click on the SQL Databases icon.
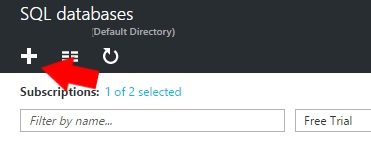
Next, click on the plus icon in the Azure Database Screen.
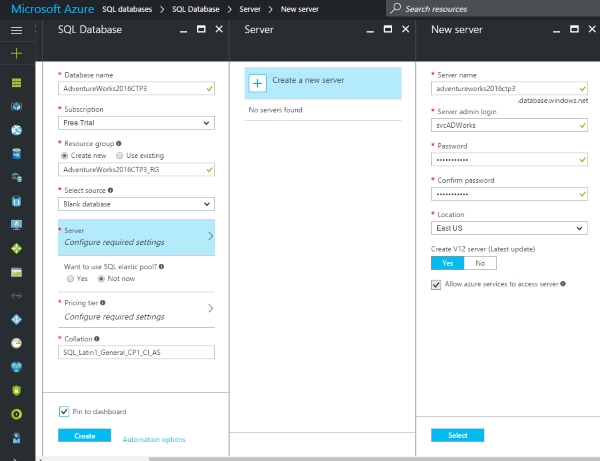
You will be presented with various options to create a new Azure SQL Database. We will walk though each one.
- Database Name = AdventureWorks2016CTP3
- Subscription = This will be the free trial you signed up for. This is $200 and good for 30 days
- Resource Group = This is the resource group that you assign to your database. You can read more about Resource Group Guidelines in Azure Documentation Site.
- Server = When you create an Azure SQL Database it needs to be assigned to a server. You can create one from the portal or choose an existing one. We will create a new one. You will need to choose the Server Name, User Name and Password, Location.
- Want to use SQL Elastic Pool? = Allow you to budget your resources while providing resources based on demand
- Pricing tier = You have a number of different tiers of pricing available. For this demo, we will choose the Basic.
- Collation = Default SQL Server Collation
After your database is deployed you will see the new database in your list of Microsoft Azure SQL Databases. Click on the database to see the properties.
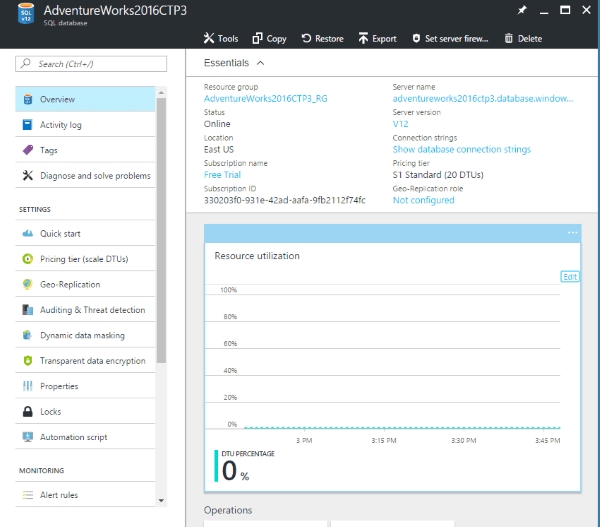
From here you can perform a number of different actions.
- Setup Dynamic Data Masking
- Transparent Data Encryption
- Geo-Replication
- Get Connection String Information
- Restore/Export Database
Connect to Azure SQL Database with SQL Server Management Studio (SSMS)
You can download the Microsoft SQL Server Management Studio software from Microsoft for free. In this demonstration, we will be using a Release Candidate 17.0. To connect to Azure SQL Database with Microsoft SQL Server Management Studio you will need the server name, user name, and password that you created when you setup the database. You will connect using SQL Authentication. The screenshot (Figure 1) is an example of what you will need to type in to connect.
You may be asked, when you click Connect, to sign into your Microsoft Account (Figure 2). You will need to enter the same credentials you use to log into the Microsoft Azure Portal. You will also be asked to add a New Firewall Rule with your public IP Address listed. Click OK.
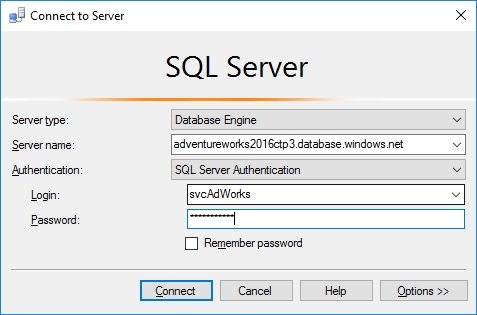
Figure 1 - SSMS Connection Screen
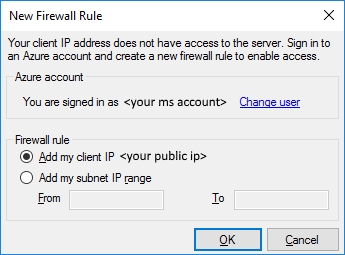
Figure 2 - Azure Sign in Screen and New Firewall Rule
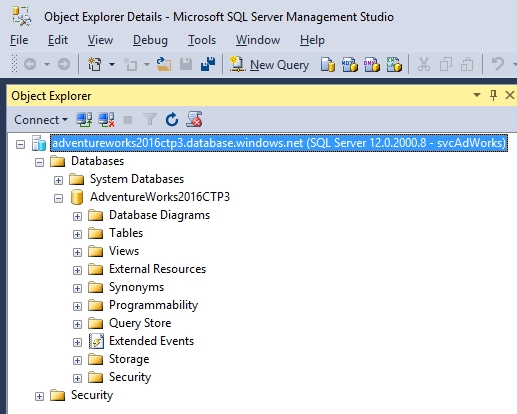
Figure 3 - SSMS Object Explorer Screen connected to Azure SQL Database
You would query a Azure Database just like you would an on-premise SQL Server. The screenshot below (Figure 4) is an example of a simple query that will select database from a table.
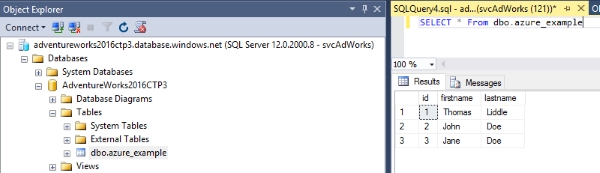
Figure 4 - Query a SQL Azure Database from SQL Server Management Studio (SSMS)
Connect to Azure SQL Database with Powershell
You will need to install the Azure Powershell Modules in order to connect to Azure via Powershell. You can find the MSI file here on Github. Once you have the installation completed, perform the following commands to add your Azure Account You will be asked to log into your Microsoft Azure Account.
PS C:\>Add-AzureAccount
PS C:\>Disable-AzureDataCollection
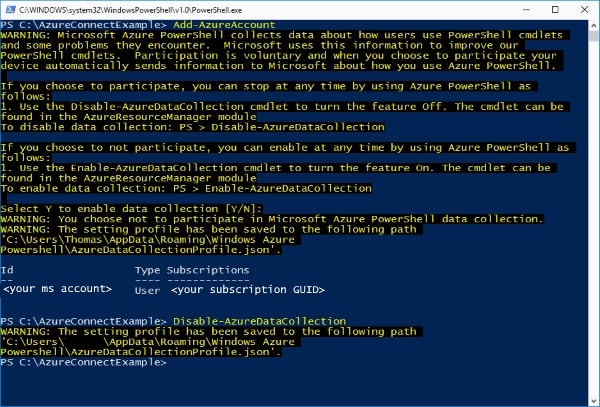
Figure 1 - Add Azure Account after Powershell plugin installation
To view your list of Azure Databases with your subscription, you can type in the following command in PowerShell.
PS C:\>Get-AzureSqlDatabaseServer
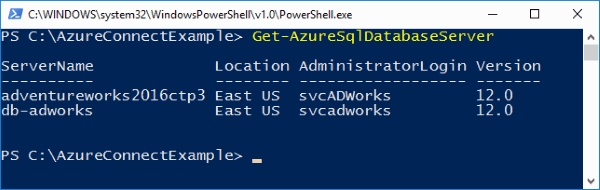
Figure 2 - List Database associated with Azure Subscription
To query a table in SQL Azure via Powershell, run the following Invoke-SQLCmd command.
PS SQLSERVER:\> Invoke-Sqlcmd -Query "SELECT * From dbo.azure_example"
-ServerInstance "adventureworks2016ctp3.database.windows.net"
-UserName svcAdWorks -Password "enter password w/double quotes" -Database "adventureworks2016ctp3"
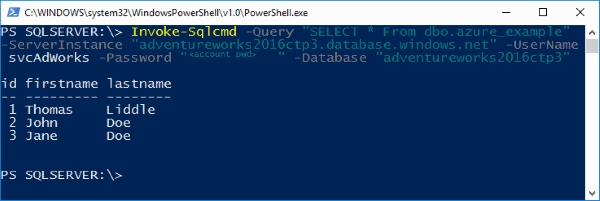
Figure 3 - Query an Azure Database with Powershell