Introduction
Non-clustered indexes are very common and often times misunderstood. In this article I will explain how to use them effectively by using included columns.
Definition
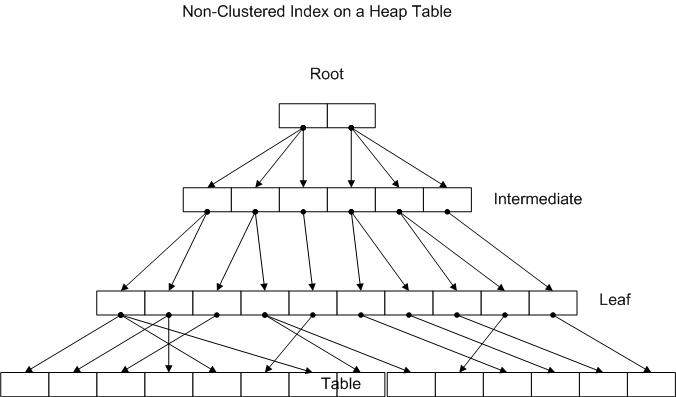
The image below is a stylized picture of a non-clustered index on a heap table. It shows each page of the index (doubly linked list) and how each entry points to the next level. One record in the root points to a complete page in the following intermediate level. One record in the Intermediate level points to a page in the next level. In the image below the next level happens to be the leaf level,but in a very large index you may have multiple intermediate levels between the root and leaf. At the very end the leaf points to the actual table pages
When you create an non-clusterd index in SQL Server 2005/2008 you have the option of columns for the key and what are called 'included' columns. Here is what it looks like if you create an index with all of the necessary columns (SARG and columns in the Select statement) as keys.
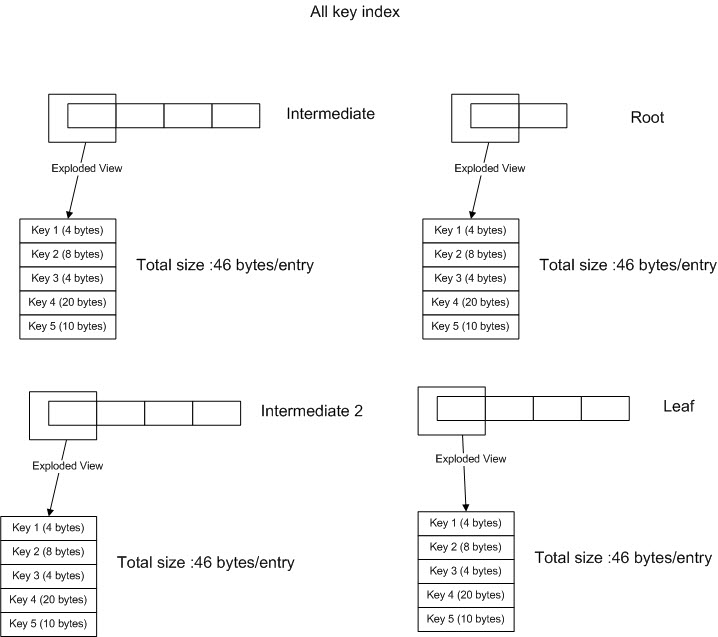
Each entry requires 46 bytes at each level. If you do some quick math you will see that for an index that has 4 levels (Root to Leaf) you will need 46*4=184 bytes * number of entries (depends upon number of records in your base table). Just concern yourself with the 184 bytes, since we will see shortly how you can reduce that..
You might be asking yourself at this point "184 bytes isn't that much", but another benefit of reducing the size of the entry is this will reduce the number of index pages, which will make searches more efficient. We will see how to do that shortly. For the image below, we have taken Keys 1-3 as actually SARGS and keys 4-5 as only necessary to produce a covered index.
Real World Example
Here is an example to show you what to look for to make sure your index is properly 'covered'. The query I have is selecting 3 columns back and using 1 of the 3 as a SARG, search criteria.

I created a simple non-clustered, non-unique index on C017_DateLastRecieved (here is a partial image of the create statement):

The result of both the execution plan and the output from statistics io is listed below. Notice the RID lookup.

![]()
Now let's add two additional columns, the ones in the select statment as included columns in the index. You will notice that you cannot adjust the order when you select them. Order for included columns, unlike index key columns, has no meaning. The included columns, are again, simply to provide information to the select statement.

Now we get to see the result of adding those two columns in the included columns section:

The showplan above pulls all of the information from the index alone, which is exactly what we want. To back that up look at the statistics io. In the original example above we had 143 logical reads, whereas now we have:
![]()
4 logical reads! We reduced our logical reads from 143 to 4. That is a dramatic improvement. Logical reads are a very good way to determine if you are improving your queries., but that is for another article 🙂
Conclusion
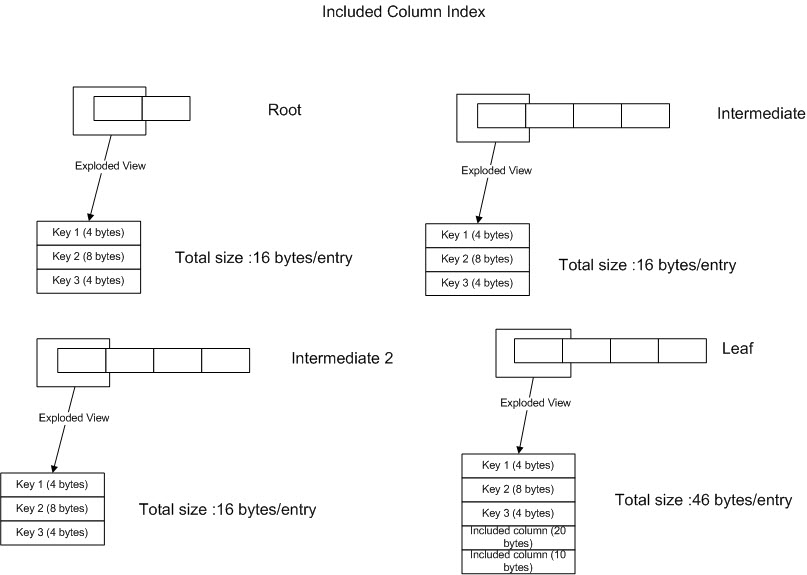
If you look above, you will see that when you use 'included columns', the entry is ONLY included at the leaf level. This saves you quite a bit of space. The new space requirement is (16*3)+46=94 bytes/entry. This saves you 1-(94/184)=48.9% in space requirements, which will reduce the space needed by the same amount. You might be asking 'when do you I use an included column vs. a key'? The answer is quite simple. Anything that is in the where clause would be a key, anything in your select statement would be an included column.