

Overview
In this article, we will understand how we can connect to PostgreSQL using Node.js application. We will start with setting up PostgreSQL in our local system and perform basic CRUD operations to interact with the PostgreSQL database.
Prerequisites
To start with this, we need the following conditions to be met:
- Windows machine (or any other OS should work, just check the command/shortcuts accordingly),
- Node.js installed (you can check that by running node -v from your CLI),
- basic familiarity with JavaScript and CLI.
Installing PostgreSQL on Windows machine
Step 1 - Download PostgreSQL
- Visit the official PostgreSQL download page: https://www.postgresql.org/download/windows/
- Click "Download the installer" from EnterpriseDB.
- Choose the latest version against your OS
Step 2 - Run the installer
Launch the downloaded .exe installer.
Next, follow the steps:
- Installation Directory: Leave default or change as needed.
- Components: Select PostgreSQL server, pgAdmin, Command Line Tools.
- Data Directory: Leave default.
- Password: Set a strong password for the postgres user (default superuser).
- Port: Default is 5432.
- Locale: Leave as default.
Click Next and install.
Once the installation is complete, we should be able to see pgAdmin application installed on our system. Open the application and login with the password you have just setup.
Congratulations! We have now successfully installed PostgreSQL on our local system.
Setting up PostgreSQL for our tutorial
Before we start on our tutorial on interacting with PostgreSQL using Node.js, we need to have some basic data setup done. For this purpose, we will first create a new database and also create a table in the same. Our database would be named as testdb and our table name would be users.
In the pgAdmin, expand: Servers -> PostgreSQL <version_number> -> Databases.
You should see a database named postgres which comes by default. Right click on the same and choose Query Tool. This will open a query tool page. Paste the following command there and run it:
CREATE DATABASE testdb;
Next, refresh the Databases and you should see the new database we created. Right click on the same and open a Query Tool here now. You may close the earlier one.
Run the following command in this new query tool which will create a new table called users in this database named testdb.
CREATE TABLE users (
  id SERIAL PRIMARY KEY,
  name VARCHAR(100),
  email VARCHAR(100) UNIQUE
);
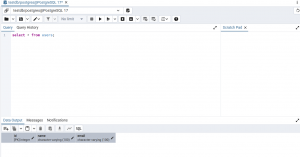
Once this is done, you can simply run the following query to see an empty table:
select * from users;
Great! Now we have completed the initial data setup needed for our upcoming tutorial.
Setting up Node.js project
As we discussed, we will connect to PostgreSQL using Node.js. Accordingly, we will create a new Node.js project for this purpose. To do that, from any folder of our choice, we will launch command prompt (or any other CLI of your choice) and run the following commands:
mkdir node-postgres-app
cd node-postgres-app
npm init -y
npm install pg
The commands will first create a directory and then navigate inside the newly created directory. Next, it will initiate a Node.js project layout here and finally install the commonly used pg module so that we can connect to PostgreSQL using Node.js.
Next, we will create a file called db.js which will be our common module to connect to PostgreSQL using Node.js for any of the upcoming CRUD operations. For this, create a new JS file in this working directory from CLI using the following command:
echo.> db.js
and then paste the following contents inside it by opening this JS file in your favorite text editor:
const { Pool } = require('pg');

const pool = new Pool({
  user: 'postgres',
  host: 'localhost',
  database: 'testdb',
  password: 'your_password', // Replace with your password
  port: 5432,
});

module.exports = pool;
Note: Remember to replace the password with the one you have setup during the installation of PostgreSQL.
Once this is done, our entire setup process is now complete. We will now start with our CRUD operations.
Performing CRUD operations
Create (Insert) Operation
We will create a new file in the directory named create.js using the same command we used earlier and paste the following contents inside:
const pool = require('./db');

const createUser = async () => {
  const res = await pool.query(
    'INSERT INTO users (name, email) VALUES ($1, $2) RETURNING *',
    ['Alice', 'alice@example.com']
  );
  console.log('User Created:', res.rows[0]);
};

createUser();
As you can see above, we are using the db.js file to get hold of the exported module pool and use the same to make a query to the DB and run an insert statement. As evident, the placeholders in the values are later substituted accordingly from the list of values provided. Finally, the inserted record is also printed from the response.
Once we save the above file and run it from the CLI using node create.js, we should see the following output:
![]()
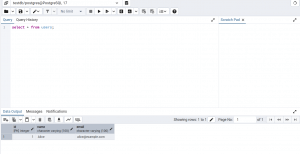
We can also confirm the same from the pgAdmin query tool:
Read (Select) Operation
We will again create a new file in the directory named read.js using the same command we used earlier and paste the following contents inside:
const pool = require('./db');

const readUsers = async () => {
  const res = await pool.query('SELECT * FROM users');
  console.log('Users:', res.rows);
};

readUsers();
As explained earlier, it uses the pool module exported by reusing the db.js file and makes a select query into the database. The response is printed onto the console for all rows fetched.
Once we save the above file and run it from CLI using node read.js, we should see a similar output:
![]()
Update Operation
We will again create a new file in the directory named update.js using the same command we used earlier and paste the following contents inside:
const pool = require('./db');

const updateUser = async () => {
  const res = await pool.query(
    'UPDATE users SET name = $1 WHERE email = $2 RETURNING *',
    ['Alicia', 'alice@example.com']
  );
  console.log('User Updated:', res.rows[0]);
};

updateUser();
Now that we know, it uses pool module from imported db.js file and runs an update query into the database and prints the updated data from the response into the console.
Once we save the file and run it, we should see the following output:
![]()
We have updated the name by finding the user using the email id.
Delete Operation
We will again create a new file in the directory named update.js using the same command we used earlier and paste the following contents inside:
const pool = require('./db');

const deleteUser = async () => {
  const res = await pool.query(
    'DELETE FROM users WHERE email = $1 RETURNING *',
    ['alice@example.com']
  );
  console.log('User Deleted:', res.rows[0]);
};

deleteUser();
Now that we know, it uses pool module from imported db.js file and runs an delete query into the database and prints the deleted data from the response into the console.
Once we save the file and run it, we should see the following output:
![]()
Conclusion
We have seen in this article on how to install and setup PostgreSQL in our local system and connect to it using Node.js to perform basic CRUD operations.