

There are numerous Git tutorials on the Internet, plenty of initial getting started posts, and no shortage of documentation available. However, for many DBAs and database developers, they often aren't asked or forced to give version control a try. This series of articles will walk you through using Git from the basics for someone that hasn't done much with version control. The goal will be to provide some practical examples using scripts and SSMS in a way that will help you get comfortable without requiring you to learn a large amount at once.
The goal of this series is to walk you through the basics of using Git as a version control system in a practical way. The articles in this series are:
- Basic Git for DBAs: Getting Started with Git
- Basic Git for DBAs: Sharing Files Through GitHub
- Basic Git for DBAs: the Basics of Branches
- Basic Git for DBAs: Making Changes in GitHub
- Basic Git for DBAs: Merging Code Between Branches
- Basic Git for DBAs: What's a Pull Request?
- Basic Git for DBAs: Managing PowerShell Scripts
- Basic Git for DBAs: Ignoring Files and Customizing Your Environment
Installing Software
Git is its own software application that integrates with your filesystem. You can install git from https://git-scm.com/, the official site for Git. Git is open source software, and completely free for you to install on your machine. The site will detect your OS, but I have links here for the major platforms:
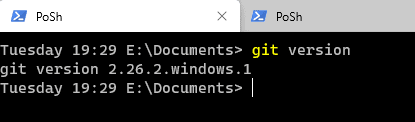
Once you download the appropriate file, install this as you would any other software. When this is complete, you can verify your installation at a command prompt or Terminal. Run this command:
git version
This will return the current version of Git you have on your system. As you can see, at the time of this writing, I have v2.26.2.
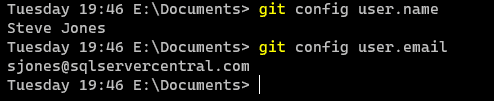
I also need to configure Git with my identity. Git uses a name and email as a way to track who makde changes, so I need to do this initial config. Some GUI clients will let you do this inside them, but we'll just start with the command line. First, I'll set the name. I'll use Steve Jones, but you should replace this in the code below with your name:
git config --global user.name "Steve Jones"
I also need to set my email address with the git config command. This is also a global setting (hence the parameter name), and I'll set this to my email here.
git config --global user.email "sjones@sql******central.com"
Please replace the parameter values with your own information when you run this.
When this completes, I can check this with the "git config <setting>" command, as I show in this image. This verifies I've set the values.
Like much software, git does release new versions periodically and you many wish to update your version periodically. The basic commands are stable, but since you will likely work with others, you may be required to upgrade your version at times to ensure you can exchange repository files.
Git is a command line application, but there are many GUI clients that will allow you to work with Git using a piece of software. The major clients I have used, and periodically use today are:
- GitHub Desktop (formerly GitHub for Windows)
- SourceTree
- GitKrakken
- Tortoise Git
There are plenty of others available as well, and support for Git is built into Visual Studio Code, Visual Studio, and many IDEs. For this series, I will use SourceTree. You can choose any client that you like, but download one and install it on your system. The concepts and steps we will follow are applicable to any client. I will use the names for the git features in the text, and you will then need to map these to the same selection in your own client.
I downloaded and installed SourceTree v3.3.8 for this writing.
Beginning to Track Files
Rather than explain a lot about version control, let's start to actually track files. To begin, let's imagine that we want to track a number of SQL scripts that we use. I want to keep these organized and eventually share them with my team. Let's create a new folder that we can use to track scripts.
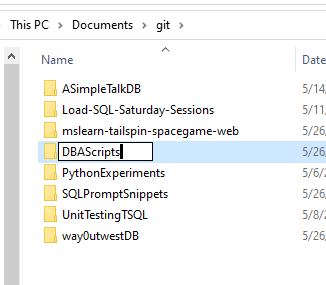
I keep a "git" folder under my Documents folder. I used to call this GitHub, but I find myself working with many git hosting spots, so I just use Git. You may also choose to use the Source\Repos folder under your profile (e.g. some applications will default to c:\Users\Steve\Source\Repos for their projects). I find Documents handy and more convenient for me, so I'll create a folder under Documents called "Git" and then under that another folder that I want to call "DBA Scripts".
Once I have this created, I want to make this a git repository. I can do this in a few ways. The "git init" command will do this, and it's what I often use, but I'll use SourceTree in this case to make this a repository. All clients should have a "Create" command somewhere. For SourceTree, this is on the toolbar. I click that and then enter the path (or browse) and give the repository a name for the shortcut. There is a drop down in this dialog because SourceTree supports Mercurial as a VCS as well. We want a Git repository (repo) here.
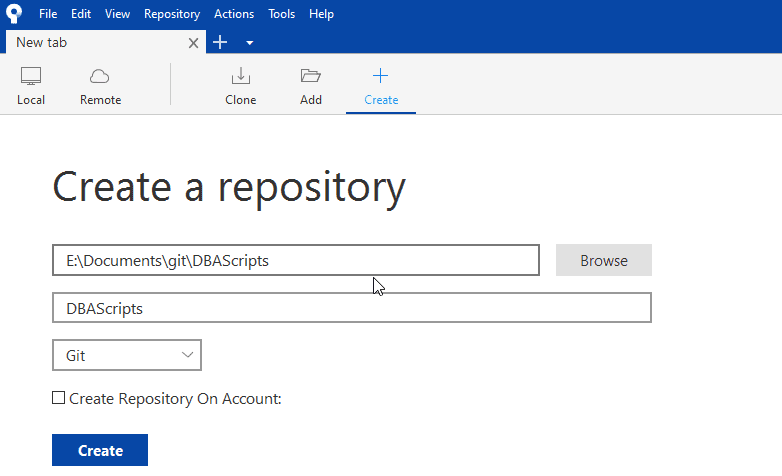
The "Create on Account" will actually let me create this on the BitBucket online Git respository, but I don't want to do that here.
When I click "Create" I actually get a warning that this path exists. Since often a new repo is in a new folder, this is a check that the path is correct. In this case, it is. You may get a similar message in your client.
Once created, I see my repo, which has no files and no changes. The "Nothing to commit" message is standard when my repo is in a known state, with no changes to any files or folders. You may see this often when you go to a git repository.
Let's change that and add some files.
Adding Files to a Repo
To get started, we need to create a file. That's the purpose of Git, so let's add a couple files. First, create a text file in the DBAScripts folder. You can use Notepad, Visual Studio Code, emacs, vi, or any text editor. I'll use Notepad, since that's easy enough. Here is my file, which contains the "This is the first version" text. I will save this as readme, which is a standard file in many repos that gives information about the repo.
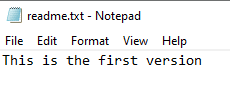
I'll actually rename this to just "readme" (no extension).
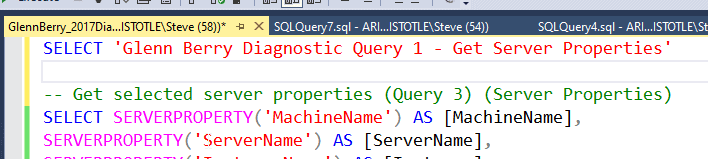
I also want to add a SQL script, so in SSMS, I'll add this content and save it as a the file, GlennBerry_2017Diagnostic_1.sql" in the same DBAScripts folder. This is the first script from Glenn Berry's Diagnostic Queries.
-- Get selected server properties (Query 3) (Server Properties)
SELECT SERVERPROPERTY('MachineName') AS [MachineName],
SERVERPROPERTY('ServerName') AS [ServerName],
SERVERPROPERTY('InstanceName') AS [Instance],
SERVERPROPERTY('IsClustered') AS [IsClustered],
SERVERPROPERTY('ComputerNamePhysicalNetBIOS') AS [ComputerNamePhysicalNetBIOS],
SERVERPROPERTY('Edition') AS [Edition],
SERVERPROPERTY('ProductLevel') AS [ProductLevel],-- What servicing branch (RTM/SP/CU)
SERVERPROPERTY('ProductUpdateLevel') AS [ProductUpdateLevel],-- Within a servicing branch, what CU# is applied
SERVERPROPERTY('ProductVersion') AS [ProductVersion],
SERVERPROPERTY('ProductMajorVersion') AS [ProductMajorVersion],
SERVERPROPERTY('ProductMinorVersion') AS [ProductMinorVersion],
SERVERPROPERTY('ProductBuild') AS [ProductBuild],
SERVERPROPERTY('ProductBuildType') AS [ProductBuildType], -- Is this a GDR or OD hotfix (NULL if on a CU build)
SERVERPROPERTY('ProductUpdateReference') AS [ProductUpdateReference], -- KB article number that is applicable for this build
SERVERPROPERTY('ProcessID') AS [ProcessID],
SERVERPROPERTY('Collation') AS [Collation],
SERVERPROPERTY('IsFullTextInstalled') AS [IsFullTextInstalled],
SERVERPROPERTY('IsIntegratedSecurityOnly') AS [IsIntegratedSecurityOnly],
SERVERPROPERTY('FilestreamConfiguredLevel') AS [FilestreamConfiguredLevel],
SERVERPROPERTY('IsHadrEnabled') AS [IsHadrEnabled],
SERVERPROPERTY('HadrManagerStatus') AS [HadrManagerStatus],
SERVERPROPERTY('InstanceDefaultDataPath') AS [InstanceDefaultDataPath],
SERVERPROPERTY('InstanceDefaultLogPath') AS [InstanceDefaultLogPath],
SERVERPROPERTY('BuildClrVersion') AS [Build CLR Version],
SERVERPROPERTY('IsXTPSupported') AS [IsXTPSupported],
SERVERPROPERTY('IsPolybaseInstalled') AS [IsPolybaseInstalled],-- New for SQL Server 2016
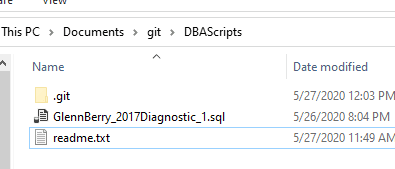
SERVERPROPERTY('IsAdvancedAnalyticsInstalled') AS [IsRServicesInstalled];-- New for SQL Server 2016The filesystem looks like this:
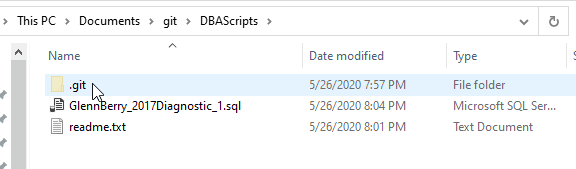
I do have hidden files enabled as visible, and when I created this as a repo, the .git folder was added. This isn't a folder to explore or interact with, but it is how git manages tracking versions. If I were to check at the command line, I'd see this with "git status":
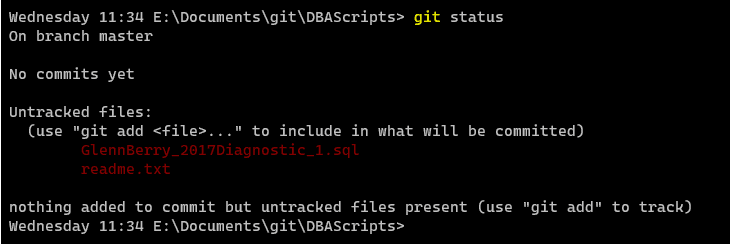
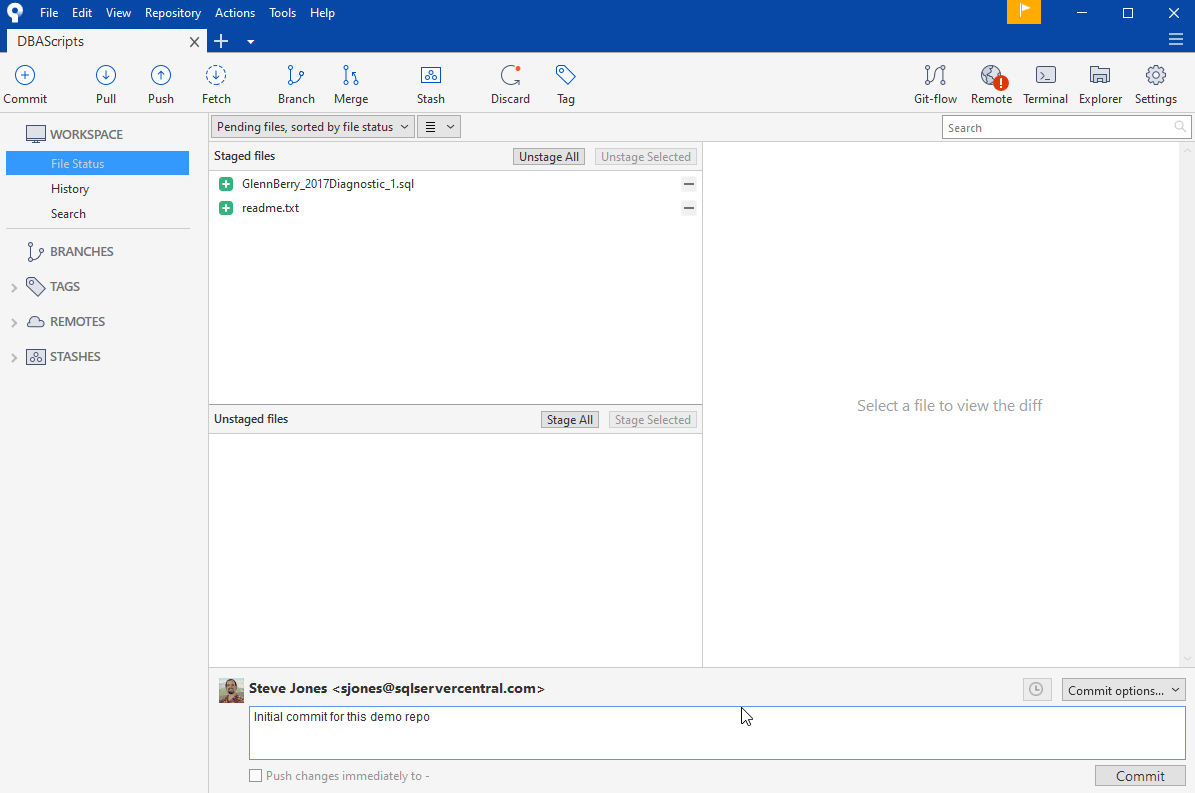
The status shows me the two files are in the folder, but not tracked, and not ready to commit. They need to be added (git add) to be tracked and committed. If I look in SourceTree, I also see the files. In this case, they're listed as "unstaged", which means they aren't tracked or ready to be committed and tracked.
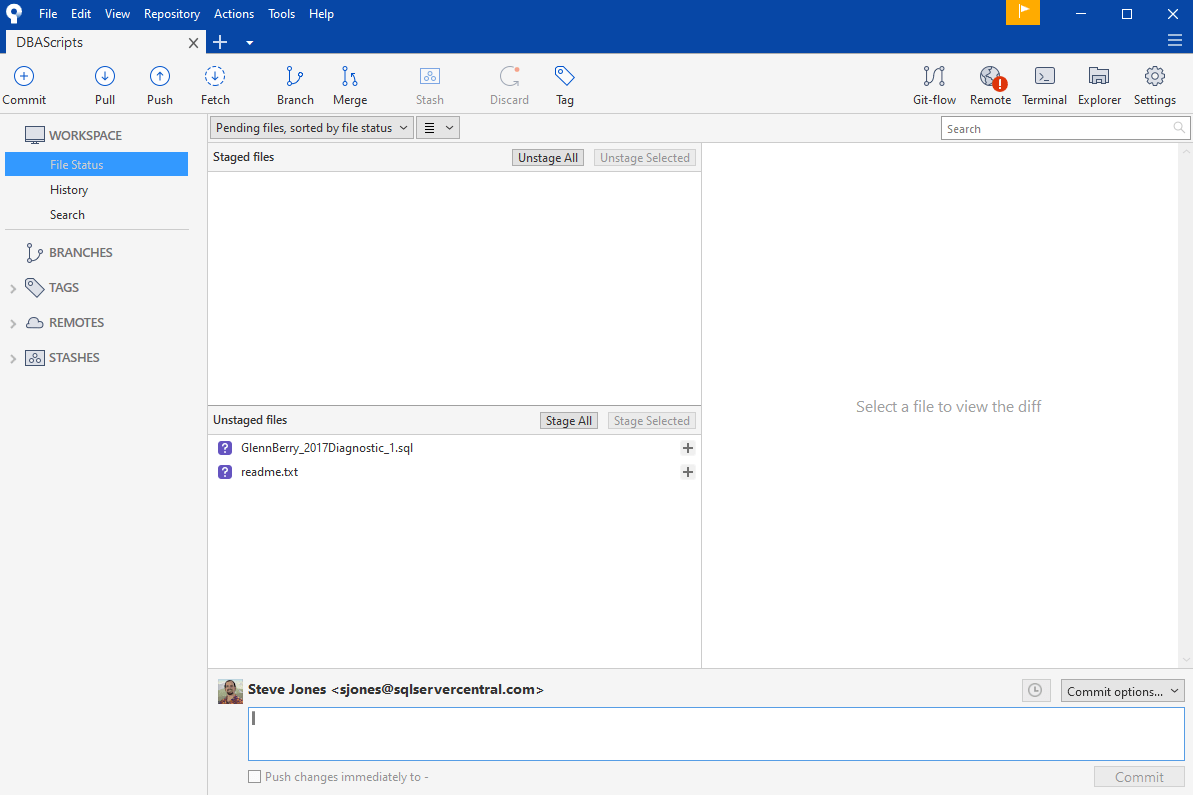
I can click the plus (+) sign next to each file to add it, or I can use the "Stage All". Once I do that, I can then commit this version of the file to git. That might not make much sense or matter now, but it will in a few minutes as we make some changes. Let's stage these files. I'll click the "Stage All" and then enter a message at the bottom. This the "why" message, and there is a good post on writing them.
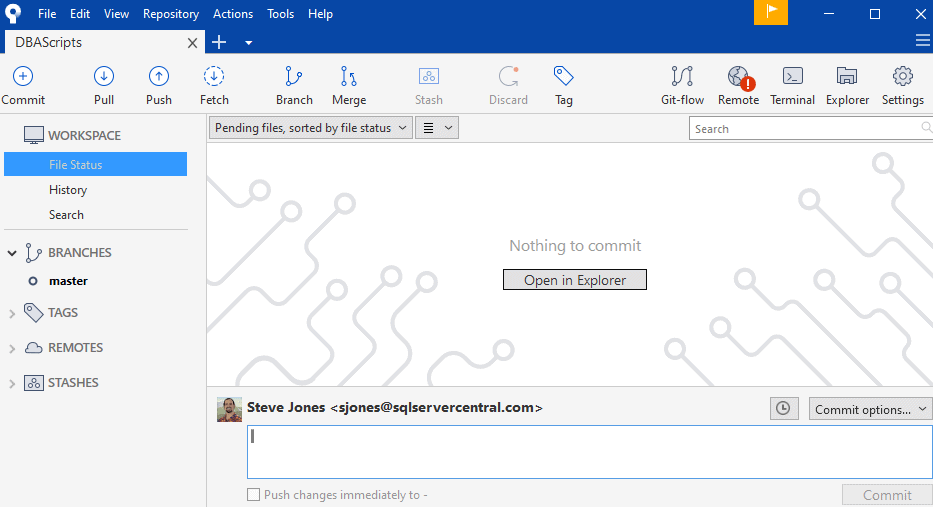
After I press commit, I see the blank screen I initially saw. This means I have no work in progress that hasn't been versioned.
If we continue to add new files to our repo, they will initially appear as untracked, but changed, for git. Both with the CLI status message and in the GUI Client.
Making Changes
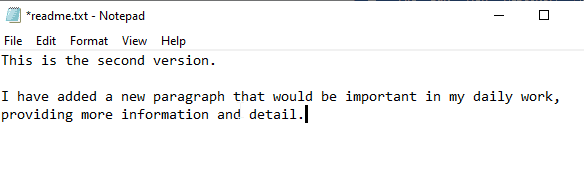
Let's now make a change to our files. First, we'll start by changing the text file with a new message. I'll open this up and edit the text as shown:
Once I save this, I see it in SourceTree as a changed file. This is still unstaged, meaning it's not ready to be committed. This allows me to make many changes, but commit them in appropriate groups. One of the powers of a VCS is that we can save work as we appropriate. Rather than a file system, where every change is committed to disk, we can choose which of those versions to save in a VCS. We can (and should) group related items together. Notice that my file in SourceTree now has an orange pencil as an edit symbol, rather than the purple question mark shown a few images above.
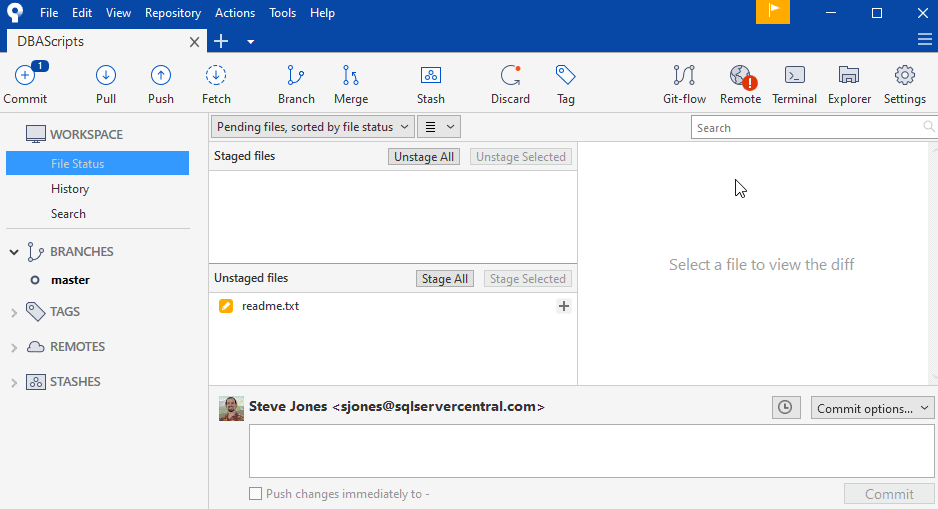
This orange symbol means this file is being tracked by git and has been changed. There is a new version. I can stage this and edit it. I'll do that, with a new message.
My file system looks the same. As far as the way I interact with the files, I do it in Notepad and SSMS, as I would normally. Using Git is a layer of tracking above the normal editing I do, under my control.
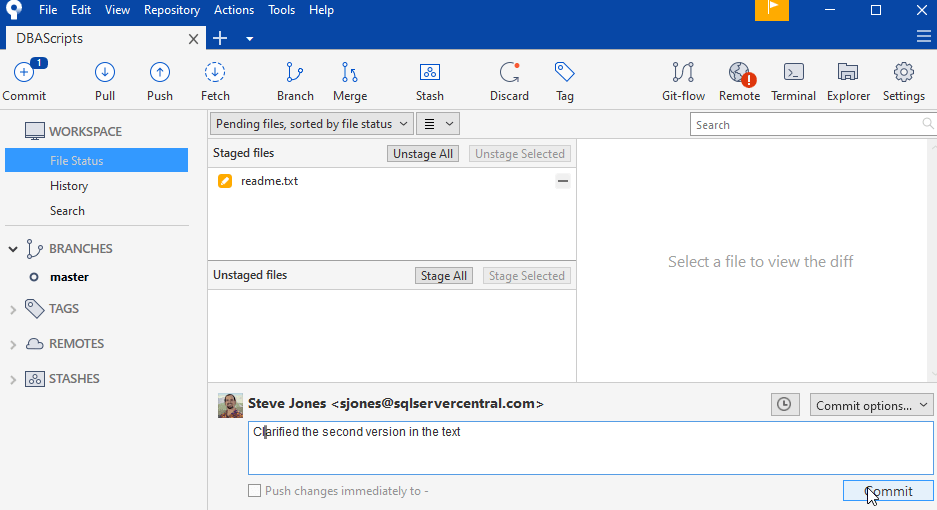
Now let's make a few changes. One of the things we often do is edit our scripts over time. I'll do that in SSMS with a message at the top of the file (shown below).
I'll save this and then edit the readme.txt again. This time I'll mark this as the third version, but I'll add a note about the SQL Script in there, so this is a related change. Here are the contents of my file:
This is the third version.

This folder contains a number of diagnostic scripts to be run against our SQL Server instances. Each script has an initial SELECT that explains what is being returned from the script.
I'll save that. As you might expect, I'd then see two files in SourceTree that have been edited, with the orange pencil symbol. Let's do one more thing that shows how we might use git to capture our files differently. I'll add a CSV with the results of my SQL script file. I'll run the query in SSMS and then save the results as "LocalSQL2017_ServerProperties.csv". This is what I see in SourceTree (the file system is just the three files, as I'd normally see them).
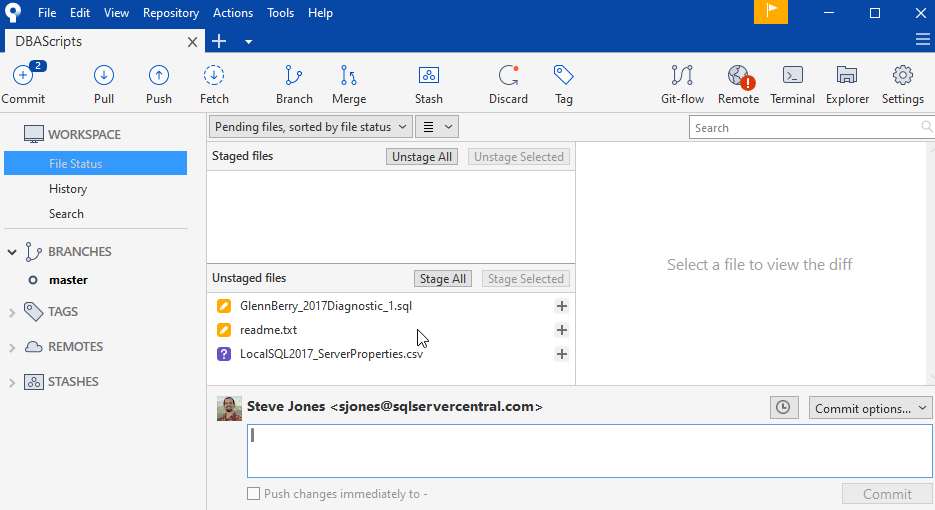
Two of my files are being tracked in Git and have been edited. The third is not tracked. In this case, I want to commit the two orange tagged files together, as the changes relate to each other. They are part of the work I'm doing. I'll click the plus for these two and then commit them.
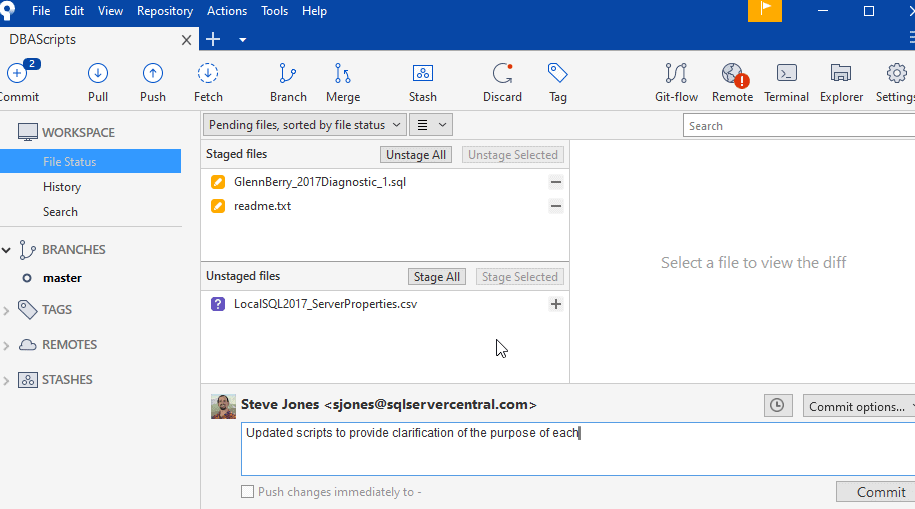
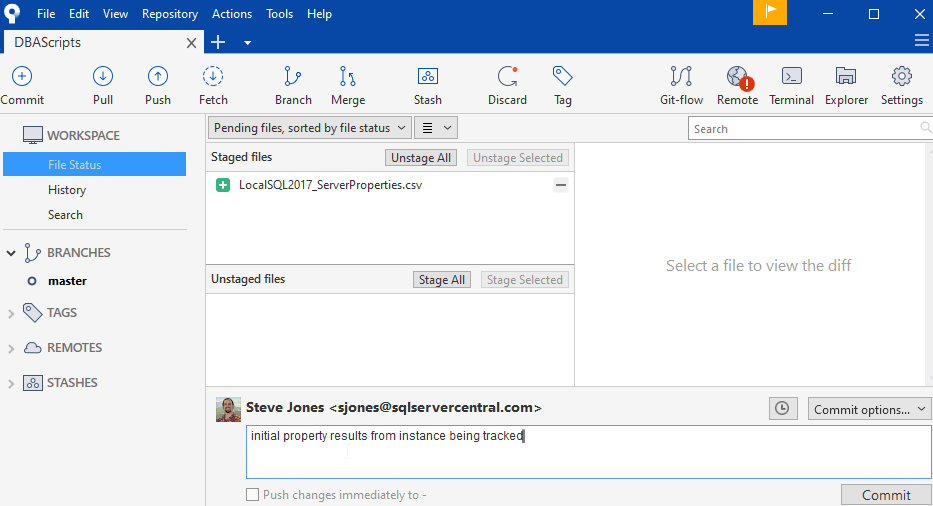
Once I do this, the two files will disappear from the top pane and I'll just have the unstaged file. I can have a few choices here. One is that I can not commit this and just leave it here, but that's confusing over time. I can commit this if I want to keep versions of this file. In this case, I might want to know how these properties change over time. The last option is to tell git to ignore this file (or file pattern). We'll cover the third option in another article. For now, let's commit this version.
We've now tracked a few versions of different files. Let's review what has happened.
History
One of the things git enables is the tracking of history. What happened over time, who changed the files, and when. These are all questions I've wanted answered with files and code at different times in my career. Often this would have resulted in files named like this:
- readme.txt
- readme_old.txt
- GlennBerry_2017Diagnostic_1.sql
- GlennBerry_2017Diagnostic_1_v2.sql
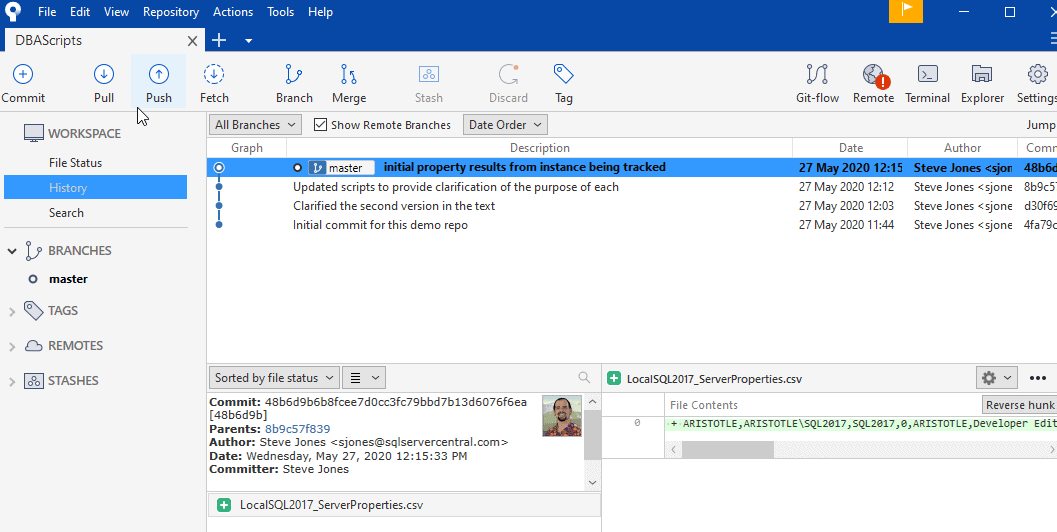
However, in Git, I can see this easily in SourceTree with this view. Click the "History" item in the Workspace, and we see a graph, a description, and some details. The graph is the history of the committed versions. Next to each commit (represented by a circle) is the commit message we included in the commit. We see the date of the commit, the author, and a binary hash value on the side. The latest commit is highlighted, which is the last commit on the master branch. This shows the details below. The left pane shows the metadata (commit, parent commit, author, date, etc.) and the files. The right pane shows the file preview.
Git is designed to work with text files, which lend themselves to displaying the details. The reason the line is in green is that this was an addition to the file. Since this was the first commit of this file, everything in the file was added.
If we click the second commit listed in the top, we see a different view. We now see two files were changed at the bottom, and these were edited (the orange pencil).
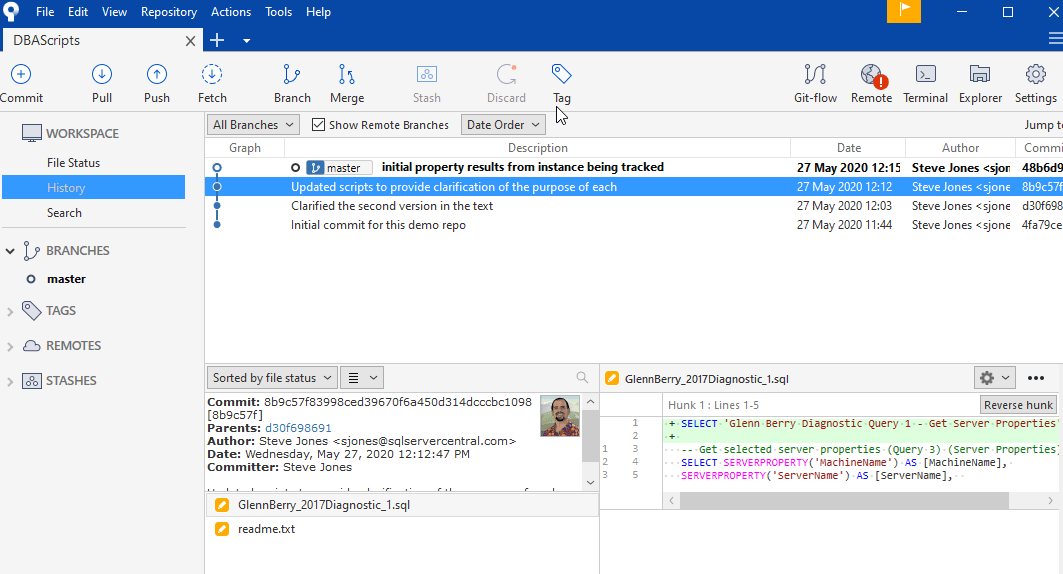
This time, the first file, the SQL script, is highlighted. We see the two lines I added at the top in green (added) and the existing lines below this in white background, meaning these were unchanged. How would we find out what changed without a VCS? We'd depend on some comment, our memory, or looking at two different files and trying to find the differences. Git does this easily for me, if I commit the changes.
If I select the second file, the readme.txt file, I see this.
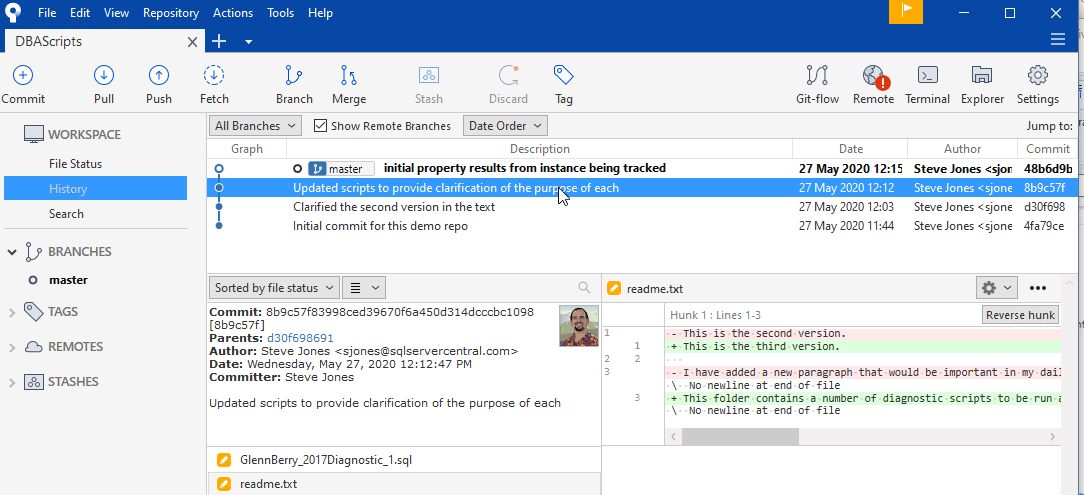
Now I see some red background lines, which are the old lines before this commit. The top two lines (red and green), show me the previous version of this lien and the new version. Git doesn't track the character changes, in that I don't see "second" changed to "third", but the lines are shown so that I can more easily find what's different. I also see the lines below edited as well.
I can also get this with "git log" and other commands at the command line, but the data is harder to read. We'll cover more command prompt options in another article.
Summary and Moving Forward
This article has barely scratched the surface of the power and capability of git. We saw how to create a repository in a folder and start tracking files, as well as track their changes. We learned how to get the history of our changes and see the lines that were edited.
Even if this is all you were to use git for, this provides a lot of value in knowing who changed what files, when. This might allow you to understand why your code starts or stops working or behavior changed. How often has someone said "nothing changed" and we later learn that someone forgot about an edit.
In future articles, we'll see how to start sharing changes with others, comparing two versions of a file and making copies of our code for independent work. For now, I would encourage you to install and experiment with git, and try these tasks on your own:
- Re-run the SQL script as is, which should return the same values. Save this as the same file name and see what happens.
- Change a server property and run the script, save the results as the same name and see what happens.
- Add other script files to this folder and commit them. Use separate commits for some and commit some in groups.
- Update the readme.txt file with new information as appropriate.
If you have questions about this article, please feel free to ask. We'll cover other git topics in future pieces.
Other Resources
I've tried to give a basic view of Git, but you might appreciate other resources. A few of the links I've used over the years are listed here:
- Learn Git with BitBucket Cloud (from Atlassian)
- Kendra Little's Git CLI Cheat Sheet
- Git Handbook
- Pro Git