

SQL databases are crucial for businesses, so it's critical to back them up. A dependable and affordable option is offered by Azure Blob Storage. Let's examine the advantages, the steps involved in backing up to and restoring from a device, recommended practices, and more.
Why Backup to Azure Blob Storage?
Backups are accessible from anywhere and are simple to scale with Azure Blob Storage, which is Microsoft's cloud-based object storage service. Utilizing this technology also offers cost savings, ease of use, and security. Without worrying about the cost of storage, you can easily create backups on a periodic basis and keep them for as long as you like.
Large-scale unstructured data storage is where blob storage excels. Unstructured data, such as text or binary data, is data that doesn't follow a certain data model or specification. The major benefits for using blob storage are as follows:
Cost-effective
- Storage cost is quite low, as compared to backups on-premises.
- Only pay for the amount of storage you are using.
Scalable
- Azure Blob Storage can handle a huge amount of data.
- Can easily be scaled based on your needs.
Secure and Reliable
- Backup files are always encrypted and secure.
- Always available, no matter the location.
Creating an Azure Blob Storage Container
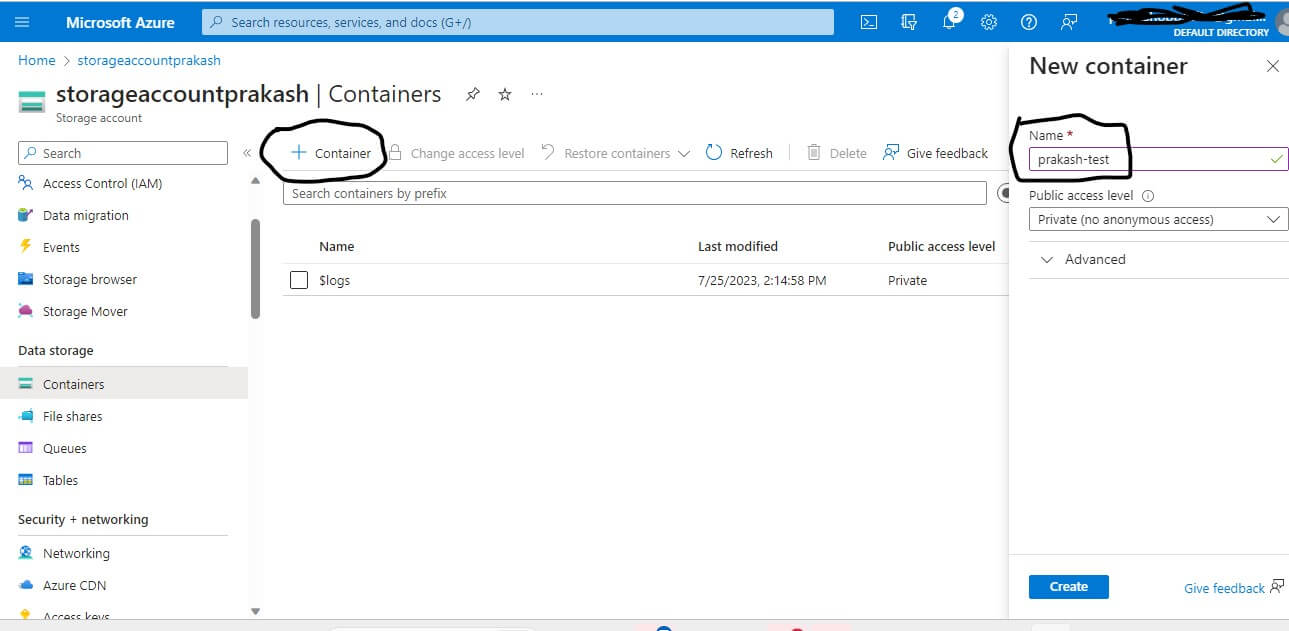
The first step to backup your SQL database to Azure Blob Storage is to create a container in Azure. This container is basically a storage unit that can contain files. You can create a container by following these simple steps:
- Sign in to the Azure portal
- Go to your storage account
- Click on the "Containers" tab, and then click on "New Container"
- Give your container a name, select "Private" as the access level, and click on "Create."

Creating a SQL Server Credential in Azure
After you've created a container in Azure Blob Storage, you need to create a SQL Server credential in Azure. This credential will be used by SQL Server to access the container and backup the database. To create a credential, follow these steps:
- Open SSMS and connect to your SQL Server instance
- Right-click on your server instance and select "Properties"
- Go to the "Security" section, and then click on "SQL Server and Windows Authentication mode"
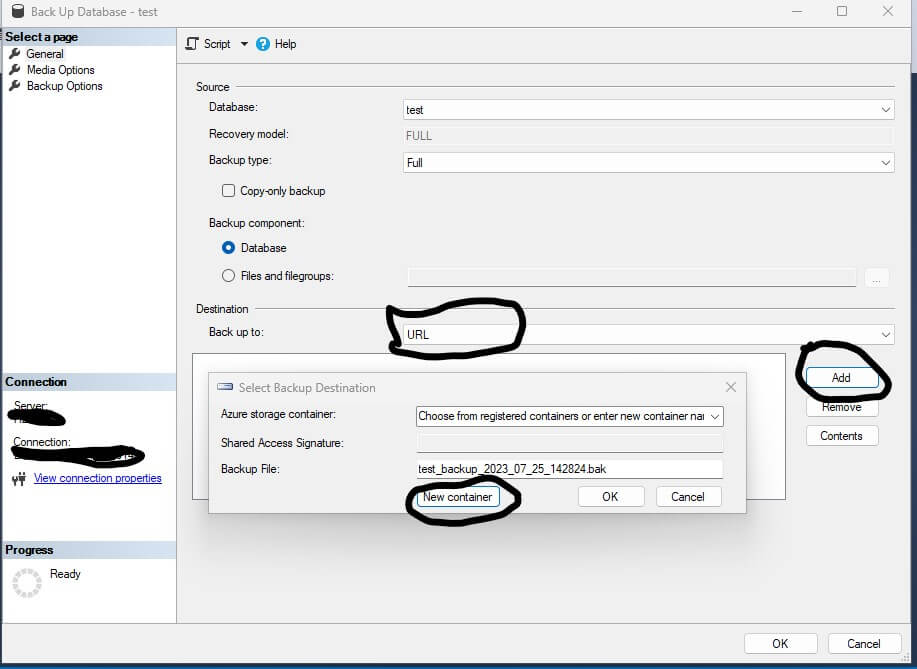
- Right click on “Database”. Select Backup task . Select Destination as URL . Click on Add.
- . A new pop-up box will Appear, click on "New container".
- New window will open asking for sign in on Azure. Fill in the details and click on "Create Credential."
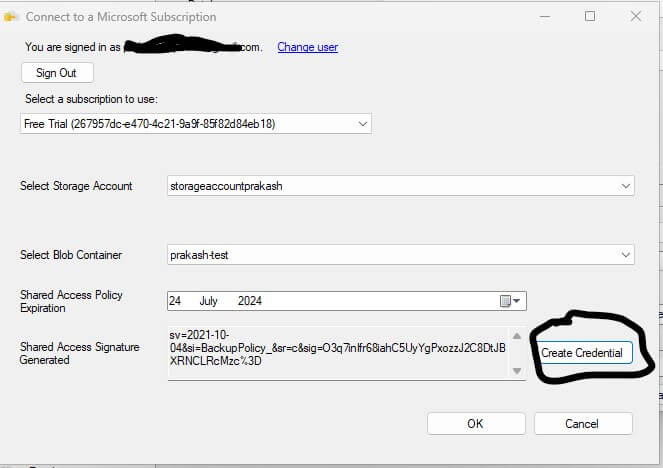
Your Credential has been created
Backup to Azure Blob Storage using T-SQL
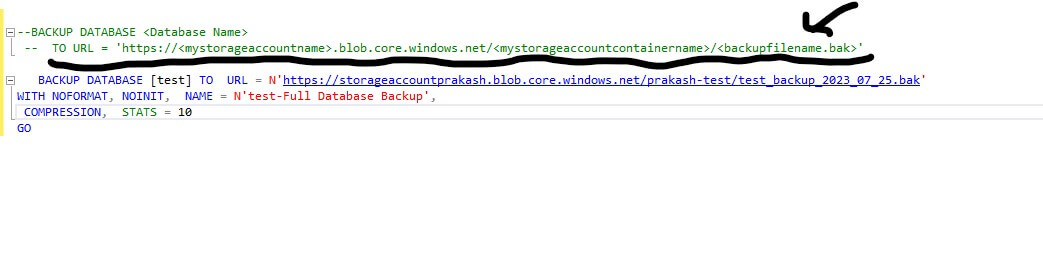
You can backup your SQL Database using T-SQL. To backup your database to Azure Blob Storage, open a new query window in SSMS and run the following script:
BACKUPDATABASE [YourDatabase Name] TO URL = 'https://[YourStorage Account].blob.core.windows.net/ [YourContainer Name]/[YourBackup File Name].bak'
STATS= 5 , Compression ;
Go
Once the command is successfully run, we will have backup successfully created on azure container. To check that we can log in to azure storage account. Open SSMS, click on connect on object explorer. Select Azure Storage.

Sign in with same azure id. Select the storage account and container and click on Ok.
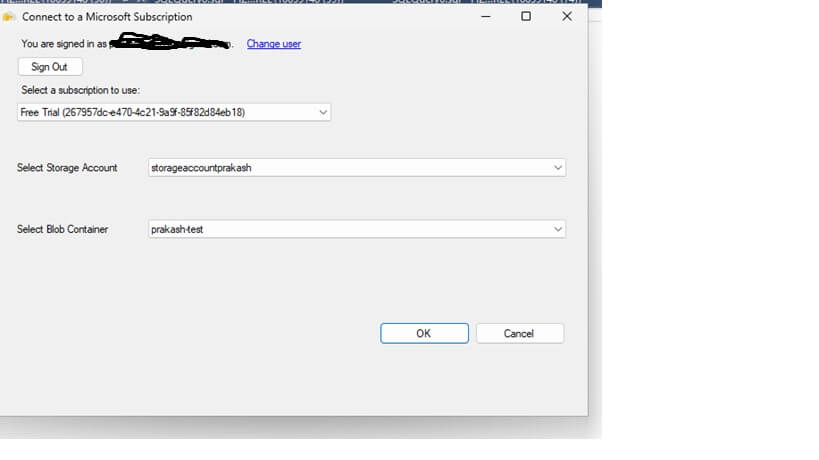
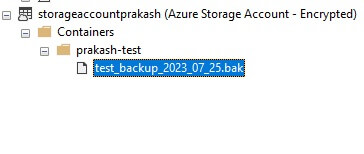
You will get connected to Azure storage account. Expand the container and you can see the backup file present there.
Restoring Databases from Azure Blob Storage
Restoring a database from Azure Blob Storage is a simple process. Here's how you can do it.
Open a new query window in SSMS and Run the following script:
RESTOREDATABASE [YourDatabase Name] FROM URL = 'https://[YourStorage Account].blob.core.windows.net/YourContainer Name/Your Backup File Name.bak'
MOVE '[YourData File Name]' TO '[YourData File Path]',
MOVE '[Your Log File Name]' TO '[Your Log File Path]'

Or one can use the GUI. Open to SSM, login to SQL server and right click on "Database" select restore new database option. You will get window to select Backup file. Select Source from Device, specify media Type as “URL” click on Add, specify the azure storage container and click OK. Select the file path. Click on OK.
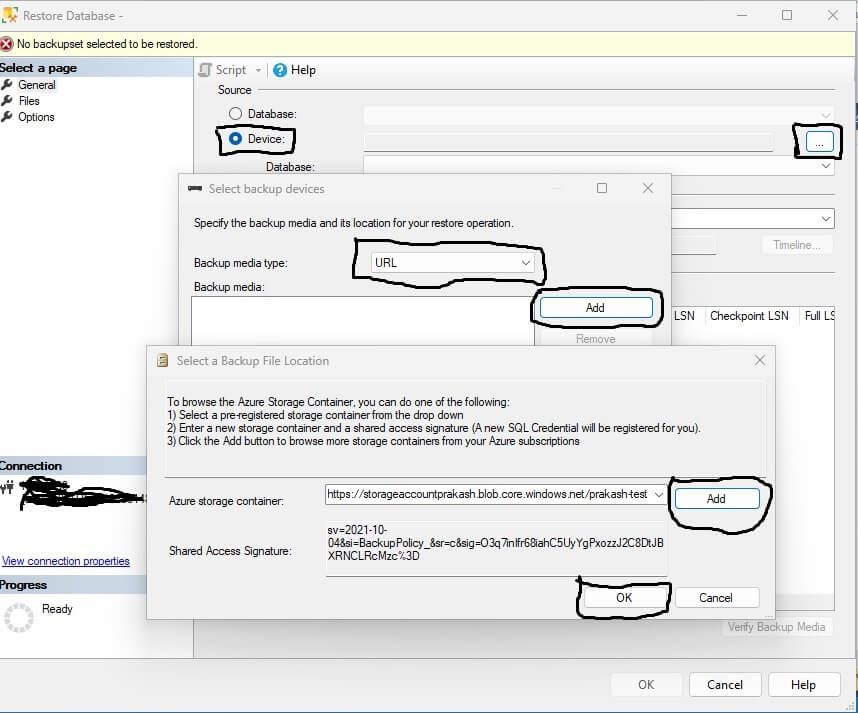
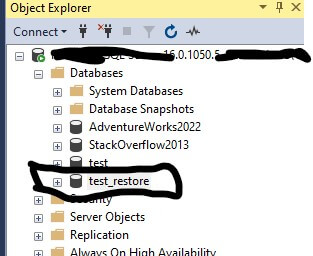
Select the file path and click on OK. Once database restoration is completed, we can expand the object explorer and expand the database and see the newly created database there.
Best Practices for SQL Backups to Azure Blob Storage
- Unique file name for every backup is recommended to prevent accidentally overwriting the blobs.
- When creating a container, it is recommended that you set the access level to private, so only users or accounts that can provide the required authentication information can read or write the blobs in the container.
- For SQL Server databases on an instance of SQL Server running in an Azure Virtual Machine, use a storage account in the same region as the virtual machine to avoid data transfer costs between regions. Using the same region also ensures optimal performance for backup and restore operations.
- Failed backup activity can result in an invalid backup file. We recommend periodic identification of failed backups and deleting the blob files.
- Using the WITH COMPRESSION option during backup can minimize your storage costs and storage transaction costs. It can also decrease the time taken to complete the backup process.
Conclusion
Backing up your SQL Database to Azure Blob Storage is a smart, cost-effective, and secure way to store important data. Follow these best practices and our step-by-step guide, and you'll be well on your way to securing your SQL database backups.
