

Developers require convenient and separate spaces for testing and development. They can utilize various tools, such as PowerShell, to create and manage virtual machines, network settings, and software setups. This simplifies the setup of labs or test areas, allowing for pre-installed Microsoft SQL Server instances for better testing. However, this method helps with the creation of new environments from scratch. AutomatedLab for Windows is a valuable tool for achieving this. Let's explore this helpful tool further.
About AutomatedLab
AutomatedLab is a strong tool that makes the setup and handling of virtual environments simpler, including Microsoft SQL Server. With AutomatedLab, users can easily create sandboxed environments to test and develop their applications. Moreover, AutomatedLab is an open-source project with a strong community of contributors constantly improving and updating the tool. Additionally, the active community provides extensive resources and support, including docs, and tutorials. Overall, AutomatedLab is an accessible and valuable tool for IT professionals who need to create and manage virtual lab environments.
How to install AutomatedLab
The easiest way to obtain it is by downloading it from the PowerShell Gallery.
# install the module
Install-Module -Name AutomatedLab
Because the module is in continuous development some of the issues in the released version might be already fixed. Checking the preview version in that case. That happened to me once or twice, hence the advice.
# if something is not working in the released version, try preview
Install-Module -Name AutomatedLab -AllowPrerelease
Before we start
To create the VM, the module relies on external binaries such as the operating system and SQL Server. After installing the module, the next step is to create the necessary directory structure.
# Create an empty folder structure
New-LabSourcesFolder -FolderStructureOnly
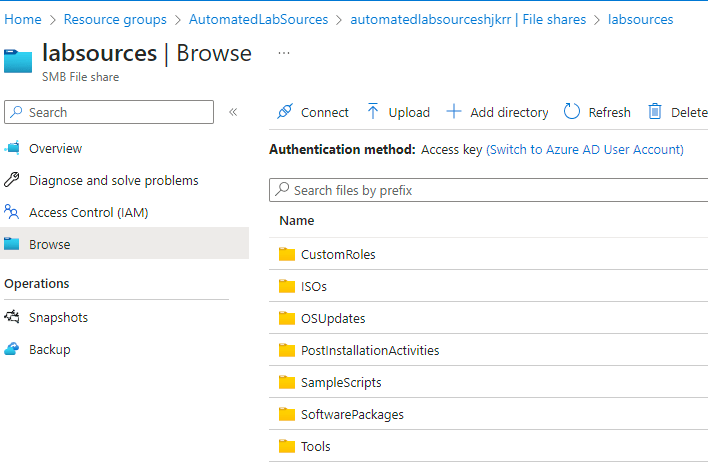
The default structure will look like this in the picture:
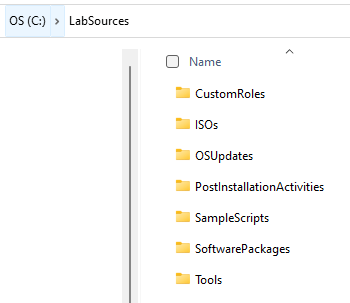
Next, put the ISO files for the OS and SQL Server in there (ISOs). You can add scripts and tools you want to copy over to the VM (Tools)
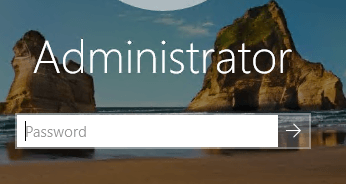
What's the password?
Before we start making the machines, I want to clear up something that confused me a few times at the start. The credentials are
- HyperV: Administrator / Somepass1
- Azure: Install / Somepass1
It's possible to alter these details, which we'll elaborate on in the following examples.
My machine
As a point of reference, I create labs on Dell 15 with an i9-11900H processor and 64 GB RAM. The time taken varies - it's approximately 2 minutes for the HyperV option (once you create the BASE image). While for Azure, it largely depends on factors such as region, time of day, and other varying conditions. For the UK South region, the process takes roughly 5 minutes.
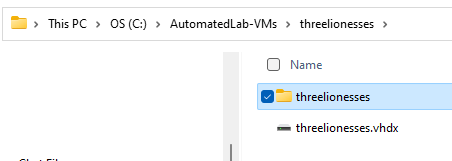
We won't dive into the specifics in this brief introduction, but the module creates the BASE image in the background for the first lab. It will be reused for the consequent builds.

By default, you can find it in the C:\AutomatedLab-VMs folder, where the rest of the VMs also reside.
Now that we've covered the basics, let's dive into some practical applications.
Creating a quick VM on HyperV - OS only
To quickly create a VM on Hyper-V, use the New-LabDefinition cmdlet with just three lines of code. Here, we are creating a new lab called "Lab1" using Hyper-V as the default virtualization engine.
# create a new lab with 3 lines of code - Hyper-V
New-LabDefinition -Name "Lab1" -DefaultVirtualizationEngine "HyperV"
Add-LabMachineDefinition -Name "threelionesses" -Memory 1GB -OperatingSystem "Windows Server 2022 Datacenter (Desktop Experience)"
Install-Lab
Add-LabMachineDefinition cmdlet permits the specification of the new virtual machine's name (set to "threelionesses" in this instance), and the allocation of memory capacity (set to 1GB). We can also select the OS ("Windows Server 2022 Datacenter with Desktop Experience"). The Install-Lab cmdlet finally deploys the lab definition and formulates the new virtual machine.
You can now find the newly created virtual machine within the Hyper-V Manager. An initial double-click connects you without needing any credentials. However, by modifying the mode to the Enhanced session, a prompt will appear for the credential.
Creating a quick VM on Azure - OS only
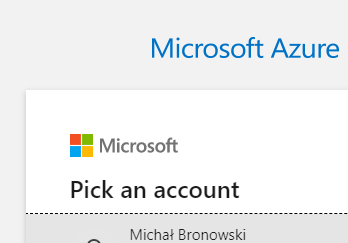
You can create a new lab in Azure in just four lines of code. Prior to initiating AutomatedLab, you need to establish a connection to Azure; this can be executed using the Az PowerShell module.
# Connect to Azure
Connect-AzAccount
This command will prompt the account. Once you've logged in, you can close the window and revert to VS Code.
Skipping this connection process could result in error messages indicating issues with the Azure subscription.
- Using Azure Subscription '' ()
Register-LabAzureRequiredResourceProvider: Cannot bind argument to parameter 'SubscriptionName' because it is an empty string.
Exception: Error selecting subscription . Cannot validate argument on parameter 'Subscription'. The argument is null or empty. Provide an argument that
is not null or empty, and then try the command again.. The local Azure profile might have expired. Please try Connect-AzAccount.
After connecting to the Azure account, we can proceed back to AutomatedLab. Below is an illustrative example:
# create a new lab with 3+1 lines of code - Azure
New-LabDefinition -Name "Lab1Azure" -DefaultVirtualizationEngine "Azure"
Add-LabAzureSubscription -DefaultLocationName "UK South"
Add-LabMachineDefinition -Name "lab1azure" -OperatingSystem "Windows Server 2022 Datacenter (Desktop Experience)"
Install-Lab
This command series will install a new lab named "Lab1Azure" using the Azure virtualization engine. It will also create a resource group in the "UK South" location.
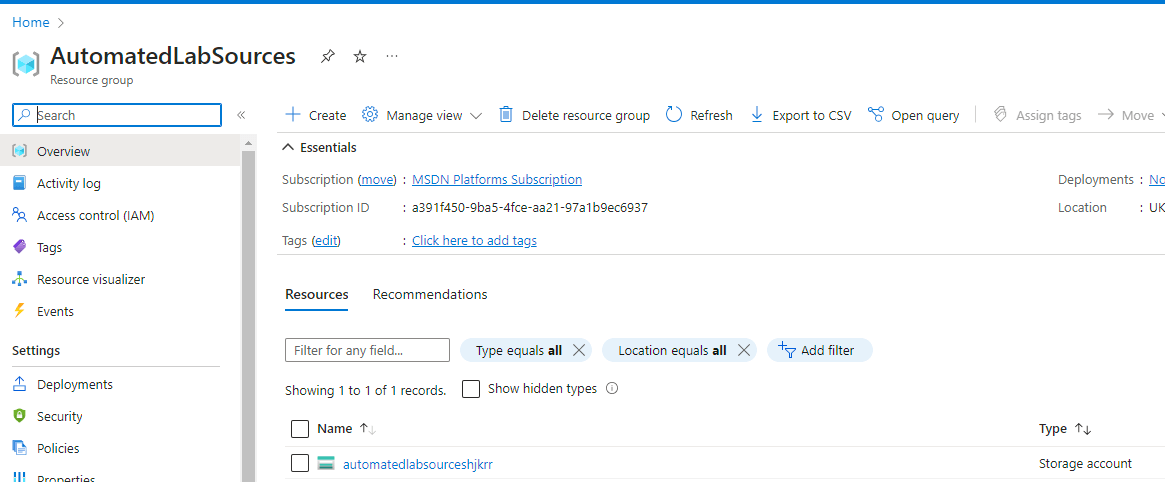
That will result in two resource groups:
- AutomatedLabSources is ready for your own binaries, otherwise, it will use AutomatedLab's ones.
Including the familiar folder structure.
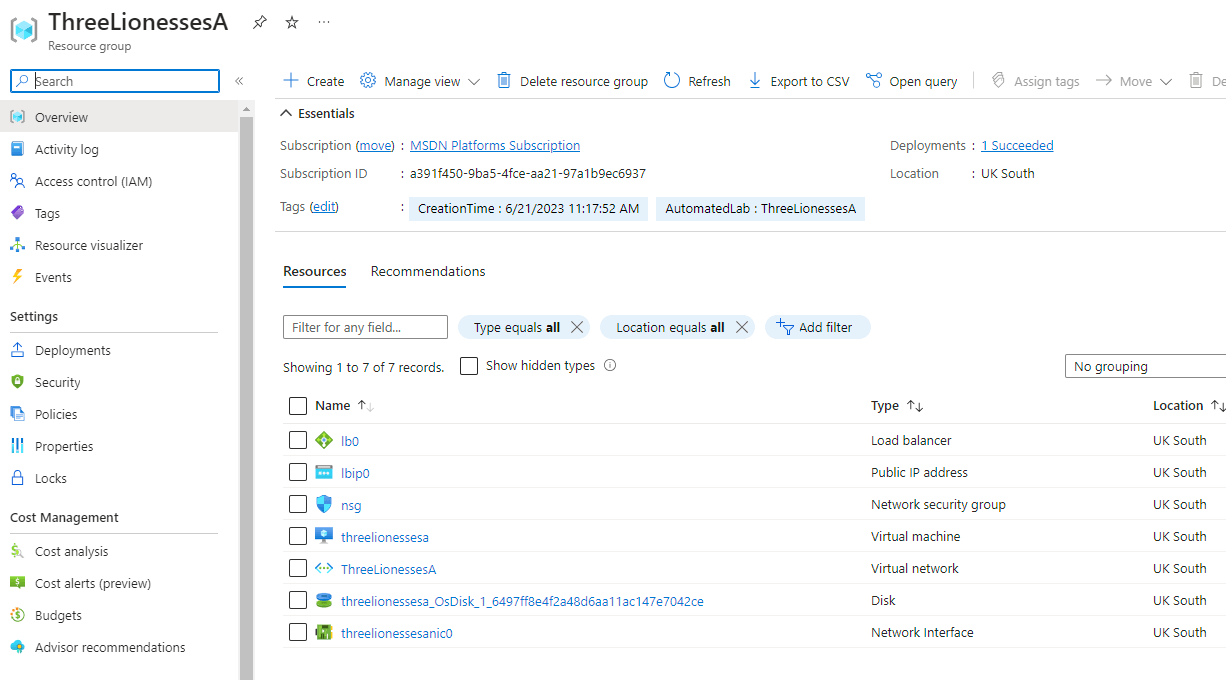
2. The other resource group is named after the lab. This RG contains all objects, including VMs.
In conclusion, by executing a few simple commands, you can efficiently set up a virtual machine on either Hyper-V or Azure.
Creating a quick VM with SQL Server and tools
In the first step, we instantiate a new lab in Hyper-V with specified custom paths. For the purpose of this example, we'll assign the lab name "Lab2" and set custom paths. The code snippet below depicts this process.
# create a new lab(s) in Hyper-V using custom paths
$labName = "Lab2"
$vmPath = "C:\AutomatedLab-VMs-custom"
$labSources = "C:\LabSources-custom"
$vmName = "prideoflions"

# new lab definition
$newLab = @{
    DefaultVirtualizationEngine = "HyperV"
    VmPath                      = $vmPath
}
New-LabDefinition @newLab -Name $labName
Subsequently, default credentials are altered for future accessibility. Make sure to store the new credentials in a password manager or similar tool for future reference.
# Set custom user
Set-LabInstallationCredential -Username MikeyBronowski -Password 'Hamster-Chilli-Pink-Arrow9'
Define images and OSs
Unlike in a simpler example, we are going to use SQL Server ISO definition. For the purpose of this demonstration, we're using SQLServer2019 as a template. The following scripts define the ISO images and retrieve their details.
# new ISO image definition

Add-LabIsoImageDefinition -Name SQLServer2019 -Path "$labSources\ISOs\SQLServer2019-x64-ENU-Dev.iso"
Add-LabIsoImageDefinition -Name SQLServer2022 -Path "$labSources\ISOs\SQLServer2022-x64-ENU-Dev.iso"


# get details about ISO images
Get-LabIsoImageDefinition $labSources

<#
Name                                 Size             OS Count Path
----                                 ----             -------- ----
Windows11                            5,557,432,320.00 11       C:\LabSources\ISOs\Win11_22H2_English_x64v1.iso
SQLServer2019                        1,433,974,784.00 0        C:\LabSources\ISOs\SQLServer2019-x64-ENU-Dev.iso
SQLServer2022                        1,163,053,056.00 0        C:\LabSources\ISOs\SQLServer2022-x64-ENU-Dev.iso
#>
Upon execution, the script output indicates that the Windows11 image has 11 operating systems (OSs). Further OS details within the ISO can be obtained via the command:
# list the OSs inside the ISO
Get-LabAvailableOperatingSystem


<#
OperatingSystemName Idx Arch Version PublishedDate IsoPath
------------------- --- ---- ------- ------------- -------
Windows 11 Home 1 x64 10.0.22621.525 9/25/2022 3:47:30 AM C:\LabSources\ISOs\Win1…
Windows 11 Home N 2 x64 10.0.22621.525 9/25/2022 3:46:10 AM C:\LabSources\ISOs\Win1…
Windows 11 Home Single Language 3 x64 10.0.22621.525 9/25/2022 3:50:17 AM C:\LabSources\ISOs\Win1…
Windows 11 Education 4 x64 10.0.22621.525 9/25/2022 3:58:35 AM C:\LabSources\ISOs\Win1…
Windows 11 Education N 5 x64 10.0.22621.525 9/25/2022 4:04:13 AM C:\LabSources\ISOs\Win1…
Windows 11 Pro 6 x64 10.0.22621.525 9/25/2022 3:47:30 AM C:\LabSources\ISOs\Win1…
Windows 11 Pro N 7 x64 10.0.22621.525 9/25/2022 3:51:26 AM C:\LabSources\ISOs\Win1…
Windows 11 Pro Education 8 x64 10.0.22621.525 9/25/2022 3:53:05 AM C:\LabSources\ISOs\Win1…
Windows 11 Pro Education N 9 x64 10.0.22621.525 9/25/2022 3:59:09 AM C:\LabSources\ISOs\Win1…
Windows 11 Pro for Workstations 10 x64 10.0.22621.525 9/25/2022 3:55:50 AM C:\LabSources\ISOs\Win1…
Windows 11 Pro N for Workstations 11 x64 10.0.22621.525 9/25/2022 4:01:41 AM C:\LabSources\ISOs\Win
#>
Next, the network is set up on a local laptop for the lab.
# setup network
$newNetwork = @{
    Name = "Default Switch"
    HyperVProperties = @{ SwitchType = "External"; AdapterName = "Wi-Fi" }
}
Add-LabVirtualNetworkDefinition @newNetwork
SQL Server role definition
Next, we require a role definition specific to the SQL Server. In this context, we use a basic role definition, but there are other machine types as well.
# install the SQL Server engine with Replication

$role = Get-LabMachineRoleDefinition -Role SQLServer2019 -Properties @{Features = 'SQLEngine,Replication'}
Although it's not part of this example it's worth mentioning that we can use ConfigurationFile.ini for more complex SQL Server setup.
# install the SQL Server using ConfigurationFile.ini

$role2 = Get-LabMachineRoleDefinition -Role SQLServer2019 -Properties @{ConfigurationFile = "path-to-ConfigurationFile.ini"}
Creating a lab
OperatingSystem - programmatically select the OS from the listMemory- set the memory for the machineNetwork- use the previously configured networkRoles- the role of the VM, previously configured SQLServer2019ToolsPath- a folder with all the extra tools/scripts we want to copy over to the machine# customise the VM
$newVM = @{
OperatingSystem = $(Get-LabAvailableOperatingSystem | Where-Object {$_.ImageIndex -eq 4}).OperatingSystemName
Memory = "6GB"
Network = $newNetwork.Name
Roles = $role
ToolsPath = "$labSources\Tools"
}
Add-LabMachineDefinition @newVM -Name "$vmName"The -Name parameter is purposely left out of the PowerShell splat to reuse the base definition for other machines that we intend to build.
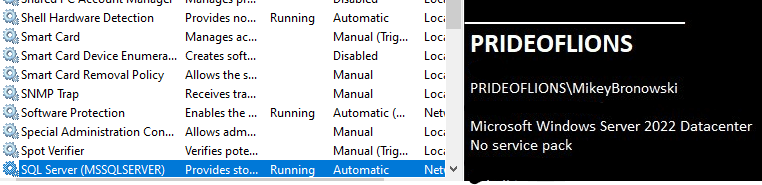
The final step requires the execution of the Install-Lab command to initiate the lab. After it's done we can see the SQL Server up and running.
Conclusion
The article provided detailed instructions on how to install AutomatedLab and set up virtual machines (VMs). These VMs can be created on both local systems using HyperV and cloud-based platforms like Azure. The entire process requires only a few lines of code, even when we add SQL Server.
