
The final level of the stairway series means that we have successfully created an Azure account, created an Azure logical SQL Server, created a database and connected to the database using best practices via SQL Server Management Studio (SSMS).
We will finish the series off by looking at the most common tasks that you will be asked to carry out.
Reset the Server Admin Account
If you forget the server admin account password, or you did not enter the details into a safe password vault, it is quite easy to reset the password. You will find the option to do this in the main overview page for your SQL Server in question. There is a Reset password on the top line, as shown below.

Once you click this, you will get a blade that allows you to change the password. Enter a new value and click save.
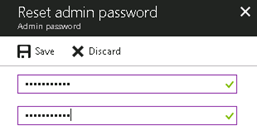
The password updates immediately and you can use this to log into your database server.
Create a SQL Login
When you get asked to create a login you can use the traditional approach or a contained user model. The traditional approach is where both the login (in the master database) and the user (in the user database) must exist and be related to each other.
In the contained database user model, the login in the master database is not present. Instead, the authentication process occurs at the user database and the database user in the user database does not have an associated login in the master database. I prefer this because it makes your database more portable. If for example you need to restore the database to a different region you need not worry about orphaned users but your scenarios may be different.
Let’s create a contained user under the twitterdb that will have read only access. Connect to the server as we have done so in the previous level using SQL Server Management Studio (SSMS) but this time make sure that you are under the context of the user database, as shown here.

Start a New Query and then enter the code below in the window. Click Execute to create the user. You can change the password to meet your requirements. The second line gives this user permission to read data from all tables in the database.
CREATE USER [TwitterRO] WITH password='aStrongPassword'
GO
EXEC sp_addrolemember 'db_datareader', 'TwitterRO';
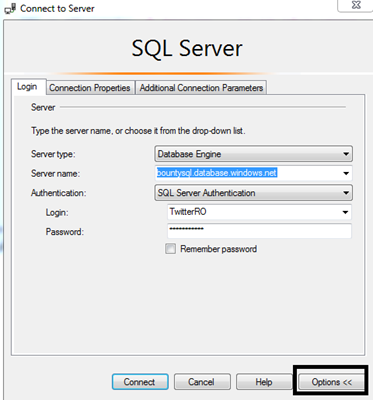
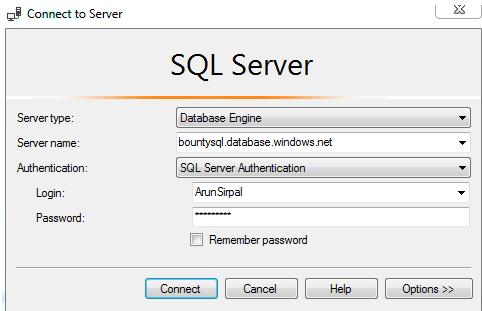
Test the credentials out by using SSMS. Click the Connect to Server option in the Object Explorer to open a login dialog. Complete the server name and login details and then click the Options button at the bottom of the dialog..
We need to route our connection to the relevant database. Click the Connection Properties tab. Enter the "twitterdb" database name in the Connect to database edit box. Then click Connect at the bottom.
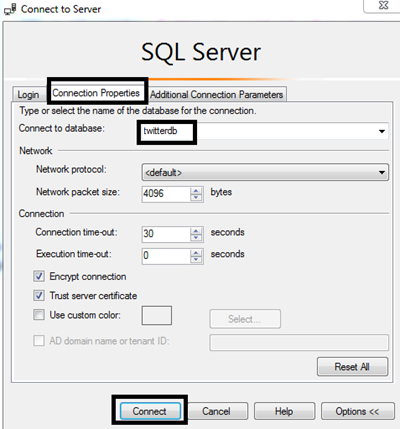
You will have a successful connection and can see this in the Object Explorer.

You can select from any of our tables, but remember this is a read only account. If you try and perform an update, you will not be allowed. If you run this code:
UPDATE [SalesLT].[Address]
  SET PostalCode = 'BW2 DK2'
  Where AddressID = 450
You will receive this error.
Msg 229, Level 14, State 5, Line 13
The UPDATE permission was denied on the object 'Address', database 'twitterdb', schema 'SalesLT'.
Note: we will not be covering Azure AD authentication in this series. The setup is well documented by Microsoft but in an enterprise environment where you will most likely want this. You will need help from your Azure administrators to set this up. Please see https://docs.microsoft.com/en-us/azure/sql-database/sql-database-aad-authentication
Create a Database Level Firewall Rule
As I have mentioned in the previous level you can have the ability to create database level firewall rules. If you decide to do this, then you can only do it via T-SQL statements.
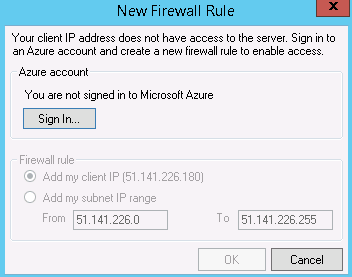
For this example, I have spun up an Azure Virtual Machine with SQL Server Management Studio installed. If I try and connect to the database, I will get the dialog below. You will be familiar with this you have gone through the previous level.
Let’s create a database level firewall that to allow this VM access to the twitterdb database. First, connect to the server using your server admin credentials in a new query window.
Next, switch context to the user database. You can verify this at the top of SSMS.
The code to create the database level firewall is as follows. This calls the sp_set_database_firewall_rule procedure. The name of a rule and the start and end IP addresses are the parameters. You will need the public IP address that you wish to allow to connect to the database.
EXECUTE sp_set_database_firewall_rule N'CloudApp', '51.141.226.180', '51.141.226.180'
You can confirm the rule with this query:
SELECT * FROM sys.database_firewall_rules
This returns the following value for me.

Now that the rule is in place, if I go back to my cloud based VM and connect, I won't see the firewall dialog. I will just connect as I would to any other SQL Server instance.
Configure Alerts
It is good to be proactive when managing your database. One way to do this is to setup alerts. I like creating alerts and I encourage you to do the same. The different metrics available to you are shown below:
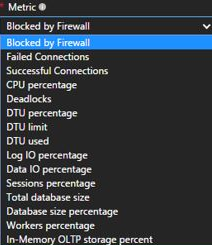
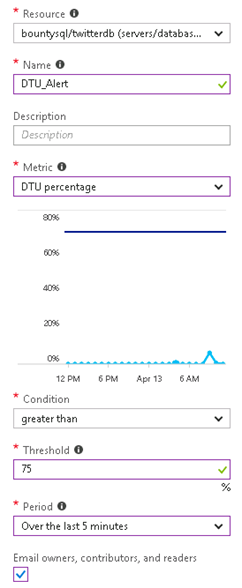
Let’s set an alert up. For this alert, we want to get notified when the DTU percentage usage is greater than 75% over a 5 minute time period.
First, navigate to your Azure SQL Database. Find the twitterdb database and click it.
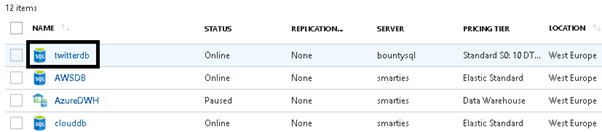
We will get a blade that opens. On the left side menu bar, scroll down to find the monitoring section. Then click Alerts.
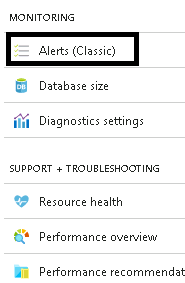
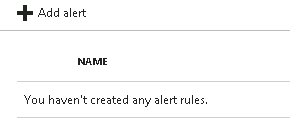
There should not be any alert rules listed if you have been following along in this series. Now, click Add Alert to create a new alert.
Complete the details for the alert. Give it a name and choose the metric. I have filled out the data to create the alert when the condition is greater than 75 over a 5-minute period of analysis. Don’t forget to tick the email option too.
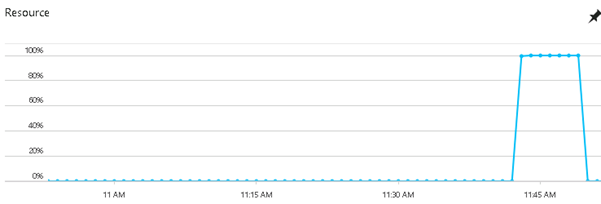
If you create a workload that looks like that below, the alert should fire.
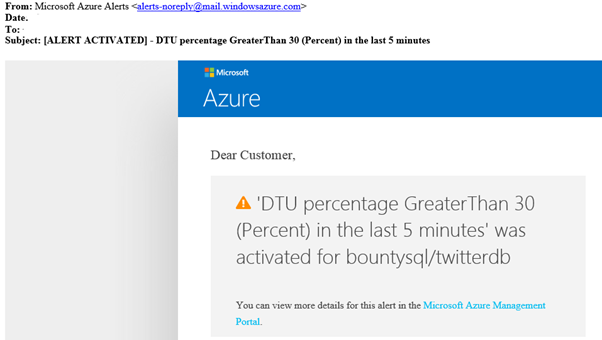
You should then receive an email from Microsoft that looks similar to this:
Restoring Your Database
A common requirement to restore a copy of a database. There are many factors that impact the time for the restore to complete, such as the size of the database and the point in time you have requested. Once a database is restored, this is to a new Azure SQL Database. The restored database must have a different name. If the newly restored database is to replace the older database, you will need to rename both of these databases.
To restore a copy, within the portal navigate to your database find the restore button at the top of the server details blade. Click Restore.

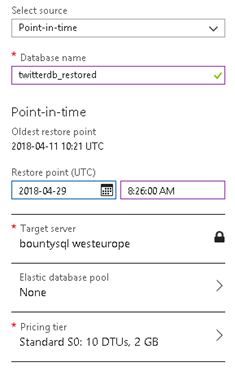
Next select the restore point. You can enter any time since the oldest restore point listed. Choose a target server, pool, and pricing tier for your copy.
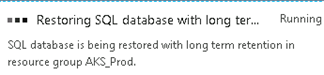
Then click OK to start the restore. You will see a message in your notifications area that the database is being restored.
When it completes, you can connect to the new database in the same manner as you have the previous one.
If you are replacing the original database, you will need to drop the old one first. Then you can rename the database by using the following T-SQL.
DROP DATABASE [twitterdb];
GO
ALTER DATABASE  twitterdb_restored
 MODIFY NAME = twitterdb ;
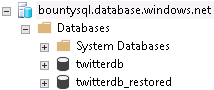
If you refresh the database node within SSMS you will see only one database now.
Scaling Up/Down
Scaling up or down your database is something that is quite common to do. Please be aware that when changing the service tier (and/or performance level) of a database it creates a replica of the original database and then switches connections over to the replica. No data is lost during this process but during the brief moment when the switch over to the replica occurs connections to the database are disabled, so some transactions in flight may be rolled back. So it is probably best that you do this during a period of low activity.
It is very easy to do this via the Azure portal but for this example we will use TSQL where I scale up my Basic database to a Standard S0 database.
First, connect to the master database and issue the below T-SQL statement.
ALTER DATABASE [Testdb]
  MODIFY (EDITION = 'Standard',  SERVICE_OBJECTIVE = 'S0');
You can then execute the below query to confirm that you have scaled correctly.
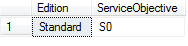
SELECT Edition = DATABASEPROPERTYEX('Testdb', 'Edition'),
       ServiceObjective = DATABASEPROPERTYEX('Testdb', 'ServiceObjective')
You should get a result set like this one:
Wrap-Up
Just to recap the whole series we have created an Azure account with a free-trial subscription hence allowing us to create a logical SQL Server. Doing this gave us the ability to create a database where then we discussed the different purchasing models available. We then discussed how to connect to the database from SSMS whilst configuring firewall rules. Finally, we wrapped things up with some common administration tasks.
Hopefully you have found this stairway series useful.