
In the previous level we successfully created a logical SQL Server. We are now ready to create an Azure SQL database. A key decision will be what sort of pricing model you will follow. Whether it will be a DTU or vCore model. The DTU model offers a pre-configured and pre-defined amount of compute resource whereas vCore is all about independent scalability, we will look into this with more detail later on.
Creating an Azure SQL Database
We will start by opening your Azure portal at portal.azure.com.
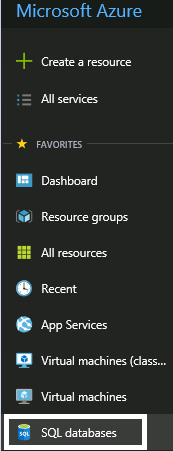
- Navigate to SQL databases located within the main resources menu bar.
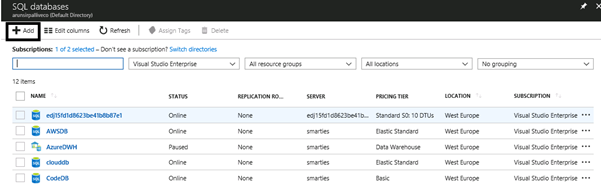
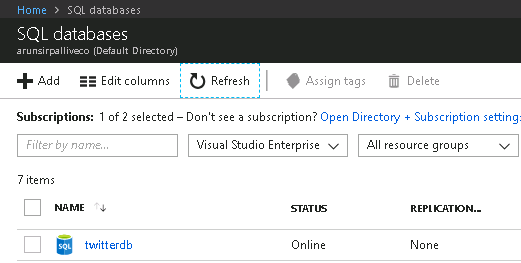
Here you will be presented with the main SQL databases blade. You will get to see all the databases you have currently deployed and you will also have the ability to add another database.
Let's start the process by clicking Add at the top of the blade.
Once you have clicked Add, you will then need to populate the following details:
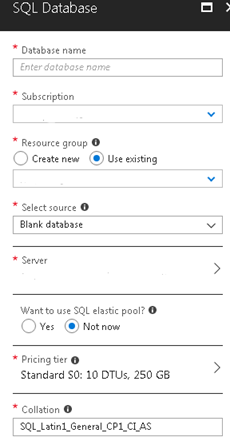
Choosing the Options
Database name – This is name of the new database that will appear for applications. This name must be unique on the logical SQL server machine you created in Level 2, which can host both Azure SQL Database databases and SQL Data Warehouse databases. Letters, numbers, hyphens and underscores are allowed.
Subscription – The subscription that you want to use for billing when creating the database. For this stairway, that will be the free trial (I have multiple subscriptions and you will see that I am using my Visual Studio Enterprise Subscription). Do not forget when we create the database, it becomes billable.
Resource Group – You will need to state what resource group you would like this database to be a part of. Think of it as a container that holds related resources for an Azure solution. I actually have multiple resource groups for different environments but for this level I will be using the resource group, AKS_Prod, that I created in the previous level. Please use the resource group that you created in the previous level.
Select Source – The options here are whether you would like to create a blank database, a database from a backup or a sample database. We will be using the AdventureWorksLT sample.
Server – The logical SQL Server that you would like to build you databases in. Remember, this will be the server that we created in Level 2, called bountysql.
SQL elastic pool – For this stairway we will not be using elastic pools. Elastic pools are a totally different way to deploy and manage SQL Databases, and it makes sense to use this when we have many databases that have varying and unpredictable usage demands. For further reading please see this link - https://docs.microsoft.com/en-us/azure/sql-database/sql-database-elastic-pool
Pricing tier – Here you will have the option of sizing a database based on DTU or vCore (see the purchasing models section). For this example, keep costs low and use the S0 performance level.
Collation – For this deployment I leave the default collation as SQL_Latin1_General_CP1_CI_AS. If you want a different default collation, you can type it in this box. A list of collations is in this article: https://docs.microsoft.com/en-us/sql/t-sql/statements/collations?view=sql-server-2017
For our example we have:
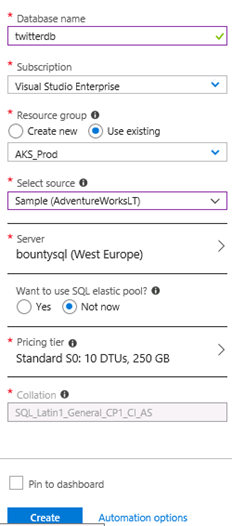
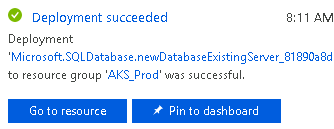
Now you can click, Create. Once you click create, deployment will take place in the background as indicated by the below screen shot.

For our example, this will only take a couple of minutes. You will be given a successful notification once the deployment successfully completes.
If you click the refresh button when on the main SQL Database menu, you will see your newly created database.
It is as simple as that. We have created a Standard: S0 Azure SQL database within a specific resource group in West Europe in our bountysql SQL Server. You can now connect to this database with SSMS or the Query Editor in the portal. The username and password will be the ones you used in Level 2 when creating the logical server.
Note: You may need to add your current IP to the firewall access list. SSMS will ask for this when you attempt to connect.
Cloud Shell
Again all this can be simplified by using code. For example, if you wanted to create a S1 level database called Database007 from a sample backup called AdventureWorksLT within our bountysql server you would need to do the following.
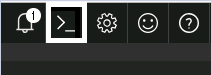
First, click the cloud shell icon from the top menu bar.
Then enter the following code.
New-AzureRmSqlDatabase -ResourceGroupName "AKS_PROD" -ServerName "bountysql" -DatabaseName "Database007" -SampleName "AdventureWorksLT" -RequestedServiceObjectiveName "S1"
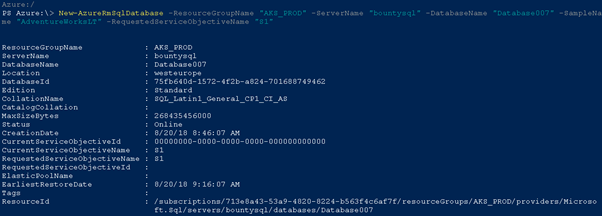
Hit enter to run this code, and you will see Database007 in your database list. Remember to delete it after this step if you are not going to use it as you will be billed for this database.
The Purchasing Models
An important topic worthy of a brief section. There are now two purchasing models for Azure SQL database. For single databases we have the option of using a DTU based or vCore based model and they are quite different.
DTU
DTU stands for Database Transaction Unit and it represents the relative power assigned to the database. It is a blended measure of CPU, memory and read-write rates. This concept might sound strange for new users of Azure SQL database and it might actually take you some guess work to find your optimal service tier and performance level.
There are three service tiers, Basic, Standard and Premium and as you go up a service tier you are increasing the number of DTUs assigned to your database – this is called a performance level as shown below.
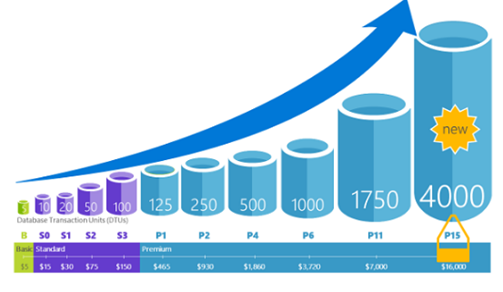
The DTU Chart Note S0 is near the left.
Where do we start with the sizing exercise? Well the Basic tier will very likely never enter the production realm because of its 2GB max size limit. Microsoft label the Standard tier as fit for most production workloads and the Premium tier for your most IO intensive workloads, thing along the lines of SSD based capability. So if you know that your IO workloads are intensive the Premium tier might be a better fit.
Once you have made a decision with a performance level but you realise that you made a mistake it is very easy to make changes to the correct one. When a request to scale up (or down) is made a replica of the original database at the new performance level is created and then connections are switched over to the replica. No data is lost during this process but during the brief moment when the switch over occurs connections to the database are disabled, so some transactions in flight may be rolled back.

Each service tier differs and offers different capabilities. Study the above service-tier table. If for example you require a database that has a backup retention of thirty-five days and In-memory OLTP then you will have no choice but to select the Premium tier, then the decision will be what performance level. To see in more detail, the differences between performance levels and resource limits please see this link: https://docs.microsoft.com/en-us/azure/sql-database/sql-database-dtu-resource-limits-single-databases.
vCore
vCore based performance levels are very new and not yet rolled out to all Azure regions. With that being said, this option offers a different approach to sizing your database. It is easier to translate an on-premises workload to a vCore based model because the components are what we are used too.
vCore Options
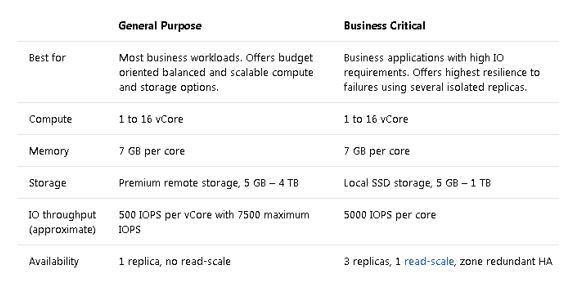
There are two tiers you can select from, General Purpose and Business Critical. The biggest differences between the two tiers is the storage (in terms of type and throughput) and availability features. See the table below for an outline of the tiers.
For larger organisations vCore can be an attractive option. This is because of Azure Hybrid Benefit for SQL Server where it enables you to use your SQL Server Enterprise Edition or Standard Edition licenses with active Software Assurance to pay a reduced rate on vCore-based databases with savings up to 30 percent.
This is what the vCore model options look like from the Azure portal.
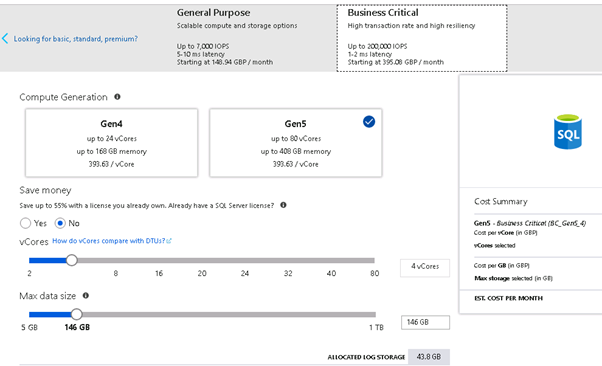
As you can see the idea of independent scalability where you have options to state how many vCores you desire and your max data size. Also take note of the important IO differences between Business Critical and General Purpose tiers in terms of throughput and latency.
Next Steps
In this level we created a database from a sample backup on our logical SQL Server that we created in level one. We then discussed the two main purchasing models. In the next level we will discuss firewall rules and configure some logins to finally allow us to connect to the database via SSMS (SQL Server Management Studio).
References
https://docs.microsoft.com/en-us/azure/sql-database/sql-database-service-tiers