With CTP3 for SQL Server Denali available, a lot of us want to play with all the new cool features, as well as the new tools, such as Crescent and Juneau. The steps below are what I took to create a virtual machine to install all the products needed to create an environment where I can play with everything. This environment included: Windows Server 2008 R2 Enterprise, SQL Server Denali CTP3, Sharepoint 2010, Crescent, PowerPivot, and Juneau:
- The first thing I did was follow Jonathan Kehayias’s post Building a Completely Free Playground for SQL Server – (1 of 3) – Downloading the Software and Setting up a Windows Server 2008R2 VM Template to create a VM using Windows Server 2008 R2 Enterprise, 64-bit (you must use 64-bit for SharePoint 2010). Use VirtualBox for your VM, since Microsoft Virtual PC does not support 64-bit
- Then I followed the post Step By Step Guide for Windows Server 2008 Domain Controller and DNS Server Setup to set up the VM as a domain controller, which is required by SharePoint 2010
- I then followed the post Getting up and running with SQL Server Denali for Business Intelligence (Crescent and PowerPivot in CTP3) to install SharePoint, PowerPivot for SharePoint, and Denali (SSRS, SSIS, SSAS)
- I then used my Office 2010 64-bit image to install Excel 2010 and Office Shared Features, and then downloaded and installed Visual Studio 2010 Tools for Office Runtime
- Then I followed the post How to install PowerPivot for Excel
- Then installed Juneau from here
I did this on my desktop computer, which runs 64-bit Windows 7. I went to copy the completed virtual to my laptop so I can use it on that, when I realized my laptop has the 32-bit version of Windows 7. I thought I would have to rebuild my laptop using the 64-bit version of Windows 7, but fortunately with VirtualBox, you can have a 64-bit guest on a 32-bit computer if the computer has a 64-bit processor with hardware virtualization support, which I had. I tried the VM on my laptop and it worked fine. That saved a lot of work. More info at VirtualBox – 64 bit guests on 32 bit hosts – still need hardware virtualisation.
A few notes:
In step #1, make sure to change the computer name to something other than the default, since the default name is usually hard to remember.
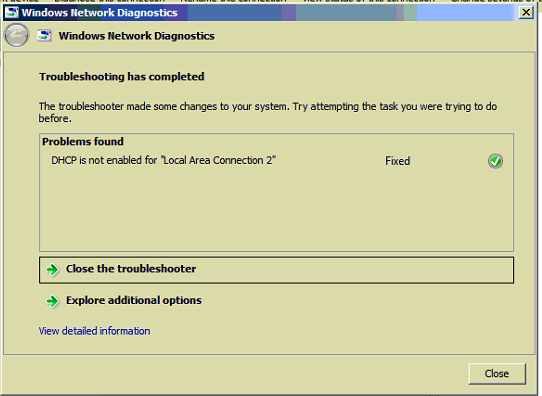
After step #2, the internet in the VM was not working. I ran the network diagnostics and had it do the repair, and the internet started working:
For step #3, when installing SharePoint, note you will not have an option to select installation type (like “server farm” or “Standalone”) because you are running setup on a machine that is also a domain controller, so it automatically installs as a server farm.
Also for step #3, when prompted for the account to use for SQL Server Analysis Services, I choose Administrator (you will need to enter password). You might want to create another user account beforehand and use that instead. After you install Denali, you will launch the PowerPivot Configuration tool (more info) which will create all the SharePoint databases in Denali. I choose to save them to the Denali instance servername\POWERPIVOT (I should have choosen the Denali default instead) .
Note the finished VM was about 31GB!


