Building an audit in SQL Server 2008 is very easy, much easier than in previous versions using SQL Trace. That was painful, and I am glad that it’s not required anymoer.
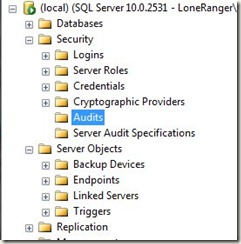
Building a server audit consists of first setting up the audit. You do that in SSMS through the following steps. First find the “Audits” folder until the Security folder.
Right click this and select “New Audit”
That gives you the main dialog, where you can specify a number of options. First is the name, which isn’t important. It just allows you to identify each audit.
The Queue Delay is used to determine how the audit is recorded in the target file. If this is set to 0, then you have synchronous auditing. Audit records are immediately written to the target location. The default is asynchronous auditing, for performance reasons. This value is in ms, and defaults to 1 sec. This determines up to how long audit records can be held in a buffer in memory. There is a potential for audit record loss if the server crashes here. The minimum delay is 1000ms (other than 0) and the max is 2,147,483,647 (24 days, 20 hours, 31 minutes, 23.647sec)
The next option is the “Shut down server on audit log failure.” This is important if you need to ensure no actions can occur if auditing does not work. If this option (off by default) is checked, then if there is a write failure to the audit target, the server is shut down. Note that if this is checked, the login creating the audit must have the server shutdown permission, then the function fails.
The drop down allows you to choose the target location. You have three choices:
- a file
- The Windows Security Log
- The Windows Application Log
If you choose one of the Event logs, no other options are needed. If you choose the Security log, there are some additional configuration options (coming in a later blog). If you choose file, then you specify other options.
The file path can be specified and the SQL Server service account must be able to write to that location. You don’t get to choose the file name. That is automatically generated in the following format.
<audit_name>_<audit_guid>_nn_<timestamp_as_bigint>.sqlaudit
Once you pick the file name, you have to choose how large each file gets (maximum file) and the maximum number of files (Maximum). The sizes can be specified in MB, GB, or TB. The minimum size if 2MB and the max is 2,147,483,647TB. You can specify an unlimited size, which grows until the disk is full. You can specify the number of files as unlimited as well.
The last option is the RESERVE SPACE option. If checked, it reserves the space on disk of the file size specified and preallocates that to the audit file. This is only used if the maximum size is not set to unlimited.
By default, the server audit is disabled, meaning that no audit records are recorded. Since we haven’t specified any audit specifications at the server or database level, nothing will get recorded anyway. To turn the audit on in SSMS, you need to save the audit and then right click it and select “Enable Audit”
As I mentioned, without any audit specifications, nothing will get recorded. In another blog I’ll look over creating specifications and viewing audit records.


