In my last post, I started out with a new SCA project, getting a connection to my database up and running. Now, let’s start the new project by adding some objects.
Adding Objects
I’m going to start with a couple objects to make this simple, but we’ll move on from there in other posts to describe the options and details.
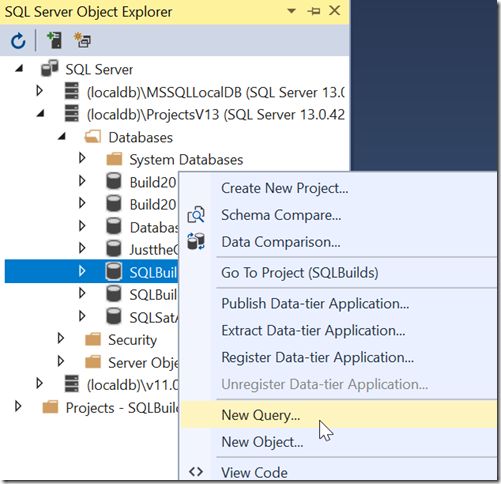
Our database is not terribly useful without tables, so let’s create a table. I’ll start by using a query window to build a table. Right click the database and choose New Query.
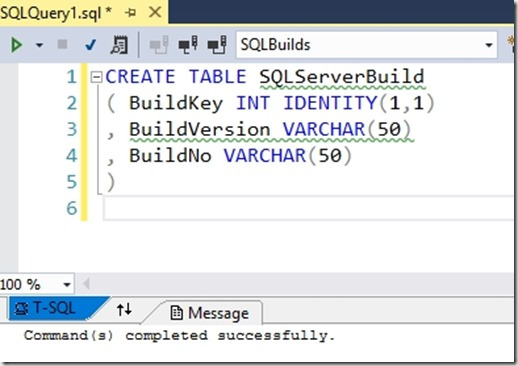
Once this opens, let’s write a query. I’m comfortable building tables like this, so I’ll add the first table to hold my SQL Server builds. I’ll write the code shown below and then execute this.
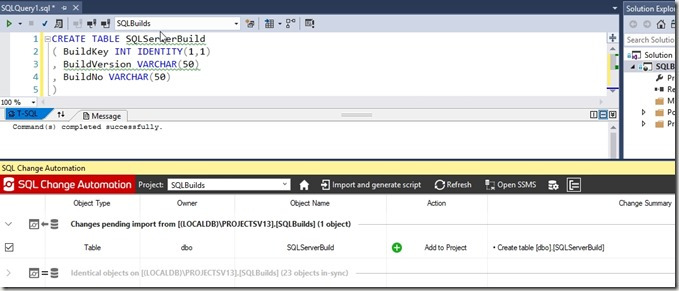
At this point, the development database has a change, but it’s not in my project. I need to use the SCA pane to let VS know that I’m ready to import this change. Open the pane and click refresh. The following should appear when the process completes.
In this dialog, we see a new table was found. The process compares the Shadow database, where no changes have occurred, with the development database, which has a new table. This gives me a “diff” in essence and I can add this to my project.
The change is checked on the left, so I can click the Import and Generate Script button. I’ll do that and I see the image below. There’s a lot here, so let’s discuss this after the image.
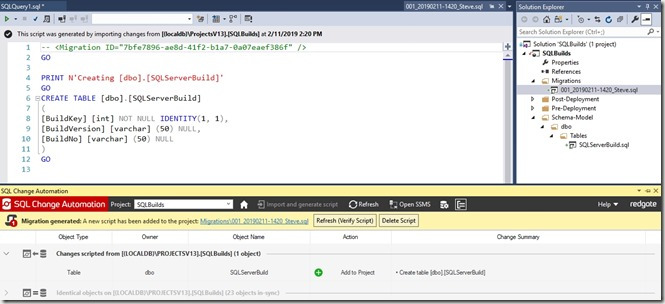
The first thing to look at is the script that’s active in the upper pane. If you notice, the tab name is on the right side of that upper left pane, highlighted in blue. This is my first migration script. You can see the migration ID at the top and then a PRINT statement, which is useful for logging during the build or deployment process, then the top of my code.
On the right side, in the Solution Explorer, we see that my script has been added to the Migrations folder. The default name has been applied, but I can rename this if I want.
In the SCA pane, we see a few things. First, the change is grayed out because the change was scripted. Above that, we have a yellow bar that notes a migration was generated, and it gives us the path in the project. Finally, there is a “Refresh” button to verify the script. We want to click that. This will use our script with the Shadow database to verity the code is correct. Once I click that, I get a note that the project was verified.
At this point, the Shadow and development databases are in sync.
This tells me that my changes should work when I deploy them to another system. Hopefully that works, and we’ll tackle that next time.


