

Purpose and Scope
This guide covers setting up SQL Server transactional replication from a database in an Always On Availability Group to Azure SQL Database, with replication configured to survive AG database failovers provided the Distributor node stays available. One boundary to be clear about upfront: the Distributor and agent jobs stay on NODE_1 throughout. Replication will survive a database failover between replicas, but it will not survive NODE_1 going offline.
By the end you will understand why transactional replication breaks when it is tied to a specific replica name, and how redirecting it to the AG listener keeps the agents pointing at whoever is currently primary. You will also have the Publisher, Distributor, snapshot share, and security configured so that failover becomes a non-event, and you will know where to look when things go wrong.
This guide assumes transactional replication (not merge, and not snapshot-only), with Azure SQL Database as the Subscriber and push subscriptions so the agents run on SQL Server rather than in Azure. You should already have an AG with at least two replicas and a listener, and be able to make changes on both replicas and on the Distributor server.
A few things are deliberately not covered: a highly available Distributor (kept on NODE_1 here for simplicity), pull subscriptions, targets other than Azure SQL Database, and fully scripted end-to-end automation. This guide uses a mix of SSMS wizards and T-SQL.
A quick note on terminology: the Publisher is whichever SQL Server instance is currently hosting the published database as primary. The Distributor is where replication metadata and queued commands live, which in this guide is NODE_1. The Subscriber is Azure SQL Database.
Why Replication Breaks with Availability Groups
Transactional replication was built around the assumption of a stable Publisher name. The Distributor stores that name, and the Log Reader Agent and Distribution Agent connect to it every time they run. An AG breaks that assumption. After failover, the published database moves to a different replica. If the agents are still trying to connect to the original node name, they land on a server where the database is now secondary, typically read-only or not accessible at all. Replication stops.
The AG listener is the stable endpoint that always resolves to the current primary. By redirecting replication to use the listener, the agents follow the primary automatically after any failover.
To make this concrete: if you create a publication whilst connected to SQLNODE01, the metadata stores "SQLNODE01" as the Publisher. When the AG fails over and the database becomes primary on SQLNODE02, the agents are still trying to reach SQLNODE01, where the database is now secondary and read-only. After redirection, they connect to AGLISTENER01 instead, which routes them to SQLNODE02, and replication carries on without any manual intervention.
Environment Reference
Before starting, collect the following details for your environment. These are not variables in the scripting sense; they are simply the names and values specific to your setup. The placeholder names below are used throughout all examples and commands, and you should substitute your own values wherever they appear.
SQL Server AG configuration
NODE_1 is the first node in your AG, where the Distributor will live (example: SQLNODE01). NODE_2 is the second node (example: SQLNODE02). AG_LISTENER is the virtual network name for your Availability Group (example: AGLISTENER01). Because the Distributor is placed on NODE_1 in this guide, DISTRIBUTOR and NODE_1 refer to the same server.
It is worth being clear about what this means in practice: if NODE_1 goes down, the AG can fail over to NODE_2 and your databases stay online, but replication will stop because the distribution database and agent jobs are on NODE_1. This is a deliberate trade-off for simplicity. Environments with stricter requirements may want a separate, dedicated Distributor, but that is not covered here.
Azure SQL Database details
You will need the fully qualified server name (for example: yourserver.database.windows.net), the database name, and SQL authentication credentials. Azure SQL Database requires SQL authentication for replication; Windows authentication will not work across this boundary.
Snapshot share
The snapshot folder must be referenced by a UNC path, for example \\SQLNODE01\ReplicationData. A local path such as D:\ReplicationData will not work. After failover, NODE_2 becomes the publisher and needs to reach snapshot files across the network, and a local path on NODE_1 is inaccessible from NODE_2.
Per-database values
For each database you publish, note its name, the publication name you want to give it, and the original publisher, which is the exact node name you were connected to when the publication was created. This last value matters more than it might appear: the publisher redirection system uses it as a lookup key. If you create a publication whilst connected to NODE_1, the original publisher is NODE_1, regardless of which node is currently primary.
Design Decisions to Make Before Starting
There are two decisions worth thinking through before you begin. Both have real consequences, so it is better to understand the reasoning now than to revisit it later.
Decision 1: Distributor placement
This guide places the Distributor on NODE_1. It is the simpler approach, with one fewer server to manage, and it works well for most setups. The downside is that the distribution database is not itself highly available. If NODE_1 fails, replication stops even though the AG databases continue running on NODE_2. If that is unacceptable for your environment, the alternative is a dedicated Distributor server with its own availability solution. That adds significant complexity and is not covered here.
Decision 2: Publication creation consistency
Always create new publications when NODE_1 is primary for that database. The node you are connected to at creation time becomes the "original publisher" stored in the replication metadata, and that value is used later as a lookup key during publisher redirection. If some publications are created on NODE_1 and others on NODE_2, the metadata becomes inconsistent and troubleshooting gets considerably harder. By always using NODE_1, you always know what the original publisher value will be. Before creating any publication, confirm NODE_1 is primary, or perform a planned failover to make it so.
Prerequisites and Preparation
Before touching any replication configuration, there are a few things to verify across both SQL Server nodes and in Azure.
On NODE_1, confirm that SQL Server Agent is running. Open SQL Server Configuration Manager, go to SQL Server Services, and find the Agent entry for your instance. It should show as Running. If it is stopped, start it. Replication depends entirely on SQL Server Agent to schedule and run the replication agent jobs, so nothing will work without it.
On both NODE_1 and NODE_2, verify that the Replication feature is installed. Open SQL Server Installation Centre on each server, choose to add features to the existing instance, and confirm that SQL Server Replication and Management Tools - Complete are both selected. If either is missing on either node, install them. Both nodes need the replication binaries because either can become primary after failover, and whichever is primary must be capable of acting as a publisher.
The snapshot folder needs to exist on NODE_1 and be shared correctly. Create the folder (for example D:\ReplicationData), share it with the name ReplicationData, and grant the SQL Server Agent service account Full Control on both the share permissions and the underlying NTFS permissions. Once shared, open \\SQLNODE01\ReplicationData from NODE_2 to confirm the path is accessible from that server. It will be empty at this stage, which is expected.
On the Azure side, confirm your Azure SQL Database exists and is reachable from the on-premises network. Test this by opening a connection from SSMS on NODE_1 using SQL Server Authentication. You also need a SQL authentication user in the database with sufficient permissions. During initial setup db_owner is appropriate, since the Snapshot Agent will be creating tables. You can reduce permissions to db_datareader and db_datawriter once the snapshot has been applied. To check and create the user if needed, connect to Azure SQL Database and run:
SELECT name, type_desc FROM sys.database_principals
WHERE name = 'YourReplicationUser';

-- If you need to create it:
CREATE USER [YourReplicationUser] WITH PASSWORD = 'StrongPassword123!';
ALTER ROLE db_owner ADD MEMBER [YourReplicationUser];
Part 1: One-Time Environment Setup
This section sets up the foundational replication infrastructure. You do this once for the environment, not once per database.
Step 1: Configure Distribution on NODE_1
Connect to NODE_1 by node name (SQLNODE01) in SSMS, not through the listener. In Object Explorer, expand the server, right-click the Replication folder, and select Configure Distribution.
On the Distributor page, choose the option to make SQLNODE01 act as its own Distributor. This hosts the distribution database locally on NODE_1 rather than pointing to a remote server.
On the Snapshot Folder page, enter \\SQLNODE01\ReplicationData. Do not enter a local path here. After failover, agents on the Distributor need to reach the snapshot folder across the network, and only the UNC path makes that possible.
On the Distribution Database page, the default name distribution is fine. Accept the default file locations or adjust them as needed; these are local to NODE_1. On the Publishers page, make sure SQLNODE01 is ticked. You will register NODE_2 separately in the next step using T-SQL, which gives more control. Complete the wizard and wait for all steps to report success.
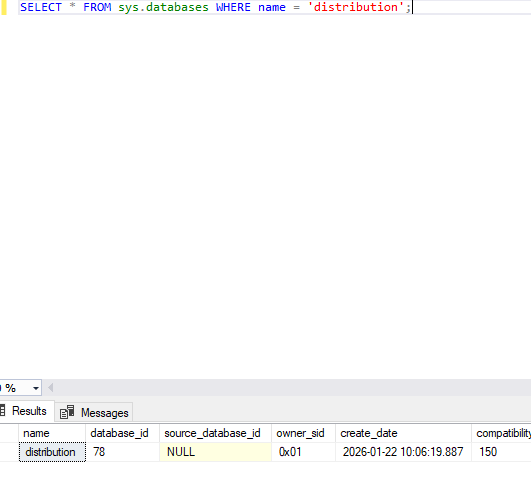
Verify distribution is configured:
SELECT * FROM sys.databases WHERE name = 'distribution';

EXEC sys.sp_helpdistributor;
SELECT * FROM sys.databases WHERE name = 'distribution';

EXEC sys.sp_helpdistributor;
SELECT * FROM sys.databases WHERE name = 'distribution';

EXEC sys.sp_helpdistributor;
The first query should return the distribution database, and sp_helpdistributor should show SQLNODE01 as the distributor.
Step 2: Register Both AG Nodes as Publishers at the Distributor
The Distributor needs to know that both NODE_1 and NODE_2 are legitimate publishers. Without this, NODE_2 will be rejected after failover. Check what is currently registered:
USE distribution;

EXEC sys.sp_helpdistpublisher;
You should see SQLNODE01. NODE_2 almost certainly will not be there yet. Register both:
USE distribution;

EXEC sys.sp_adddistpublisher
  @publisher = N'SQLNODE01',
  @distribution_db = N'distribution',
  @working_directory = N'\\SQLNODE01\ReplicationData',
  @security_mode = 1;

EXEC sys.sp_adddistpublisher
  @publisher = N'SQLNODE02',
  @distribution_db = N'distribution',
  @working_directory = N'\\SQLNODE01\ReplicationData',
  @security_mode = 1;
Both nodes use the same UNC working directory; that is intentional. The @security_mode = 1 parameter means the agents connect to the publisher using Windows authentication. Run sp_helpdistpublisher again to confirm both are now listed.
Step 3: Configure NODE_2 to Use the Remote Distributor
NODE_2 needs to know where the Distributor lives. Even though it is on NODE_1, NODE_2 may become the primary publisher after failover and must know how to reach distribution services.
Connect directly to NODE_2 (SQLNODE02), not through the listener, and confirm you are on the right server:
SELECT @@SERVERNAME AS connected_to;
You will need the distributor password that was set during distribution configuration on NODE_1. If you did not record it, reset it on NODE_1 first:
-- Run on NODE_1
USE distribution;
EXEC sys.sp_changedistributor_password @password = N'YourStrongPasswordHere'; Then on NODE_2: sql USE master;

EXEC sys.sp_adddistributor
  @distributor = N'SQLNODE01',
  @password = N'YourStrongPasswordHere';
This creates a pointer on NODE_2 saying "for distribution services, connect to SQLNODE01." It does not make NODE_2 a distributor. Verify on NODE_2:
EXEC sys.sp_helpdistributor;
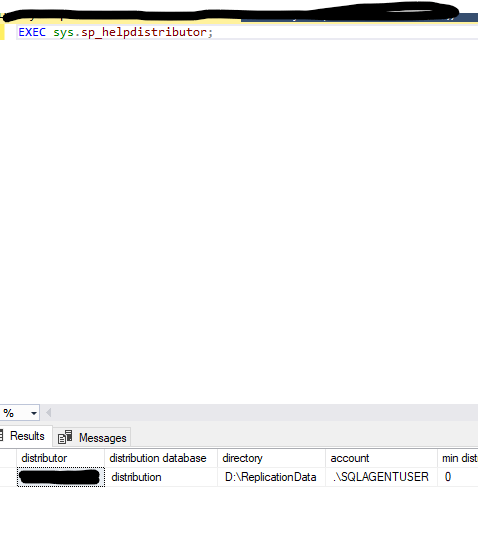
The output should show SQLNODE01 as the distributor with distribution as the database name.
Step 4: Create the Azure SQL Linked Server on Both Nodes
The replication agents need a linked server definition to connect to Azure SQL Database. It must exist on both nodes because after failover, NODE_2 may be primary and agents may need to validate the subscriber connection from there.
Run the following on NODE_1, then repeat the same script on NODE_2:
IF NOT EXISTS (SELECT 1 FROM sys.servers WHERE name = N'yourserver.database.windows.net')
BEGIN
  EXEC sys.sp_addlinkedserver
    @server = N'yourserver.database.windows.net',
    @srvproduct = N'',
    @provider = N'SQLNCLI',
    @datasrc = N'yourserver.database.windows.net';
END

EXEC sys.sp_addlinkedsrvlogin
  @rmtsrvname = N'yourserver.database.windows.net',
  @useself = N'FALSE',
  @locallogin = NULL,
  @rmtuser = N'AzureSqlLogin',
  @rmtpassword = N'AzureSqlPassword';
Setting @useself = FALSE tells SQL Server to use the specified SQL credentials rather than the local Windows identity when connecting to Azure. Test that the linked server is working:
SELECT * FROM OPENQUERY([yourserver.database.windows.net],
  'SELECT DB_NAME() AS AzureDatabase');
This should return the name of the default Azure SQL Database for that login.
Part 2: Per-Database Configuration
With the infrastructure in place, you can now configure replication for each individual database. Repeat these steps for every database you want to replicate.
Step 1: Verify the Database is PRIMARY on NODE_1
SELECT
  ar.replica_server_name,
  ars.role_desc AS current_role,
  DB_NAME(drs.database_id) AS database_name,
  drs.synchronization_state_desc,
  drs.is_suspended
FROM sys.dm_hadr_database_replica_states drs
JOIN sys.dm_hadr_availability_replica_states ars
  ON drs.replica_id = ars.replica_id
JOIN sys.availability_replicas ar
  ON ars.replica_id = ar.replica_id
WHERE DB_NAME(drs.database_id) = N'YourPublishedDatabaseName'
ORDER BY ars.role_desc;
You want to see SQLNODE01 in the row where current_role is PRIMARY, with is_suspended showing 0. If NODE_1 is not primary, fail over to it before continuing:
-- Run on the current primary
ALTER AVAILABILITY GROUP [YourAGName] FAILOVER;
Wait 30 to 60 seconds, then re-run the check.
Step 2: Create the Transactional Publication
Connect to NODE_1 by node name (SQLNODE01), not through the listener and not to NODE_2. In Object Explorer, expand Replication, right-click Local Publications, and select New Publication. Select your database, then choose Transactional publication. Unlike snapshot publication, which sends data once, transactional publication continuously replicates changes as they happen.
On the Articles page, tick the tables you want to replicate. Only tables with primary keys are eligible; any without will be flagged on the Article Issues page. If this is your first time setting up this pipeline, it is worth starting with one or two tables to validate the whole flow before adding the rest.
On the Snapshot Agent page, tick the option to create a snapshot immediately, then click Security Settings. The agent typically runs under the SQL Server Agent service account and connects to the publisher using Windows authentication. It needs read access to the published database and write access to the snapshot folder.
Give the publication a descriptive name on the final page, complete the wizard, and wait for all steps to succeed. Verify it was created:
SELECT
    publication AS name,
    CASE publication_type
        WHEN 0 THEN 'Transactional'
        WHEN 1 THEN 'Snapshot'
        WHEN 2 THEN 'Merge'
    END AS publication_type
FROM distribution.dbo.MSpublications;
Step 3: Create the Push Subscription to Azure SQL Database
Right-click the publication under Local Publications and select New Subscriptions. On the Distribution Agent Location page, choose to run all agents at the Distributor (SQLNODE01). This is a push subscription; the Distribution Agent runs as a SQL Agent job on NODE_1, not in Azure.
On the Subscribers page, add a SQL Server Subscriber. Enter the Azure SQL server name and authenticate with SQL Server Authentication using your Azure credentials. Select your Azure database from the Subscription Database dropdown. The database must already exist; the wizard will create tables within it but will not create the database itself.
On the Distribution Agent Security page, configure the agent to connect to the Subscriber using SQL Server Authentication with your Azure login and password. These credentials are used every time the agent connects to apply transactions.
Set the schedule to run continuously. For transactional replication this is the right choice; scheduled intervals introduce unnecessary latency and complexity.
After the wizard completes, the Snapshot Agent will run and write schema and data files to \\SQLNODE01\ReplicationData. The Distribution Agent will then apply the snapshot to Azure SQL Database and, once that is done, continuously apply new transactions as they come in.
Check the subscription status on NODE_1:
USE distribution;

SELECT
    p.publication,
    s.subscriber_db,
    s.status,
    CASE s.subscription_type
        WHEN 0 THEN 'Push'
        WHEN 1 THEN 'Pull'
        WHEN 2 THEN 'Anonymous'
    END AS subscription_type
FROM dbo.MSsubscriptions s
JOIN dbo.MSpublications p ON s.publication_id = p.publication_id
WHERE p.publication = N'YourPublicationName';
You should also see new SQL Agent jobs for the Log Reader Agent and Distribution Agent under SQL Server Agent on NODE_1. Right-click each and view the history to confirm they are running without errors.
Step 4: Redirect the Publisher to the AG Listener
This is the step that makes failover transparent. You are telling the Distributor to connect through the AG listener whenever it sees a particular publisher name and database combination, rather than going directly to the node.
Once this is in place, the agents connect to the listener, which routes them to whichever node is currently primary. Connect to NODE_1 and run:
USE distribution;

EXEC sys.sp_redirect_publisher
  @original_publisher = N'SQLNODE01',
  @publisher_db = N'YourPublishedDatabaseName',
  @redirected_publisher = N'AGLISTENER01';
The @original_publisher value must exactly match what is stored in the publication metadata, that is, the node name you were connected to when you created the publication. Verify the redirection was saved correctly:
USE distribution;

EXEC sys.sp_get_redirected_publisher
  @original_publisher = N'SQLNODE01',
  @publisher_db = N'YourPublishedDatabaseName';
The result should show SQLNODE01 as the original publisher, AGLISTENER01 as the redirected publisher, and the validation_error_info column should be NULL.
Step 5: Validate Replica Hosts
This step confirms that both NODE_1 and NODE_2 are properly set up to act as publishers through the listener. It connects to the listener, discovers all replicas, tests whether each can be accessed as a publisher, and checks that the replication metadata is present.
USE distribution;

DECLARE @redir sysname;

EXEC sys.sp_validate_replica_hosts_as_publishers
  @original_publisher = N'SQLNODE01',
  @publisher_db = N'YourPublishedDatabaseName',
  @redirected_publisher = @redir OUTPUT;

SELECT @redir AS redirected_publisher;
Look for AGLISTENER01 as the redirected publisher, and SUCCESS for both SQLNODE01 and SQLNODE02 in the replica results. If you see "Cannot connect to replica", check network connectivity from the Distributor to both node names. "Publisher not registered" points back to Part 1, Step 2. "Linked server missing" points back to Part 1, Step 4.
If everything passes, you are ready to test.
Part 3: Testing
Do not skip this section. Many configuration problems only show up during an actual failover, and it is much better to find them in a controlled test than during a real incident.
Test A: Initial Data Flow
Connect to your Azure SQL Database and confirm the tables you selected in the publication are present. Compare row counts against the source database on NODE_1; they should match once the snapshot has finished applying.
To test live replication, insert a row in the published database on NODE_1:
USE YourPublishedDatabaseName;

INSERT INTO YourReplicatedTable (Column1, Column2, TestColumn)
VALUES ('Test1', 'Value1', 'Failover Test - Pre-Failover');
Wait 10 to 30 seconds, then check Azure SQL Database:
SELECT * FROM YourReplicatedTable
WHERE TestColumn = 'Failover Test - Pre-Failover';
When the Distribution Agent is running continuously, the row typically appears within a few seconds. If it does not show up within 30 seconds, check the Distribution Agent job history in SQL Server Agent on NODE_1.
Test B: Failover
Confirm NODE_1 is currently primary, then connect to NODE_2 and perform a manual failover:
ALTER AVAILABILITY GROUP [YourAGName] FAILOVER;
Wait 30 to 60 seconds, then confirm NODE_2 is now showing as primary. Insert a test row from NODE_2:
USE YourPublishedDatabaseName;

INSERT INTO YourReplicatedTable (Column1, Column2, TestColumn)
VALUES ('Test2', 'Value2', 'Failover Test - Post-Failover');
Check Azure SQL Database for this row after a short wait. If it appears, the listener redirection is working correctly and replication is following the primary without any manual intervention. Also check the Log Reader and Distribution Agent job histories on NODE_1; both should show continued activity without interruption or errors.
Troubleshooting
Replication stops after failover
If rows inserted after failover are not reaching Azure, work through the following checks in order.
Run sp_get_redirected_publisher on NODE_1 and confirm it returns AGLISTENER01. If the result is empty or wrong, re-run the redirection from Part 2, Step 4.
Run sp_helpdistpublisher on NODE_1 and confirm both SQLNODE01 and SQLNODE02 are listed. If NODE_2 is absent, re-run Part 1, Step 2.
On NODE_2, run sp_helpdistributor and confirm SQLNODE01 is shown as the distributor. If not, re-run Part 1, Step 3 on NODE_2.
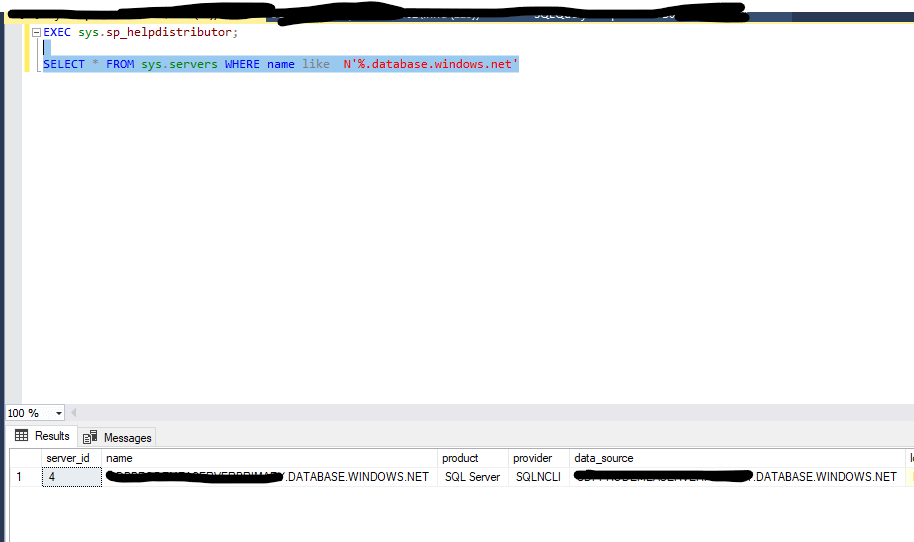
On NODE_2, query sys.servers to confirm the Azure linked server exists. If it is missing, re-run Part 1, Step 4 on NODE_2.
Finally, check the replication agent job histories on NODE_1. The most common error messages are "Could not connect to publisher" (check listener connectivity), "Database is secondary" (the redirection is probably not working), and "Login failed" (a permissions issue).
Replication agent jobs fail immediately — subsystem failed to load
If SQL Server Agent runs T-SQL jobs without issue but replication jobs fail straight away with a message about being unable to load a subsystem DLL, the replication binaries are not loading. Check the subsystem registration:
SELECT
subsystem,
subsystem_dll,
agent_exe
FROM dbo.syssubsystems
WHERE subsystem IN (N'Snapshot', N'LogReader', N'Distribution');
All three should have valid file paths. If any are wrong or the files do not exist at those paths, the most likely causes are that the Replication feature was not installed on this node, the DLL files are missing, or the SQL Server Agent service account lacks execute permissions on them. Check the SQL Server Agent error log for detail. If the binaries are genuinely missing, run a repair through SQL Server Installation Centre, then restart SQL Server Agent.
Snapshot Agent cannot access the snapshot folder
If the Snapshot Agent fails with an error about the snapshot folder, first test whether \\SQLNODE01\ReplicationData is accessible from NODE_1 itself by browsing to it in File Explorer. If it is not, the share is not configured correctly.
If the path is reachable but the agent still fails, the issue is usually permissions. The SQL Server Agent service account needs Full Control on both the share permissions and the NTFS permissions of the underlying folder. Check both in the folder's Properties dialog.
Distribution Agent cannot connect to Azure SQL Database
If the Distribution Agent fails with a login failure or connection error, test the connection manually from SSMS on NODE_1 using the same credentials configured in the subscription. If that connection fails, either the network is blocked or a firewall rule is missing. Check the Networking settings on your Azure SQL Server in the Azure Portal and confirm the on-premises IP range is allowed.
If an SSMS connection works but the agent still fails, the credentials stored in the agent job are likely incorrect. You can inspect the job command by querying msdb.dbo.sysjobsteps for jobs matching your publication name. If the credentials are wrong, the cleanest fix is to drop the subscription and recreate it with the correct details.
Cannot enable a database for publishing after restoring to AG
If you have restored a database backup into your AG and cannot create publications on it, there may be old replication metadata left over from a previous setup. Check whether the database already reports itself as published:
sql
USE YourDatabase;
SELECT DATABASEPROPERTYEX(DB_NAME(), 'IsPublished') AS is_published;
If this returns 1 but no publications exist, there is orphaned metadata. Clean it up:
USE YourDatabase;
EXEC sp_removedbreplication;
Then attempt to create the publication again.
Quick Reference Checklist
NODE_1: Distribution configured via the SSMS wizard. Snapshot folder created and shared with a UNC path. Both NODE_1 and NODE_2 registered as publishers using sp_adddistpublisher. Azure SQL linked server created. Publications created whilst NODE_1 was primary. Push subscriptions created to Azure SQL. Each published database redirected to the listener using sp_redirect_publisher. Replica hosts validated using sp_validate_replica_hosts_as_publishers. Log Reader Agent and Distribution Agent jobs running without errors. SQL Server Agent service running.
NODE_2: Remote distributor configured using sp_adddistributor pointing to NODE_1. Azure SQL linked server created. Confirmed capable of becoming primary. Replication verified as working when NODE_2 is primary via failover test.
Azure SQL Database: Database exists and is reachable from on-premises. SQL authentication user present with appropriate permissions. Firewall rules permit connections from the on-premises IP range. Replicated tables present with the correct schema. Data flow confirmed via test inserts.
Maintenance and Operations
Here are a few common operations you may need to perform.
Adding new tables to an existing publication
Confirm NODE_1 is primary, then connect to it and open the publication properties in SSMS. On the Articles page, tick the additional tables and save. Run the Snapshot Agent afterwards to generate a new snapshot that includes the new tables.
Removing a database from replication
Drop the subscription before the publication. Run the following on NODE_1 in the published database:
USE YourPublishedDatabaseName;

EXEC sp_dropsubscription
  @publication = N'YourPublicationName',
  @article = N'all',
  @subscriber = N'yourserver.database.windows.net',
  @destination_db = N'YourAzureDatabase';

EXEC sp_droppublication @publication = N'YourPublicationName';
Monitoring replication health
Run the following on NODE_1 to check the current status and latency of the Distribution Agent:
USE distribution;

SELECT
    da.name AS agent_name,
    da.publisher_db,
    da.publication,
    da.subscriber_db,
    CASE dh.runstatus
        WHEN 1 THEN 'Start'
        WHEN 2 THEN 'Succeed'
        WHEN 3 THEN 'In progress'
        WHEN 4 THEN 'Idle'
        WHEN 5 THEN 'Retry'
        WHEN 6 THEN 'Fail'
    END AS status_desc,
    dh.time AS last_sync_time,
    DATEDIFF(SECOND, dh.time, GETDATE()) AS seconds_since_last_sync,
    dh.comments
FROM dbo.MSdistribution_agents da
LEFT JOIN dbo.MSdistribution_history dh ON da.id = dh.agent_id
WHERE dh.time = (
    SELECT MAX(time)
    FROM dbo.MSdistribution_history
    WHERE agent_id = da.id
)
ORDER BY da.name;
Healthy replication shows a status of Succeed or In progress, with seconds_since_last_sync below 60 when running continuously.
Planned maintenance on NODE_1
Before taking NODE_1 offline, make sure replication is caught up with no backlog. If NODE_1 is currently primary for any published databases, fail those over to NODE_2 first. Replication will stop while NODE_1 is unavailable because the Distributor is down, but it will resume automatically once it comes back online.
Summary
The four things that make this setup work are: the Distributor on a stable node running the agent jobs; both nodes registered as valid publishers so the Distributor will accept either; publisher redirection to the AG listener so agents always connect through the endpoint that follows the primary; and correct configuration on both nodes so either can take over without manual changes. The failover test in Part 3 is what proves all of it is actually working together.

