

Introduction
The problem statement is to send email from Azure Data Factory Pipeline with one or more attachments to one or more Office 365 Outlook recipients.
Here are the Azure Resources used:
- Azure Storage Account. Microsoft Documentation Link: https://learn.microsoft.com/en-us/azure/storage/common/storage-introduction
- Azure Data Factory. Microsoft Documentation Link: https://learn.microsoft.com/en-us/azure/data-factory/
- Logic App. Microsoft Documentation Link: https://learn.microsoft.com/en-us/azure/logic-apps/logic-apps-overview
Steps followed
I will explain the step-by-step process for implementation of sending email with one or more attachments from Azure Data Factory Pipeline.
Step 1:
Create a Logic App resource. Use the Azure portal to do this.
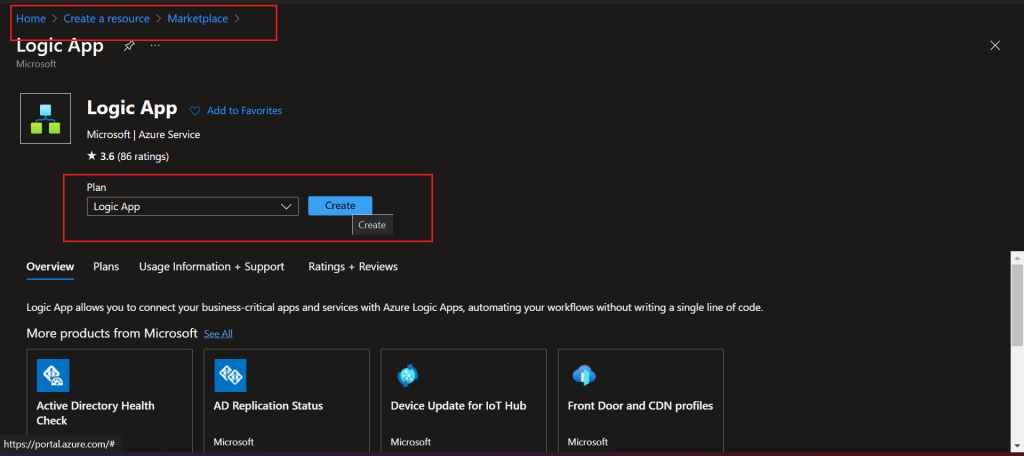
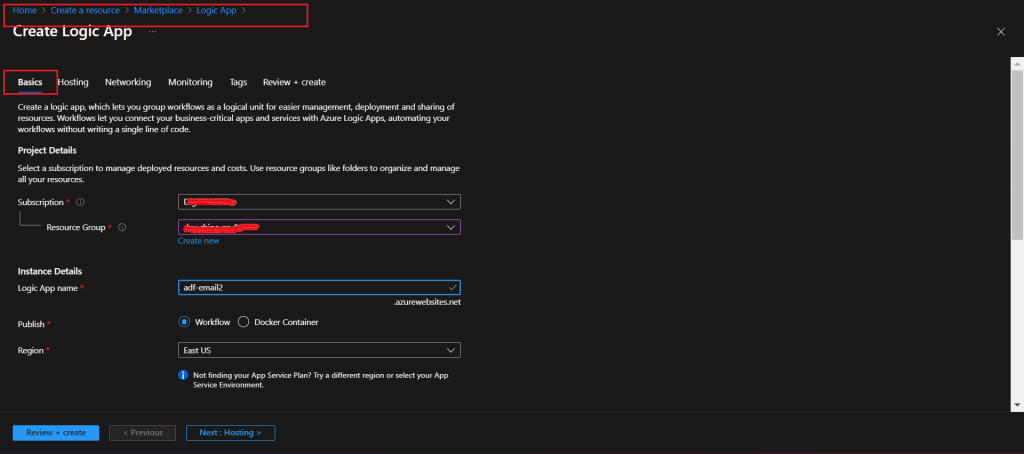
Select the Subscription and Resource Group. Provide a name for the Logic App. In the Hosting tab, a Storage account needs to be provided. For all other columns, keep the default values. Press the 'Review+Create' button to create the resource.
Step 2:
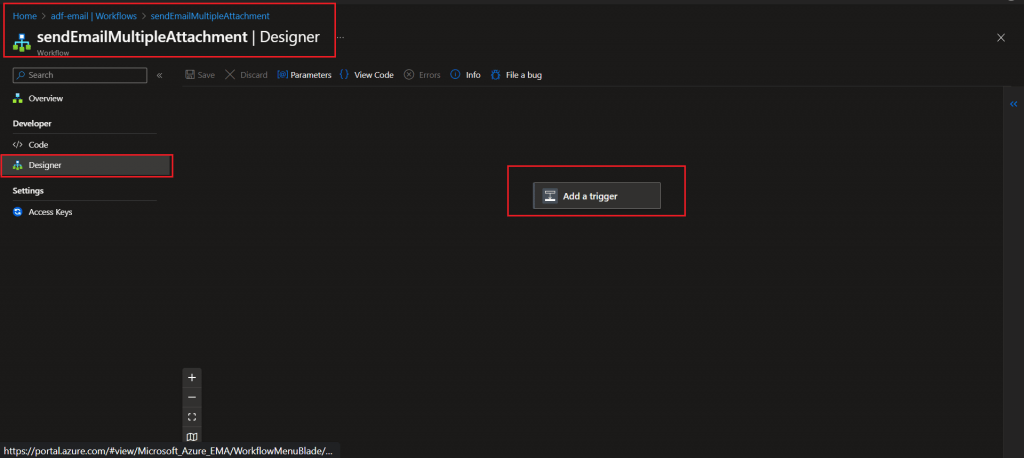
Go to Workflows section for the newly created Logic App and add a new workflow. Provide a name for the workflow and set the State Type as Stateful.

Step 3:
Go to the Designer menu for the workflow as created in the last step. The first item to add is a trigger.
Step 4:
Add a trigger: When a HTTP request is received.

Copy the following block in Request Body JSON schema of the trigger:
{
    "properties": {
        "dataFactoryName": {
            "type": "string"
        },
        "message": {
            "type": "string"
        },
        "pipelineName": {
            "type": "string"
        },
        "filelist": {
            "DisplayName": {
                "type": "string"
            },
            "FileType": {
                "type": "string"
            },
            "Path": {
                "type": "string"
            },
            "type": "array"
        },
        "receiver": {
            "type": "string"
        }
    },
    "type": "object"
}
Note: filelist is the JSON array of files to be sent as attachment with the mail.
Step 5:
Add an action named Parse JSON which will take the filelist from the last step as input and generate the JSON from the list.

The schema should look like this:
{
    "items": {
        "properties": {
            "DisplayName": {
                "type": "string"
            },
            "FileType": {
                "type": "string"
            },
            "Path": {
                "type": "string"
            }
        },
        "required": [
            "DisplayName",
            "Path"
        ],
        "type": "object"
    },
    "type": "array"
}
Step 6:
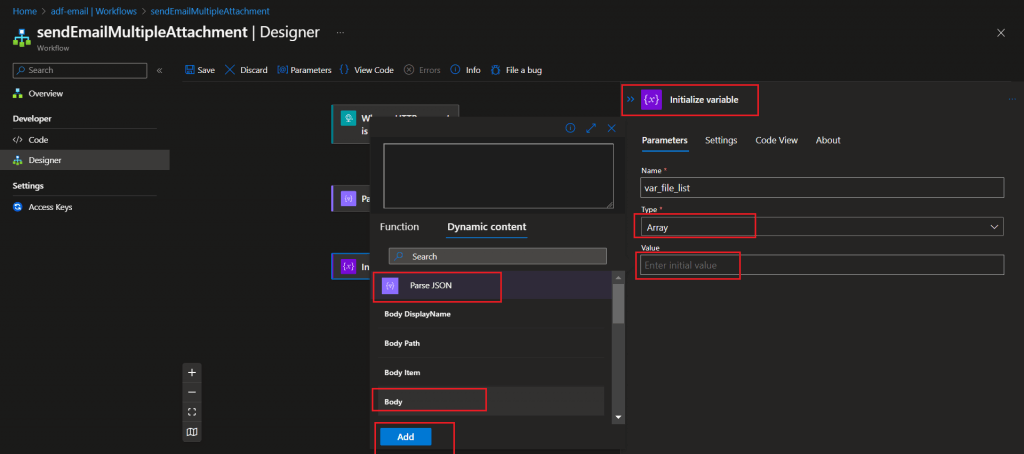
Add an Initialize variable action. Set the name as var_file_list and type as array. Value should be the output from the Parse JSON action.
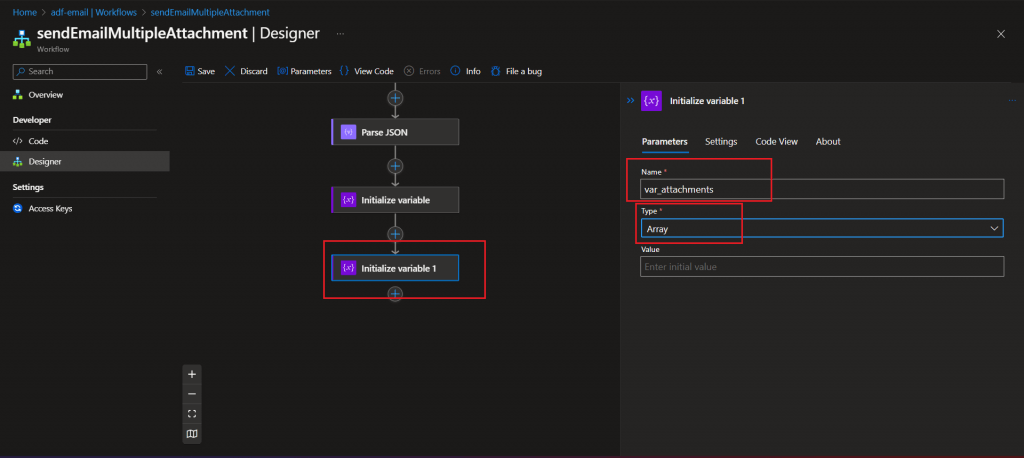
Step 7:
Add another Initialize variable action. Set the name as var_attachments and type as array. No value is required for initialization.
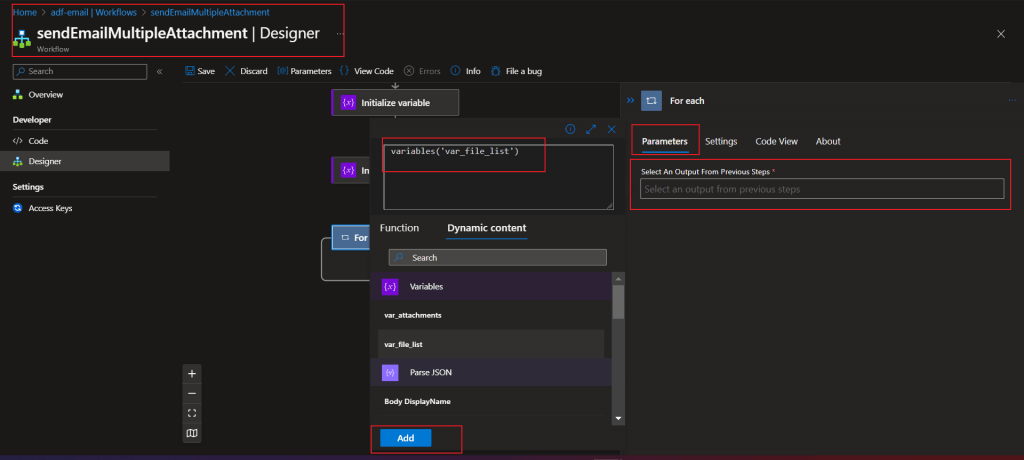
Step 8:
Add a For each action. The loop should be executed for all the files as available in the var_file_list variable.
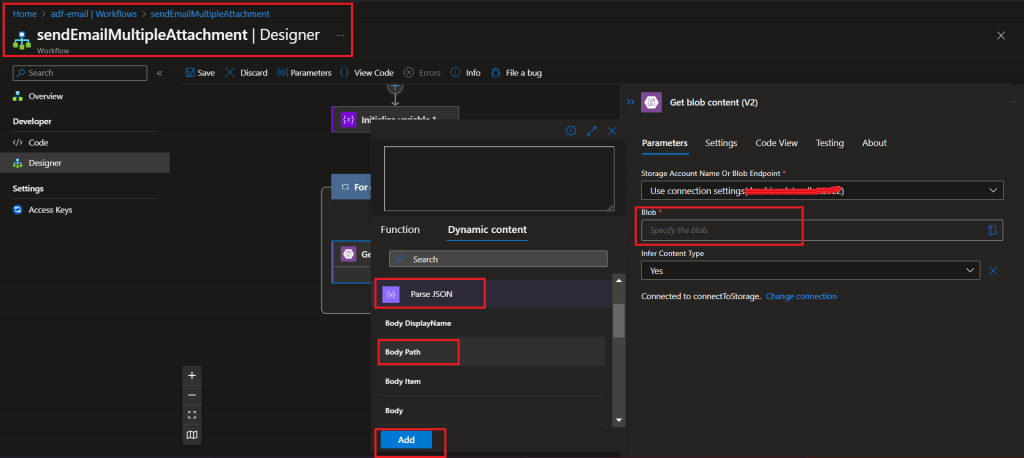
Step 9:
Add Get Blob Content(V2) action inside the For each block. The Blob value should be set as the Path output from the Parse JSON action. The Storage Account connection is set with the Account Name and Account Key details provided.
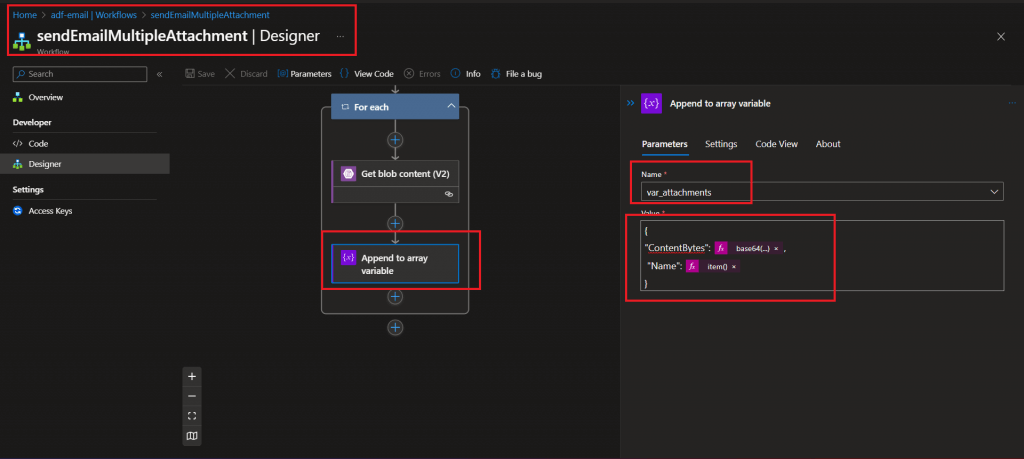
Step 10:
Add an Append to Array variable action after Get Blob Content(V2) action inside the For each block. Name should be set as var_attachments and value should be set as the following:
{
"ContentBytes": @{base64(body('Get_blob_content_(V2)'))},
"Name": @{item()['DisplayName']}
}
Step 11:
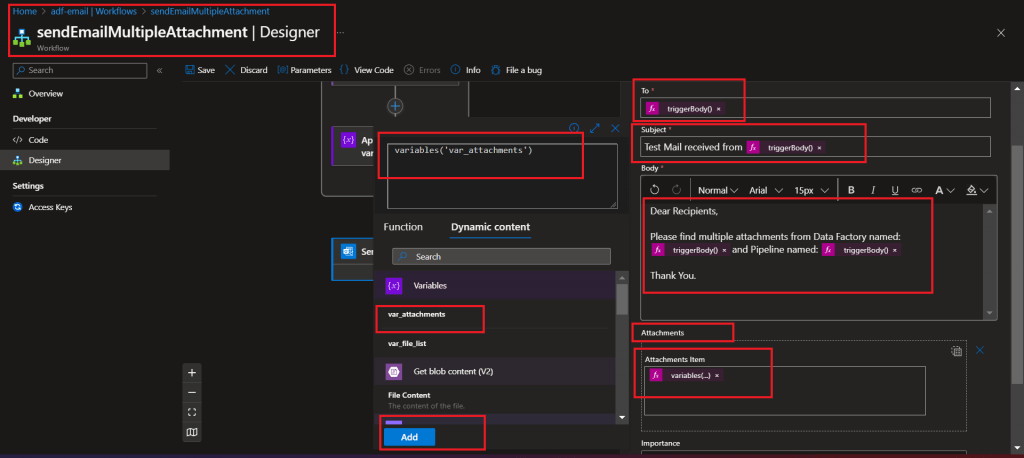
Add a Send an Email(V2) action after the for each loop.
Set the To parameter value as the receiver output of the HTTP Request trigger. Set the Subject and Body parameters with the combination of hard coded message and the other output values from the HTTP Request trigger like Datafactoryname, Pipelinename etc.
Add a new parameter named Attachments. Go to the text mode for attachments and select the var_attachments variable as attachment item. var_attachments variable contains all the attachments as sent using the filelist output of the HTTP Request trigger.
Step 12:
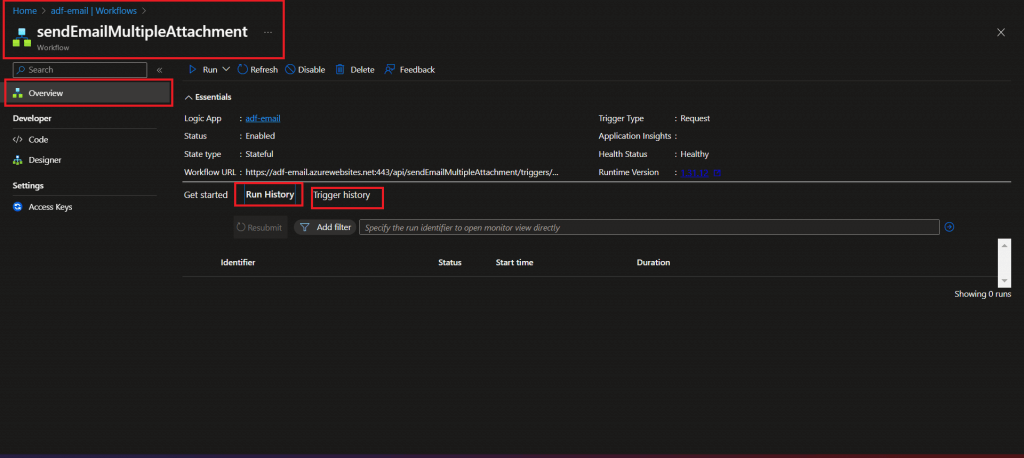
Save the Workflow. Go to the Overview section and copy the Workflow URL.

Step 13:
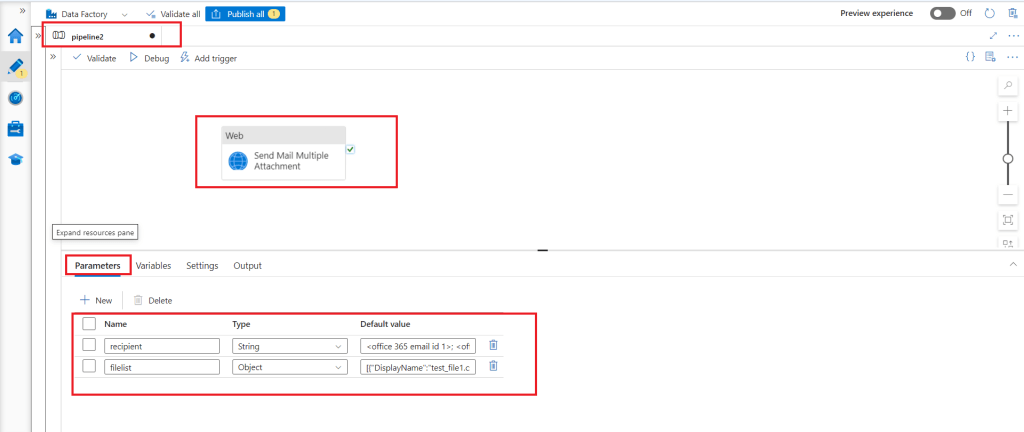
Create a new Data Factory Pipeline and add a Web Activity. Two parameters are added with the following default value set:
- recipient: <office 365 email id 1>; <office 365 email id 2>; <office 365 email id 3>
- filelist: [{"DisplayName":"test_file1.csv","FileType":"CSV","Path":"/container1/folder1/test_file1.csv"},{"DisplayName":"test_file2.csv","FileType":"CSV","Path":"/container1/folder3/test_file1.csv"},{"DisplayName":"test_file3.csv","FileType":"CSV","Path":"/container2/folder1/test_file1.csv"}]
recipient parameter is of type string and has the list of email ids separated by semi colon. Here, three email ids are sent.
filelist parameter is of type object and has a json list of attachment files from same or different container and folders of the storage account. The Storage account connection is set in the logic app workflow as mentioned in the earlier steps.
Step 14:
The Workflow URL copied from Logic App is pasted in the URL of the Settings tab of the Web activity. Method is set as POST. Body is configured with the parameter values to be sent to the Logic App.
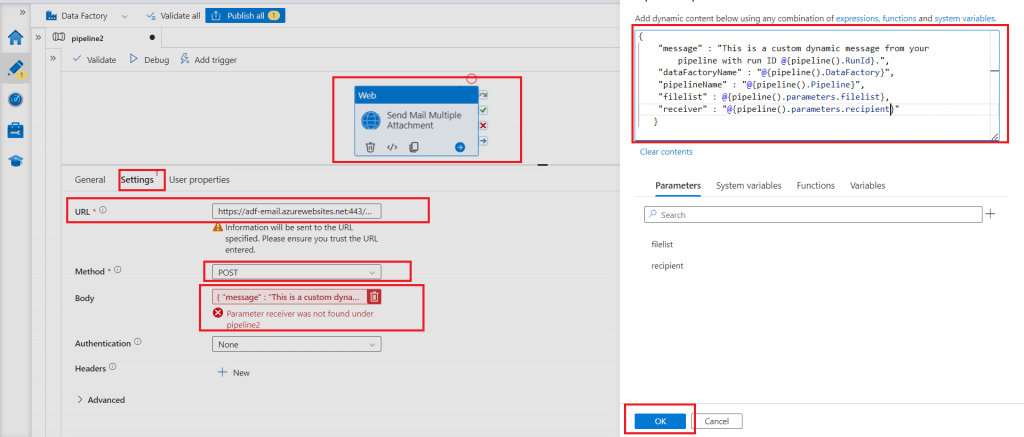
Sample Body script for the Settings of Web Activity:
{
    "message" : "This is a custom dynamic message from your pipeline with run ID @{pipeline().RunId}.",
    "dataFactoryName" : "@{pipeline().DataFactory}",
    "pipelineName" : "@{pipeline().Pipeline}",
    "filelist" : @{pipeline().parameters.filelist},
    "receiver" : "@{pipeline().parameters.recipient}"
   }
Step 15:
The Pipeline is published and then executed with the required values of recipient and filelist parameters. Once the Pipeline execution is completed, the recipient mailbox is checked. The email sent from the Web Activity is available in the mailbox with the required attachments.
Step 16:
The Trigger History and Run History of the Logic App can be verified to check the status and the details of processing.
Conclusion
Azure Data Factory pipelines can be automated using a trigger. For automated pipelines, it is a very common requirement to send email on success, failure or completion of any step of a pipeline. Web Activity and Logic App helps in sending the email. Sending variable number of attachments to different sets of recipients can be implemented using the dynamic values of the parameters in the Data Factory Pipeline and then using the parameter values in the Logic App workflow to send email with different number of attachments.
