

Introduction
This article will show how can one connect to an AWS S3 bucket to read a specific file from a list of objects stored in S3. We will then import the data in the file and convert the raw data into a Pandas data frame using Python for more deeper structured analysis.
Solution
In this section we will look at how we can connect to AWS S3 using the boto3 library to access the objects stored in S3 buckets, read the data, rearrange the data in the desired format and write the cleaned data into the csv data format to import it as a file into Python Integrated Development Environment (IDE) for advanced data analytics use cases.
We can use any IDE, like Spyder or JupyterLab (of the Anaconda Distribution). Here we are using JupyterLab.
The first step would be to import the necessary packages into the IDE. Boto is the Amazon Web Services (AWS) SDK for Python. If you have had some exposure working with AWS resources like EC2 and S3 and would like to take your skills to the next level, then you will find these tips useful.
- The Boto module provides an easy to use, object-oriented API, as well as low-level access to AWS resources
- The Sys module provides functions and variables that are used to manipulate different parts of the Python Runtime Environment
- The os module provides a way of using operating system dependent functionality in Python.
- Pandas is the data manipulation package of Python. We are importing pandas here with an alias ’pd’.
- The csv module in python implements classes to read and write tabular data in csv format
- The io module allows us to manage the file related input and output operations.
""" For pulling data from AW S3 buckets -Importing the necessary Python Modules"""
import boto3
import sys
import os
import pandas as pd
import csv
import io
If you have an AWS account, you would also be having a access token key (Token ID analogous to a username) and a secret access key (analogous to a password) provided by AWS to access resources, like EC2 and S3 via an SDK. Currently the languages supported by the SDK are node.js, Java, .NET, Python, Ruby, PHP, GO, C++, JS (Browser version) and mobile versions of the SDK for Android and iOS.
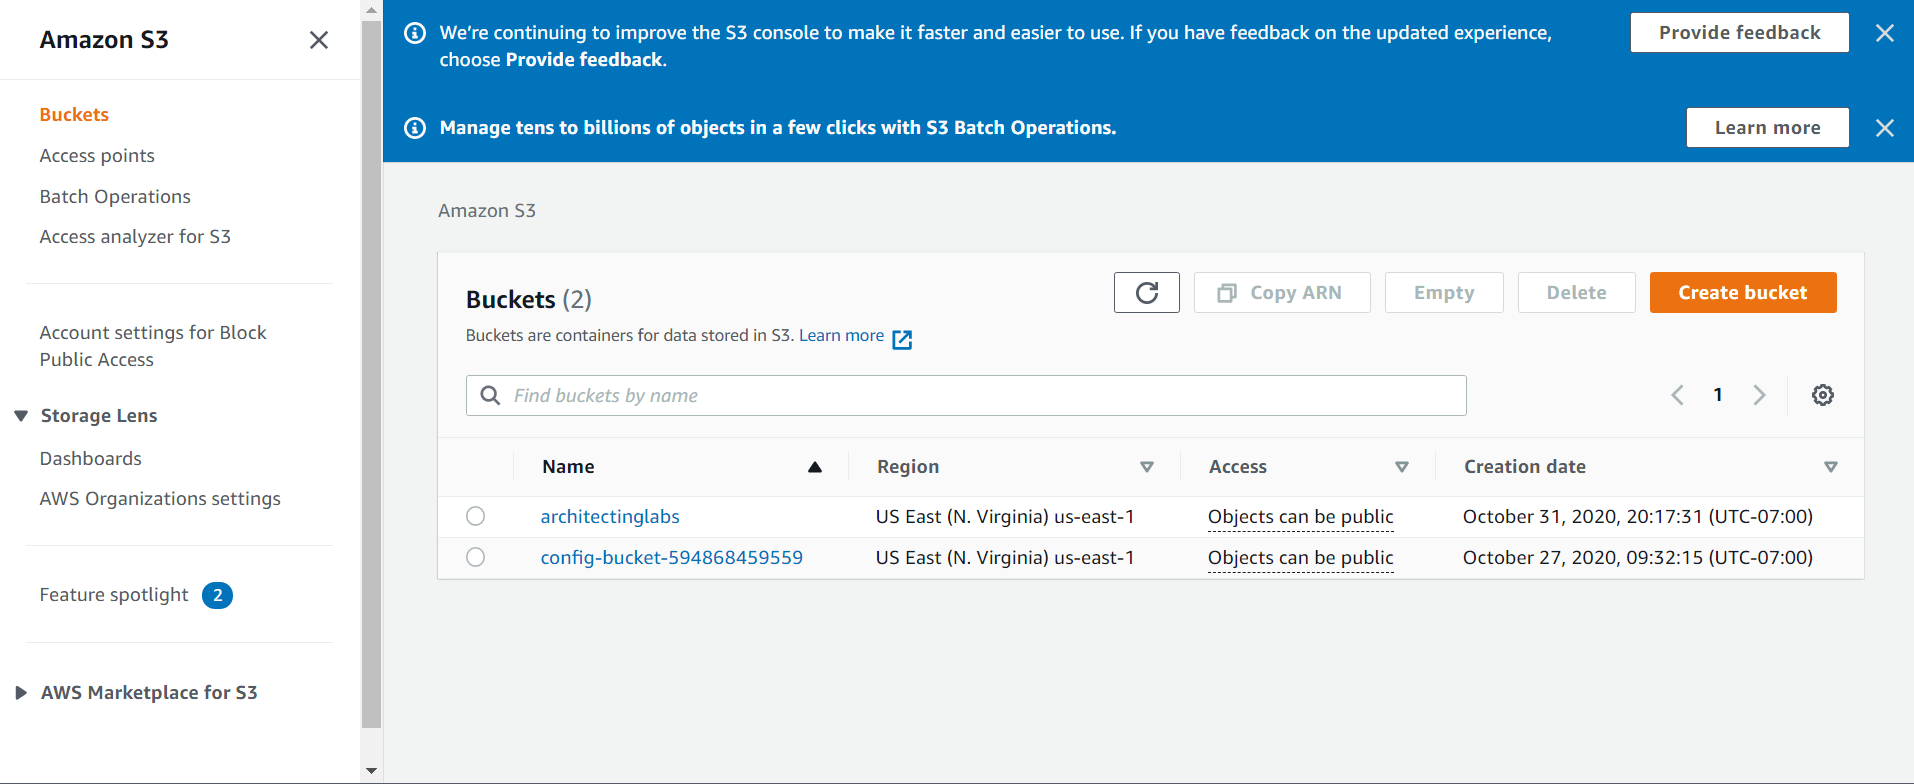
You can explore the S3 service and the buckets you have created in your AWS account using this resource via the AWS management console. To create an AWS account and how to activate one read here. Once you land onto the landing page of your AWS management console, and navigate to the S3 service, you will see something like this:
Identify, the bucket that you would like to access where you have your data stored. Once you have the identified the name of the bucket for instance ‘filename_prod’, you can assign this name to the variable named s3_bucket name as shown in the script below:
"""Accessing the S3 buckets using boto3 client"""
s3_client =boto3.client('s3')
s3_bucket_name='filename_prod'
s3 = boto3.resource('s3',
                    aws_access_key_id= 'YOUR_ACCESS_KEY_ID',
                    aws_secret_access_key='YOUR_SECRET_ACCESS_KEY')
Next, we will look at accessing the objects in the bucket name, which is stored in the variable, named “s3_bucket_name”, with the Bucket() method and assigning the list of objects into a variable, named my_bucket. We start by creating an empty list, called bucket_list. The for loop in the below script reads the objects one by one in the bucket, named “my_bucket”, looking for objects starting with a prefix ‘2019/7/8’. Once it finds the object with a prefix ‘2019/7/8’, the ‘if’ condition in the below script checks for the .csv extension.
This continues until the loop reaches the end of the list and then appends the filenames with a suffix of .csv and having a prefix’2019/7/8’ to the list, bucket_list. We will then print out the length of the list bucket_list and assign it to a variable, named length_bucket_list, and print out the file names of the first 10 objects.
""" Getting data files from the AWS S3 bucket as denoted above and printing the first 10 file names having prefix "2019/7/8" """
my_bucket=s3.Bucket(s3_bucket_name)
bucket_list = []
for file in my_bucket.objects.filter(Prefix = '2019/7/8'):
    file_name=file.key
    if file_name.find(".csv")!=-1:
        bucket_list.append(file.key)
length_bucket_list=print(len(bucket_list))
print(bucket_list[0:10])
Next, the following piece of code lets you import the relevant file input/output modules, depending upon the version of Python you are running. Then we will initialize an empty list of the type dataframe, named df. We will access the individual file names we have appended to the bucket_list using the s3.Object() method. The .get() method[‘Body’] lets you pass the parameters to read the contents of the file and assign them to the variable, named ‘data’. Using the io.BytesIO() method, other arguments (like delimiters), and the headers, we are appending the contents to an empty dataframe, df.
""" Reading the individual files from the AWS S3 buckets and putting them in dataframes """
if sys.version_info[0] < 3:
    from StringIO import StringIO  # Python 2.x
else:
    from io import StringIO  # Python 3.x

df = []   # Initializing empty list of dataframes
for file in bucket_list:
    obj = s3.Object(s3_bucket_name,file)
    data=obj.get()['Body'].read()
    df.append(pd.read_csv(io.BytesIO(data), header=0, delimiter=",", low_memory=False))
Next, we want to see how many file names we have been able to access the contents from and how many have been appended to the empty dataframe list, ‘df’. We can do this using the len(df) method by passing the df argument into it.
""" Printing the lengths of the df list"""
len(df)
The results from my example are:

Printing out a sample dataframe from the df list to get an idea of how the data in that file looks like this:
""" Printing the sample dataframe from the df list 989th entry"""
df[989]
Here is a sample of what I get:
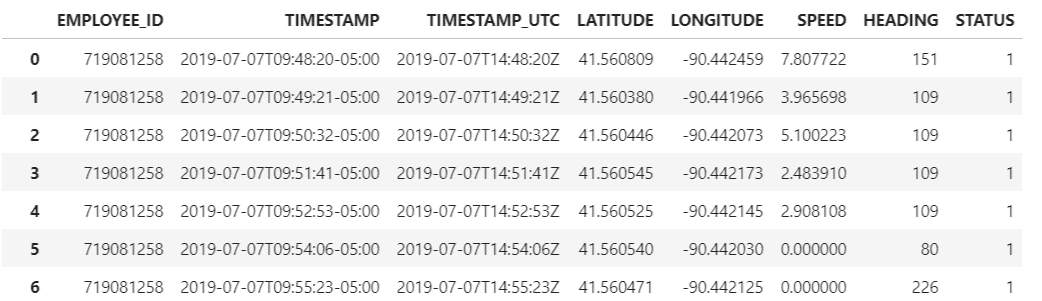
To convert the contents of this file in the form of dataframe we create an empty dataframe with these column names:
- EMPLOYEE_ID
- TIMESTAMP
- TIMESTAMP_UTC
- LATITUDE
- LONGITUDE
- SPEED
- HEADING
- STATUS
""" Creating an empty dataframe with column names 'EMPLOYEE_ID','TIMESTAMP','TIMESTAMP_UTC','LATITUDE','LONGITUDE','SPEED','HEADING','STATUS' and printing it out """
converted_df = pd.DataFrame(columns=['EMPLOYEE_ID','TIMESTAMP','TIMESTAMP_UTC','LATITUDE','LONGITUDE','SPEED','HEADING','STATUS'
Next, we will dynamically read the data from the ‘df’ list file by file and assign the data into an argument, as shown in line one snippet inside of the ‘for’ loop. The second line writes the data from converted_df1.values as the values of the newly created dataframe and the columns would be the new columns which we created in our previous snippet.
""" Reading the data from the files in the S3 bucket which is stored in the df list and dynamically converting it into the dataframe and appending the rows into the converted_df dataframe """
import numpy as np
for file in df:
    converted_df1 = pd.DataFrame(data = file)
    converted_df = pd.DataFrame(np.concatenate([converted_df.values, converted_df1.values]), columns=converted_df.columns)
If we were to find out what is the structure of the newly created dataframe then we can use the following snippet to do so.
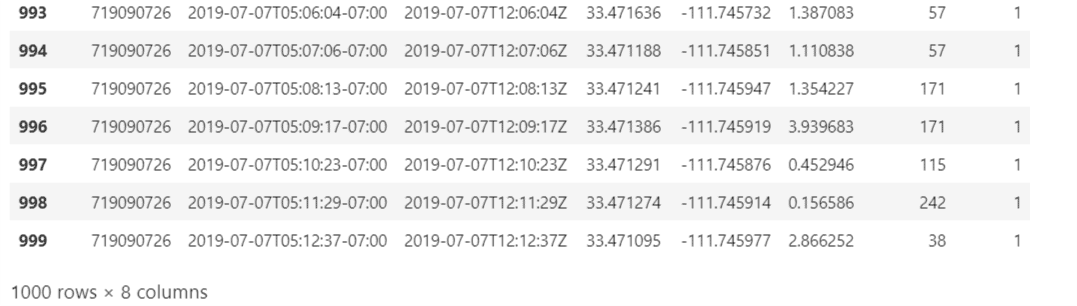
""" Printing the structure number of rows and columns in the converted_df dataframe """
converted_df.shape
The above dataframe has 5850642 rows and 8 columns. The 8 columns are the newly created columns that we have created and assigned it to an empty dataframe, named ’converted_df. Also, to validate if the newly variable ‘converted_df’ is a dataframe or not, we can use the following type function which returns the type of the object or the new type object depending on the arguments passed.
type(converted_df)
This returns the a pandas dataframe as the type.

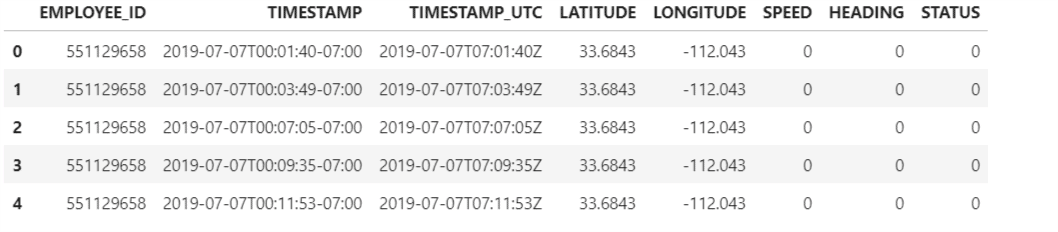
Printing a ‘sample data’ of how the newly created dataframe, which has 5850642 rows and 8 columns, looks like the image below with the following script.
""" Printing a sample of the converted_df dataframe which is the first few lines to validate if the data has been appended properly"""
converted_df.head()
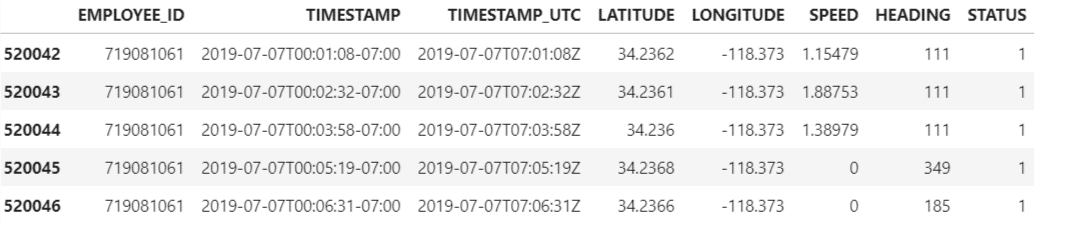
If we would like to look at the data pertaining to only a particular employee id, say for instance, ‘719081061’, then we can do so using the following script:
""" Only filtering for the Employee Id which we need for our analysis 719081061 and printing the sample of the first few lines of the new dataframe containing the data for this emp_id= 719081061 """
converted_df = converted_df.loc[converted_df['EMPLOYEE_ID'] == 719081061]
converted_df.head()
This code will print the structure of the newly created subset of the dataframe containing only the data pertaining to the employee id= ‘719081061’
"""  Printing the shape of the converted_df contaning the data for emp_id = 719081061 """
converted_df.shape
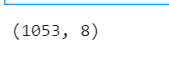
This new dataframe containing the details for the employee_id =719081061 has 1053 rows and 8 rows for the date 2019/7/8’.
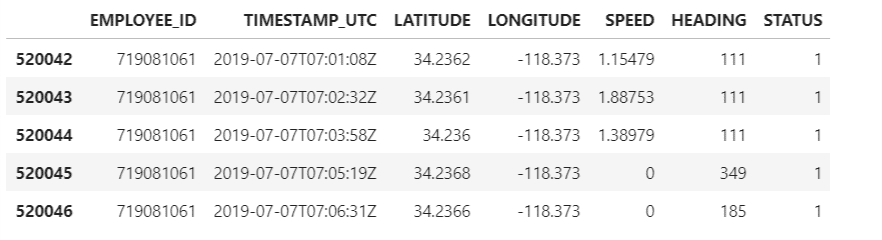
We can use this code to get rid of unnecessary column in the dataframe ‘converted-df’ and printing the sample of the newly cleaned dataframe ‘converted-df’
""" Printing the first 5 rows of the pandas dataframe """
converted_df = pd.DataFrame(converted_df, columns=columns)
converted_df. head()converted_df.shape
We can store this newly cleaned re-created dataframe into a csv file, named ’Data_For_Emp_719081061_07082019.csv’, which can be used further for deeper structured analysis.
""" Writing  the cleaned dataframe into the csv file named 'Data_For_Emp_719081061_07082019.csv'
    contaning only the data for the emp:719081061 and saving it locally"""
converted_df.to_csv(r"C:\Desktop\Data_For_Emp_719081061_07082019.csv")
Data Identification and cleaning takes up to 800 times the efforts and time of a Data Scientist/Data Analyst. Once the data is prepared in the form of a dataframe that is converted into a csv , it can be shared with other teammates or cross functional groups. They can use the same kind of methodology to be able to gain quick actionable insights out of their data to make some data driven informed business decisions. We can further use this data as one of the data sources which has been cleaned and ready to be leveraged for more advanced data analytic use cases which I will be discussing in my next blog.
Next Steps
Here, we have looked at how we can access data residing in one of the data silos and be able to read the data stored in a s3 bucket, up to a granularity of a folder level and prepare the data in a dataframe structure for consuming it for more deeper advanced analytics use cases. Next, we will look at using this cleaned ready to use data frame (as one of the data sources) and how we can apply various geo spatial libraries of Python and advanced mathematical functions on this data to do some advanced analytics to answer questions such as missed customer stops and estimated time of arrival at the customer’s location.
To gain a holistic overview of how Diagnostic, Descriptive, Predictive and Prescriptive Analytics can be done using Geospatial data, read my paper, which has been published on advanced data analytics use cases pertaining to that.
